ignition CITROEN C-ELYSÉE 2018 Handbook (in English)
[x] Cancel search | Manufacturer: CITROEN, Model Year: 2018, Model line: C-ELYSÉE, Model: CITROEN C-ELYSÉE 2018Pages: 260, PDF Size: 8.4 MB
Page 23 of 260
21
AdBlue® fluid range
indicators
Once the AdBlue® tank is on reser ve or after
detection of a fault with the SCR emissions
control system, when the ignition is switched
on, an indicator displays an estimate of the
distance that can be covered, the range, before
engine starting is prevented.
In the event of a simultaneous system fault and
low AdBlue
® level, the shortest range figure is
the one displayed.
In the event of the risk of
non-starting related to a
lack of AdBlue
®
The engine starting inhibition system
required by regulations is activated
automatically once the AdBlue
® tank is
e m pt y.
Range greater than 1,500
miles (2,400 km)
When switching on the ignition, there is no
automatic display of the range in the instrument
panel.
Resetting the service indicator
After each service, the service indicator must
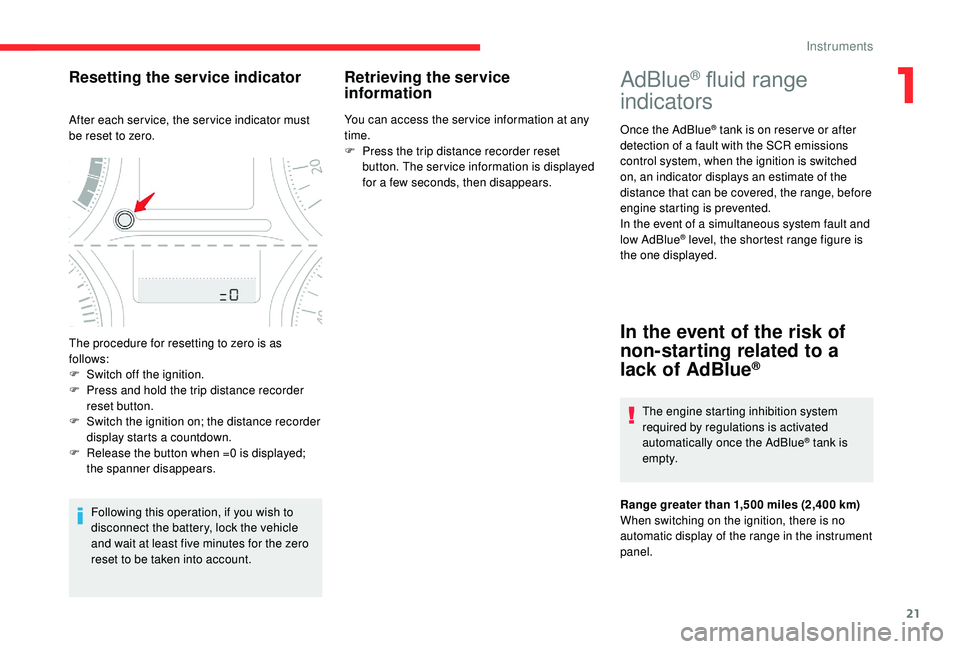
be reset to zero.
Following this operation, if you wish to
disconnect the battery, lock the vehicle
and wait at least five minutes for the zero
reset to be taken into account.
Retrieving the service
information
You can access the ser vice information at any
time.
F
P
ress the trip distance recorder reset
button. The ser vice information is displayed
for a few seconds, then disappears.
The procedure for resetting to zero is as
follows:
F
S
witch off the ignition.
F
P
ress and hold the trip distance recorder
reset button.
F
S
witch the ignition on; the distance recorder
display starts a countdown.
F
R
elease the button when =0
is displayed;
the spanner disappears.
1
Instruments
Page 24 of 260

22
Remaining range between 1,500 and 350 miles (2,400 and 600 km)
When driving, this message is displayed every
180 miles (300 km) until the fluid level has been
topped up.
The reser ve level has been reached; it is
recommended that you top up as soon as
possible.
It is recommended that you do not top up by
more than 10
litres of AdBlue.
For more information on AdBlue
® and
the SCR system , and, in particular,
on topping up the AdBlue
®, refer to the
corresponding section. Range below 350
miles (600 km)
When driving, this message is displayed every
30 seconds until the AdBlue level has been
topped up.
It is essential to top up as soon as possible and
before the tank is completely empty; other wise
it will not be possible to restart the engine after
the next stop.
When switching on the ignition, this warning
lamp comes on, accompanied by an audible
signal and the display of "NO START IN" and a
distance on the instrument panel, indicating the
driving range expressed in miles or kilometres
before engine starting is prevented –
(e.g. "NO START IN 900
miles" means
"Starting will be prevented in 900 miles").
When switching on the ignition, this warning
lamp flashes and the service warning lamp
comes on, accompanied by an audible signal
and the temporary display of "NO START
IN" and a distance on the instrument panel,
indicating the remaining range expressed in
miles or kilometres before engine starting is
prevented –
(e.g. "NO START IN 180 miles" means "Starting
will be prevented in 180 miles").
For more information on AdBlue
®
(BlueHDI engines) and, in particular, on
topping up, refer to the corresponding
section. Breakdown related to a lack of AdBlue
®
The AdBlue® tank is empty: the starting
inhibition system required by regulations
prevents starting of the engine.
To be able to restart the engine, it is
essential to add at least 4
litres of AdBlue
®
to its tank.
For more information on the AdBlue
® (BlueHDi
engines) , and, in particular, on topping up,
refer to the corresponding section. When switching on the ignition, this warning
lamp flashes and the service warning lamp
comes on, accompanied by an audible signal
and the temporary display of "NO START IN"
and 0
miles or km on the instrument panel –
("NO START IN 0
miles" means "Starting
prevented").
Instruments
Page 25 of 260

23
If it is a temporary fault, the alert
disappears during the next journey,
after auto diagnosis checks of the SCR
emissions control system.
During the permitted driving phase
(between 650
and 0 miles (1,100 km and
0
km))
While driving, the message is displayed every
30
seconds while the fault with the SCR
emissions control system persists.
The alert is repeated when switching on the
ignition. Starting prevented
You have exceeded the authorised driving
limit: the starting inhibition system does
not allow the engine to be started.
To be able to restart the engine, you must call
on a CITROËN dealer or a qualified workshop.In the event of a fault with
the SCR emissions control
system
An engine starting inhibition device is
activated automatically after you have
driven a further 650 miles (1,100 km)
following confirmation of a fault with the
SCR emissions control system. Have the
system checked by a CITROËN dealer or
a qualified workshop as soon as possible.
In the event of the detection of a fault
These warning lamps come on, accompanied
by an audible signal and the display of the
message "Emissions fault".
The alert is triggered while driving as soon
as the fault is detected for the first time, then
when switching on the ignition for subsequent
journeys, while the fault persists. If a fault with the SCR system is confirmed
(after 30
miles (50 km) covered with the
permanent display of the message signalling
a fault), these warning lamps come on and the
AdBlue warning lamp flashes, accompanied
by an audible signal and the temporary display
in the instrument cluster of NO START IN
and a distance, indicating the driving range
expressed in miles or kilometres before engine
starting is prevented – (e.g. "NO START IN
350
miles" means "Starting will be prevented in
350
miles").You should go to a CITROËN dealer or a
qualified workshop as soon as possible.
Other wise you will not be able to restart the
vehicle.
When switching on the ignition, these warning
lamps comes on and the AdBlue warning lamp
flashes, accompanied by an audible signal and
the temporary display of "NO START IN" and
0
miles or kilometres on the instrument panel –
("NO START IN 0
miles" means "Starting
prevented").
1
Instruments
Page 26 of 260
24
Distance recorders
Total distance recorder
System which measures the total distance
travelled by the vehicle during its life.
Trip distance recorder
System which measures a distance travelled
during a day or other period since it was reset
to zero by the driver.
The total and trip distances are displayed for
thirty seconds when the ignition is switched off,
when the driver's door is opened and when the
vehicle is locked or unlocked. F
W
ith the ignition on, press the button until
zeroes appear.
Setting the date and time
Instrument panel
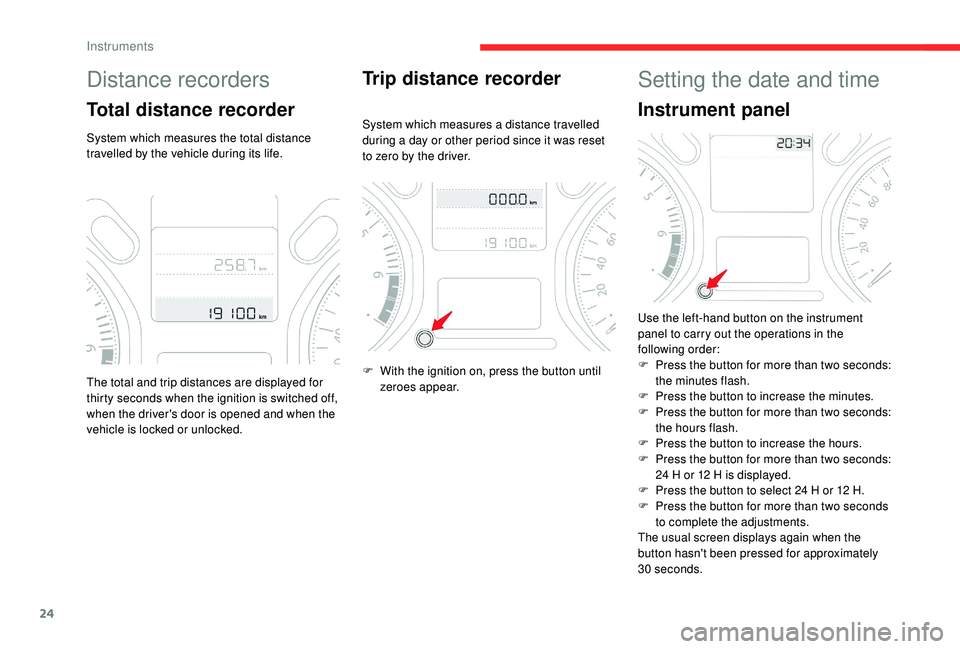
Use the left-hand button on the instrument
panel to carry out the operations in the
following order:
F
P
ress the button for more than two seconds:
the minutes flash.
F
P
ress the button to increase the minutes.
F
P
ress the button for more than two seconds:
the hours flash.
F
P
ress the button to increase the hours.
F
P
ress the button for more than two seconds:
24
H or 12 H is displayed.
F
P
ress the button to select 24 H or 12 H.
F
P
ress the button for more than two seconds
to complete the adjustments.
The usual screen displays again when the
button hasn't been pressed for approximately
30
seconds.
Instruments
Page 30 of 260
28
This value may vary following a change
in the driving style or the relief, resulting
in a significant change in the current fuel
consumption.
When the range falls below 18
miles (30 km),
dashes are displayed. After filling with at least
5
litres of fuel, the range is recalculated and is
displayed if it exceeds 60
miles (100 km).
If dashes are displayed continuously while
driving instead of the digits, contact a
CITROËN dealer or a qualified workshop.
Current fuel consumption
(mpg or l/100 km or km/l)
C alculated over the last few
seconds. This function is only displayed from
18
mph (30 km/h).
Average fuel consumption
(mpg or l/100 km or km/l)
C alculated since the last time the
trip was reset.
Average speed
(mph or km/h)
Calculated since the last time the
trip was reset.
Distance travelled
(miles or km)
Calculated since the last time the
trip was reset.
Stop & Start time counter
or (minutes/seconds or hours/minutes) If your vehicle is fitted with the Stop & Start, a
time counter adds up the time spent in STOP
mode during a journey.
It resets to zero every time the ignition is
switched on.
Trip computer, some
definitions
Range
(miles or km)
The number of miles (kilometres)
which can be covered with
the fuel remaining in the tank.
Related to the average fuel
consumption over the last few
miles (kilometres) travelled.
Instruments
Page 32 of 260
30
Locking is confirmed by continuous lighting of
the direction indicators for approximately two
seconds.If one of the doors or the boot is still open,
the central locking does not work; the
vehicle locks, then immediately unlocks,
identifiable by the locks making a rebound
sound.
When the vehicle is locked, if it is
unlocked inadvertently, it will lock again
automatically after thirty seconds unless a
door or the boot is open.
Locating your vehicle
This function allows you to identify your vehicle
from a distance, particularly in poor light. Your
vehicle must be locked. F
P
ress the closed padlock button
on the remote control.
This will switch on the courtesy lights and the
direction indicators will flash for a few seconds.
Fault with the remote
control
In the event of a malfunction with the remote
control, you can no longer unlock, lock or
locate your vehicle.
F
F
irst of all, use the key in the door lock to
unlock or lock your vehicle.
F
T
hen reinitialise the remote control.
Reinitialisation
F Switch off the ignition and remove the key from the switch.
F
P
ress the closed padlock button for a few
seconds.
F
R
eturn the key to position 2 (ignition on ).
F
S
witch off the ignition and remove the key
from the switch.
The remote control is now fully operational
again.
Changing the battery
Battery type: CR2032 / 3 volts.
I f the battery is flat, you are informed
by lighting of this warning lamp in the
instrument panel, an audible signal
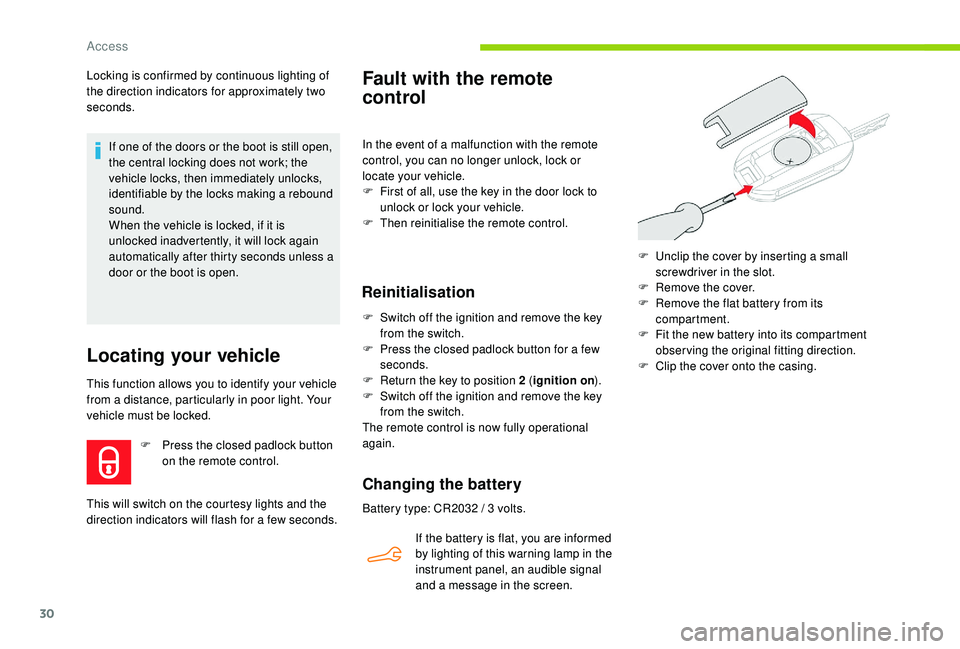
and a message in the screen. F
U
nclip the cover by inserting a small
screwdriver in the slot.
F
R
emove the cover.
F
R
emove the flat battery from its
compartment.
F
F
it the new battery into its compartment
observing the original fitting direction.
F
C
lip the cover onto the casing.
Access
Page 33 of 260
31
Lost keys
Go to a CITROËN dealer with the vehicle's
registration document, your personal
identification documents and if possible the key
code label.
The CITROËN dealer will be able to look up the
key code and the transponder code required to
order a new key.Do not throw away the remote control
batteries, they contain metals which are
harmful to the environment.
Take them to an approved collection
point.
Anti-theft protection
Do not make any modifications to the electronic
engine immobiliser system; this could cause
malfunctions.
Remote control
The high frequency remote control is a sensitive
system; do not operate it while it is in your
pocket as there is a possibility that it may unlock
the vehicle, without you being aware of it.
Do not repeatedly press the buttons of your
remote control out of range and out of sight of
your vehicle. You risk making it inoperative. It
will then be necessary to reinitialise it.
No remote control can operate when the key is
in the ignition switch, even when the ignition is
switched off, except for reinitialisation.
Locked vehicle
Driving with the doors locked may render
access by the emergency services to the
interior difficult in an emergency.
As a safety precaution, never leave children
alone in the vehicle, except for a very short
period.
In all cases, it is essential to remove the key
from the ignition switch when leaving the
vehicle. Second-hand vehicle
Have the pairing of all of the keys in your
possession checked by a CITROËN dealer, to
ensure that only your keys can be used to open
and start the vehicle.
2
Access
Page 34 of 260
32
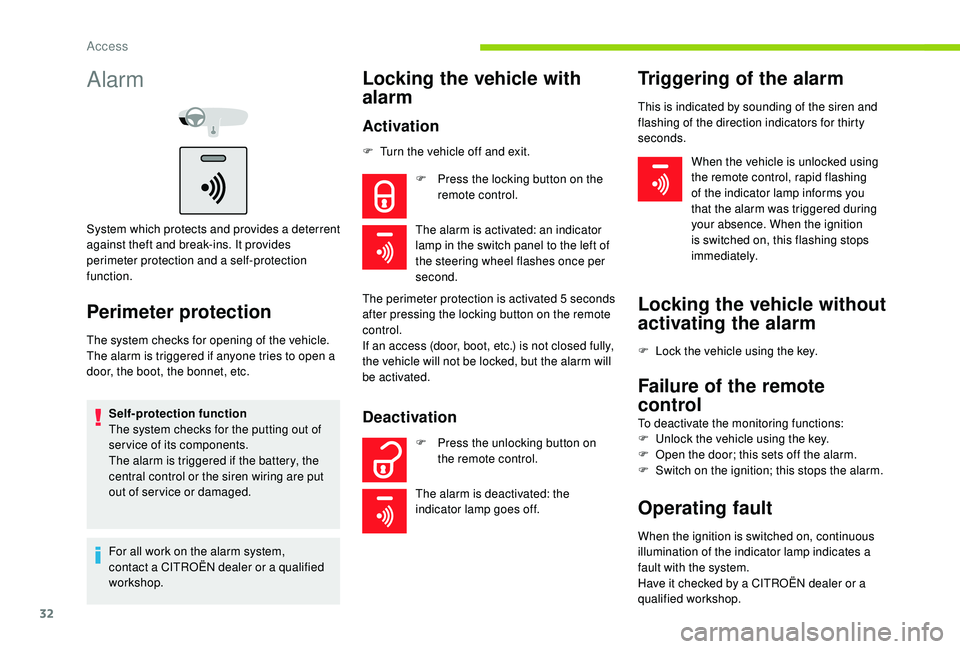
Alarm
System which protects and provides a deterrent
against theft and break-ins. It provides
perimeter protection and a self-protection
function.
Perimeter protection
The system checks for opening of the vehicle.
The alarm is triggered if anyone tries to open a
door, the boot, the bonnet, etc.Self-protection function
The system checks for the putting out of
ser vice of its components.
The alarm is triggered if the battery, the
central control or the siren wiring are put
out of ser vice or damaged.
For all work on the alarm system,
contact a CITROËN dealer or a qualified
workshop.
Locking the vehicle with
alarm
Activation
F Press the locking button on the remote control.
The alarm is activated: an indicator
lamp in the switch panel to the left of
the steering wheel flashes once per
second.
Deactivation
F Press the unlocking button on the remote control.
The alarm is deactivated: the
indicator lamp goes off.
Triggering of the alarm
F Turn the vehicle off and exit.
The perimeter protection is activated 5
seconds
after pressing the locking button on the remote
control.
If an access (door, boot, etc.) is not closed fully,
the vehicle will not be locked, but the alarm will
be activated. When the vehicle is unlocked using
the remote control, rapid flashing
of the indicator lamp informs you
that the alarm was triggered during
your absence. When the ignition
is switched on, this flashing stops
immediately.
This is indicated by sounding of the siren and
flashing of the direction indicators for thirty
seconds.
Locking the vehicle without
activating the alarm
F Lock the vehicle using the key.
Failure of the remote
control
To deactivate the monitoring functions:
F
U nlock the vehicle using the key.
F
O
pen the door; this sets off the alarm.
F
S
witch on the ignition; this stops the alarm.
Operating fault
When the ignition is switched on, continuous
illumination of the indicator lamp indicates a
fault with the system.
Have it checked by a CITROËN dealer or a
qualified workshop.
Access
Page 38 of 260
36
Electric controls
Deactivating the rear window
controls
For the safety of your children, press
this button to deactivate all the rear
window controls, irrespective of their
positions.
When the indicator lamp is on, all controls are
inhibited. When the indicator is off, all controls
are active. Always remove the key from the ignition
when leaving the vehicle, even for a short
time.
In the event of pinching during operation
of the windows, you must reverse the
movement of the window. To do this, press
the switch concerned.
When operating the passenger electric
window controls, the driver must ensure
that no one is preventing correct closing of
the windows.
The driver must ensure that all passengers
use of electric windows correctly.
Be particularly aware of children when
operating the windows.
1
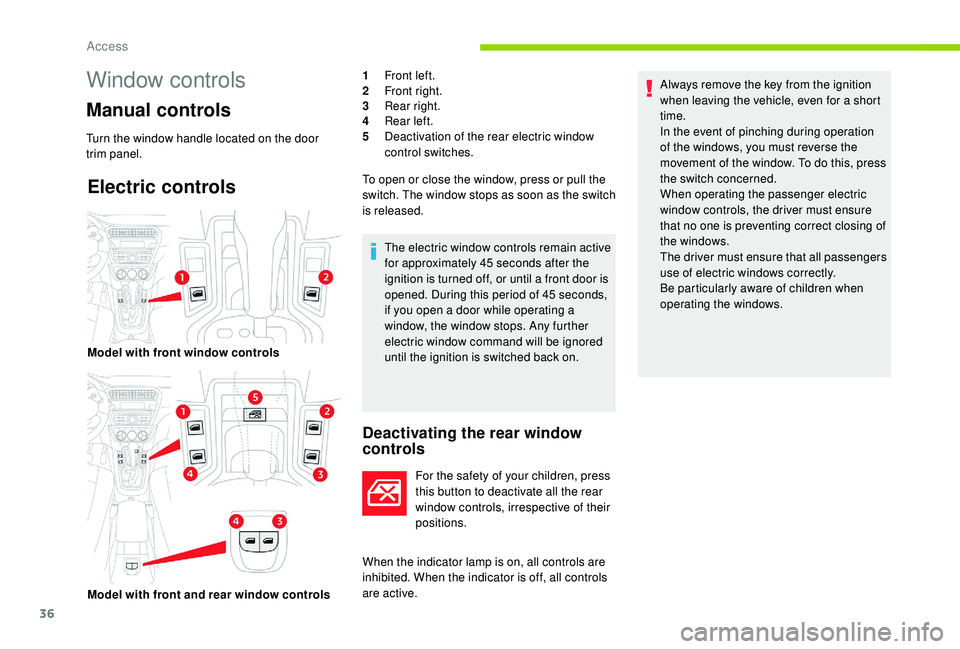
Front left.
2 Front right.
3 Rear right.
4 Rear left.
5 Deactivation of the rear electric window
control switches.
To open or close the window, press or pull the
switch. The window stops as soon as the switch
is released.
The electric window controls remain active
for approximately 45 seconds after the
ignition is turned off, or until a front door is
opened. During this period of 45 seconds,
if you open a door while operating a
window, the window stops. Any further
electric window command will be ignored
until the ignition is switched back on.
Model with front window controls
Model with front and rear window controls
Window controls
Manual controls
Turn the window handle located on the door
trim panel.
Access
Page 53 of 260

51
Lighting control
In some weather conditions (e.g. low
temperature or humidity), the presence
of misting on the internal sur face of the
glass of the headlamps and rear lamps is
normal; it disappears after the lamps have
been on for a few minutes.
Travelling abroad
The design of the dipped beam headlamps
allows, without modification, driving in a
country that drives on the other side of
the road than the country in which your
vehicle was sold.
Selection ring for main
lighting mode
Lamps off (ignition off) / Daytime
running lamps (engine running).
Sidelamps only.
Dipped or main beam headlamps.
Dipping the headlamps
Pull the lever to switch the lighting
between dipped and main beam
headlamps.
When the lamps are off or only the sidelamps
are on, the driver can switch on the main beam
headlamps (headlamp flash) by pulling and
releasing the stalk.
Display
Turn to align the desired symbol with the mark. Illumination of the corresponding indicator
lamp in the instrument panel confirms that the
lighting selected is on.
Foglamp selection ring
The foglamps operate with the dipped and main
beam headlamps.
Rear foglamp only
F To switch it on, turn the ring for wards.
F
T o switch it off, turn the ring rear wards.
4
Lighting and visibility