lock CITROEN C-ELYSÉE 2023 Owner's Manual
[x] Cancel search | Manufacturer: CITROEN, Model Year: 2023, Model line: C-ELYSÉE, Model: CITROEN C-ELYSÉE 2023Pages: 180, PDF Size: 4.77 MB
Page 60 of 180
58
Driving
If the engine speed is too low or too high, the
selected gear flashes for a few seconds, then the
gear actually engaged is shown.
It is possible to change from position D to
position M
at any time.
When the vehicle is stationary or moving very
slowly, the gearbox selects gear 1 automatically.
The Sport and Snow programmes are inactive
in manual operation.
This symbol is displayed if a gear is not engaged correctly (gear selector between
two positions).
Switching off the vehicle
Before switching off the engine, it is possible to
engage position P or N to place the gearbox in
neutral.
In both cases, apply the parking brake to
immobilise the vehicle.
If the gear selector is not in position P ,
when the driver's door is opened or
approximately 45
seconds after the ignition is
switched off, an audible signal sounds and a
message appears.
►
Return the gear selector to
P
; the audible
signal stops and the message disappears.
Malfunction
In the event of a malfunction, this warning
lamp comes on accompanied by an
audible signal and a message is displayed, when
the ignition is switched on.
In this case, the gearbox goes into back-up
mode and is locked in 3
rd gear. You may feel a
significant jolt (without risk to the gearbox) when
changing from
P
to R and from N to R.
Do not exceed 62 mph (100
km/h), local speed
restrictions permitting.
Have it checked by a CITROËN dealer or a
qualified workshop.
There is a risk of damaging the gearbox: – If the accelerator and brake pedals are
depressed simultaneously
.
–
In the event of a battery failure, forcing the
selector from position P
to another position.
Gear shift indicator
(Depending on engine)
This system is designed to reduce fuel
consumption by recommending the most suitable
gear.
Operation
Depending on the driving situation and
the vehicle's equipment, the system may
recommend skipping one or more gears.
Gear engagement recommendations are
not to be considered mandatory. Indeed, the
configuration of the road, the traffic density and
safety remain determining factors when choosing
the best gear. Therefore, the driver remains
responsible for deciding whether or not to follow
the system’s advice.
The system cannot be deactivated.
With an automatic gearbox, the system is
only active in manual operation.
The information appears on the instrument panel, in the form of an arrow
and the recommended gear.
The system adapts the gear change instructions according to the driving
conditions (e.g.
slope, load) and driving style
(e.g.
power demand, acceleration, braking).
The system never suggests:
–
engaging first gear
.
–
engaging reverse gear
.
Stop & Start
The Stop & Start function puts the engine temporarily into standby - STOP mode - during
phases when the vehicle is stationary (e.g.
red
lights, traffic jams). The engine automatically
restarts - START mode - as soon as the driver
indicates the intention of moving off again.
Primarily designed for urban use, the function
is intended to reduce fuel consumption and
exhaust emissions as well as the noise level
when stationary.
The function does not affect the functionalities of
the vehicle, in particular the braking.
Page 74 of 180

72
Practical information
Precautions for use
AdBlue® is a urea-based solution. This fluid is
non-flammable, colourless and odourless (when
kept in a cool place).
In the event of contact with the skin, wash the
affected area with soap and running water. In the
event of contact with the eyes, immediately rinse
the eyes with large amounts of water or with an
eye wash solution for at least 15 minutes. Seek
medical attention if you feel a persistent burning
sensation or irritation.
If swallowed, immediately wash out the mouth
with clean water and then drink plenty of water.
In certain conditions (high temperature, for
example), the risk of release of ammonia cannot
be excluded: do not inhale the fluid. Ammonia
vapours have an irritant effect on mucous
membranes (eyes, nose and throat).
Store AdBlue® out of the reach of
children, in its original container.
Procedure
Before starting the top-up procedure, ensure that
the vehicle is parked on a flat and level surface.
In wintry conditions, ensure that the temperature
of the vehicle is above -11°C. Otherwise the
AdBlue
® may be frozen and so cannot be poured
into the tank. Park the vehicle in a warmer area
for a few hours to allow the top-up to be carried
out.
Never pour the AdBlue® into the Diesel
fuel tank.
For specific information about how to
access the AdBlue tank, refer to the
detailed descriptions below.
If any AdBlue® is splashed, or if there are
any spillages on the bodywork, rinse
immediately with cold water or wipe with a
damp cloth.
If the fluid has crystallised, clean it off using a
sponge and hot water.
Important: in the event of a top-up after
an AdBlue breakdown, you must wait
about 5
minutes before switching on the
ignition, without opening the driver's door,
unlocking the vehicle or bringing the
electronic key into the passenger
compartment.
Switch on the ignition, then wait for 10
seconds before starting the engine.
►
Switch off the ignition and remove the key
from the switch to switch off the engine.
► Turn the blue cap of the AdBlue® tank anti-
clockwise and remove it.
Filling up
► With a bottle or container of AdBlue®: after
checking the expiry date, read the instructions
on the label carefully before pouring the contents
into the vehicle's AdBlue
® tank.
►
With an
AdBlue® pump: insert the nozzle and
fill the tank until the nozzle automatically cuts
out.
In order not to overfill the AdBlue® tank:
–
Add between 10 and 13 litres using
AdBlue® containers.
–
Stop after the nozzle’ s first automatic cut-
out, if you are refilling at a service station.
The system only registers AdBlue
®
intermediate top-ups of 5
litres or more.
If the AdBlue® tank is completely empty
– which is confirmed by the message
Page 78 of 180

76
Practical information
or in certain moving components - risk of
strangulation and serious injury!
The location of the interior bonnet release lever prevents the bonnet being
opened when the left-hand front door is
closed.
When the engine is hot, handle the
exterior safety catch and the bonnet stay
with care (risk of burns), using the protected
area.
When the bonnet is open, take care not to
damage the safety catch.
Do not open the bonnet under very windy
conditions.
Cooling of the engine when stopped
The engine cooling fan may start after
the engine has been switched off.
Take care with objects or clothing that
could be caught in the blades of the fan!
Opening
► Open the left-hand front door .
► Pull the interior release lever, located at the
bottom of the dashboard, towards you.
►
T
ilt the exterior safety catch to the left and
raise the bonnet.
► Unclip the stay from its housing and place it
in the support slot to hold the bonnet open.
Closing
► Hold the bonnet and pull out the stay from the
support slot.
►
Clip the stay in its housing.
► Lower the bonnet and release it near the end
of its travel.
►
Pull on the bonnet to check that it is locked
correctly
.
Because of the presence of electrical
equipment under the bonnet, it is strongly
recommended that exposure to water (rain,
washing, etc.) be limited.
Engine compartment
The engine shown here is an example for
illustrative purposes only.
The locations of the following components may
vary:
–
Engine oil dipstick.
–
Engine oil filler cap.
–
Priming pump.
Petrol engine
Page 83 of 180

81
Practical information
7With manual or automatic
gearbox and manual parking
brake
/
To release them
► With the vehicle stationary and engine
running, depress the brake pedal.
►
With a manual gearbox, place the gear lever
into neutral.
►
With an automatic gearbox, place the gear
selector to mode
N.
►
Release the parking brake.
►
Release the brake pedal, then switch off the
engine.
Reverting to normal operation
► Apply the parking brake.
► With an automatic gearbox, place the gear
selector to mode
P.
Advice on care and maintenance
General recommendations
Observe the following recommendations to avoid
damaging the vehicle.
Exterior
Never use a high-pressure jet wash in
the engine compartment - risk of
damaging the electrical components!
Do not wash the vehicle in bright sunshine or
extremely cold conditions.
When washing the vehicle in an
automatic roller-brush car wash, be sure
to lock the doors and, depending on version,
move the electronic key away.
When using a pressure washer, keep the jet
nozzle at a minimum distance of 30 cm from
the vehicle (particularly when cleaning areas
containing chipped paint, sensors or seals).
Promptly clean up any stains containing
chemicals liable to damage the vehicle's
paintwork (including tree resin, bird
droppings, insect secretions, pollen and tar).
Depending on the environment, clean the
vehicle frequently to remove salty deposits
(in coastal areas), soot (in industrial areas)
and mud/salts (in wet or cold areas). These
substances can be highly corrosive.
Contact a CITROËN dealer or a qualified
workshop for advice on removing stubborn
stains requiring special products (such as tar
or insect removers).
Preferably, have paint touch-ups performed
by a CITROËN dealer or a qualified
workshop.
Interior
When washing the vehicle, never use a
water hose or high-pressure jet to clean
the interior.
Liquids carried in cups or other open
containers can spill, presenting a risk of
damage to the instruments and controls and
the controls located on the centre console. Be
vigilant!
To clean instrument panels, touch screens
or other displays, wipe gently with a soft,
dry cloth. Do not use products (e.g. alcohol,
disinfectant) or soapy water directly on these
surfaces - risk of damage!
Bodywork
High-gloss paint
Do not use abrasive products, solvents,
petrol or oil to clean the bodywork.
Never use an abrasive sponge to clean
stubborn stains - risk of scratching the
paintwork!
Do not apply polish in strong sunshine, or to
plastic or rubber parts.
Use a soft cloth and soapy water or a pH
neutral product.
Gently wipe the bodywork with a clean
microfibre cloth.
Apply polish with the vehicle clean and dry.
Page 87 of 180

85
In the event of a breakdown
8Depending on engine, the spare wheel
may be a standard steel or 'space-saver'
wheel (BlueHDi 100).
Removing the spare wheel
► Unclip the tool storage box (standard spare
wheel).
►
Slacken the central nut.
►
Remove the fastening device (nut and bolt).
►
Lift the spare wheel towards you from the
rear
.
►
T
ake the wheel out of the boot.
Putting the spare wheel back in place
The punctured wheel cannot be put under the boot floor.
► Put the spare wheel back in place in its
housing.
►
Slacken the nut on the bolt by a few turns.
►
Position the fastening device (nut and bolt) in
the middle of the wheel.
►
T
ighten the central nut sufficiently to retain
the wheel correctly.
►
Put the tool box back in place in the middle of
the wheel and clip it in place.
Removing a wheel
Parking the vehicle
Immobilise the vehicle where it does
not obstruct traffic: the ground must be level,
stable and non-slippery.
With a manual gearbox, engage first gear
to lock the wheels, apply the parking brake,
unless it is set to automatic mode, and switch
off the ignition.
With an automatic gearbox, select mode
P
to lock the wheels, apply the parking brake,
unless it is set to automatic mode, and switch
off the ignition.
Check that the parking brake indicator lamps
on the instrument panel are on fixed.
The occupants must get out of the vehicle
and wait where they are safe.
If necessary, place a chock under the wheel
diagonally opposite the wheel to be changed.
Never go underneath a vehicle raised using a
jack; use an axle stand.
Wheel with wheel trim
When removing the wheel , first remove
the wheel trim by pulling at the valve aperture
using the wheelbrace.
When refitting the wheel , refit the wheel
trim, starting by placing its aperture in line
with the valve and then pushing it into place
all round its edge with the palm of your hand.
Page 90 of 180
88
In the event of a breakdown
lamp has been switched off for several
minutes - risk of serious burns!
Do not touch the bulb directly with your
fingers; use a lint-free cloth.
It is essential only to use anti-ultraviolet
(UV) type bulbs, so as not to damage the
headlamp.
Always replace a failed bulb with a new bulb
of the same type and specification. To avoid
lighting imbalance, replace the bulbs in pairs.
Refitting the lamp units
Perform the operations in the reverse
order to dismantling.
Light-emitting diode (LED)
headlamps and lamps
Depending on version, the affected types of
headlamps/lamps are:
–
Daytime running lamps/sidelamps.
If you need to replace this type of bulb,
you must contact a CITROËN dealer or a
qualified workshop.
Do not touch the LED technology bulbs - risk
of electrocution!
Front lamps
Halogen headlamps
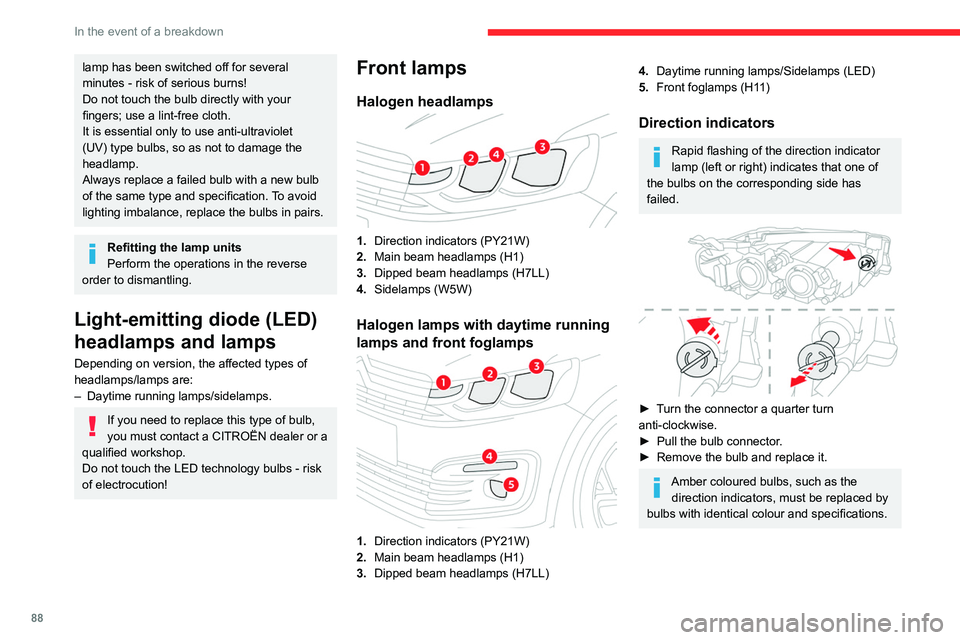
1. Direction indicators (PY21W)
2. Main beam headlamps (H1)
3. Dipped beam headlamps (H7LL)
4. Sidelamps (W5W)
Halogen lamps with daytime running
lamps and front foglamps
1.Direction indicators (PY21W)
2. Main beam headlamps (H1)
3. Dipped beam headlamps (H7LL)
4.Daytime running lamps/Sidelamps (LED)
5. Front foglamps (H11)
Direction indicators
Rapid flashing of the direction indicator
lamp (left or right) indicates that one of
the bulbs on the corresponding side has
failed.
► Turn the connector a quarter turn
anti-clockwise.
►
Pull the bulb connector
.
►
Remove the bulb and replace it.
Amber coloured bulbs, such as the direction indicators, must be replaced by
bulbs with identical colour and specifications.
Page 92 of 180

90
In the event of a breakdown
Front foglamps
► Insert a flat screwdriver between the lamp
and the cover .
►
Pull and lever to unclip the cover
.
► Remove the two fastening screws of the
module.
►
Remove the module from its housing.
► Press the locking clip and disconnect the
connector .
►
T
urn the bulb holder a quarter turn
anti-clockwise.
►
Remove the bulb holder
.
►
Remove the bulb and replace it.
If you experience any difficulty in
replacing these bulbs, you can also
contact a CITROËN dealer or a qualified
workshop.
Direction indicator side repeaters
► Insert a screwdriver towards the centre of the
repeater , between the repeater and the base of
the bodywork.
►
Lever with the screwdriver to extract the
repeater and pull it out.
►
Disconnect the connector from the repeater
.
►
Replace the module.
Contact a CITROËN dealer or a qualified
workshop to obtain the module.
Rear lamps
1. Brake lamps/Sidelamps (P21/5W)
2. Direction indicators (PY21W)
3. Reversing lamps (W16W)
4. Foglamp (P21/5W)
These bulbs are changed from inside the boot: ►
Open the boot.
►
Remove the access grille from the
corresponding side trim panel.
►
Disconnect the lamp connector
.
Page 97 of 180
95
In the event of a breakdown
8► Push clamp B fully down.
► Lower lever A to lock clamp B.
►
Depending on equipment, lower the plastic
cover on the
(+) terminal.
Do not force the lever when pressing on
it, as if the clamp is not positioned
correctly, locking will then not be possible.
Start the procedure again.
The Stop & Start system may not be operational during the trip following the
first engine start.
In this case, the system will only be available
again after a continuous period with the
vehicle immobilised, the duration of which
depends on the exterior temperature and the
state of charge of the battery (up to about 8
hours).
Following reconnection
After reconnecting the battery, turn on the
ignition and wait 1 minute before starting the
engine, to enable the electronic systems to
initialise.
If minor problems nevertheless persist following
this operation, contact a CITROËN dealer or a
qualified workshop.
Referring to the relevant section, reinitialise
certain equipment:
–
Remote control key
.
–
Electric windows.
–
Date and time.
–
Preset radio stations.
Towing the vehicle
General recommendations
Observe the legislation in force in the
country where you are driving.
Check that the towing vehicle is heavier than
the towed vehicle.
The driver must remain at the wheel of the
towed vehicle and must have a valid driving
licence.
When towing a vehicle with all four wheels on
the ground, always use an approved towbar;
ropes and straps are prohibited.
The towing vehicle must move off gently.
When the vehicle is towed with its engine
off, there is no longer braking and steering
assistance.
A professional recovery service must
be called in the following cases:
–
broken down on a motorway or main road;
–
not possible to put the gearbox into neutral,
unlock the steering, or release the parking
brake;
–
not possible to tow a vehicle with an
automatic gearbox, with the engine running;
–
towing with only two wheels on the ground;
–
four-wheel drive vehicle;
–
no approved towbar available.
Towing constraints
Type of vehicle
(engine/gearbox) Front wheels on the
ground Rear wheels on the
ground Flatbed
4 wheels on the ground
with towbar
Internal combustion/Manual
Page 98 of 180
96
In the event of a breakdown
Towing constraints
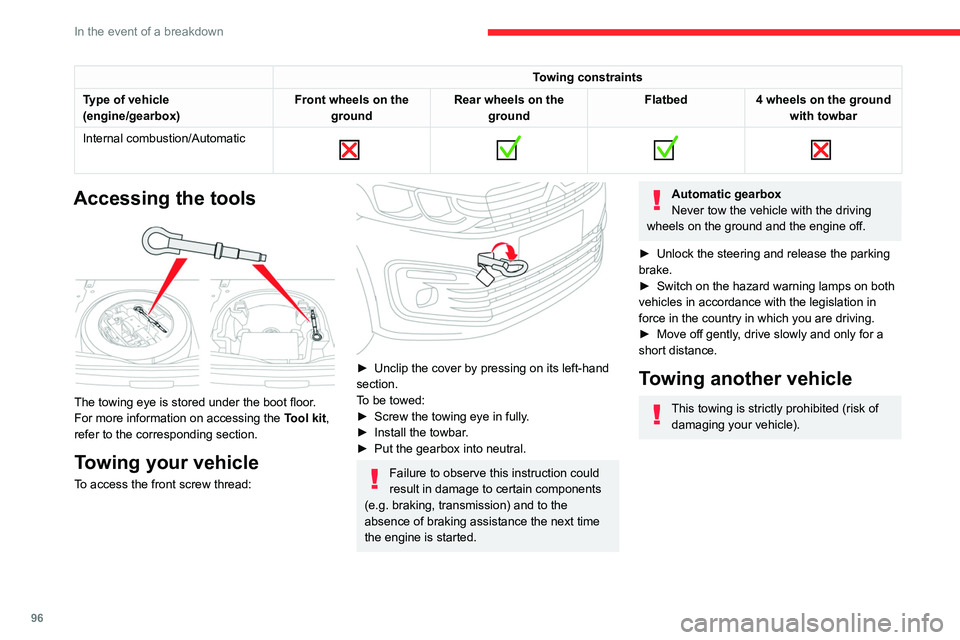
Type of vehicle
(engine/gearbox) Front wheels on the
ground Rear wheels on the
ground Flatbed
4 wheels on the ground
with towbar
Internal combustion/Automatic
Accessing the tools
The towing eye is stored under the boot floor.
For more information on accessing the
Tool kit,
refer to the corresponding section.
Towing your vehicle
To access the front screw thread:
► Unclip the cover by pressing on its left-hand
section.
T
o be towed:
►
Screw the towing eye in fully
.
►
Install the towbar
.
►
Put the gearbox into neutral.
Failure to observe this instruction could
result in damage to certain components
(e.g. braking, transmission) and to the
absence of braking assistance the next time
the engine is started.
Automatic gearbox
Never tow the vehicle with the driving
wheels on the ground and the engine off.
►
Unlock the steering and release the parking
brake.
►
Switch on the hazard warning lamps on both
vehicles in accordance with the legislation in
force in the country in which you are driving.
►
Move off gently
, drive slowly and only for a
short distance.
Towing another vehicle
This towing is strictly prohibited (risk of damaging your vehicle).
Page 105 of 180
103
Bluetooth® audio system
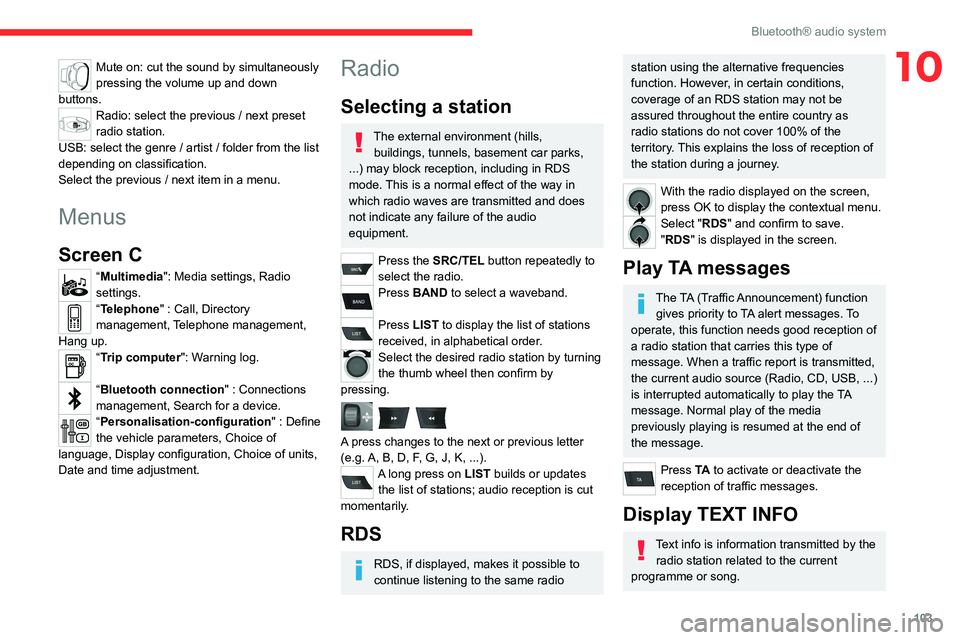
10Mute on: cut the sound by simultaneously
pressing the volume up and down
buttons.
Radio: select the previous / next preset
radio station.
USB: select the genre / artist / folder from the list
depending on classification.
Select the previous / next item in a menu.
Menus
Screen C
“Multimedia": Media settings, Radio
settings.
“Telephone" : Call, Directory
management, Telephone management,
Hang up.
“Trip computer": Warning log.
“Bluetooth connection " : Connections
management, Search for a device.
“Personalisation-configuration " : Define
the vehicle parameters, Choice of
language, Display configuration, Choice of units,
Date and time adjustment.
Radio
Selecting a station
The external environment (hills, buildings, tunnels, basement car parks,
...) may block reception, including in RDS
mode. This is a normal effect of the way in
which radio waves are transmitted and does
not indicate any failure of the audio
equipment.
Press the SRC/TEL button repeatedly to
select the radio.
Press BAND to select a waveband.
Press LIST to display the list of stations
received, in alphabetical order.
Select the desired radio station by turning
the thumb wheel then confirm by
pressing.
A press changes to the next or previous letter
(e.g. A, B, D, F, G, J, K, ...).
A long press on LIST builds or updates the list of stations; audio reception is cut
momentarily.
RDS
RDS, if displayed, makes it possible to
continue listening to the same radio
station using the alternative frequencies
function. However, in certain conditions,
coverage of an RDS station may not be
assured throughout the entire country as
radio stations do not cover 100% of the
territory. This explains the loss of reception of
the station during a journey.
With the radio displayed on the screen,
press OK to display the contextual menu.
Select "RDS" and confirm to save.
"RDS" is displayed in the screen.
Play TA messages
The TA (Traffic Announcement) function gives priority to TA alert messages. To
operate, this function needs good reception of
a radio station that carries this type of
message. When a traffic report is transmitted,
the current audio source (Radio, CD, USB, ...)
is interrupted automatically to play the TA
message. Normal play of the media
previously playing is resumed at the end of
the message.
Press TA to activate or deactivate the
reception of traffic messages.
Display TEXT INFO
Text info is information transmitted by the radio station related to the current
programme or song.