low beam CITROEN C-ELYSÉE 2023 Owners Manual
[x] Cancel search | Manufacturer: CITROEN, Model Year: 2023, Model line: C-ELYSÉE, Model: CITROEN C-ELYSÉE 2023Pages: 180, PDF Size: 4.77 MB
Page 13 of 180

11
Dashboard instruments
1Front foglampsFixed.
The front foglamps are on.
Direction indicatorsFlashing with audible signal.
The direction indicators are on.
Dipped beam headlampsFixed.
The lamps are on.
Blue warning/indicator lamps
Main beam headlamps
Fixed.
The lamps are on.
Black/white warning lamps
Foot on the clutch
Fixed.
Stop & Start: the change to START mode
is rejected because the clutch pedal is not fully
depressed.
Fully depress the clutch pedal.
Foot on the brake
Fixed.
Insufficient or no pressure on the brake
pedal.
With an automatic gearbox, with the engine
running, before releasing the parking brake, to
move out of position P.
Indicators
Service indicator
The servicing information is expressed in terms
of distance (miles or kilometres) and time
(months or days).
The alert is given at whichever of these two
terms is reached first.
The servicing information is displayed in the
instrument panel. Depending on the version of
the vehicle:
–
The distance recorder display line indicates
the distance remaining before the next service
is due, or the distance travelled since it was due
preceded by the "-" sign.
–
An alert message indicates the distance
remaining, as well as the period before the next
service is due or how long it is overdue.
The value indicated is calculated according to the distance covered and
the time elapsed since the last service.
The alert may also be triggered close to a
due date.
Service spannerOn temporarily when the ignition is
switched on.
Between 620 and 1,860 miles (1,000 and 3,000
km) remain before the next service is due.
Fixed, when the ignition is switched on.
The next service is due in less than 620
miles (1,000 km). Have your vehicle serviced very soon.
Service spanner flashingFlashing then fixed, when the
ignition is switched on.
(With
BlueHDi Diesel engines, associated with
the Service warning lamp.)
The servicing interval has been exceeded.
Have your vehicle serviced as soon as possible.
Resetting the service indicator
After each service, the service indicator must be
reset to zero.
The procedure for resetting to zero is as follows:
► Switch off the ignition.
►
Press and hold the trip distance recorder
reset button.
►
Switch the ignition on; the distance recorder
display starts a countdown.
►
When the display indicates "=0", release the
button; the spanner disappears.
Page 36 of 180

34
Lighting and visibility
If the driver's door is opened, a temporary
audible signal warns the driver that the lamps
are on.
The lamps, with the exception of the
sidelamps, switch off automatically after a
maximum duration of 30 minutes to avoid
draining the battery.
They will go off automatically after a period
of time that depends on the level of charge in
the battery (entering energy economy mode).
In some weather conditions (e.g. low
temperature or humidity), misting on the
internal surface of the glass of the headlamps
and rear lamps is normal, and will disappear
after the lamps have been on for a few
minutes.
Never look too closely at the light beam
of LED technology lamps - risk of serious
eye injury!
Travelling abroad
Vehicles equipped with halogen
headlamps:
If planning to use your vehicle in a country
that drives on the other side of the road, the
dipped beam headlamps must be adjusted to
avoid dazzling oncoming drivers. Contact a
CITROËN dealer or a qualified workshop.
Daytime running lamps/
Sidelamps
(Depending on version)
These LED lamps at the front of the vehicle light
up automatically when the engine starts.
They perform the following functions:
–
Daytime running lamps (lighting control stalk
at position "
0" with adequate ambient light).
In daytime running lamps mode, the
diodes are brighter.
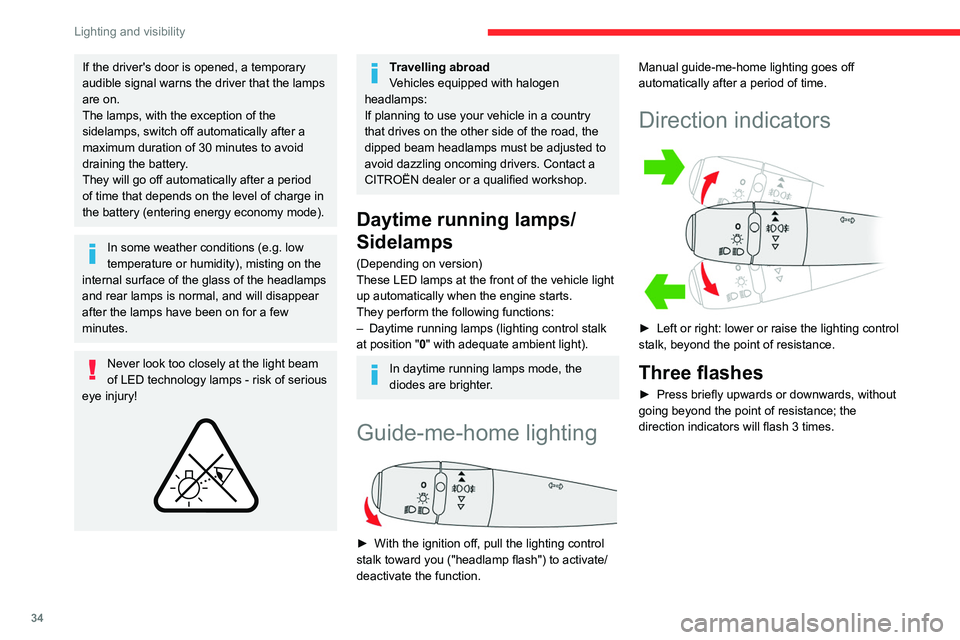
Guide-me-home lighting
► With the ignition off, pull the lighting control
stalk toward you ("headlamp flash") to activate/
deactivate the function. Manual guide-me-home lighting goes off
automatically after a period of time.
Direction indicators
► Left or right: lower or raise the lighting control
stalk, beyond the point of resistance.
Three flashes
► Press briefly upwards or downwards, without
going beyond the point of resistance; the
direction indicators will flash 3 times.
Page 37 of 180

35
Lighting and visibility
4Headlamp beam height
adjustment
To avoid causing a nuisance to other road users,
the height of the headlamp beams should be
adjusted according to the load in the vehicle.
0. (Initial adjustment) Driver only or driver + front passenger
-. Driver + front passenger + rear passengers
1. Driver + front passenger + rear passengers +
load in the boot
-. Driver + front passenger + rear passengers +
load in the boot
2. Driver only + maximum authorised load in
the boot
Wiper control stalk
Before operating the wipers in wintry
conditions, clear any snow, ice or frost
from the windscreen and around the wiper
arms and blades.
Do not operate the wipers on a dry
windscreen. In extremely hot or cold
weather, check that the wiper blades are not
stuck to the windscreen before operating the
wipers.
After using an automatic car wash, you may temporarily notice abnormal noises
and poorer wiping performance.
You do not
need to replace the wiper blades.
Front wipers
Raise or lower the control to the desired position
to change the wiping speed.
Fast wiping (heavy rain).
Normal wiping (moderate rain).
Intermittent wiping (proportional to the
speed of the vehicle).
Off.
Single wipe (press down and release).
Windscreen wash
► Pull the wiper control stalk towards you and
hold.
The screenwash then the windscreen wipers
operate for a pre-determined time.
The screenwash jets are not adjustable. Do not handle them (risk of damage).
To avoid damaging the wiper blades, do not operate the screenwash if the
screenwash reservoir is empty.
Only operate the screenwash if there is no
risk of the fluid freezing on the windscreen
and hindering visibility. During the winter
period, use "very cold climate" rated products.
Never top up with water.
Special position of the
windscreen wipers
This maintenance position is used while cleaning
or replacing the wiper blades. It can also be
Page 54 of 180

52
Driving
Towing
Driving with a trailer places greater
demands on the towing vehicle and
particular care must be taken.
Do not exceed the maximum towable
weights.
At altitude: reduce the maximum load by
10% per 1,000 metres of altitude; the lower
air density at high altitudes decreases engine
performance.
New vehicle: do not tow a trailer until the
vehicle has driven at least 620 miles
(1,000 kilometres).
If the outside temperature is high, let the
engine idle for 1 to 2 minutes after the
vehicle comes to a stop, to help it to cool.
Before setting off
Nose weight
► Distribute the load in the trailer so that the
heaviest items are located as close as possible
to the axle, and the nose weight (at the point
where it joins your vehicle) approaches the
maximum permitted, without exceeding it.
Tyres
► Check the tyre pressures of the towing
vehicle and of the trailer , observing the
recommended pressures.
Lighting
► Check the electrical signalling on the trailer
and the headlamp beam height of your vehicle.
If a genuine CITROËN towing device is
used, the rear parking sensors will be
deactivated automatically to avoid activating
the audible signal.
When driving
Cooling
Towing a trailer uphill causes the coolant
temperature to increase. The maximum towable
load depends on the gradient and the exterior
temperature. The fan’s cooling capacity does not
increase with engine speed.
►
Reduce speed and lower the engine speed to
limit the amount of heating produced.
►
Pay constant attention to the coolant
temperature.
If this warning lamp and the STOP
warning lamp come on, stop the vehicle
and switch off the engine as soon as possible.
Brakes
Using the engine brake is recommended to limit
the overheating of the brakes. Braking distances
are increased when towing a trailer.
Side wind
Bear in mind that the vehicle will be more
susceptible to wind when towing.
Anti-theft protection
Electronic immobiliser
The remote control contains an electronic chip
which has a special code. When the ignition is
switched on, this code must be recognised in
order for starting to be possible.
A few seconds after switching off the ignition,
this system locks the engine control system,
therefore preventing the engine from being
started in the event of a break-in.
In the event of a fault, you are informed
by illumination of this warning lamp, an
audible signal and a message on the screen.
The vehicle will not start; contact a CITROËN
dealer as soon as possible.
Page 56 of 180

54
Driving
Switching off the engine
► Immobilise the vehicle.
► With the engine at idle, turn the key to
position 1
.
►
Remove the key from the ignition switch.
►
T
o lock the steering column, turn the steering
wheel until it locks.
To facilitate unlocking of the steering column, it is recommended that the
wheels be returned to the straight ahead
position before switching off the engine.
Never switch off the ignition before the
complete immobilisation of the vehicle.
With the engine off, the braking and steering
assistance systems are also cut off - risk of
loss of control of the vehicle!
Check that the parking brake is correctly
applied, particularly on sloping ground.
When leaving the vehicle, keep the key in
your possession and lock the vehicle.
Energy economy mode
After the engine has stopped (position 1. Stop),
for a maximum combined duration of 30 minutes,
you can still use functions such as the audio and
telematics system, courtesy lamps or dipped
beam headlamps.
For more information on Energy
economy mode, refer to the
corresponding section.
Key left in
When the driver's door is opened, a
message is displayed, accompanied by an
audible signal, if the key has been left in the
ignition switch in position 1.
If the key has been left in the ignition switch
in position 2, the ignition will be switched off
automatically after one hour.
To switch the ignition back on, turn the key to
position 1, then back to position 2.
Parking brake
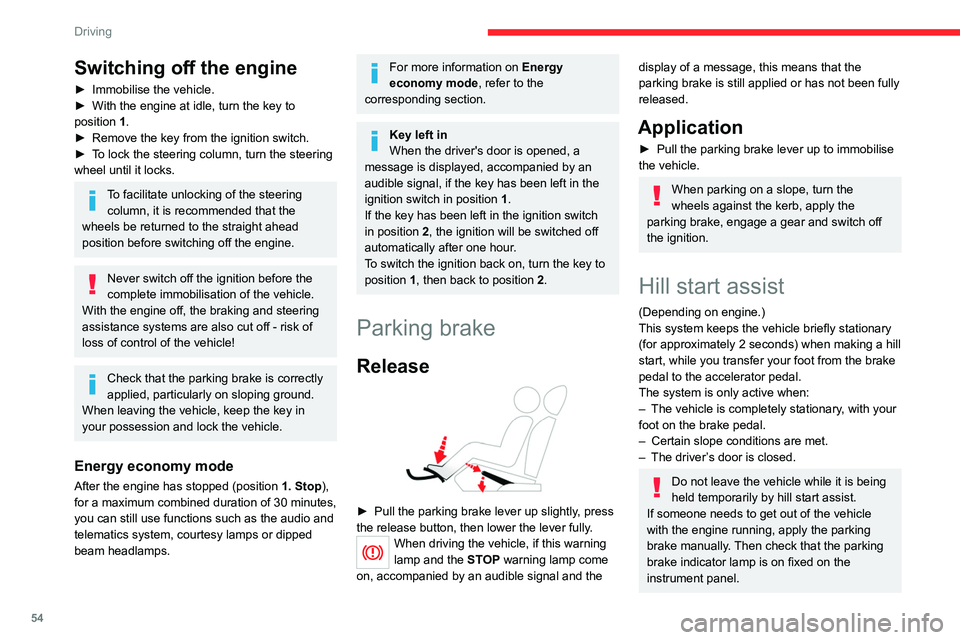
Release
► Pull the parking brake lever up slightly , press
the release button, then lower the lever fully.
When driving the vehicle, if this warning
lamp and the STOP warning lamp come
on, accompanied by an audible signal and the
display of a message, this means that the
parking brake is still applied or has not been fully
released.
Application
► Pull the parking brake lever up to immobilise
the vehicle.
When parking on a slope, turn the
wheels against the kerb, apply the
parking brake, engage a gear and switch off
the ignition.
Hill start assist
(Depending on engine.)
This system keeps the vehicle briefly stationary
(for approximately 2
seconds) when making a hill
start, while you transfer your foot from the brake
pedal to the accelerator pedal.
The system is only active when:
–
The vehicle is completely stationary
, with your
foot on the brake pedal.
–
Certain slope conditions are met.
–
The driver
’s door is closed.
Do not leave the vehicle while it is being
held temporarily by hill start assist.
If someone needs to get out of the vehicle
with the engine running, apply the parking
brake manually. Then check that the parking
brake indicator lamp is on fixed on the
instrument panel.
Page 75 of 180

73
Practical information
7“Top up AdBlue: Starting impossible” – it is
essential to add at least 10 litres.
Top-up detection may not be instantaneous
after addition. It may take a few minutes of
driving before the top-up detection is effective.
Do not dispose of AdBlue® bottles or
containers in the household waste.
Place them in a container reserved for this
purpose or take them back to where you
purchased them.
Snow chains
In wintry conditions, snow chains improve
traction as well as the behaviour of the vehicle
when braking.
Snow chains must be fitted only to the
front wheels. They must never be fitted to
"space-saver" type spare wheels.
Observe the legislation in force in your
country relating to the use of snow
chains and maximum authorised speeds.
Use only the chains designed to be fitted to the
type of wheel fitted to your vehicle :
Original tyre size Maximum link size 185/65 R15 9 mm
195/55 R16
For more information on snow chains, contact a
CITROËN dealer or a qualified workshop.
Installation tips
► To fit the snow chains during a journey, stop
the vehicle on a flat surface at the side of the
road.
►
Apply the parking brake and position any
wheel chocks under the wheels to prevent
movement of the vehicle.
►
Fit the snow chains following the instructions
provided by the manufacturer
.
►
Move off gently and drive for a few moments,
without exceeding 31
mph (50 km/h).
►
Stop the vehicle and check that the snow
chains are correctly tightened.
It is strongly recommended that you
practise fitting the snow chains on a level
and dry surface before setting off.
Avoid driving with snow chains on roads that have been cleared of snow to avoid
damaging the vehicle's tyres and the road
surface. If the vehicle is fitted with alloy
wheels, check that no part of the chain or its
fixings is in contact with the wheel rim.
Energy economy mode
This system manages the duration of use of
certain functions, in order to conserve a sufficient
level of charge in the battery with the ignition off.
After switching off the engine and for a maximum
cumulative period of around 30 minutes, you can
continue to use functions such as the audio and
telematics system, dipped beam headlamps or
courtesy lamps.
Selecting the mode
A confirmation message is displayed when
energy economy mode is entered, and the active
functions are placed on standby.
If a telephone call is in progress at the
time, it will be maintained for around 10
minutes via the audio system’s hands-free
system.
Exiting the mode
These functions are automatically reactivated the
next time the vehicle is used.
To restore the use of these functions
immediately, start the engine and let it run:
–
For less than 10 minutes, to use the
equipment for approximately 5 minutes.
–
For more than 10 minutes, to use the
equipment for approximately 30 minutes.
Let the engine run for the specified duration to
ensure that the battery charge is sufficient.
Page 89 of 180

87
In the event of a breakdown
8
► Lower the vehicle again fully.
► Fold jack 2 and remove it.
► Tighten the bolts using the wheelbrace 1 only.
► Refit the bolt covers to each of the bolts
(depending on equipment).
►
Store the tools.
After changing a wheel
Store the punctured wheel in the boot or,
depending on version, remove the central cover
first to store it beneath the floor in place of the
spare wheel.
With a non-standard or 'space-saver'
spare wheel
Do not exceed the maximum authorised
speed of 50 mph (80 km/h) or the maximum
distance of 50 miles (80 km).
Driving with more than one spare wheel of
this type is prohibited.
The wheel trim from the replaced wheel must
not be refitted.
Visit a CITROËN dealer or a qualified
workshop.
Have the tightening of the spare wheel's bolts
and its tyre pressure checked.
Have the punctured tyre examined. After
inspection, the technician will advise you on
whether the tyre can be repaired or if it must
be replaced.
Changing a bulb
In some weather conditions (e.g. low
temperature or humidity), misting on the
internal surface of the glass of the headlamps
and rear lamps is normal, and will disappear
after the lamps have been on for a few
minutes.
Never look too closely at the light beam
of LED technology lamps - risk of serious
eye injury!
The headlamps have polycarbonate lenses with a protective coating:
–
Do not clean them with a dry or abrasive
cloth, nor with detergent or solvent
products.
–
Use a sponge and soapy water or a pH
neutral product.
–
When using a high-pressure washer on
persistent marks, do not keep the lance
directed towards the headlamps, lamps or
their edges for too long, so as not to damage
their protective coating and seals.
Changing a bulb must only be done with
the ignition off and after the headlamp /
Page 155 of 180

153
Alphabetical index
Control stalk, lighting 33
Control stalk, wipers
35
Courtesy lamps
32
Cruise control
64–66
D
DAB (Digital Audio Broadcasting) -
Digital radio
117, 138–139
Date (setting)
14, 123, 145
Daytime running lamps
34, 88
Deactivating the passenger airbag
42, 45
Defrosting
26–27, 29
Defrosting, front
29
Defrosting, lower windscreen
29
Defrosting, rear screen
29–30
Demisting
26–27
Demisting, front
29
Demisting, rear
30
Dimensions
100
Dipstick
77
Direction indicators (turn signals)
34, 88, 90
Doors
20
Driving
51–52
Driving aids (recommendations)
62
Driving economically
6
Dynamic stability control (DSC)
38–39
E
EBFD 38
Eco-driving (advice)
6
Electric windows
22
Electronic brake force distribution (EBFD)
38
Emergency braking assistance (EBA)
38
Emergency warning lamps
37, 83
Emissions control system, SCR
70
Energy economy (mode)
73
Energy economy mode
73
Engine compartment
76–77
Engine, Diesel
69, 77, 83, 99
Engine, petrol
76, 98
Engines
97–99
Environment
6, 19
ESC (electronic stability control)
38
F
Filling the AdBlue® tank 72, 79
Filling the fuel tank
69–70
Filter, air
79
Filter, oil
79
Filter, particle
78–79
Filter, passenger compartment
26, 79
Fitting a wheel
85–86
Fitting roof bars
75
Fittings, interior
30
Flap, fuel filler
69–70
Flashing indicators
34, 88
Fluid, brake 78
Fluid, engine coolant
78
Foglamp, rear
33, 90
Foglamps, front
33, 90
Folding the rear seats
24
Frequency (radio)
138
Fuel
6, 69
Fuel consumption
6
Fuel level, low
69
Fuel (tank)
69–70
Fuses
91
G
Gauge, fuel 69
Gearbox, automatic
55–57, 80, 92
Gearbox, manual
55, 80
Gear lever, automatic gearbox
57
Gear lever, manual gearbox
55
Gear shift indicator
58
Glove box
30
G.P.S.
132
H
Hazard warning lamps 37, 83
Headlamps (adjustment)
35
Headlamps, dipped beam
88–89
Headlamps, halogen
88
Headlamps, main beam
88–89