trip computer CITROEN C-ELYSÉE 2023 Owners Manual
[x] Cancel search | Manufacturer: CITROEN, Model Year: 2023, Model line: C-ELYSÉE, Model: CITROEN C-ELYSÉE 2023Pages: 180, PDF Size: 4.77 MB
Page 4 of 180
2
Contents
■
Overview
■
Eco-driving
1Dashboard instrumentsInstrument panel 7
Warning and indicator lamps 7
Indicators 11
Distance recorders 13
Setting the date and time 14
Trip computer 14
2AccessRemote control / Key 17
Central locking 18
Back-up procedures 19
Doors 20
Boot 20
Alarm 21
Electric windows 22
3Ease of use and comfortFront seats 23
Rear bench seat 24
Steering wheel adjustment 25
Mirrors 25
Heating and Ventilation 26
Air conditioning, manual (without display screen) 27
Electronic air conditioning (with display screen) 28
Front demisting - defrosting 29
Demisting/de-icing the rear screen
and/or the door mirrors
30
Interior fittings 30
Courtesy lamps 32
4Lighting and visibilityExterior lighting control stalk 33
Direction indicators 34
Headlamp beam height adjustment 35
Wiper control stalk 35
Changing a wiper blade 36
5SafetyGeneral safety recommendations 37
Hazard warning lamps 37
Horn 38
Electronic stability control (ESC) 38
Seat belts 39
Airbags 41
Child seats 43
Deactivating the front passenger airbag 45
ISOFIX child seats 47
Child lock 50
6DrivingDriving recommendations 51
Starting-switching off the engine 53
Parking brake 54
Hill start assist 54
5-speed manual gearbox 55
6-speed manual gearbox 55
6-speed automatic gearbox 56
Gear shift indicator 58
Stop & Start 58
Tyre under-inflation detection 60
Driving and manoeuvring aids -
General recommendations 62
Speed limiter 63
Cruise control - Specific recommendations 64
Cruise control 65
Rear parking sensors 66
Reversing Camera 67
7Practical informationCompatibility of fuels 69
Refuelling 69
Misfuel prevention (Diesel) 70
AdBlue® (BlueHDi) 70
Snow chains 73
Energy economy mode 73
Towing device 74
Very cold climate screen 74
Roof bars 75
Bonnet 75
Engine compartment 76
Checking levels 77
Checks 79
Free-wheeling 80
Advice on care and maintenance 81
8In the event of a breakdownWarning triangle 83
Running out of fuel (Diesel) 83
Tool kit 83
Spare wheel 84
Changing a bulb 87
Fuses 91
12 V battery 92
Towing the vehicle 95
Page 6 of 180
4
Overview
Presentation
These illustrations and descriptions are intended
as a guide. The presence and location of some
components varies according to the version, trim
level and country of sale.
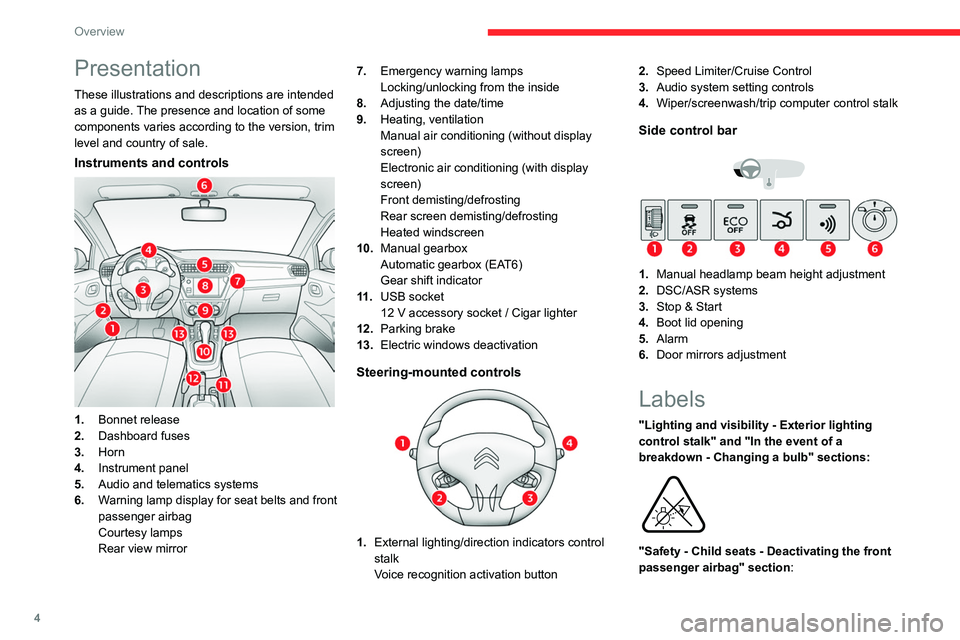
Instruments and controls
1.Bonnet release
2. Dashboard fuses
3. Horn
4. Instrument panel
5. Audio and telematics systems
6. Warning lamp display for seat belts and front
passenger airbag
Courtesy lamps
Rear view mirror 7.
Emergency warning lamps
Locking/unlocking from the inside
8. Adjusting the date/time
9. Heating, ventilation
Manual air conditioning (without display
screen)
Electronic air conditioning (with display
screen)
Front demisting/defrosting
Rear screen demisting/defrosting
Heated windscreen
10. Manual gearbox
Automatic gearbox (EAT6)
Gear shift indicator
11 . USB socket
12 V accessory socket / Cigar lighter
12. Parking brake
13. Electric windows deactivation
Steering-mounted controls
1.External lighting/direction indicators control
stalk
Voice recognition activation button 2.
Speed Limiter/Cruise Control
3. Audio system setting controls
4. Wiper/screenwash/trip computer control stalk
Side control bar
1.Manual headlamp beam height adjustment
2. DSC/ASR systems
3. Stop & Start
4. Boot lid opening
5. Alarm
6. Door mirrors adjustment
Labels
"Lighting and visibility - Exterior lighting
control stalk" and "In the event of a
breakdown - Changing a bulb" sections:
"Safety - Child seats - Deactivating the front
passenger airbag" section:
Page 16 of 180
14
Dashboard instruments
Setting the date and time
With instrument panel
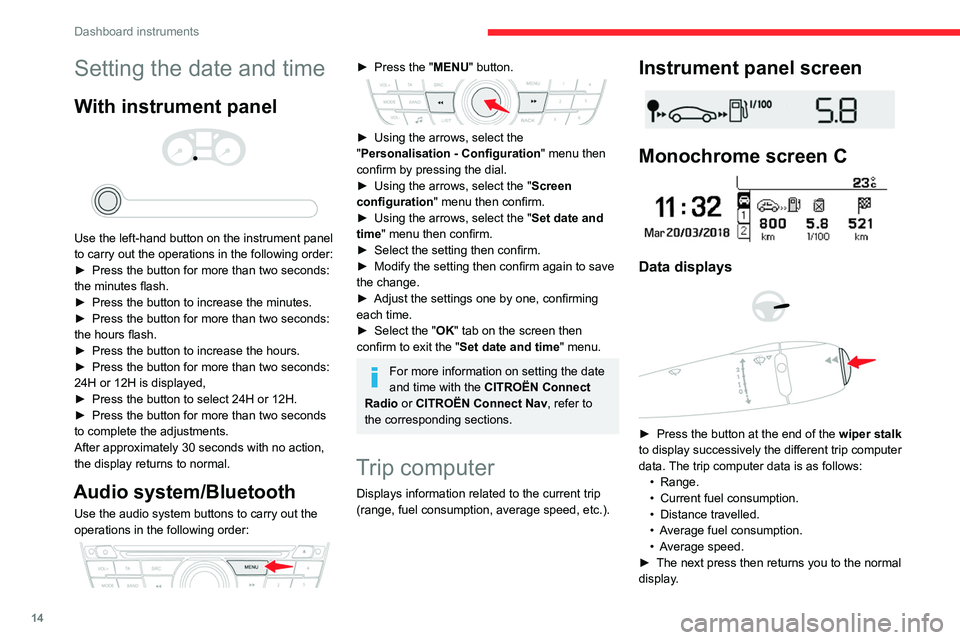
Use the left-hand button on the instrument panel
to carry out the operations in the following order:
►
Press the button for more than two seconds:
the minutes flash.
►
Press the button to increase the minutes.
►
Press the button for more than two seconds:
the hours flash.
►
Press the button to increase the hours.
►
Press the button for more than two seconds:
24H or 12H is displayed,
►
Press the button to select 24H or 12H.
►
Press the button for more than two seconds
to complete the adjustments.
After approximately 30 seconds with no action,
the display returns to normal.
Audio system/Bluetooth
Use the audio system buttons to carry out the
operations in the following order:
► Press the " MENU" button.
► Using the arrows, select the
" Personalisation - Configuration " menu then
confirm by pressing the dial.
►
Using the arrows, select the " Screen
configuration " menu then confirm.
►
Using the arrows, select the " Set date and
time
" menu then confirm.
►
Select the setting then confirm.
►
Modify the setting then confirm again to save
the change.
►
Adjust the settings one by one, confirming
each time.
►
Select the "
OK" tab on the screen then
confirm to exit the "Set date and time" menu.
For more information on setting the date
and time with the CITROËN Connect
Radio or CITROËN Connect Nav, refer to
the corresponding sections.
Trip computer
Displays information related to the current trip
(range, fuel consumption, average speed, etc.).
Instrument panel screen
Monochrome screen C
Data displays
► Press the button at the end of the wiper stalk
to display successively the different trip computer
data. The trip computer data is as follows: •
Range.
•
Current fuel consumption.
•
Distance travelled.
•
A
verage fuel consumption.
•
A
verage speed.
►
The next press then returns you to the normal
display
.
Page 17 of 180
15
Dashboard instruments
1Reset
► Hold the control down for more than two
seconds to reset the distance travelled, the
average fuel consumption and the average
speed.
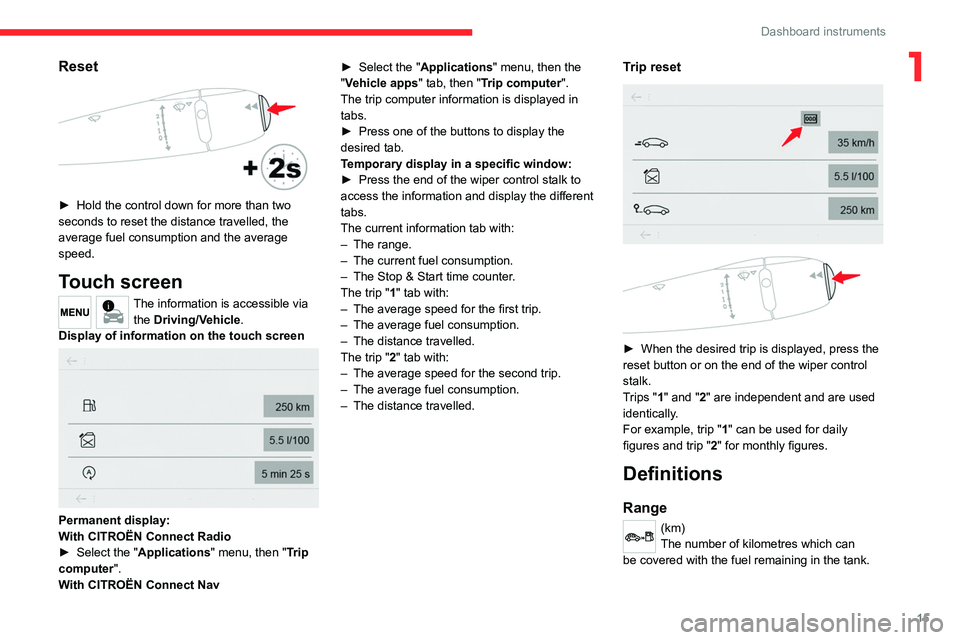
Touch screen
The information is accessible via the Driving/Vehicle.
Display of information on the touch screen
Permanent display:
With CITROËN Connect Radio
►
Select the "
Applications" menu, then "Trip
computer".
With CITROËN Connect Nav ►
Select the "
Applications" menu, then the
"Vehicle apps" tab, then "Trip computer".
The trip computer information is displayed in
tabs.
►
Press one of the buttons to display the
desired tab.
T
emporary display in a specific window:
►
Press the end of the wiper control stalk to
access the information and display the different
tabs.
The current information tab with:
–
The range.
–
The current fuel consumption.
–
The Stop & Start time counter
.
The trip "1" tab with:
–
The average speed for the first trip.
–
The average fuel consumption.
–
The distance travelled.
The trip "
2" tab with:
–
The average speed for the second trip.
–
The average fuel consumption.
–
The distance travelled.
Trip reset
► When the desired trip is displayed, press the
reset button or on the end of the wiper control
stalk.
T
rips "1" and "2" are independent and are used
identically.
For example, trip "1" can be used for daily
figures and trip " 2" for monthly figures.
Definitions
Range
(km)
The number of kilometres which can
be covered with the fuel remaining in the tank.
Page 104 of 180
102
Bluetooth® audio system
Bluetooth® audio system
As a safety measure and because it requires sustained attention by the driver,
the pairing of a Bluetooth mobile telephone
with the Bluetooth hands-free system of your
audio system must be done with the vehicle
stationary and the ignition on.
Your audio system is coded in such a way that it will only operate in your
vehicle.
All work on the system must be carried out
exclusively by a dealer or qualified workshop,
to avoid any risk of electrocution, fire or
mechanical faults.
To avoid discharging the battery, the audio system may switch off after a few
minutes if the engine is not running.
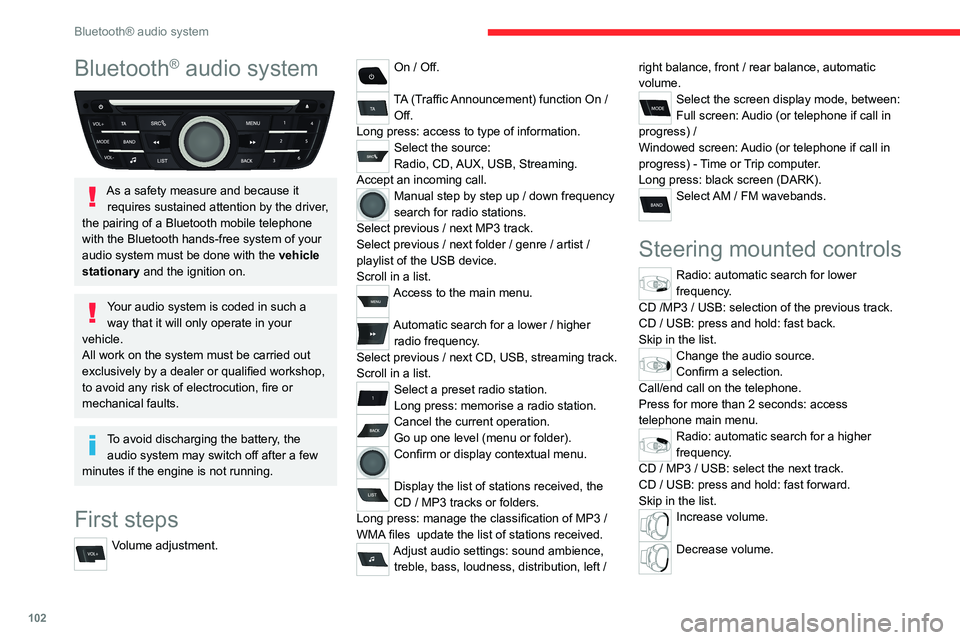
First steps
Volume adjustment.
On / Off.
TA (Traffic Announcement) function On /
Off.
Long press: access to type of information.
Select the source:
Radio, CD, AUX, USB, Streaming.
Accept an incoming call.
Manual step by step up / down frequency
search for radio stations.
Select previous
/ next MP3 track.
Select previous
/ next folder / genre / artist /
playlist of the USB device.
Scroll in a list.
Access to the main menu.
Automatic search for a lower / higher
radio frequency .
Select previous
/ next CD, USB, streaming track.
Scroll in a list.
Select a preset radio station.
Long press: memorise a radio station.
Cancel the current operation.
Go up one level (menu or folder).
Confirm or display contextual menu.
Display the list of stations received, the
CD
/ MP3 tracks or folders.
Long press: manage the classification of MP3
/
WMA files
update the list of stations received.
Adjust audio settings: sound ambience, treble, bass, loudness, distribution, left / right balance, front
/ rear balance, automatic
volume.
Select the screen display mode, between:
Full screen: Audio (or telephone if call in
progress)
/
Windowed screen: Audio (or telephone if call in
progress)
- Time or Trip computer.
Long press: black screen (DARK).
Select AM / FM wavebands.
Steering mounted controls
Radio: automatic search for lower
frequency.
CD /MP3 / USB: selection of the previous track.
CD / USB: press and hold: fast back.
Skip in the list.
Change the audio source.
Confirm a selection.
Call/end call on the telephone.
Press for more than 2 seconds: access
telephone main menu.
Radio: automatic search for a higher
frequency.
CD / MP3 / USB: select the next track.
CD / USB: press and hold: fast forward.
Skip in the list.
Increase volume.
Decrease volume.
Page 105 of 180
103
Bluetooth® audio system
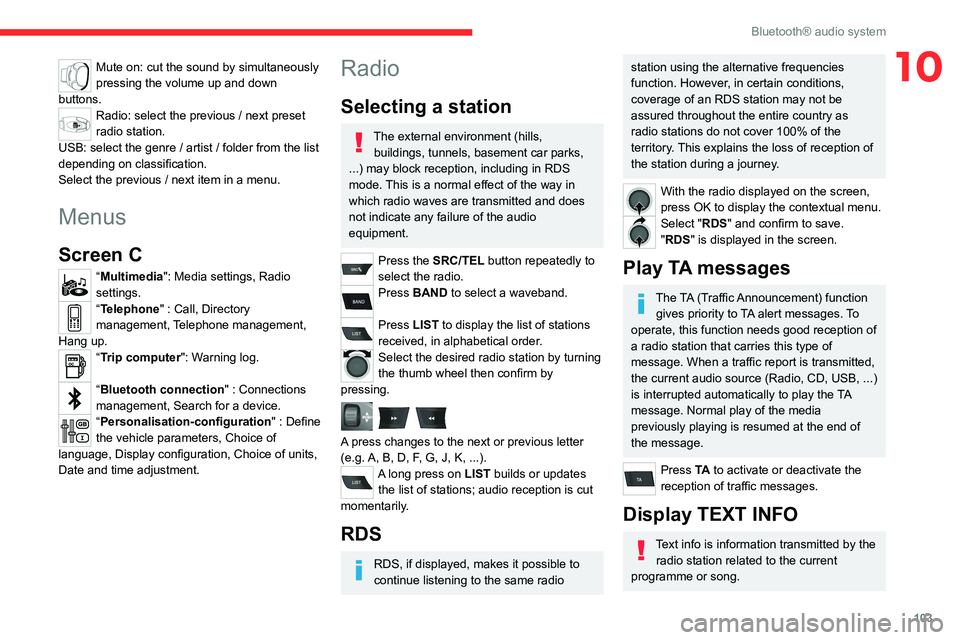
10Mute on: cut the sound by simultaneously
pressing the volume up and down
buttons.
Radio: select the previous / next preset
radio station.
USB: select the genre / artist / folder from the list
depending on classification.
Select the previous / next item in a menu.
Menus
Screen C
“Multimedia": Media settings, Radio
settings.
“Telephone" : Call, Directory
management, Telephone management,
Hang up.
“Trip computer": Warning log.
“Bluetooth connection " : Connections
management, Search for a device.
“Personalisation-configuration " : Define
the vehicle parameters, Choice of
language, Display configuration, Choice of units,
Date and time adjustment.
Radio
Selecting a station
The external environment (hills, buildings, tunnels, basement car parks,
...) may block reception, including in RDS
mode. This is a normal effect of the way in
which radio waves are transmitted and does
not indicate any failure of the audio
equipment.
Press the SRC/TEL button repeatedly to
select the radio.
Press BAND to select a waveband.
Press LIST to display the list of stations
received, in alphabetical order.
Select the desired radio station by turning
the thumb wheel then confirm by
pressing.
A press changes to the next or previous letter
(e.g. A, B, D, F, G, J, K, ...).
A long press on LIST builds or updates the list of stations; audio reception is cut
momentarily.
RDS
RDS, if displayed, makes it possible to
continue listening to the same radio
station using the alternative frequencies
function. However, in certain conditions,
coverage of an RDS station may not be
assured throughout the entire country as
radio stations do not cover 100% of the
territory. This explains the loss of reception of
the station during a journey.
With the radio displayed on the screen,
press OK to display the contextual menu.
Select "RDS" and confirm to save.
"RDS" is displayed in the screen.
Play TA messages
The TA (Traffic Announcement) function gives priority to TA alert messages. To
operate, this function needs good reception of
a radio station that carries this type of
message. When a traffic report is transmitted,
the current audio source (Radio, CD, USB, ...)
is interrupted automatically to play the TA
message. Normal play of the media
previously playing is resumed at the end of
the message.
Press TA to activate or deactivate the
reception of traffic messages.
Display TEXT INFO
Text info is information transmitted by the radio station related to the current
programme or song.
Page 158 of 180
156
Alphabetical index
Stay, engine bonnet 76
Steering mounted controls,
audio
102, 113, 126
Steering wheel (adjustment)
25
Stickers, customising
82
Stopping the vehicle
53–54, 57
Stop & Start
16, 27, 29, 58–60, 69, 75, 79, 95
Storage
30–31
Sunshine sensor
26
Sun visor
30
Switch, ignition
53–54
Synchronising the remote control
20
T
Tables of engines 98–99
Tank, fuel
69–70
Technical data
98–99
Telephone
107, 120–121, 140–143
Third brake lamp
91
Time (setting)
14, 122, 145
TMC (Traffic info)
132
Tools
83, 84
Topping-up AdBlue®
72
Top Tether (fixing)
47
Total distance recorder
13
Towbar
74
Towed loads
97
Towing
95–96
Towing another vehicle
96
Towing the vehicle
95–96
Traction control (ASR) 38–39
Traffic information (TA)
103
Traffic information (TMC)
132
Trailer
74, 98–99
Trajectory control systems
38
Triangle, warning
83
Trip computer
14–16
Tyres
80, 101
Tyre under-inflation detection
60–62
U
Under-inflation (detection) 60
Unlocking
17
Unlocking from the inside
18
Unlocking the boot
17
Unlocking the doors
18–19
Updating the date
123, 145
Updating the time
122, 145
USB
104, 117–118, 139
V
Vehicle data recording and privacy 149
Ventilation
26–29
Voice commands
128–130
W
Warning and indicator lamps 7
Warning lamp, driver's
seat belt not fastened
40
Warning lamps
7
Warning lamp, seat belts
40
Warnings and indicators
7–8
Washing
63
Washing (advice)
81–82
Weights
97
Wheel, spare
80, 83–85
Windscreen, bottom of heated
29
Windscreen, heated
29
Wiper blades (changing)
35–36
Wipers
35