warning Citroen C ZERO RHD 2017 1.G User Guide
[x] Cancel search | Manufacturer: CITROEN, Model Year: 2017, Model line: C ZERO RHD, Model: Citroen C ZERO RHD 2017 1.GPages: 174, PDF Size: 4.16 MB
Page 20 of 174
18
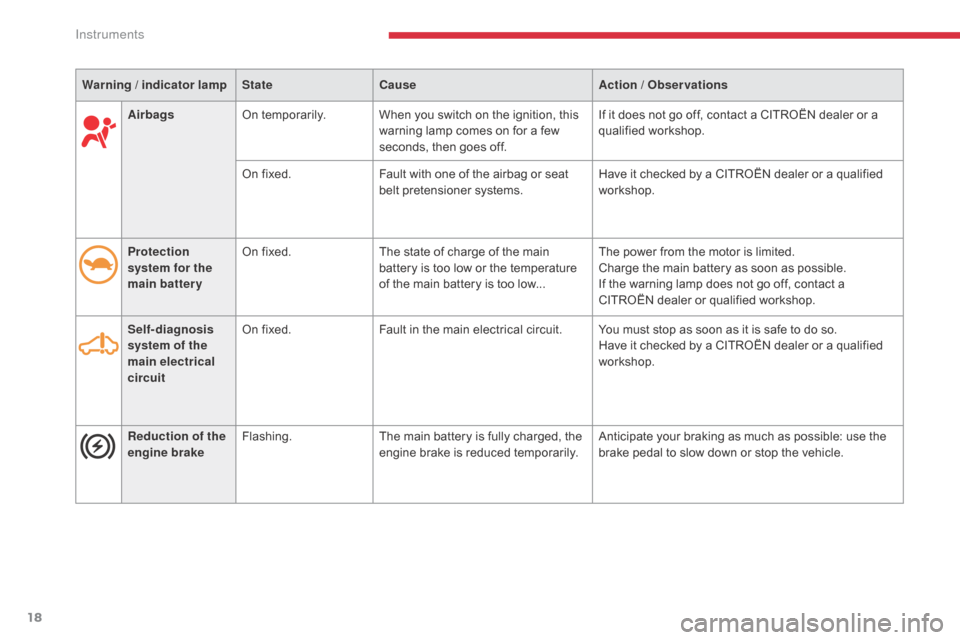
AirbagsOn temporarily. When you switch on the ignition, this
warning lamp comes on for a few
seconds, then goes off. If it does not go off, contact a CITROËN dealer or a
qualified workshop.
On fixed. Fault with one of the airbag or seat
belt pretensioner systems. Have it checked by a CITROËN dealer or a qualified
workshop.
Protection
system for the
main battery On fixed.
The state of charge of the main
battery is too low or the temperature
of the main battery is too low... The power from the motor is limited.
Charge the main battery as soon as possible.
If the warning lamp does not go off, contact a
CITROËN dealer or qualified workshop.
Self-diagnosis
system of the
main electrical
circuit On fixed.
Fault in the main electrical circuit. You must stop as soon as it is safe to do so.
Have it checked by a CITROËN dealer or a qualified
workshop.
Warning
/ indicator lamp
State Cause Action
/ Observations
Reduction of the
engine brake Flashing.
The main battery is fully charged, the
engine brake is reduced temporarily. Anticipate your braking as much as possible: use the
brake pedal to slow down or stop the vehicle.
Instruments
Page 21 of 174
19
Main battery state of charge indicator
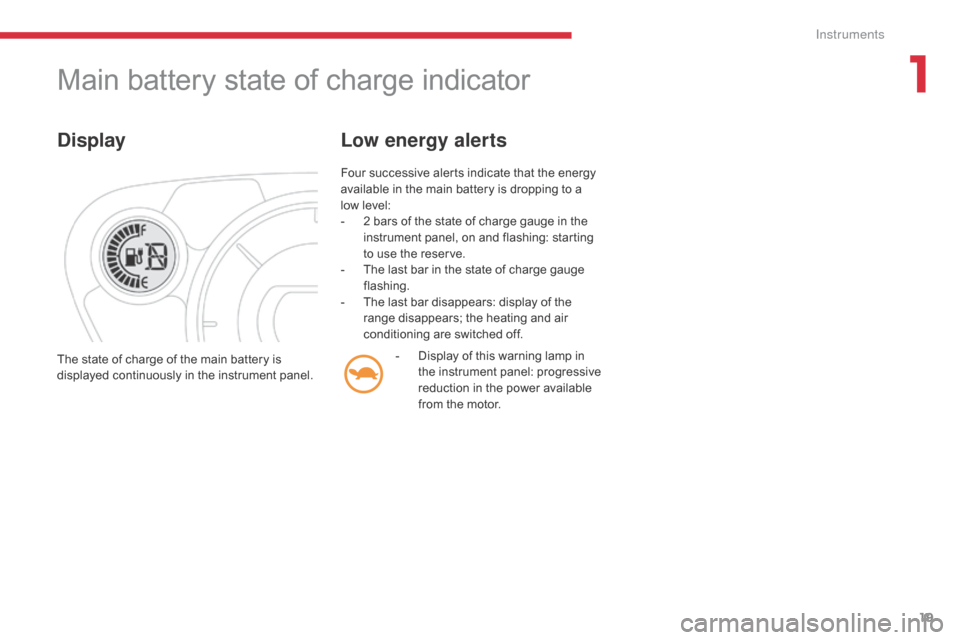
Display
Four successive alerts indicate that the energy
available in the main battery is dropping to a
low level:
-
2 b
ars of the state of charge gauge in the
instrument panel, on and flashing: starting
to use the reserve.
-
T
he last bar in the state of charge gauge
flashing.
-
T
he last bar disappears: display of the
range disappears; the heating and air
conditioning are switched off.
Low energy alerts
- Display of this warning lamp in the instrument panel: progressive
reduction in the power available
from the motor.
The state of charge of the main battery is
displayed continuously in the instrument panel.
1
Instruments
Page 26 of 174
24
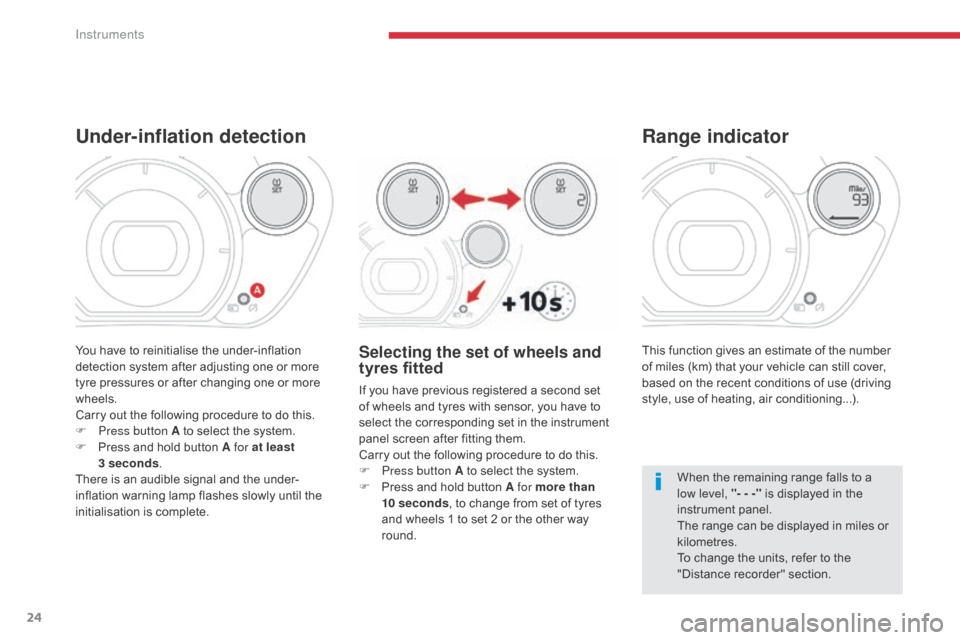
This function gives an estimate of the number
of miles (km) that your vehicle can still cover,
based on the recent conditions of use (driving
style, use of heating, air conditioning...).
Range indicator
When the remaining range falls to a
low level, "- - -" is displayed in the
instrument panel.
The range can be displayed in miles or
kilometres.
To change the units, refer to the
"Distance recorder" section.
Under-inflation detection
Selecting the set of wheels and
tyres fitted
If you have previous registered a second set
of wheels and tyres with sensor, you have to
select the corresponding set in the instrument
panel screen after fitting them.
Carry out the following procedure to do this.
F
P
ress button A to select the system.
F
P
ress and hold button A for more than
10
seconds , to change from set of tyres
and wheels 1 to set 2 or the other way
round.
You have to reinitialise the under-inflation
detection system after adjusting one or more
tyre pressures or after changing one or more
wheels.
Carry out the following procedure to do this.
F
P
ress button A to select the system.
F
P
ress and hold button A for at least
3
seconds .
There is an audible signal and the under-
inflation warning lamp flashes slowly until the
initialisation is complete.
Instruments
Page 30 of 174
28
Doors
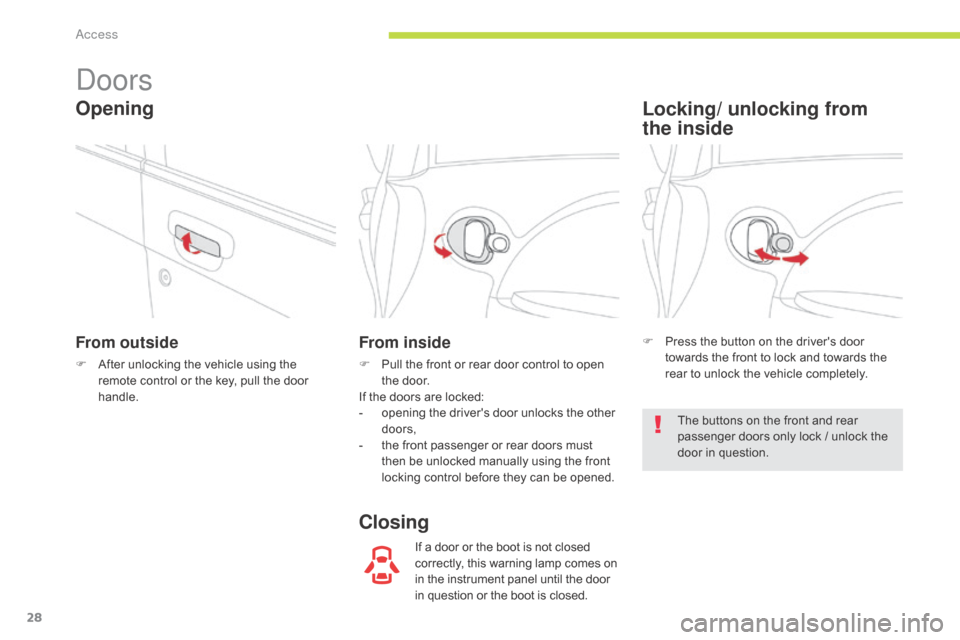
From outside
F After unlocking the vehicle using the remote control or the key, pull the door
handle.
From inside
F Pull the front or rear door control to open the door.
If the doors are locked:
-
o
pening the driver's door unlocks the other
doors,
-
t
he front passenger or rear doors must
then be unlocked manually using the front
locking control before they can be opened.
If a door or the boot is not closed
correctly, this warning lamp comes on
in the instrument panel until the door
in question or the boot is closed.
Opening
ClosingLocking/ unlocking from
the
inside
F Press the button on the driver's door
towards the front to lock and towards the
rear to unlock the vehicle completely.
The buttons on the front and rear
passenger doors only lock / unlock the
door in question.
Access
Page 35 of 174
33
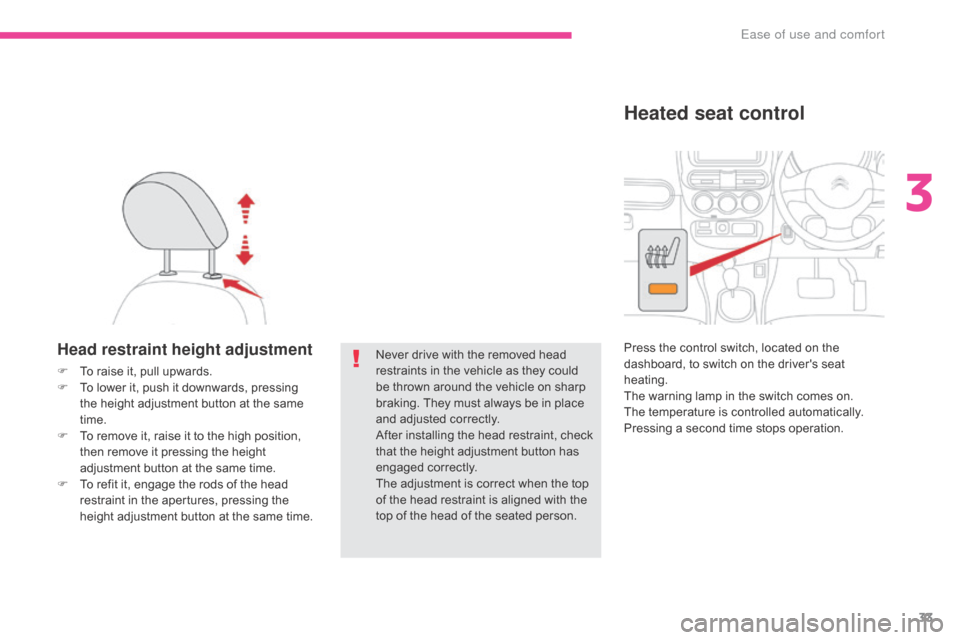
Head restraint height adjustment
F To raise it, pull upwards.
F T o lower it, push it downwards, pressing
the height adjustment button at the same
time.
F
T
o remove it, raise it to the high position,
then remove it pressing the height
adjustment button at the same time.
F
T
o refit it, engage the rods of the head
restraint in the apertures, pressing the
height adjustment button at the same time. Never drive with the removed head
restraints in the vehicle as they could
be thrown around the vehicle on sharp
braking. They must always be in place
and adjusted correctly.
After installing the head restraint, check
that the height adjustment button has
engaged correctly.
The adjustment is correct when the top
of the head restraint is aligned with the
top of the head of the seated person.Press the control switch, located on the
dashboard, to switch on the driver's seat
heating.
The warning lamp in the switch comes on.
The temperature is controlled automatically.
Pressing a second time stops operation.
Heated seat control
3
Ease of use and comfort
Page 49 of 174

47
Remote control*
This is used for remote control of the following
functions:
-
C
heck of the vehicle charge status.
-
P
rogramming of charging: start time and
duration of charging.
-
A
ctivation of the climate control functions
(heating, air conditioning, demisting).
In order to programme charging, the
following conditions must be met.
-
P
lace the drive selector in
position
P.
-
P
lace the switch on LOCK .
-
C
onnect the vehicle using the
normal charging cable.Buttons Display
1. On/Off, transmission of data.
2. M
ODE: used to scroll through the various
functions available (start of charging,
duration of charging, interior temperature).
3.
I
mmediate charging of the vehicle
(resetting of the programming values to
ze r o).
4.
S
ettings. 1.
D
ata transmission status indicator lamp.
2.
C
harging indicator lamp.
3.
F
ault warning lamp.
4.
B
attery charge status warning lamp.
5.
C
harging programming functions status
indicator lamp.
6.
C
harging time remaining indicator.
7.
I
nterior temperature function status
indicator lamp.
The remote control has a range of
approximately 100 metres.
* Depending on equipment.
3
Ease of use and comfort
Page 60 of 174

58
General safety recommendations
Labels are applied at various
points on your vehicle. They carry
safety warnings as well as vehicle
identification information. Do not
remove them: they form an integral part
of your vehicle.
For any work on your vehicle, use
a qualified workshop that has the
technical information, skills and
equipment required, all of which a
CITROËN dealer is able to provide.We draw your attention to the following points:
- The fitting of electrical equipment or accessories not listed by CITROËN may cause
excessive current consumption and faults and failures with the electrical system of
your vehicle. Contact a CITROËN dealer for information on the range of recommended
accessories.
-
A
s a safety measure, access to the diagnostic socket, used for the vehicle's electronic
systems, is reserved strictly for CITROËN dealers or qualified workshops, equipped
with the special tools required (risk of malfunctions of the vehicle's electronic systems
that could cause breakdowns or serious accidents). The manufacturer cannot be held
responsible if this advice is not followed.
-
A
ny modification or adaptation not intended or authorised by Automobiles CITROËN
or carried out without meeting the technical requirements defined by the manufacturer
would lead to the suspension of the legal and contractual warranties.
Installation of accessory radio communication transmitters
Before installing a radio communication transmitter, you must contact a CITROËN dealer
for the specification of transmitters which can be fitted (frequency, maximum power,
aerial position, specific installation requirements), in line with the Vehicle Electromagnetic
Compatibility Directive (2004/104/EC).
Depending on the legislation in force in the country, certain safety equipment may be
compulsory: high visibility safety vests, warning triangles, breathalysers, spare bulbs, spare
fuses, fire extinguisher, first aid kit, mud flaps at the rear of the vehicle...
Safety
Page 61 of 174
59
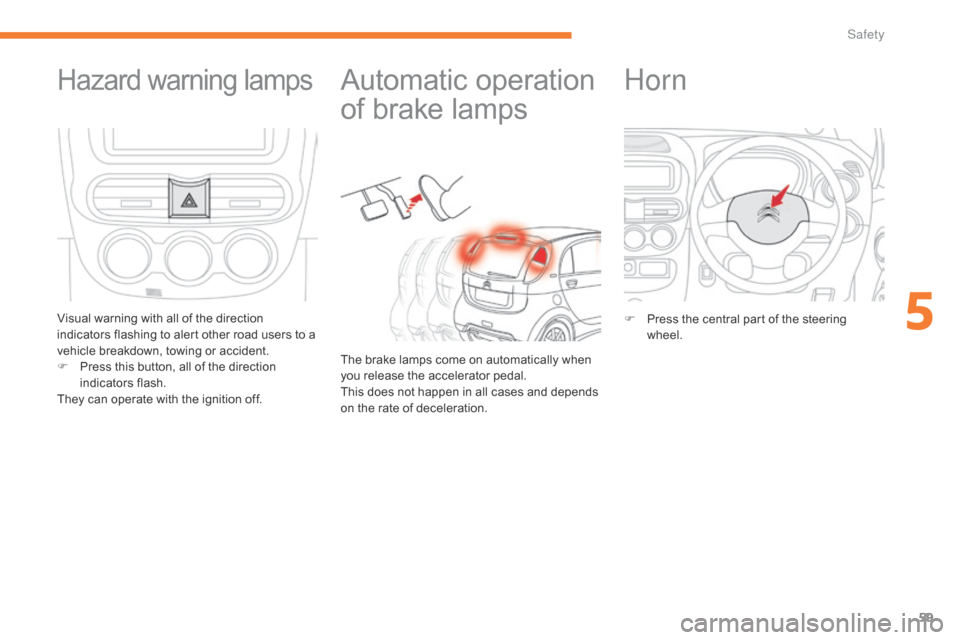
Automatic operation
of brake lamps
The brake lamps come on automatically when
you release the accelerator pedal.
This does not happen in all cases and depends
on the rate of deceleration.
Hazard warning lamps
Visual warning with all of the direction
indicators flashing to alert other road users to a
vehicle breakdown, towing or accident.
F
P
ress this button, all of the direction
indicators flash.
They can operate with the ignition off.
Horn
F Press the central part of the steering wheel.
5
Safety
Page 62 of 174
60
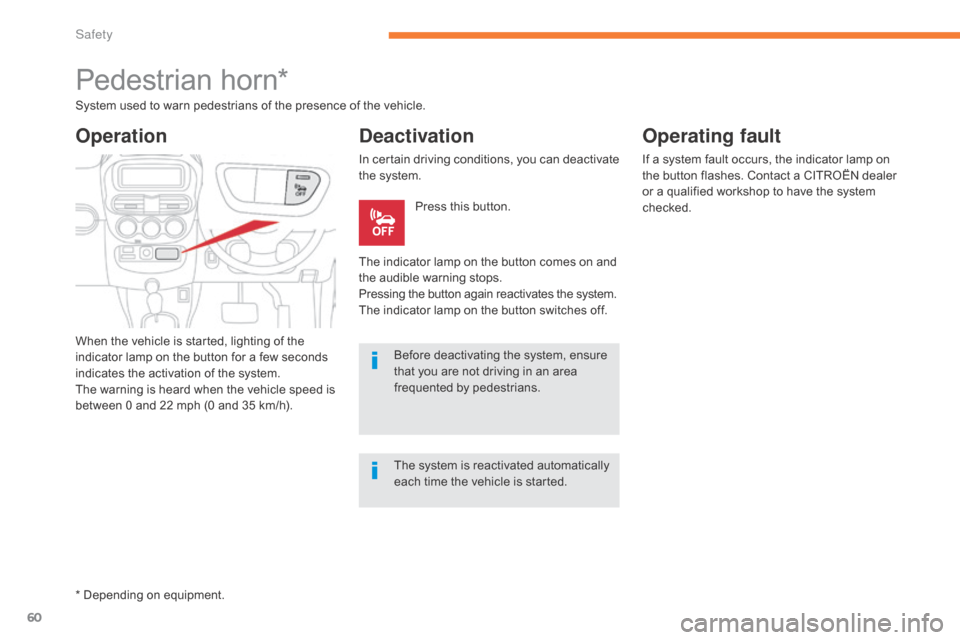
Pedestrian horn*
System used to warn pedestrians of the presence of the vehicle.
When the vehicle is started, lighting of the
indicator lamp on the button for a few seconds
indicates the activation of the system.
The warning is heard when the vehicle speed is
between 0 and 22 mph (0 and 35 km/h).
Deactivation
In certain driving conditions, you can deactivate
the system.Press this button.
The indicator lamp on the button comes on and
the audible warning stops.
Pressing the button again reactivates the system.
The indicator lamp on the button switches off. Before deactivating the system, ensure
that you are not driving in an area
frequented by pedestrians.
Operation
* Depending on equipment.
Operating fault
If a system fault occurs, the indicator lamp on
the button flashes. Contact a CITROËN dealer
or a qualified workshop to have the system
checked.
The system is reactivated automatically
each time the vehicle is started.
Safety
Page 66 of 174
64
You must stop as soon as it is safe to do so.
Contact a CITROËN dealer or a qualified
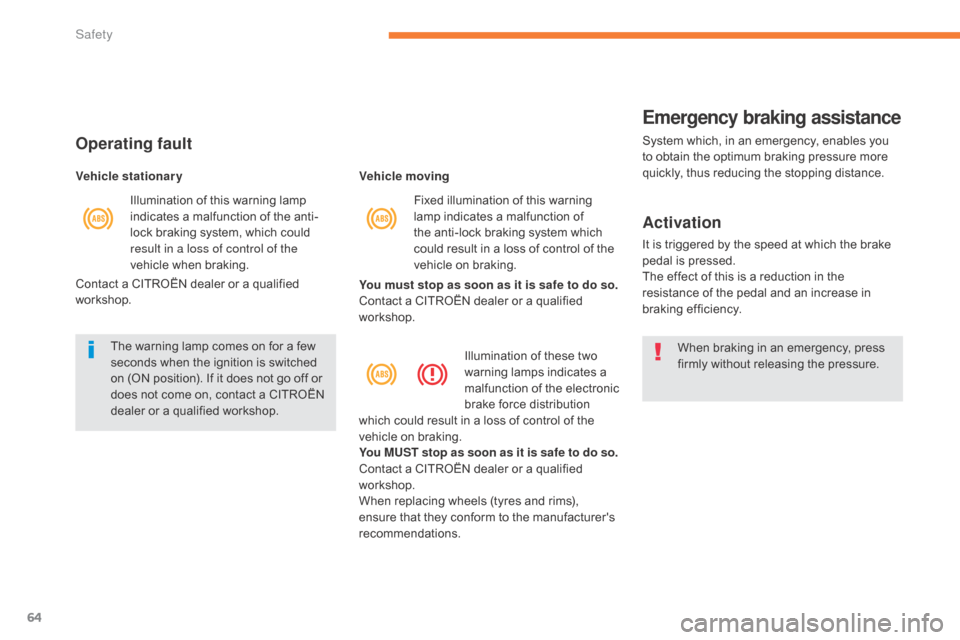
workshop. Vehicle movingIllumination of these two
warning lamps indicates a
malfunction of the electronic
brake force distribution
which could result in a loss of control of the
vehicle on braking.
You MUST stop as soon as it is safe to do so.
Contact a CITROËN dealer or a qualified
workshop.
When replacing wheels (tyres and rims),
ensure that they conform to the manufacturer's
recommendations.
Emergency braking assistance
System which, in an emergency, enables you
to obtain the optimum braking pressure more
quickly, thus reducing the stopping distance.
Activation
It is triggered by the speed at which the brake
pedal is pressed.
The effect of this is a reduction in the
resistance of the pedal and an increase in
braking efficiency.
When braking in an emergency, press
firmly without releasing the pressure.
Operating fault
Vehicle stationary
The warning lamp comes on for a few
seconds when the ignition is switched
on (ON position). If it does not go off or
does not come on, contact a CITROËN
dealer or a qualified workshop.Illumination of this warning lamp
indicates a malfunction of the anti-
lock braking system, which could
result in a loss of control of the
vehicle when braking.
Contact a CITROËN dealer or a qualified
workshop. Fixed illumination of this warning
lamp indicates a malfunction of
the anti-lock braking system which
could result in a loss of control of the
vehicle on braking.
Safety