refuelling Citroen C1 2016 1.G Owner's Manual
[x] Cancel search | Manufacturer: CITROEN, Model Year: 2016, Model line: C1, Model: Citroen C1 2016 1.GPages: 269, PDF Size: 7.63 MB
Page 6 of 269

4
C1_en_Chap00b_vue-ensemble_ed01-2016
Keys 31
R emote control 3 2-33
"Keyless
Entry and Starting"
s
ystem
3
4-37
Remote
control battery
3
3, 37
Starting
7
1, 72-73
Exterior
Door mirrors 5 0
Lighting control stalk
9
8 -103
Adjusting
the headlamps
1
03
Changing
bu
lbs
1
63-165,
1
67
-
f
ront lamps
-
d
irection indicator repeaters
Doors
3
8-40
-
o
pening / closing
-
c
entral locking
Electric
windows
4
1
Quarter
lights (5 -door)
4
1 Wipers
10
4 -105
Changing a wiper blade
1
44
Boot 3 9-40
Temporary puncture repair kit 1 53 -157
Reversing
camera
9
2
To w i n g
1
8 0
Changing
bu
lbs
1
66-167
-
r
ear lamps
-
3rd brake lamp
-
n
umber plate lamps
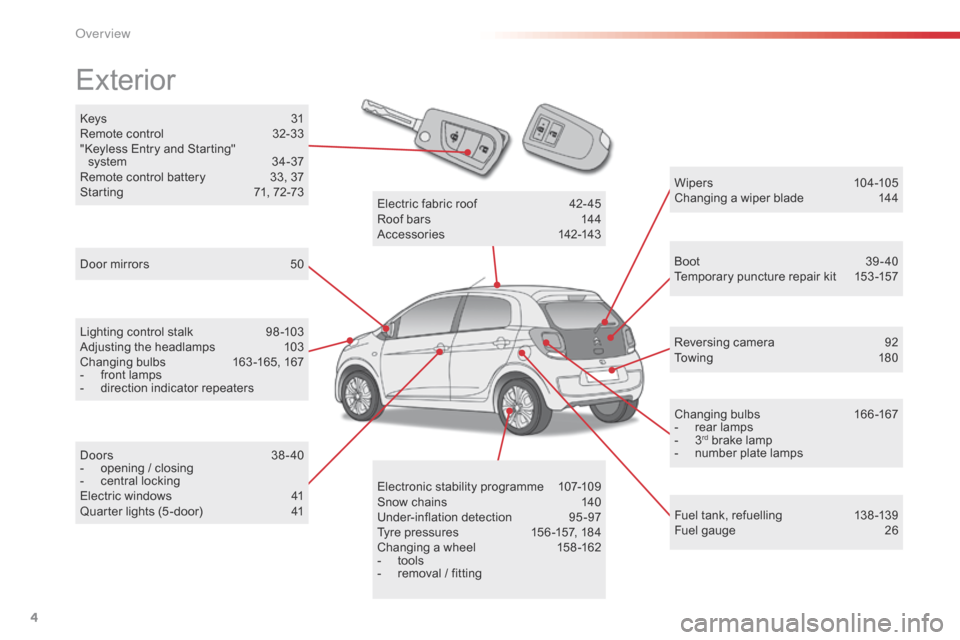
Fuel
tank, refuelling
1
38 -139
Fuel
gauge
2
6
Electronic
s
tability
pro
gramme
1
07-109
Snow
chains
1
40
Under-inflation
d
etection
9
5-97
Tyre
pressures
1
56 -157,
184
Changing
a
wheel
1
58 -162
-
t
ools
-
r
emoval
/
fitting
Electric
fa
bric
ro
of
4
2-45
Roof
bars
1
44
Accessories
1
42-143
O
Page 12 of 269

10
C1_en_Chap00c_eco-conduite_ed01-2016
Limit the causes of excess consumption
Spread loads throughout the vehicle; place the heaviest items in the bottom of the boot, as close as possible to the rear seats.
Limit
the loads carried in the vehicle and reduce wind resistance
(roof
bars, roof rack...). Use a roof box in preference.
Remove
roof bars and roof racks after use.
At
the end of winter, remove snow tyres and refit your summer tyres.
Observe the recommendations on
maintenance
Check the tyre pressures regularly, when cold, referring to the label in the door aperture, driver's side.
Carry
out this check in particular:
-
b
efore a long journey,
-
a
t each change of season,
-
a
fter a long period out of use.
Don't
forget the spare wheel and the tyres on any trailer or caravan.
Have
your vehicle serviced regularly (engine oil, oil filter, air filter,
p
assenger compartment filter...) and observe the schedule of
o
perations recommended in the maintenance and warranty guide.
When
refuelling, do not continue after the third cut-off of the nozzle to
a
void any over flow.
At
the wheel of your new vehicle, it is only after the first 1 800 miles
(
3 000 kilometres) that you will see the fuel consumption settle down to
a
consistent average.
Eco-driving
Page 140 of 269

138
C1_en_Chap07_info-pratiques_ed01-2016
Fuel tank
Low fuel levelRefuelling
When the low fuel level is reached, t
his warning lamp comes on,
a
ccompanied by an audible signal.
The
message "LO FUEL" is displayed in place
o
f
the
range.
You have approximately 5 litres remaining.
In
certain
driving conditions and depending on
t
he
engine, the distance which can be travelled
w
ith
the
fuel remaining may be less than
3
0 miles
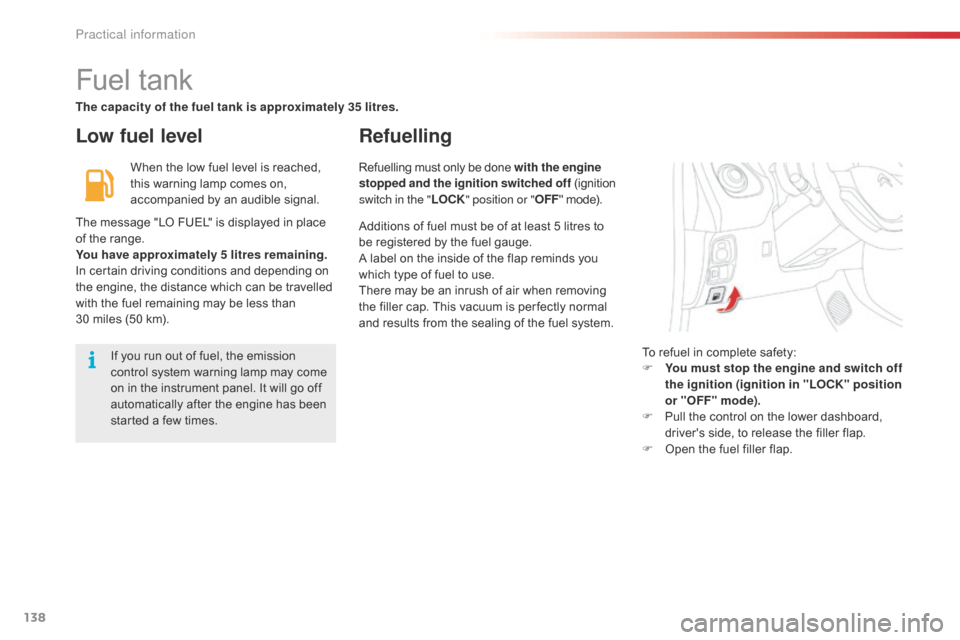
(50 km). To
refuel in complete safety:
F
Y
ou must stop the engine and switch off
the ignition (ignition in "LOCK" position
or "OFF" mode) .
F
P
ull the control on the lower dashboard,
d
river's side, to release the filler flap.
F
O
pen the fuel filler flap.
If
you run out of fuel, the emission
c
ontrol system warning lamp may come
o
n
in the instrument panel. It will go off
a
utomatically after the engine has been
s
tarted a few times. Refuelling
must only be done with the engine
stopped and the ignition switched off ( ignition s
witch in the "LOCK" position or " OFF"
mode).
The capacity of the fuel tank is approximately 35 litres.
Additions of fuel must be of at least 5 litres to
b
e registered by the fuel gauge.
A
label on the inside of the flap reminds you
w
hich type of fuel to use.
There
may be an inrush of air when removing
t
he filler cap. This vacuum is per fectly normal
a
nd results from the sealing of the fuel system.
Practical information
Page 141 of 269

139
C1_en_Chap07_info-pratiques_ed01-2016
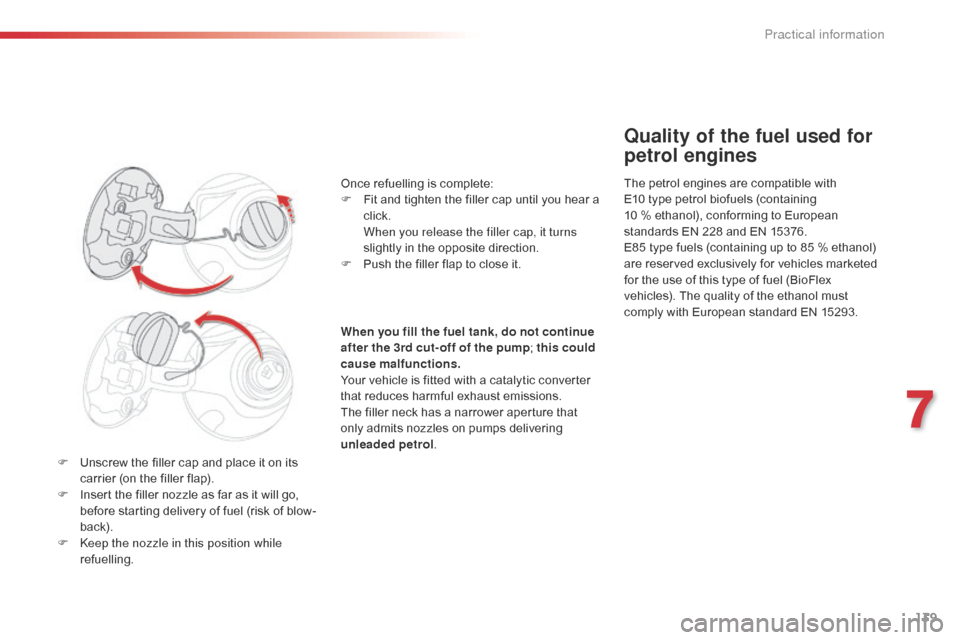
F Unscrew the filler cap and place it on its c
arrier (on the filler flap).
F
I
nsert the filler nozzle as far as it will go,
b
efore starting delivery of fuel (risk of blow-
back).
F
K
eep the nozzle in this position while
refuelling.
Quality of the fuel used for
petrol engines
The petrol engines are compatible with
E 10 type petrol biofuels (containing
10
% ethanol), conforming to European
s
tandards EN 228 and EN 15376.
E85
type fuels (containing up to 85 % ethanol)
a
re reserved exclusively for vehicles marketed
f
or the use of this type of fuel (BioFlex
v
ehicles). The quality of the ethanol must
c
omply with European standard EN 15293.
Once
refuelling
is
complete:
F
F
it
and
tighten
the
filler
cap
until
you
hear
a
c
lick.
W
hen you release the filler cap, it turns
slightly
in
the
opposite
direction.
F
P
ush
the
filler
flap
to
close
it.
When you fill the fuel tank, do not continue
after the 3rd cut- off of the pump ;
this could
cause malfunctions .
Your
vehicle
is
fitted
with
a
catalytic
converter
t
hat
reduces
harmful
exhaust
emissions.
The
filler
neck
has
a
narrower
aperture
that
o
nly
admits
nozzles
on
pumps
delivering
unl
eaded petrol .
7
Practical information