key CITROEN C1 2020 Owner's Manual
[x] Cancel search | Manufacturer: CITROEN, Model Year: 2020, Model line: C1, Model: CITROEN C1 2020Pages: 269, PDF Size: 7.63 MB
Page 114 of 269

112
C1_en_Chap06_securite_ed01-2016
Setting the alert thresholds
Press this button repeatedly to cycle through the thresholds.
The
default setting is "Normal".
The
alert
thresholds determine how you want to be warned of the imminent risk of collision with the
v
ehicle
ahead of you.
You
can
choose one of three thresholds:
A.
"
Far",
to be given early warning (cautious driving).
B.
"
Normal".
C.
"
Close", for a later warning (sporty driving).
Deactivation / Reactivation
Press this button for more than 3 seconds.
P ress the button again to reactivate the system.
The
system is automatically reactivated every
t
ime the engine is started with the key or the
"
START/STOP" button.
This
indicator lamp comes on in the
in
strument
pan
el.
This
indicator lamp comes on in the
i
nstrument panel and the message
"
PCS OFF" is displayed.
Safety
Page 121 of 269
119
C1_en_Chap06_securite_ed01-2016
Deactivating the passenger's
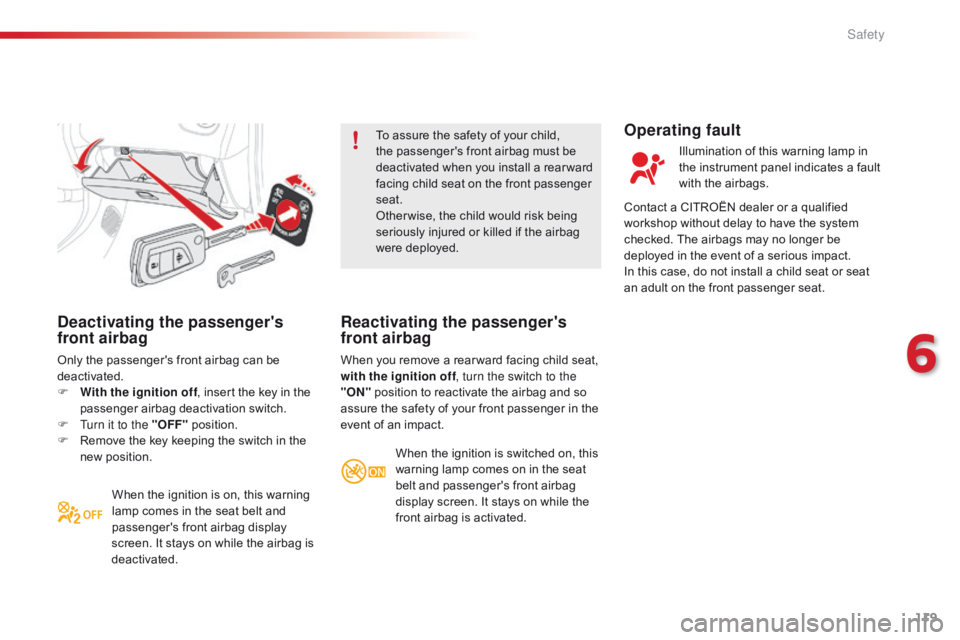
front airbag
Only the passenger's front airbag can be deactivated.
F
W
ith the ignition off ,
insert the key in the
p
assenger airbag deactivation switch.
F
T
urn it to the "OFF"
p
osition.
F
R
emove the key keeping the switch in the
n
ew position.When
the ignition is on, this warning
l
amp comes in the seat belt and
p
assenger's front airbag display
s
creen. It stays on while the airbag is
d
eactivated. To
assure the safety of your child,
t
he passenger's front airbag must be
d
eactivated when you install a rear ward
f
acing child seat on the front passenger
sea
t.
Other wise, the child would risk being
s
eriously injured or killed if the airbag
w
ere deployed.
Reactivating the passenger's
front airbag
When you remove a rear ward facing child seat, w
ith the ignition off , turn the switch to the
"ON"
position to reactivate the airbag and so
a
ssure the safety of your front passenger in the
e
vent of an impact.
When
the ignition is switched on, this
w
arning lamp comes on in the seat
b
elt and passenger's front airbag
d
isplay screen. It stays on while the
f
ront airbag is activated.
Operating fault
Illumination of this warning lamp in the instrument panel indicates a fault
w
ith the airbags.
Contact
a
CITROËN dealer or a qualified
w
orkshop
without delay to have the system
c
hecked.
The airbags may no longer be
d
eployed
in the event of a serious impact.
In
this
case, do not install a child seat or seat
a
n
adult
on the front passenger seat.
6
Safety
Page 138 of 269
136
C1_en_Chap06_securite_ed01-2016
The incorrect installation of a child seat in a vehicle compromises the child's protection in
t
he event of an accident.
Check
that there is no seat belt or seat belt
b
uckle under the child seat as this could
de
stabilise
i
t.
Remember
to fasten the seat belts or the
c
hild seat harnesses keeping the slack in
relation
to the child's body to a minimum,
even
for short journeys.
For
the installation of a child seat using a
s
eat belt, ensure that this is well tensioned
o
n the child seat and that it is holding the
c
hild seat firmly against the seat of your
v
ehicle. If your front passenger seat is
a
djustable, move it for ward if necessary.
At the rear seats, always leave sufficient
space
between the front seat and:
-
a
rear ward facing child seat,
-
t
he feet of a child seated in a for ward
f
acing child seat.
For
this, move the front seat for ward and if
n
ecessary straighten its backrest.
Recommendations on child seats
The chest part of the seat belt must be positioned on the child's shoulder without
t
ouching the neck.
Ensure that the lap part of the seat belt
passes
correctly over the child's thighs.
CITROËN
recommends the use of a booster
s
eat which has a back, fitted with a seat belt
g
uide at shoulder level.
As
a safety precaution, never leave:
-
o
ne or more children alone and
u
nsupervised in a vehicle,
-
a
child or an animal in a vehicle which
i
s exposed to the sun, with the windows
c
losed,
-
t
he keys within reach of children inside
t
he vehicle.
To
prevent accidental opening of the doors,
u
se the "Child lock".
Take
care not to open the rear windows by
m
ore than one third.
To
protect young children from the rays of
t
he sun, fit side blinds on the rear windows.
The
legislation
on
carrying
a
child
on
the
f
ront
passenger
seat
is
specific
to
each
c
ountry.
Refer
to
the
legislation
in
force
in
y
our
country.
Deactivate
the
passenger's
front
airbag
w
hen
a
rear ward
facing
child
seat
is
installed
o
n
the
front
seat.
Other wise,
the
child
would
r
isk
being
seriously
injured
or
killed
if
the
a
irbag
were
deployed.
For
o
ptimum
in
stallation
o
f
t
he
fo
rward
f
acing
c
hild
seat,
ensure
that
the
back
of
the
child
s
eat
is
as
close
as
possible
to
the
backrest
o
f
the
vehicle's
seat,
or
in
contact
if
possible.
The
head
restraint
must
be
removed
before
i
nstalling
a
child
seat
with
a
backrest
on
the
p
assenger
sea
t.
Ensure
that
the
head
restraint
is
stowed
or
a
ttached
securely
so
that
it
is
not
thrown
a
round
the
vehicle
in
the
event
of
sharp
b
raking.
Refit
the
head
restraint
as
soon
as
the
child
s
eat
is
removed.
Installing a booster
cushion
Children at the front
Safety
Page 143 of 269

141
C1_en_Chap07_info-pratiques_ed01-2016
Electrical energy economy mode*
System which manages the duration of use of certain functions to conserve a sufficient level of charge in the battery.
After
the engine has stopped, you can still use functions such as the audio system, windscreen
w
ipers, dipped beam headlamps, courtesy lamps, etc. for a maximum combined duration of
t
wenty minutes.
This
period may be greatly reduced if the battery is not fully charged.
Let
the engine run for the duration
s
pecified to ensure that the battery
c
harge is sufficient.
Do
not repeatedly and continuously
r
estart the engine in order to charge the
b
attery.
A
flat battery prevents the engine from
s
tarting.
Refer
to the "Battery" section.
Switching to economy mode
Once this time has elapsed the active functions are put on standby.
Exiting economy mode
These functions are reactivated automatically next time the vehicle is driven.
To restore the use of these functions
immediately,
start the engine and let it run for at
l
east 5 minutes.
*
O
nly on vehicles with the "Keyless Entry and
S
tarting" system.
7
Practical information
Page 160 of 269
158
C1_en_Chap08_en-cas-pannes_ed01-2016
Spare wheel
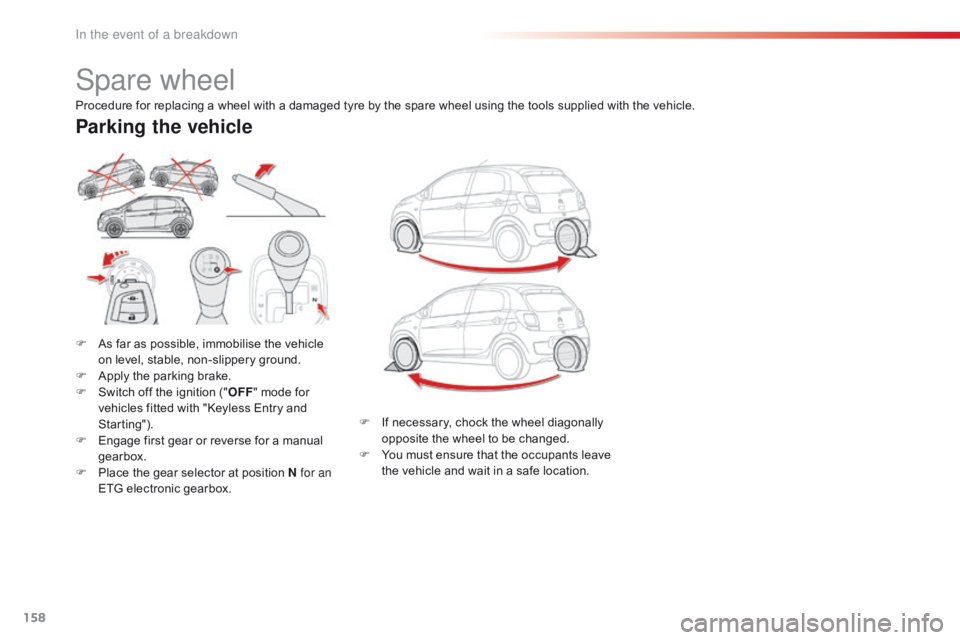
F As far as possible, immobilise the vehicle o
n level, stable, non-slippery ground.
F
A
pply the parking brake.
F
S
witch off the ignition ("OFF "
mode for
v
ehicles fitted with "Keyless Entry and
S
tarting").
F
E
ngage first gear or reverse for a manual
g
earbox.
F
P
lace the gear selector at position N for an
ETG
electronic gearbox.
Parking the vehicle
Procedure for replacing a wheel with a damaged tyre by the spare wheel using the tools supplied with the vehicle.
F
I
f necessary, chock the wheel diagonally
o
pposite the wheel to be changed.
F
Y
ou must ensure that the occupants leave
t
he vehicle and wait in a safe location.
In the event of a breakdown
Page 173 of 269

171
C1_en_Chap08_en-cas-pannes_ed01-2016
FuseN° Rating
(A) Functions
11 5Steering
lock - Fuel injection system - Electronic gearbox
12 7. 5Airbags
13 5Instrument
panel - Display Screen - Stop & Start
14 15
**
Steering
- Fuel injection system - Brake lamps
7. 5 *
15 7. 5 * *
Fuel
injection system - Stop & Start
10*
16 7. 5Engine
d
iagnosis
17 10Brake
lamps - Third brake lamp - Fuel injection system -
ABS
system - VSC system - Electronic gearbox - Keyless Entry
a
nd Starting system
18 10Sidelamps
- Number plate lamps - Rear foglamp - Rear lamps -
L
ighting dimmer
19 40Air
c
onditioning
*
PureTech 82 engine.
**
VTi 68 engine.
8
In the event of a breakdown
Page 174 of 269

172
C1_en_Chap08_en-cas-pannes_ed01-2016
FuseN° Rating
(A) Functions
20 40Air
conditioning - Engine self-diagnosis - Sidelamps - Number
p
late lamps - Rear foglamp - Rear lamps - Lighting dimmer -
B
rake lamps - Third brake lamp - Fuel injection system -
A
BS system - VSC system - Electronic gearbox - Keyless Entry
a
nd Starting system - Electric windows
21 30Fuel
injection system - Stop & Start - Main distribution unit
22** 7, 5Fuel
injection system
23** 20Fuel
injection system - Stop & Start
24 25Main
distribution unit
25 30Electric
windows
26 25Electric
windows
27 10Air
c
onditioning
28 5Rear
fo
glamp
**
VTi 68 engine.
In the event of a breakdown
Page 176 of 269
174
C1_en_Chap08_en-cas-pannes_ed01-2016
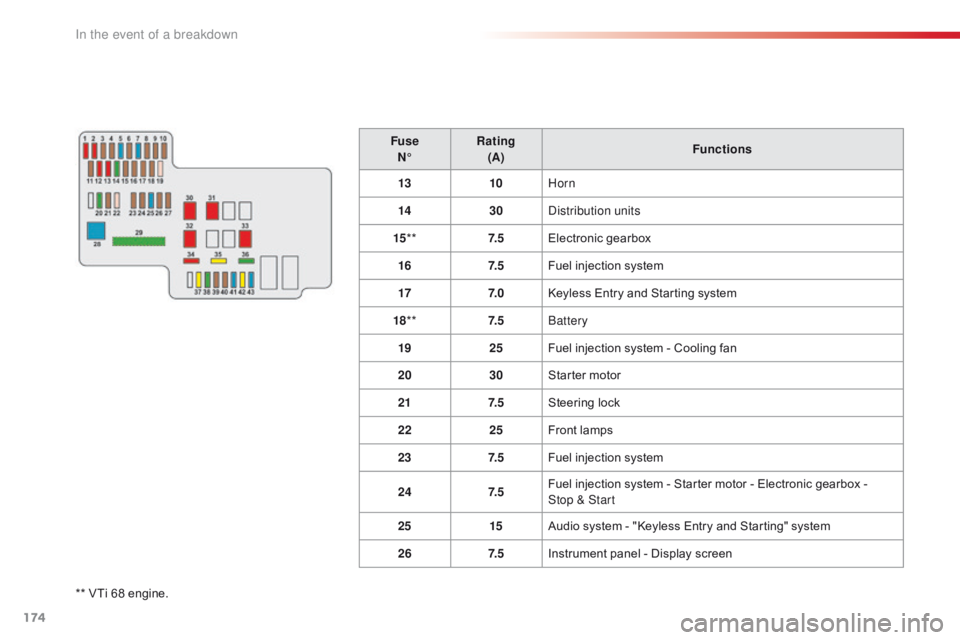
** VTi 68 engine.F use
N° Rating
(A) Functions
13 10Horn
14 30Distribution units
15 ** 7. 5Electronic
g
earbox
16 7. 5Fuel injection system
17 7. 0Keyless Entry and Starting system
18 ** 7. 5Battery
19 25Fuel injection system - Cooling fan
20 30Starter motor
21 7. 5Steering lock
22 25Front lamps
23 7. 5Fuel injection system
24 7. 5Fuel injection system - Starter motor - Electronic gearbox -
Stop & Start
25 15Audio system - "Keyless Entry and Starting" system
26 7. 5Instrument panel - Display screen
In the event of a breakdown
Page 187 of 269
185
C1_en_Chap10a_ Autoradio-Toyota-tactile-1_ed01-2016
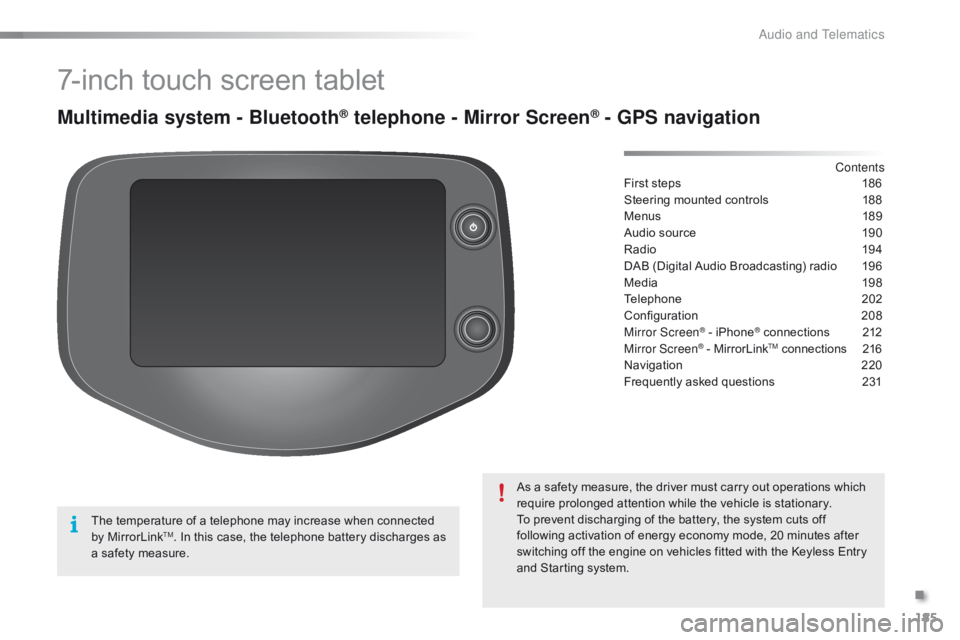
7-inch touch screen tablet
Multimedia system - Bluetooth® telephone - Mirror Screen® - GPS navigation
First steps 186
Steering mounted controls
1
88
Menus
18
9
Audio
source
1
90
Radio
19
4
DAB
(Digital Audio Broadcasting) radio
1
96
Media
19
8
Telephone
2
02
Configuration
20
8
Mirror Screen
® - iPhone® connections 2 12
Mirror Screen® - MirrorLinkTM connections 2 16
Navigation
2
20
Frequently
asked
questions
2
31
As
a
safety
measure,
the
driver
must
carry
out
operations which
r
equire
prolonged
attention
while
the
vehicle
is
stationary.
To
prevent
discharging
of
the
battery,
the
system cuts off
f
ollowing
activation
of
energy
economy
mode,
20 minutes after
s
witching
off
the
engine
on
vehicles
fitted
with
the Keyless Entry
a
nd
Starting
system. Contents
The
temperature
of
a
telephone
may
increase
when
connected
b
y
MirrorLink
TM. In this case, the telephone battery discharges as a
safety
measure.
.
Audio and Telematics
Page 208 of 269
206
C1_en_Chap10a_ Autoradio-Toyota-tactile-1_ed01-2016
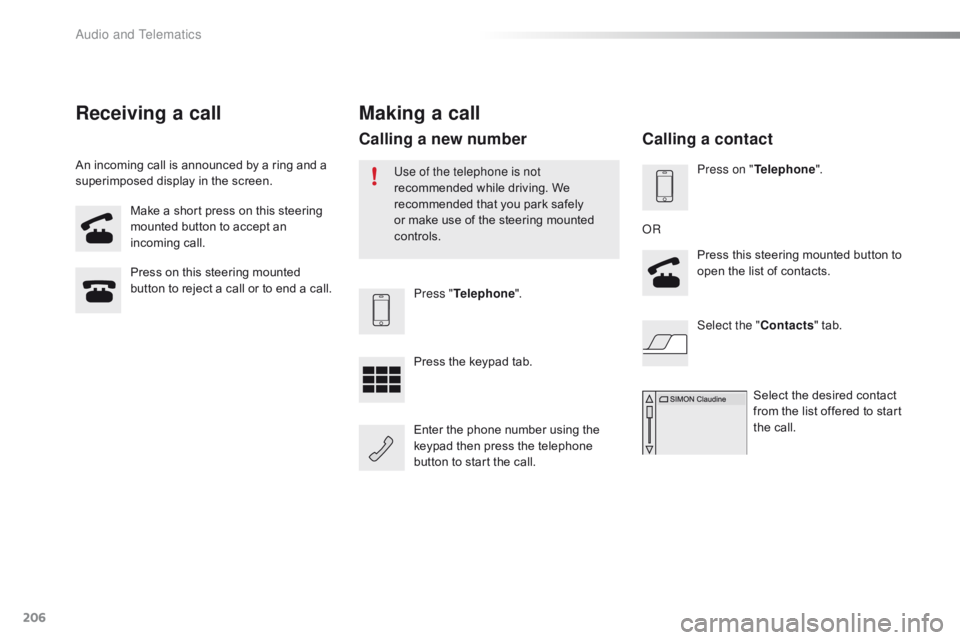
Make a short press on this steering mounted button to accept an
inc
oming
c
all.
Press
on this steering mounted
b
utton to reject a call or to end a call.Press "Telephone ".
Press
the keypad tab.
Enter
the phone number using the
k
eypad then press the telephone
b
utton to start the call.
Receiving a call
An incoming call is announced by a ring and a superimposed display in the screen.
Making a call
Use of the telephone is not
recommended while driving. We
r
ecommended that you park safely
o
r make use of the steering mounted
c
ontrols.
Calling a new number
Press on " Telephone ".
Press this steering mounted button to
o
pen the list of contacts.
OR
Select the " Contacts"
tab.
Select
the desired contact
f
rom the list offered to start
t
he call.
Calling a contact
Audio and Telematics