warning CITROEN C1 2021 Service Manual
[x] Cancel search | Manufacturer: CITROEN, Model Year: 2021, Model line: C1, Model: CITROEN C1 2021Pages: 269, PDF Size: 7.63 MB
Page 123 of 269

121
C1_en_Chap06_securite_ed01-2016
In the event of a minor impact or bump on the side of the vehicle or if the
v
ehicle rolls over, the airbags may not
b
e deployed.
In the event of a rear or front collision,
none
of the lateral airbags is deployed.
System
w
hich
c
ontributes
t
owards
t
he
i
mproved
p
rotection
of
the
driver
and
passengers
in
the
e
vent
of
a
serious
side
impact
in
order
to
limit
t
he
risk
of
injury
to
the
side
of
the
head.
Each
curtain
airbag
is
built
into
the
pillars
and
t
he
upper
passenger
compartment
area.
Curtain airbags
Deployment
It is deployed at the same time as the c
orresponding lateral airbag in the event of
a
serious side impact applied to all or part
o
f the side impact zone B,
perpendicular to
t
he longitudinal centreline of the vehicle on a
h
orizontal plane and directed from the outside
t
owards the inside of the vehicle.
The
curtain airbag inflates between the front or
r
ear occupant of the vehicle and the windows.If
this warning lamp comes on in the
i
nstrument panel, contact a CITROËN
d
ealer or a qualified workshop to have
t
he system checked. The airbags may
n
o longer be deployed in the event of
a
serious impact.
Operating fault
6
Safety
Page 128 of 269

126
C1_en_Chap06_securite_ed01-2016
Passenger airbag OFF
The warning label present on both sides of the passenger's sun visor repeats this advice. In
l
ine with current legislation, the following tables
c
ontain this warning in all of the languages
r
equired.
Never
install
a
rear ward
facing
child
r
estraint
system
on
a
seat
protected
by
a
n
active
front
airbag.
This
could
cause
t
he
death
of
the
child
or
serious
injury.
For
information on deactivating the
p
assenger's front airbag, refer to the
"
Airbags" section.
Deactivating the passenger's front airbag
Safety
Page 140 of 269

138
C1_en_Chap07_info-pratiques_ed01-2016
Fuel tank
Low fuel levelRefuelling
When the low fuel level is reached, t
his warning lamp comes on,
a
ccompanied by an audible signal.
The
message "LO FUEL" is displayed in place
o
f
the
range.
You have approximately 5 litres remaining.
In
certain
driving conditions and depending on
t
he
engine, the distance which can be travelled
w
ith
the
fuel remaining may be less than
3
0 miles
(50 km). To
refuel in complete safety:
F
Y
ou must stop the engine and switch off
the ignition (ignition in "LOCK" position
or "OFF" mode) .
F
P
ull the control on the lower dashboard,
d
river's side, to release the filler flap.
F
O
pen the fuel filler flap.
If
you run out of fuel, the emission
c
ontrol system warning lamp may come
o
n
in the instrument panel. It will go off
a
utomatically after the engine has been
s
tarted a few times. Refuelling
must only be done with the engine
stopped and the ignition switched off ( ignition s
witch in the "LOCK" position or " OFF"
mode).
The capacity of the fuel tank is approximately 35 litres.
Additions of fuel must be of at least 5 litres to
b
e registered by the fuel gauge.
A
label on the inside of the flap reminds you
w
hich type of fuel to use.
There
may be an inrush of air when removing
t
he filler cap. This vacuum is per fectly normal
a
nd results from the sealing of the fuel system.
Practical information
Page 142 of 269
140
C1_en_Chap07_info-pratiques_ed01-2016
Snow chains
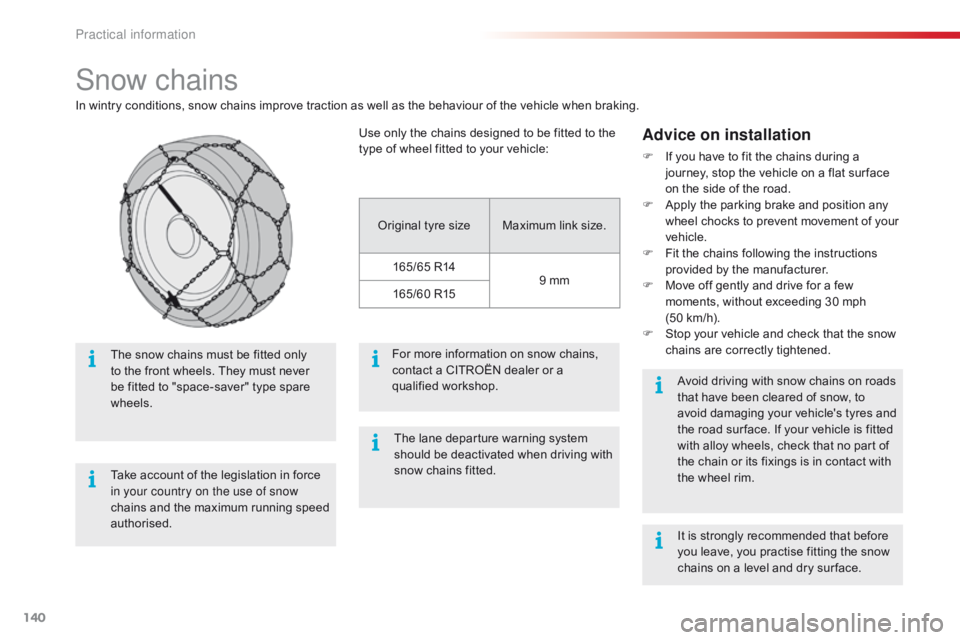
In wintry conditions, snow chains improve traction as well as the behaviour of the vehicle when braking.
Advice on installation
F If you have to fit the chains during a j
ourney, stop the vehicle on a flat sur face
o
n the side of the road.
F
A
pply the parking brake and position any
w
heel chocks to prevent movement of your
v
ehicle.
F
F
it the chains following the instructions
p
rovided by the manufacturer.
F
M
ove off gently and drive for a few
m
oments, without exceeding 30 mph
(50
km/h).
F
S
top your vehicle and check that the snow
c
hains are correctly tightened.
Take
account
of
the
legislation
in
force
i
n your country on the use of snow
chains
and
the
maximum
running
speed
a
uthorised.
The
snow
chains
must
be
fitted
only
t
o
the
front
wheels.
They
must
never
b
e
fitted
to
"space-saver"
type
spare
w
heels. Avoid
driving with snow chains on roads
t
hat have been cleared of snow, to
a
void damaging your vehicle's tyres and
t
he road sur face. If your vehicle is fitted
w
ith alloy wheels, check that no part of
t
he chain or its fixings is in contact with
t
he wheel rim.
Use
only
the
chains
designed
to
be
fitted
to
the
t
ype
of
wheel
fitted
to
your
vehicle:
Original
tyre
size Maximum
link
size.
165/65
R14 9
mm
165/60
R15
For
more
information
on
snow
chains,
c
ontact
a
CITROËN
dealer
or
a
q
ualified
w
orkshop. It
is strongly recommended that before
y
ou leave, you practise fitting the snow
c
hains on a level and dry sur face.
The
lane
departure
warning
system
s
hould
be
deactivated
when
driving
with
s
now
chains
fitted.
Practical information
Page 144 of 269

142
C1_en_Chap07_info-pratiques_ed01-2016
Accessories
A wide range of accessories and genuine parts is available from the CITROËN dealer network.
T hese accessories and parts are all suitable for your vehicle and benefit from CITROËN's recommendation and warranty.
"Transport solutions":
boot carpet, boot liner,
transverse
roof bars, bicycle carrier, ski carrier,
r
oof boxes, boot dividers, ...
"Styling":
rear diffuser, aluminium gear knob,
a
lloy wheels, exterior expressive stickers,
c
hrome mirror shells, door sill finishers, ...
"Comfort" :
door deflectors, insulated module,
s
un blinds, scented air freshener, portable
a
shtray, coat hanger fitted to head restraint,
r
eading lamp, front and rear parking sensors,
c
entre armrest, cigarette lighter, ..."Security and safety":
anti-theft alarm,
v
ehicle tracking system, snow chains, wheel
n
on-slip covers, wheel security bolts, child
s
eats, first aid kit, warning triangle, high
v
isibility vest, breathalyzer, fire extinguisher,
p
et seat belt, foglamp kit, seat belt cutter/glass
h
ammer,
...
"
Protection":
mats, mud flaps, vehicle cover,
s
eat covers, side protective mouldings, bumper
p
rotectors,
...
T
o prevent the mat from becoming caught
u
nder the pedals:
-
e
nsure that the mat is secured correctly,
-
n
ever fit one mat on top of another."Multimedia":
audio
system, speaker, semi-
integral
navigation systems, hands-free kit,
d
riving assistance systems, 230 V socket, rear
m
ulti-media support, DVD players, portable
s
atellite navigation system, smartphone
s
upport, digital radio, ...
Practical information
Page 145 of 269
143
C1_en_Chap07_info-pratiques_ed01-2016
The fitting of electrical equipment or accessories which are not
recommended
by CITROËN may result
i
n a failure of your vehicle's electronic
s
ystem and excessive electrical
c
onsumption.
Contact
a CITROËN dealer
f
or information on the range of
r
ecommended equipment and
a
ccessories.
Installation of radio
communication
transmitters
Before installing any after-market radio communication transmitter, you can
c
ontact a CITROËN dealer for the
s
pecification of transmitters which can
b
e fitted (frequency, maximum power,
a
erial position, specific installation
requirements),
in line with the Vehicle
E
lectromagnetic
C
ompatibility
D
irective (2004/104/EC). Depending
on the legislation in force in
t
he country, certain safety equipment
m
ay be compulsory: high visibility s
afety vests, warning triangles, b
reathalyzers, spare bulbs, spare fuses,
fire
extinguisher, first aid kit, mud flaps
a
t the rear of the vehicle.
7
Practical information
Page 159 of 269
157
C1_en_Chap08_en-cas-pannes_ed01-2016
Should the pressure of one or more tyres be adjusted, it is necessary to
r
einitialise the under-inflation detection
s
ystem.
For
more information on under-inflation
d
etection, refer to the corresponding
s
ection.
Tyre under-inflation
detection
After repair of the tyre, the warning lamp will remain on until the system is
r
einitialised.
For
more information on under-inflation
d
etection, refer to the corresponding
s
ection.
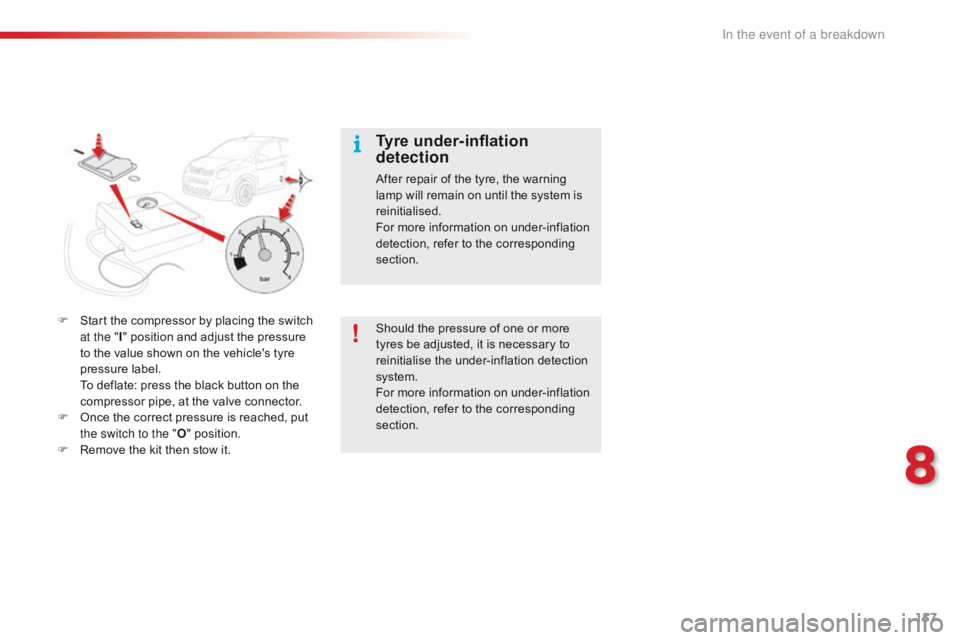
F
S
tart
the
compressor
by
placing
the
switch
a
t the " I"
position
and
adjust
the
pressure
t
o
the
value
shown
on
the
vehicle's
tyre
p
ressure
label.
T
o
deflate:
press
the
black
button
on
the
c
ompressor
pipe,
at
the
valve
connector.
F
O
nce
the
correct
pressure
is
reached,
put
t
he switch to the " O"
position.
F
R
emove
the
kit
then
stow
it.
8
In the event of a breakdown
Page 164 of 269
162
C1_en_Chap08_en-cas-pannes_ed01-2016
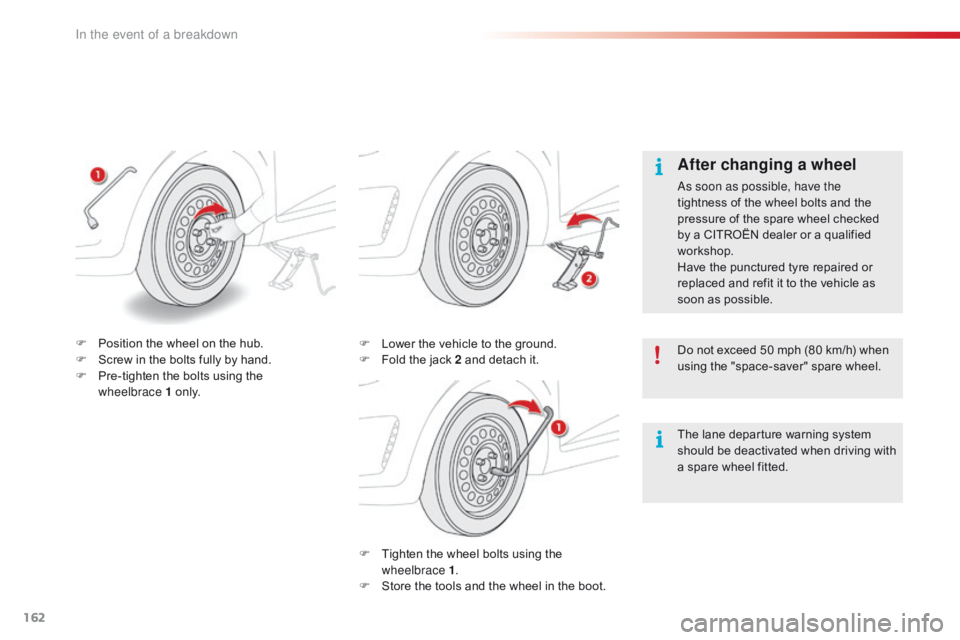
F Tighten the wheel bolts using the w
heelbrace 1 .
F
S
tore the tools and the wheel in the boot.
F
L
ower the vehicle to the ground.
F
F
old the jack 2 and detach it.
After changing a wheel
As soon as possible, have the
tightness
of the wheel bolts and the
p
ressure of the spare wheel checked
b
y a CITROËN dealer or a qualified
w
orkshop.
Have
the punctured tyre repaired or
r
eplaced and refit it to the vehicle as
s
oon as possible.
Do
not exceed 50 mph (80 km/h) when
u
sing the "space-saver" spare wheel.
F
P
osition
the
wheel
on
the
hub.
F
S
crew
in
the
bolts
fully
by
hand.
F
P
re-tighten
the
bolts
using
the
w
heelbrace
1
o
n l y. The
lane departure warning system
s
hould be deactivated when driving with
a
spare wheel fitted.
In the event of a breakdown
Page 175 of 269

173
C1_en_Chap08_en-cas-pannes_ed01-2016
Fuse
N° Rating
(A) Functions
1 10Right
hand dipped beam
2 10Left
hand dipped beam - Headlamp adjustment
3 7. 5Right
hand main beam
4 7. 5Left
hand main beam
5 * 15Fuel
injection system
6 * 7. 5Fuel
injection system
7 * 15Fuel
injection system
8 * 7. 5Cooling
fan
9 7. 5Air
c
onditioning
10 ** 7. 5Fuel
injection system - Brake lamps - Third brake lamp
11 5Courtesy
lamp - Boot lamp
12 10
Direction indicators - Hazard warning lamps - Instrument panel - Display screen
Fuses under the bonnet
F Unclip the plastic cover, located below t
he windscreen, by pressing on the two
c
atches.
F
U
nclip the fusebox cover by pressing on
t
he lug on the right, for access to the fuses.
When
you have finished, carefully refit the
c
ove r.
*
PureTech 82 engine.
**
VTi 68 engine.
8
In the event of a breakdown
Page 182 of 269
180
C1_en_Chap08_en-cas-pannes_ed01-2016
Towing the vehicle
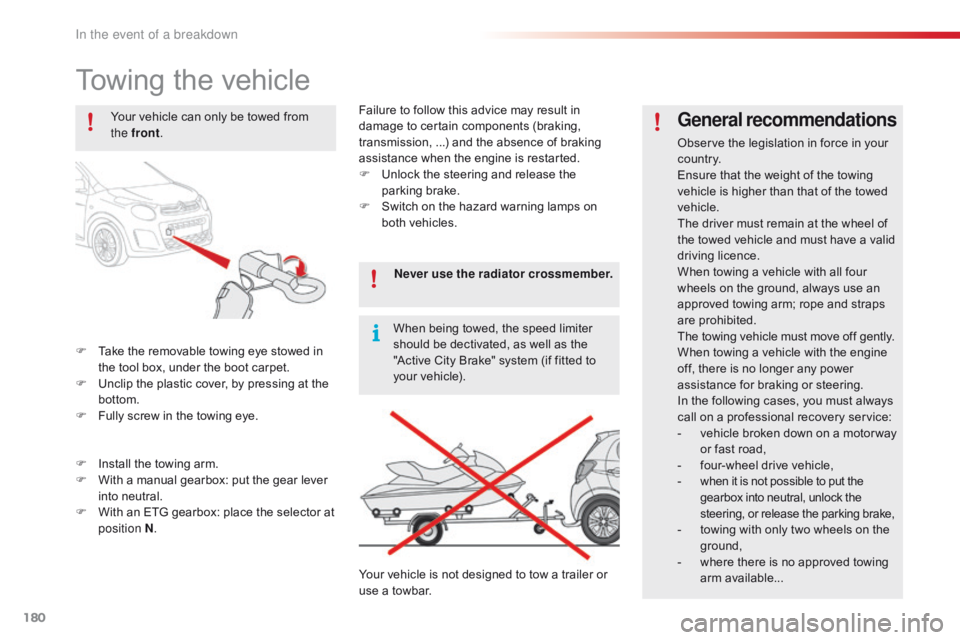
F Take the removable towing eye stowed in t
he tool box, under the boot carpet.
F
U
nclip the plastic cover, by pressing at the
b
ottom.
F
F
ully screw in the towing eye.
General recommendations
Observe the legislation in force in your co unt r y.
Ensure
that the weight of the towing
v
ehicle is higher than that of the towed
v
ehicle.
The
driver must remain at the wheel of
t
he towed vehicle and must have a valid
d
riving
l
icence.
When
towing a vehicle with all four
w
heels on the ground, always use an
a
pproved towing arm; rope and straps
ar
e
p
rohibited.
The
towing vehicle must move off gently.
When
towing a vehicle with the engine
o
ff, there is no longer any power
a
ssistance for braking or steering.
In
the following cases, you must always
c
all on a professional recovery service:
-
v
ehicle broken down on a motor way
o
r fast road,
-
f
our-wheel drive vehicle,
-
w
hen it is not possible to put the
g
earbox into neutral, unlock the
s
teering, or release the parking brake,
-
t
owing with only two wheels on the
g
round,
-
w
here there is no approved towing
ar
m
a
vailable...
Your
vehicle
can
only
be
towed
from
t
he front
.
F
I
nstall
the
towing
arm.
F
W
ith
a
manual
gearbox:
put
the
gear
lever
i
nto
neutral.
F
W
ith
an
ETG
gearbox:
place
the
selector
at
p
osition N . Never use the radiator crossmember.
When
being
towed,
the
speed
limiter
s
hould
be
dectivated,
as
well
as
the
"
Active
City
Brake"
system
(if
fitted
to
y
our
vehicle).
Your
vehicle
is
not
designed
to
tow
a
trailer
or
u
se
a
towbar.
Failure
to
follow
this
advice
may
result
in
d
amage
to
certain
components
(braking,
t
ransmission,
...)
and
the
absence
of
braking
a
ssistance
when
the
engine
is
restarted.
F
U
nlock
the
steering
and
release
the
par
king
b
rake.
F
S
witch
on
the
hazard
warning
lamps
on
b
oth
vehicles.
In the event of a breakdown