display Citroen C1 RHD 2015 1.G User Guide
[x] Cancel search | Manufacturer: CITROEN, Model Year: 2015, Model line: C1 RHD, Model: Citroen C1 RHD 2015 1.GPages: 260, PDF Size: 6.35 MB
Page 29 of 260
27
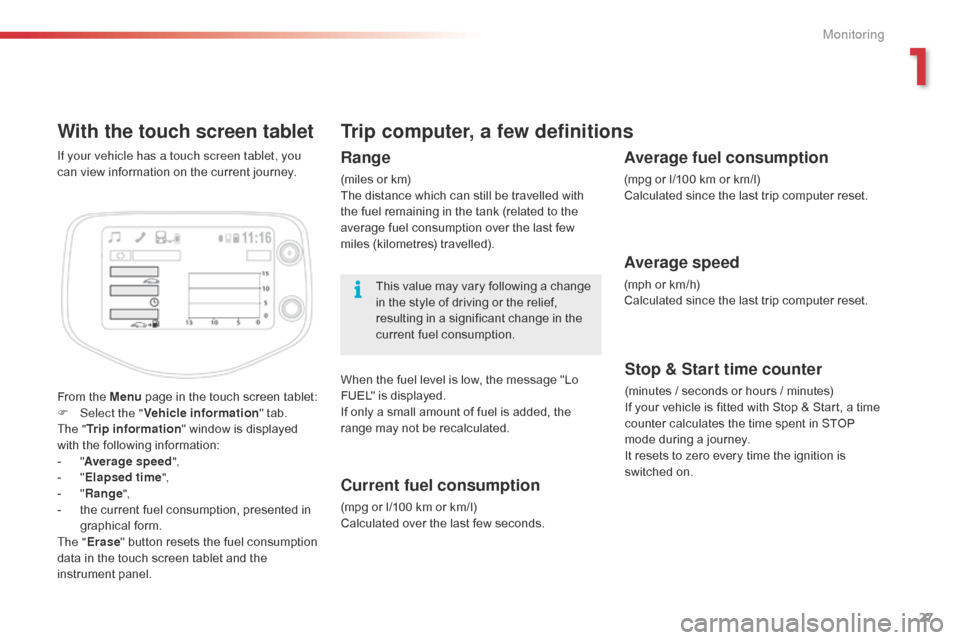
With the touch screen tablet
From the Menu page in the touch screen tablet:
F Sel ect the " Vehicle information " tab.
The " Trip information " window is displayed
with the following information:
-
"A
verage speed ",
-
" E
lapsed time ",
-
" R
ange",
-
t
he current fuel consumption, presented in
graphical form.
The " Erase " button resets the fuel consumption
data in the touch screen tablet and the
instrument panel. If your vehicle has a touch screen tablet, you
can view information on the current journey.
Trip computer, a few definitions
Range
(miles or km)
The distance which can still be travelled with
the fuel remaining in the tank (related to the
average fuel consumption over the last few
miles (kilometres) travelled).
This value may vary following a change
in the style of driving or the relief,
resulting in a significant change in the
current fuel consumption.
When the fuel level is low, the message "Lo
FUEL" is displayed.
If only a small amount of fuel is added, the
range may not be recalculated.
Current fuel consumption
(mpg or l/100 km or km/l)
Calculated over the last few seconds.
Stop & Start time counter
(minutes / seconds or hours / minutes)
I f your vehicle is fitted with Stop & Start, a time
counter calculates the time spent in STOP
mode during a journey.
It resets to zero every time the ignition is
switched on.
Average fuel consumption
(mpg or l/100 km or km/l)
Calculated since the last trip computer reset.
Average speed
(mph or km/h)
Calculated since the last trip computer reset.
1
Monitoring
Page 59 of 260
57
For maximum cooling or heating of the
cabin, it is possible to go beyond the
minimum 14 or maximum 28 value.
F
P
ress the temperature adjustment
button down or up until "LO" or
"HI" is displayed.
A setting around 21
gives optimum comfort.
However, depending on your requirements, a
setting between 18 and 24 is normal.
On entering the vehicle, if the interior is very
cold or hot, there is no need to change the
value displayed in order to reach the required
level of comfort. The system corrects the
temperature difference automatically and as
quickly as possible.
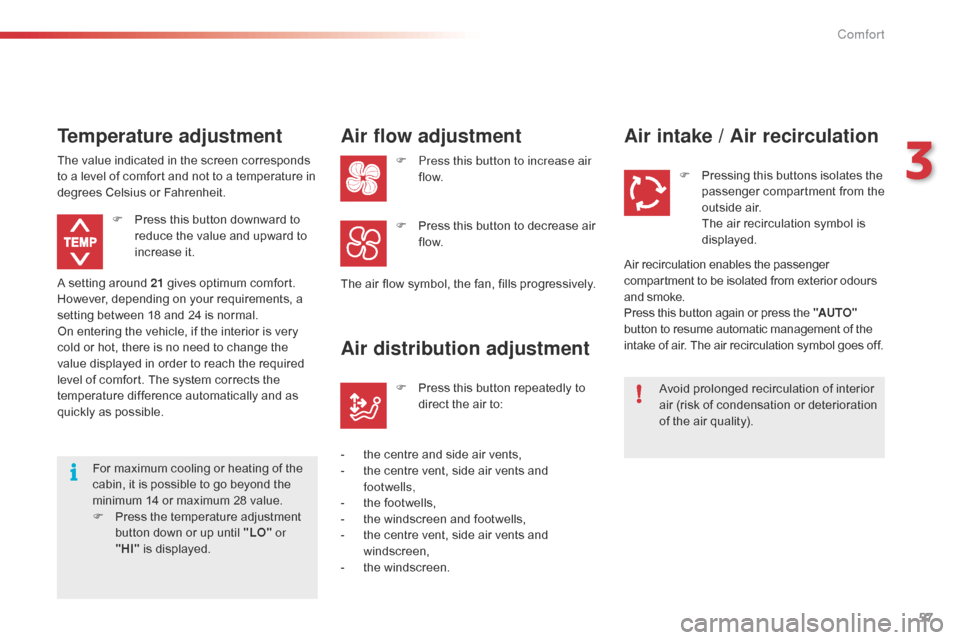
Temperature adjustment
F Press this button downward to reduce the value and upward to
increase it.
The value indicated in the screen corresponds
to a level of comfort and not to a temperature in
degrees Celsius or Fahrenheit.
Air flow adjustment
F Press this button to increase air
f low.
The air flow symbol, the fan, fills progressively. F
P
ress this button to decrease air
f low.
Air distribution adjustment
- the centre and side air vents,
- t he centre vent, side air vents and
footwells,
-
t
he footwells,
-
t
he windscreen and footwells,
-
t
he centre vent, side air vents and
windscreen,
-
t
he windscreen. F
P
ress this button repeatedly to
direct the air to:
Air intake / Air recirculation
Avoid prolonged recirculation of interior
air (risk of condensation or deterioration
of the air quality). F
P
ressing this buttons isolates the
passenger compartment from the
outside air.
T
he air recirculation symbol is
displayed.
Air recirculation enables the passenger
compartment to be isolated from exterior odours
and smoke.
Press this button again or press the "AUTO"
button to resume automatic management of the
intake of air. The air recirculation symbol goes off.
3
Comfort
Page 60 of 260
58
Avoid driving for long periods with the air
conditioning switched off (risk of misting
and reduction of the air quality in the cabin).
This action switches off all of the functions of
the air conditioning system.
Thermal comfort is no longer controlled.
A slight flow of air resulting from the movement
of the vehicle, remains perceptible however.
Pressing the "AUTO" button again reactivates
the system with the values set before it was
switched off.
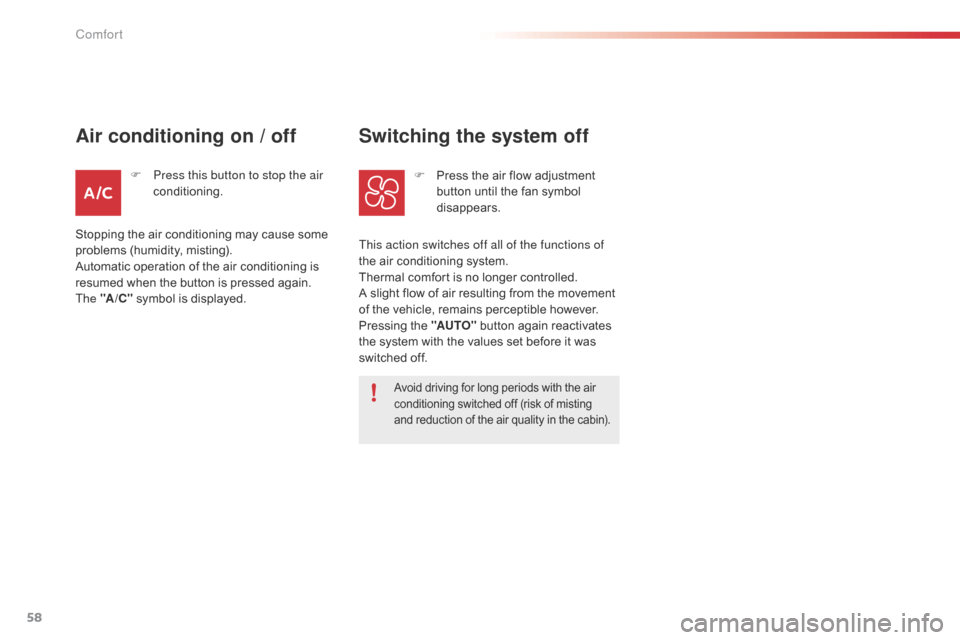
Switching the system off
F Press the air flow adjustment button until the fan symbol
disappears.
F
P
ress this button to stop the air
conditioning.
Air conditioning on / off
Stopping the air conditioning may cause some
problems (humidity, misting).
Automatic operation of the air conditioning is
resumed when the button is pressed again.
The "A /C " symbol is displayed.
Comfort
Page 77 of 260
75
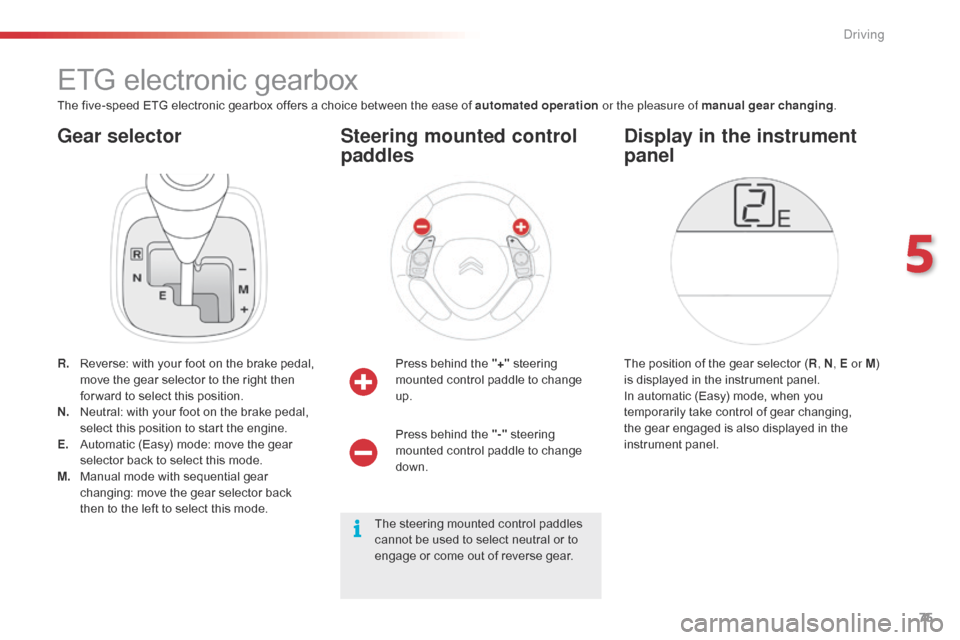
Gear selector
ETG electronic gearbox
The five-speed ETG electronic gearbox offers a choice between the ease of automated operation or the pleasure of manual gear changing.
R.
R
everse: with your foot on the brake pedal,
move the gear selector to the right then
for ward to select this position.
N.
N
eutral: with your foot on the brake pedal,
select this position to start the engine.
E.
A
utomatic (Easy) mode: move the gear
selector back to select this mode.
M.
M
anual mode with sequential gear
changing: move the gear selector back
then to the left to select this mode. Press behind the "+"
steering
mounted control paddle to change
up.
Steering mounted control
paddles
The position of the gear selector ( R, N , E or M )
is displayed in the instrument panel.
In automatic (Easy) mode, when you
temporarily take control of gear changing,
the gear engaged is also displayed in the
instrument panel.
Display in the instrument
panel
Press behind the "-" steering
mounted control paddle to change
down.
The steering mounted control paddles
cannot be used to select neutral or to
engage or come out of reverse gear.
5
Driving
Page 79 of 260
77
Temporarily taking control of
gear changes
You can temporarily take control of gear
changes using the "+" and "-"
steering
mounted control paddles.
Gear change commands are only acted on if
the engine speed allows. There is an audible
signal if a command is not accepted.
The gear engaged is displayed in the
instrument panel.
This function allows you to anticipate certain
situations such as overtaking a vehicle or
approaching a corner.
After a few moments with no action on the
controls, the gearbox returns to automatic
control of the gears. It is possible to change mode at any time, by
moving the gear selector from position E to
position M and the other way round.
Never select neutral N when the vehicle
is moving.
F
P
lace the gear selector in position M
.
F
C
hange up or down using:
- t he gear selector, pushing:
- b ack, "+" to change up,
-
f
or ward, "-" to change down.
-
o
r the "+" or "-" steering mounted
control paddle.
The gear engaged is displayed.
Gear change commands are only acted on if
the engine speed allows.
It is not necessary to release the accelerator
peal during gear changes. There is an audible
signal if a command is not accepted.
When braking or slowing down, the gearbox
automatically changes down so that pick-up is
in the right gear.
Manual mode
Under sharp acceleration, the gearbox will
not change up without action by the driver on
the gear selector or steering mounted control
paddles (unless the engine speed is close to
maximum).
5
Driving
Page 83 of 260
81
Stop & Start (VTi 68 S&S engine)
Operation
Going into engine STOP mode
This indicator lamp comes on in the
instrument panel and the engine
goes into standby automatically:
-
w
hen stationary, in neutral, and you
release the clutch pedal.
Never refuel with the engine in
STOP
mode; you must switch off the
ignition with the button. For smoother operation, during
parking manoeuvres STOP mode is
not available for a few seconds after
coming out of reverse gear.
STOP mode does not affect the
vehicle's systems, such as for example,
braking, power steering...
Special cases: STOP mode not
available
STOP mode is not invoked principally when:
- t he driver's door is open,
-
t
he driver's seat belt is not fastened,
-
t
he engine is needed to maintain a
comfortable temperature in the passenger
compartment,
-
d
emisting is active,
-
s
ome special conditions (battery charge,
engine temperature, braking assistance,
vehicle stopped on a steep gradient, high
altitude...) where the engine is needed to
assure control of a system.
The Stop & Start
system puts the engine temporarily into standby - STOP mode - during stops in the traffic (red lights, traffic jams, or other...).
The
engine restarts automatically - START mode - as soon as you want to move off. The restart takes place instantly, quickly and silently.
Per fect for urban use, the Stop & Start system reduces fuel consumption and exhaust emissions as well as the noise level when stationary.
Stop & Start time counters
A partial time counter counts the periods in
STOP mode during a journey.
It is displayed in the trip computer once the
Stop & Start acts.
Press one of the screen management buttons
to return to the previous display.
A global time counter counts the periods in
STOP mode since the last reset.
When it is displayed, press one of the screen
management buttons to reset the counter.
5
Driving
Page 86 of 260

84
The speed limiter cannot, in any
circumstances, replace the need to
observe speed limits, nor can it replace the
need for vigilance on the part of the driver.
Speed limiter (PureTech 82 engine)
The speed limiter is switched on manually:
this can be done whatever the speed of the
vehicle. However, if you are driving at less than
20 mph (30 km/h), the programmed speed will
be fixed at 20 mph (30 km/h).
The speed limiter is paused by operation of the
control.
The programmed speed can be exceeded
temporarily by pressing the accelerator firmly
beyond the point of resistance.
To return to the programmed speed, simply
release the accelerator pedal until the vehicle
returns to the programmed speed limit. System which prevents the vehicle from exceeding the speed programmed by the driver.Steering mounted controls
The controls are grouped together on this
control stalk at the steering wheel.
1.
S
peed limiter on / off: by pressing the end
of the control stalk.
2.
D
ecrease setting: by pushing the control
stalk down.
3.
I
ncrease setting: by pushing the control
stalk up.
4.
S
peed limiter on / pause: by pulling the
control stalk towards you.
Displays in the instrument
panel
The information is grouped together in the
instrument panel screen.
5.
S
peed limiter mode selection indication.
6.
S
peed limiter on / pause indication.
7.
S
peed value setting.
The programmed speed remains in the
memory when the ignition is switched off.
Driving
Page 87 of 260

85
Switching on
F Press the end of the control stalk: the speed limiter mode is selected but is not
switched on.
F
S
witch the speed limiter on by pulling the
control stalk towards you, if the speed
displayed is suitable (by default, the last
speed programmed). Once the function is selected, you can modify
the speed setting by:
-
b
y pushing the control stalk up to increase
the setting,
-
b
y pushing the control stalk down to
decrease the setting.
A brief push on the control stalk modifies the
speed setting by + or - 1 km/h.
A maintained push on the control stalk modifies
the speed setting by + or - 5 km/h.
Adjusting the speed limit
setting
You do not have to switch the speed
limiter on in order to set the speed.
Pause
F You can temporarily stop the the speed limiter by pulling the control stalk towards
you again: the display confirms that it has
been stopped (Pause).
F
P
ull the control stalk towards you again to
restore the speed limiter.
5
Driving
Page 88 of 260

86
Switching off
F Press the end of the control stalk. The display of information related to the
speed limiter disappears.
Operating fault
Illumination of this warning lamp in
the instrument panel indicates a fault
with the speed limiter.
Have it checked by a CITROËN
dealer or a qualified workshop.
The use of mats not approved by
CITROËN may inter fere with the
operation of the speed limiter.
To avoid any risk of jamming of the
pedals:
-
e
nsure that the mat is secured
c o r r e c t l y,
-
d
o not fit one mat on top of another.
Temporarily exceeding the
programmed speed
F Press f irmly on the accelerator pedal,
going beyond the point of resistance, to
exceed the programmed speed limit.
The speed limiter is deactivated temporarily
and the displayed programmed speed flashes.
As soon as the vehicle's speed returns to the
programmed value, the limiter operates again:
the display of the programmed speed becomes
steady again. An audible signal accompanies the
flashing of the programmed speed
when exceeding the speed is not due to
an action by the driver (steep hill...).
Driving
Page 89 of 260
87
Speed limiter (VTi 68 engine)
System which prevents the vehicle from exceeding the speed programmed by the driver.
The speed limiter is switched on manually:
this can be done whatever the speed of the
vehicle. However, if you are driving at less than
20 mph (30 km/h), the programmed speed will
be fixed at 20 mph (30 km/h).
The speed limiter is paused by operation of the
control.
The programmed speed can be exceeded
temporarily by pressing the accelerator firmly
beyond the point of resistance.
To return to the programmed speed, simply
release the accelerator pedal until the vehicle
returns to the programmed speed limit.
The programmed limit speed is erased
when switching off the ignition.
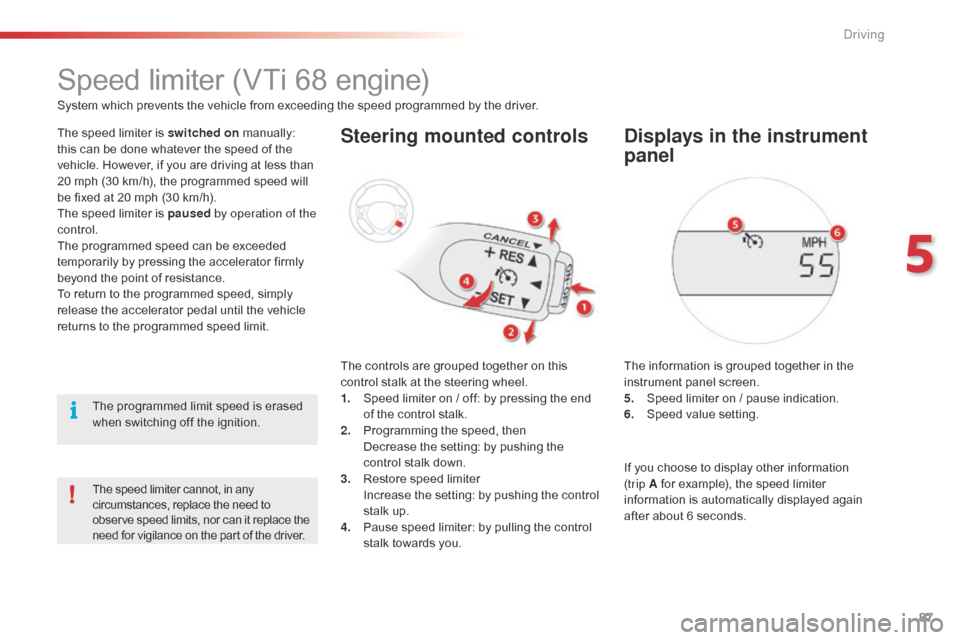
Steering mounted controls
The controls are grouped together on this
control stalk at the steering wheel.
1.
S
peed limiter on / off: by pressing the end
of the control stalk.
2.
P
rogramming the speed, then
D
ecrease the setting: by pushing the
control stalk down.
3.
R
estore speed limiter
I
ncrease the setting: by pushing the control
stalk up.
4.
P
ause speed limiter: by pulling the control
stalk towards you.
Displays in the instrument
panel
The information is grouped together in the
instrument panel screen.
5.
S
peed limiter on / pause indication.
6.
S
peed value setting.
The speed limiter cannot, in any
circumstances, replace the need to
observe speed limits, nor can it replace the
need for vigilance on the part of the driver.
If you choose to display other information
(trip A for example), the speed limiter
information is automatically displayed again
after about 6
seconds.
5
Driving