Citroen C3 2015 2.G Owner's Guide
Manufacturer: CITROEN, Model Year: 2015, Model line: C3, Model: Citroen C3 2015 2.GPages: 401, PDF Size: 13.04 MB
Page 31 of 401
29
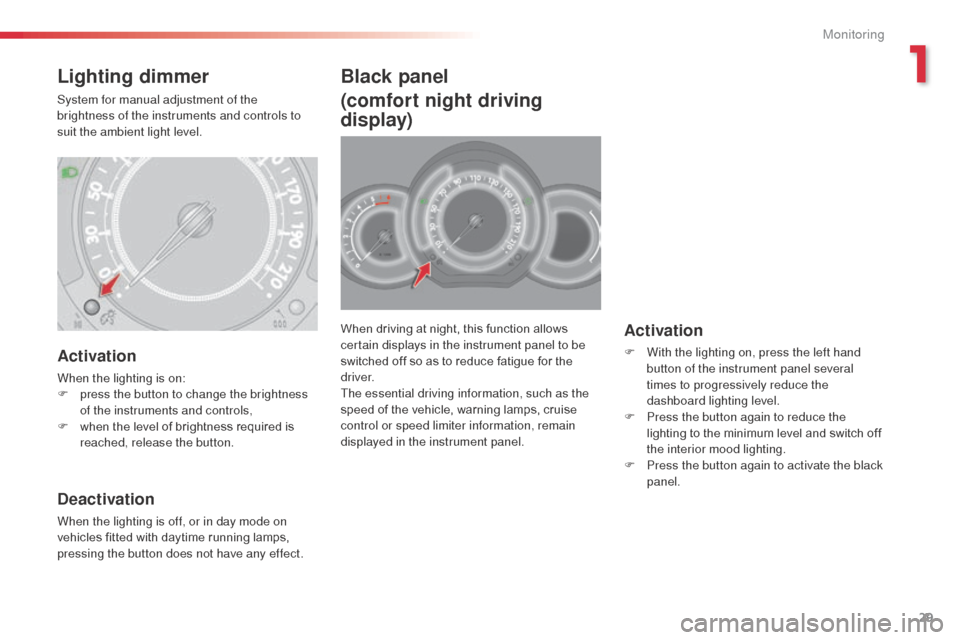
When driving at night, this function allows
certain displays in the instrument panel to be
switched off so as to reduce fatigue for the
driver.
The essential driving information, such as the
speed of the vehicle, warning lamps, cruise
control or speed limiter information, remain
displayed in the instrument panel.Activation
F With the lighting on, press the left hand button of the instrument panel several
times to progressively reduce the
dashboard lighting level.
F
P
ress the button again to reduce the
lighting to the minimum level and switch off
the interior mood lighting.
F
P
ress the button again to activate the black
panel.
Black panel
(comfort night driving
display)
Activation
When the lighting is on:
F p ress the button to change the brightness
of the instruments and controls,
F
w
hen the level of brightness required is
reached, release the button.
Deactivation
When the lighting is off, or in day mode on
vehicles fitted with daytime running lamps,
pressing the button does not have any effect.
Lighting dimmer
System for manual adjustment of the
brightness of the instruments and controls to
suit the ambient light level.
1
Monitoring
Page 32 of 401
30
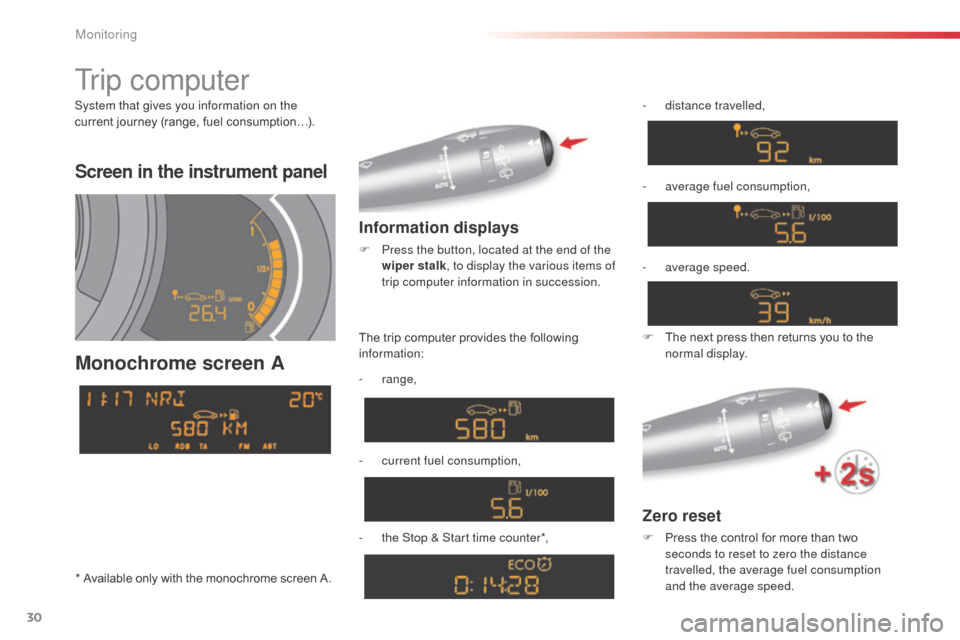
Screen in the instrument panel
Monochrome screen A
Information displays
F Press the button, located at the end of the wiper stalk , to display the various items of
trip computer information in succession.
Zero reset
F Press the control for more than two seconds to reset to zero the distance
travelled, the average fuel consumption
and the average speed.
The trip computer provides the following
information:
-
range,
-
c
urrent fuel consumption,
-
t
he Stop & Start time counter*, -
d
istance travelled,
-
a
verage fuel consumption,
F
T
he next press then returns you to the
normal display.
Tr i p c o m p u t e r
System that gives you information on the
current journey (range, fuel consumption…).
-
a
verage speed.
* Available only with the monochrome screen A.
Monitoring
Page 33 of 401
31
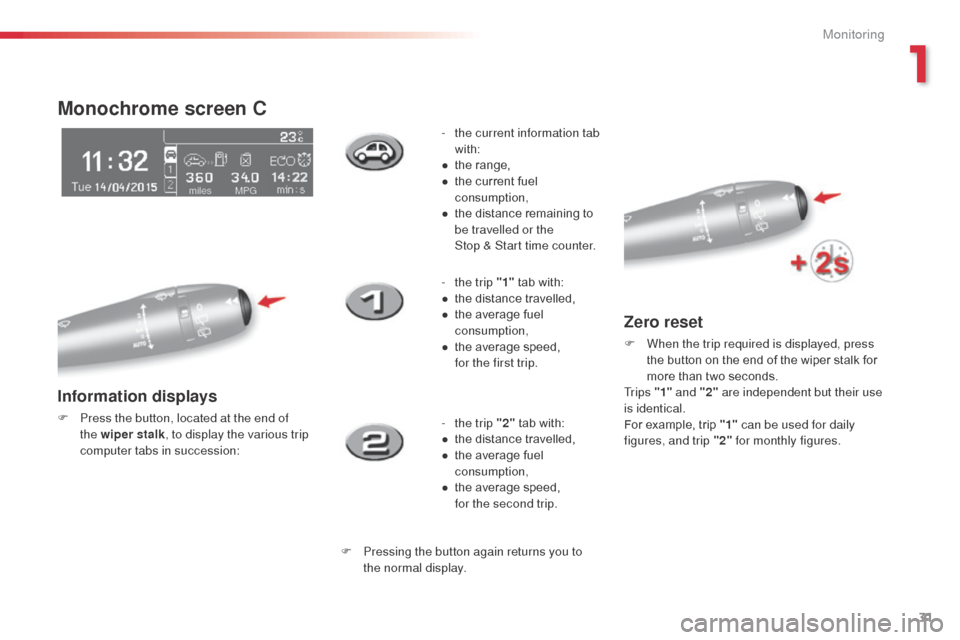
Monochrome screen C
Information displays
F Press the button, located at the end of the wiper stalk , to display the various trip
computer tabs in succession: -
t
he current information tab
with:
●
t
he range,
●
t
he current fuel
consumption,
●
t
he distance remaining to
be travelled or the
Stop & Start time counter.
-
t
he trip "1"
tab with:
●
t
he distance travelled,
●
t
he average fuel
consumption,
●
t
he average speed,
f
or the first trip.
- t he trip "2" tab with:
●
t
he distance travelled,
●
t
he average fuel
consumption,
●
t
he average speed,
f
or the second trip.
F Pressing the button again returns you to the normal display.
Zero reset
F When the trip required is displayed, press the button on the end of the wiper stalk for
more than two seconds.
Tr i p s "1" and "2" are independent but their use
is identical.
For example, trip "1" can be used for daily
figures, and trip "2" for monthly figures.
1
Monitoring
Page 34 of 401
32
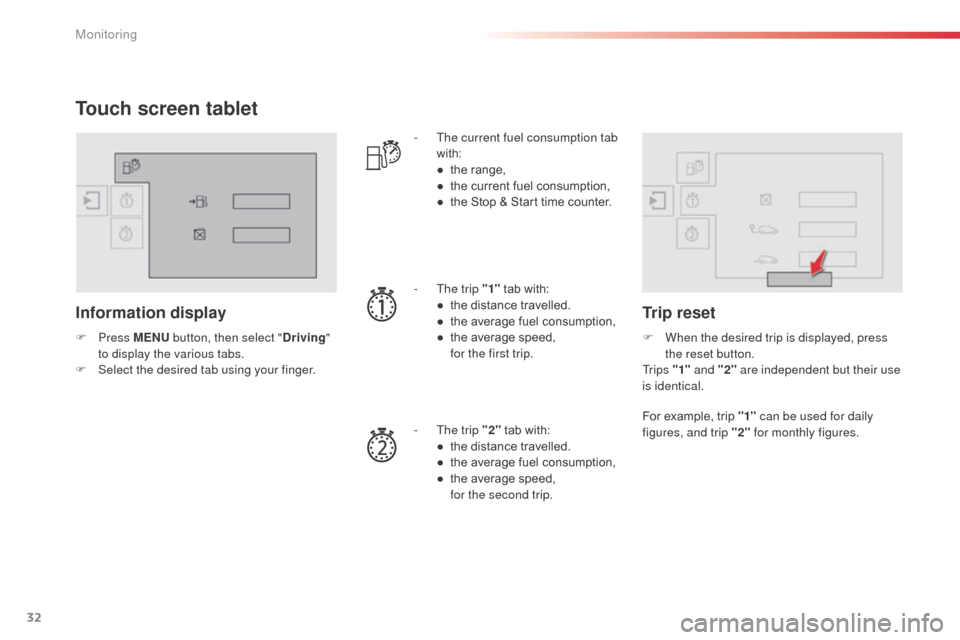
Touch screen tablet
Information display
F Press M ENU button, then select " Driving"
to display the various tabs.
F
S
elect the desired tab using your finger. -
T
he current fuel consumption tab
with:
●
t
he range,
●
t
he current fuel consumption,
●
t
he Stop & Start time counter.
-
T
he trip "1"
tab with:
●
t
he distance travelled.
●
t
he average fuel consumption,
● t he average speed, f
or the first trip.
-
T
he trip "2" tab with:
●
t
he distance travelled.
●
t
he average fuel consumption,
●
t
he average speed,
f
or the second trip.
Trip reset
F When the desired trip is displayed, press the reset button.
Tr i p s "1" and "2" are independent but their use
is identical.
For example, trip "1" can be used for daily
figures, and trip "2" for monthly figures.
Monitoring
Page 35 of 401
33
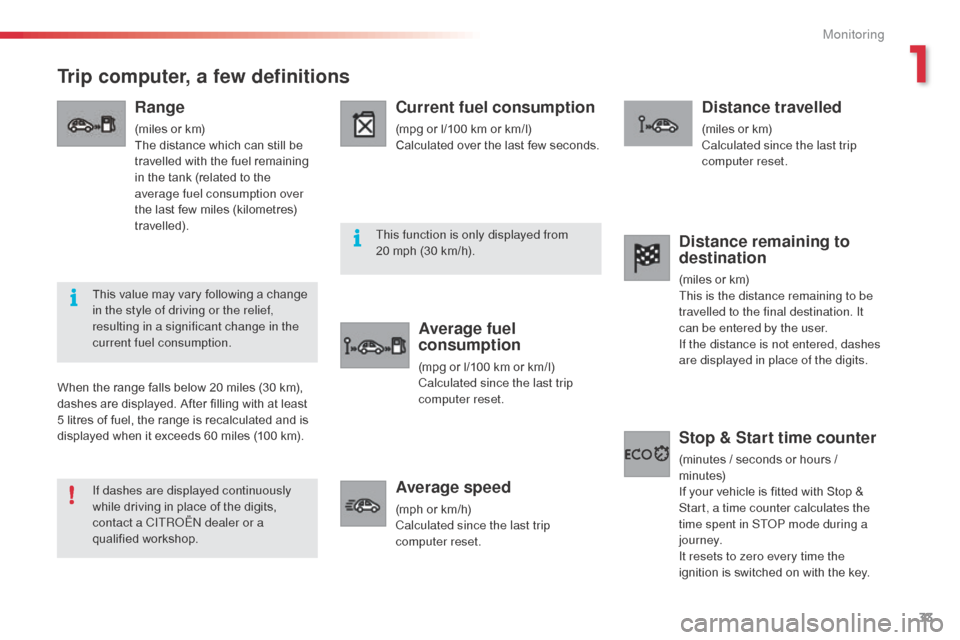
Trip computer, a few definitions
Range
(miles or km)
The distance which can still be
travelled with the fuel remaining
in the tank (related to the
average fuel consumption over
the last few miles (kilometres)
travelled).
Current fuel consumption
(mpg or l/100 km or km/l)
Calculated over the last few seconds.
Average fuel
consumption
(mpg or l/100 km or km/l)
Calculated since the last trip
computer reset.
Average speed
(mph or km/h)
Calculated since the last trip
computer reset.
Distance travelled
(miles or km)
Calculated since the last trip
computer reset.
When the range falls below 20 miles (30 km),
dashes are displayed. After filling with at least
5 litres of fuel, the range is recalculated and is
displayed when it exceeds 60 miles (100 km).
Distance remaining to
destination
(miles or km)
This is the distance remaining to be
travelled to the final destination. It
can be entered by the user.
If the distance is not entered, dashes
are displayed in place of the digits.
Stop & Start time counter
(minutes / seconds or hours /
minutes)
If your vehicle is fitted with Stop &
Start, a time counter calculates the
time spent in ST
oP m
ode during a
j o u r n ey.
It resets to zero every time the
ignition is switched on with the key.
If dashes are displayed continuously
while driving in place of the digits,
contact a CITR
oËn
dealer or a
qualified workshop. This value may vary following a change
in the style of driving or the relief,
resulting in a significant change in the
current fuel consumption. This function is only displayed from
20 mph (30 km/h).
1
Monitoring
Page 36 of 401
34
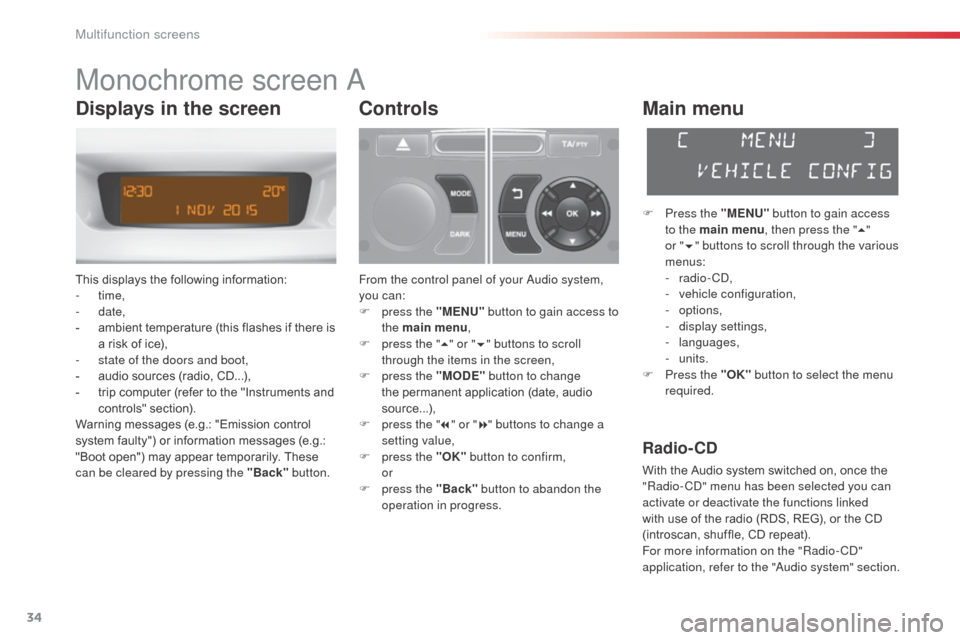
Monochrome screen a
This displays the following information:
- time,
-
date,
-
a
mbient temperature (this flashes if there is
a risk of ice),
-
s
tate of the doors and boot,
-
a
udio sources (radio, CD...),
-
t
rip computer (refer to the "Instruments and
controls" section).
Warning messages (e.g.: "Emission control
system faulty") or information messages (e.g.:
"Boot open") may appear temporarily. These
can be cleared by pressing the "Back" button.
Controls
From the control panel of your audio system,
you can:
F
p
ress the "MENU" button to gain access to
the main menu ,
F
p
ress the " 5" or " 6" buttons to scroll
through the items in the screen,
F
p
ress the "MODE" button to change
the permanent application (date, audio
source...),
F
p
ress the " 7" or " 8" buttons to change a
setting value,
F
p
ress the "OK" button to confirm,
or
F
p
ress the "Back" button to abandon the
operation in progress.
Main menu
F Press the "MENU" button to gain access
to the main menu , then press the "5"
or
"6 " buttons to scroll through the various
menus:
-
radio - C
d
,
-
v
ehicle configuration,
-
options,
-
d
isplay settings,
-
languages,
-
units.
F
P
ress the "OK" button to select the menu
required.
Radio- CD
With the Audio system switched on, once the
"Radio- Cd" m enu has been selected you can
activate or deactivate the functions linked
with use of the radio (RDS, REG), or the CD
(introscan, shuffle, CD repeat).
For more information on the "Radio-C
d"
application, refer to the "
au
dio system" section.
Displays in the screen
Multifunction screens
Page 37 of 401
35
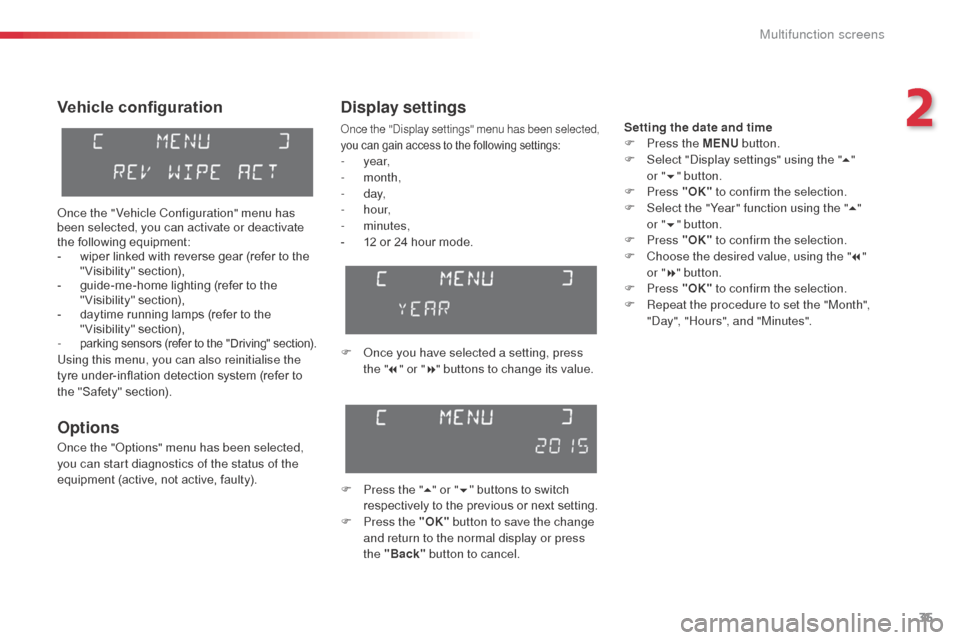
Vehicle configuration
once the " Vehicle Configuration" menu has
been selected, you can activate or deactivate
the following equipment:
-
w
iper linked with reverse gear (refer to the
"Visibility" section),
-
g
uide-me-home lighting (refer to the
"Visibility" section),
-
d
aytime running lamps (refer to the
"Visibility" section),
-
parking sensors (refer to the "Driving" section).Using this menu, you can also reinitialise the
tyre under-inflation detection system (refer to
the "Safety" section).
Options
once the "op tions" menu has been selected,
you can start diagnostics of the status of the
equipment (active, not active, faulty).
Display settings
once the "di splay settings" menu has been selected,
you can gain access to the following settings:
- year,
- month,
-
d ay,
-
h o u r,
-
minutes,
-
1
2 or 24 hour mode.
F
o
n
ce you have selected a setting, press
the " 7" or " 8" buttons to change its value.
F
P
ress the " 5" or " 6" buttons to switch
respectively to the previous or next setting.
F
P
ress the "OK" button to save the change
and return to the normal display or press
the "Back" button to cancel.
Setting the date and time
F
P ress the MENU button.
F
S
elect "
di
splay settings" using the " 5"
or
"6 " button.
F
Press "OK" to confirm the selection.
F
S
elect the "Year" function using the " 5"
or " 6" button.
F
Press "OK" to confirm the selection.
F
C
hoose the desired value, using the " 7"
or
"8 " button.
F
Press "OK" to confirm the selection.
F
R
epeat the procedure to set the "Month",
"
da
y", "Hours", and "Minutes".
2
Multifunction screens
Page 38 of 401
36
Languages
once the "Languages" menu has been
selected, you can change the language used
by the display, by choosing a new language
from the list offered.
Units
once the "Units" menu has been selected,
you can change the units of the following
parameters:
-
t
emperature (°C or °F),
-
f
uel consumption (l/100 km, mpg or km/l). For safety reasons, configuration by the
driver of the multifunction screen must
only be done when stationary.
on
ce the fuel consumption units have
been set to mpg, the information in the
instrument panel screen on speed and
distance will also be in mph and miles.
Multifunction screens
Page 39 of 401
37
Monochrome screen C
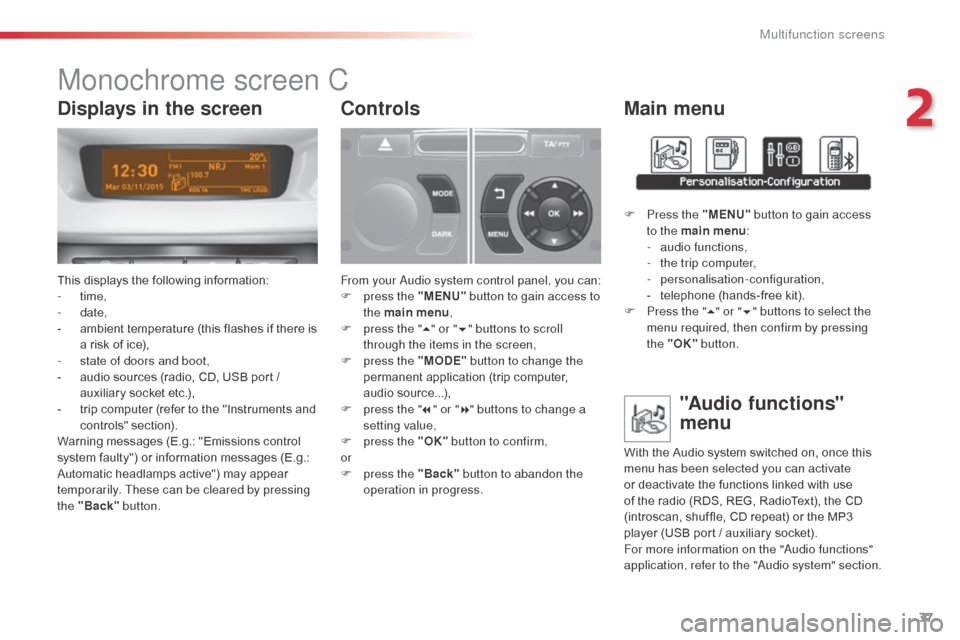
This displays the following information:
- time,
-
date,
-
a
mbient temperature (this flashes if there is
a risk of ice),
-
s
tate of doors and boot,
-
a
udio sources (radio, CD, USB port /
auxiliary socket etc.),
-
t
rip computer (refer to the "Instruments and
controls" section).
Warning messages (E.g.: "Emissions control
system faulty") or information messages (E.g.:
Automatic headlamps active") may appear
temporarily. These can be cleared by pressing
the "Back" button.
Controls
From your au dio system control panel, you can:
F p ress the "MENU" button to gain access to
the main menu ,
F
p
ress the " 5" or " 6" buttons to scroll
through the items in the screen,
F
p
ress the "MODE" button to change the
permanent application (trip computer,
audio source...),
F
p
ress the " 7" or " 8" buttons to change a
setting value,
F
p
ress the "OK" button to confirm,
or
F
p
ress the "Back" button to abandon the
operation in progress.
Main menu
F Press the "MENU" button to gain access
to the main menu :
-
a
udio functions,
-
t
he trip computer,
-
personalisation-configuration,
-
t
elephone (hands-free kit).
F
P
ress the " 5" or " 6" buttons to select the
menu required, then confirm by pressing
the "OK" button.
"Audio functions"
menu
With the Audio system switched on, once this
menu has been selected you can activate
or deactivate the functions linked with use
of the radio (RDS, REG, RadioText), the CD
(introscan, shuffle, CD repeat) or the MP3
player (USB port / auxiliary socket).
For more information on the "
au
dio functions"
application, refer to the "
au
dio system" section.
Displays in the screen
2
Multifunction screens
Page 40 of 401
38
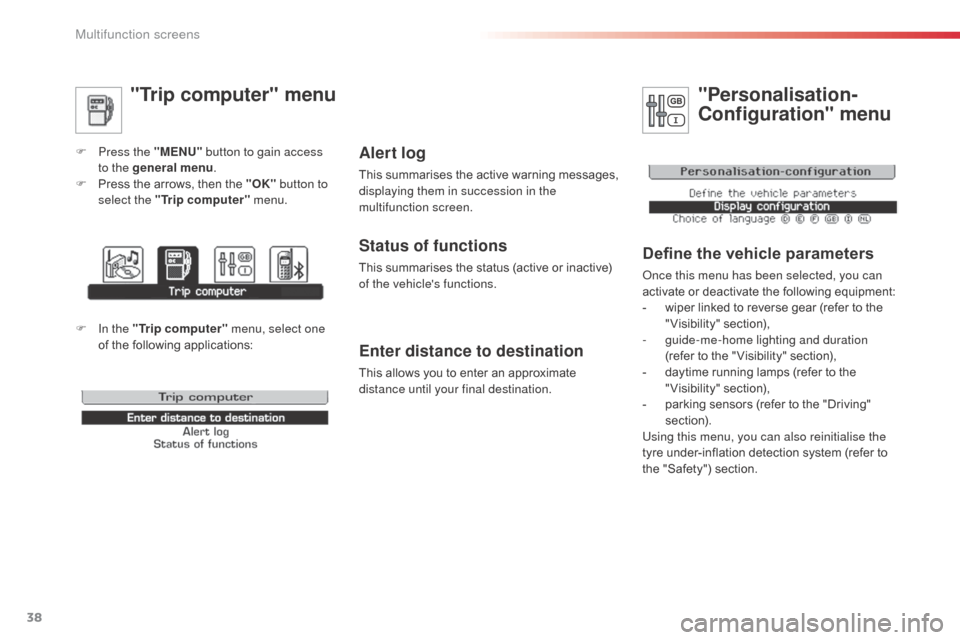
"Trip computer" menu
F Press the "MENU" button to gain access
to the general menu .
F
P
ress the arrows, then the "OK" button to
select the " Trip computer " menu.
Enter distance to destination
This allows you to enter an approximate
distance until your final destination.
Alert log
This summarises the active warning messages,
displaying them in succession in the
multifunction screen.
Status of functions
This summarises the status (active or inactive)
of the vehicle's functions.
"Personalisation-
Configuration" menu
Define the vehicle parameters
once this menu has been selected, you can
activate or deactivate the following equipment:
-
w
iper linked to reverse gear (refer to the
"Visibility" section),
-
g
uide-me-home lighting and duration
(refer to the " Visibility" section),
-
d
aytime running lamps (refer to the
"Visibility" section),
-
p
arking sensors (refer to the "Driving"
section).
Using this menu, you can also reinitialise the
tyre under-inflation detection system (refer to
the "Safety") section.
F In the " Trip computer " menu, select one
of the following applications:
Multifunction screens