CITROEN C3 2023 Repair Manual
Manufacturer: CITROEN, Model Year: 2023, Model line: C3, Model: CITROEN C3 2023Pages: 104, PDF Size: 2.38 MB
Page 61 of 104
59
In the event of a breakdown
8When towing a vehicle with all four wheels on
the ground, always use an approved towing
arm; rope and straps are prohibited.
The towing vehicle must move off gently.
When the vehicle is towed with its engine
off, there is no longer braking and steering
assistance.
A professional towing service must be
called if:
–
Broken down on a motorway or main road.
–
Not possible to put
the gearbox into neutral,
unlock the steering, or release the parking
brake.
–
T
owing with only two wheels on the ground.
–
No approved towbar available.
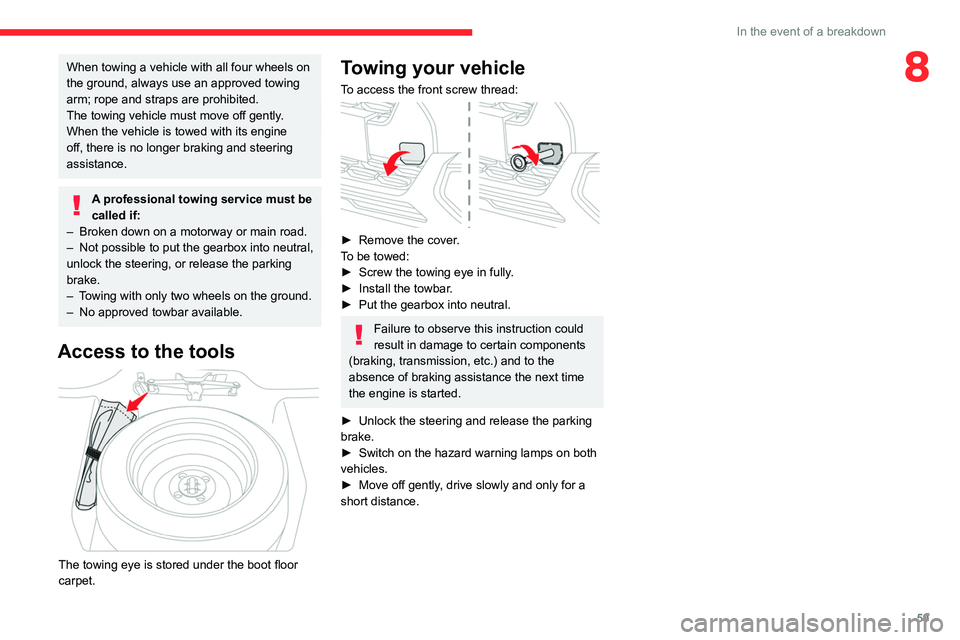
Access to the tools
The towing eye is stored under the boot floor
carpet.
Towing your vehicle
To access the front screw thread:
► Remove the cover .
To be towed:
►
Screw the towing eye in fully
.
►
Install the towbar
.
►
Put the gearbox into neutral.
Failure to observe this instruction could
result in damage to certain components
(braking, transmission, etc.) and to the
absence of braking assistance the next time
the engine is started.
►
Unlock the steering and release the parking
brake.
►
Switch on the hazard warning lamps on both
vehicles.
►
Move off gently
, drive slowly and only for a
short distance.
Page 62 of 104
60
Technical data
Engines technical data
The engine characteristics are given in the
vehicle's registration document, as well as in
sales brochures.
The maximum power corresponds to the value type-approved on a test bed, under
conditions defined as per AIS 137 (Part 5).
For more information, contact a CITROËN
dealer.
Engine EB2NA
engine EB2ADTM
engine
Gearbox MA5
(Manual
5-speed) MB6
(Manual
6-speed)
Cubic capacity 1 199 cc 1 199 cc
Max. power 60 kW at 5750 rpm81 kW at
5500 rpm
Fuel BSVI
Commercial Gasoline Fuel BSVI
Commercial Gasoline Fuel
Curb weight L1-939 kg L2-964 kgL2-1035 Kg
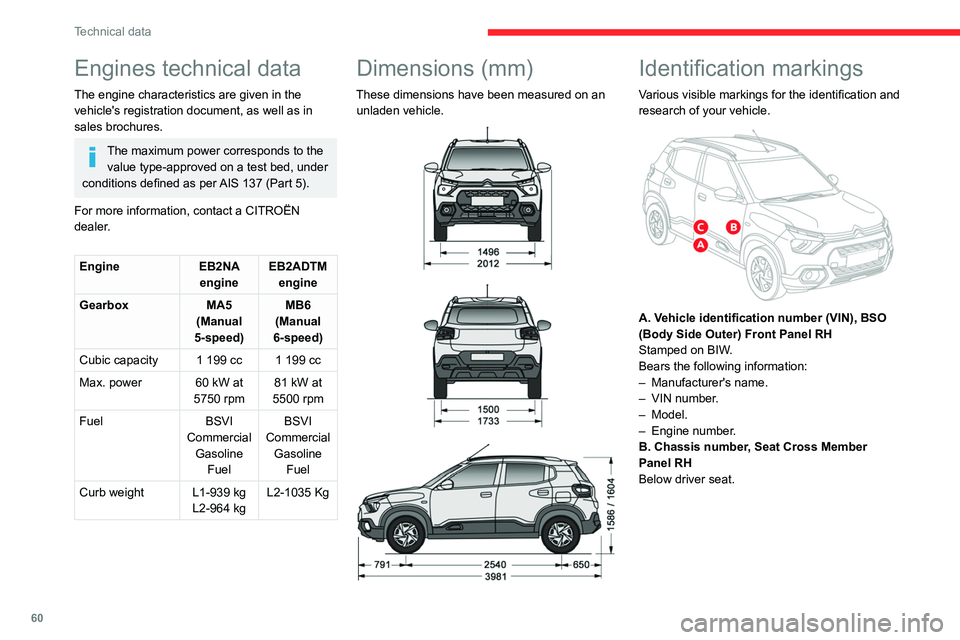
Dimensions (mm)
These dimensions have been measured on an
unladen vehicle.
Identification markings
Various visible markings for the identification and
research of your vehicle.
A. Vehicle identification number (VIN), BSO
(Body Side Outer) Front Panel RH
Stamped on BIW.
Bears the following information:
–
Manufacturer's name.
–
VIN number
.
–
Model.
–
Engine number
.
B. Chassis number, Seat Cross Member
Panel RH
Below driver seat.
Page 63 of 104
61
Technical data
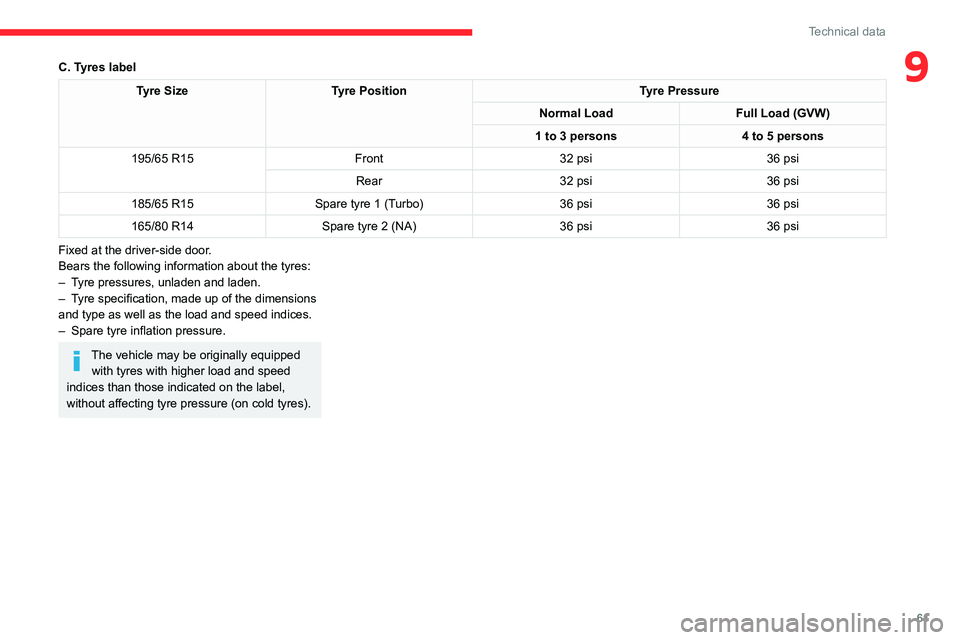
9C. Tyres label
Tyre SizeTyre Position Tyre Pressure
Normal Load Full Load (GVW)
1 to 3 persons 4 to 5 persons
195/65 R15 Front32 psi 36 psi
Rear 32 psi 36 psi
185/65 R15 Spare tyre 1 (Turbo) 36 psi36 psi
165/80 R14 Spare tyre 2 (NA) 36 psi36 psi
Fixed at the driver-side door.
Bears the following information about the tyres:
–
T
yre pressures, unladen and laden.
–
T
yre specification, made up of the dimensions
and type as well as the load and speed indices.
–
Spare tyre inflation pressure.
The vehicle may be originally equipped with tyres with higher load and speed
indices than those indicated on the label,
without affecting tyre pressure (on cold tyres).
Page 64 of 104
62
10" Touch Screen
10" Touch Screen
Multimedia audio system
The functions and settings described may vary according to the vehicle version
and configuration.
Driving while distracted can result in loss
of vehicle control, crash and injury. We
strongly recommend that you use extreme
caution when using any device that may take
your focus off the road.
Your primary responsibility is the safe
operation of your vehicle.
We recommend against the use of any hand-
held device while driving and encourage
the use of voice-operated systems when
possible.
Make sure you are aware of all applicable
local laws that may affect the use of electronic
devices while driving.
For safety reasons and because they
require sustained attention by the driver,
the following operations must be carried out
with the vehicle stationary and the ignition on:
–
Pairing the smartphone with the system in
Bluetooth® mode.
–
Connection to the Apple CarPlay® or
Android Auto applications.
–
Using the smartphone.
– Changing the system settings and
configuration.
Some functions are not accessible when
driving.
Overheating
In very hot conditions, operation may be
limited to protect the system (e.g. volume may
be reduced). A warning message is displayed
on the screen.
The system will resume normal operation
when the temperature in the passenger
compartment has dropped.
The system is protected in such a way that it will only operate in the vehicle.
For more information about smartphones
and OS compatibility, refer to the
following website:
https://citroen.in/citroen-connectivity
General information
Getting to know your
system
The system allows you to interact with a variety
of features using the touch screen and voice
commands. By integrating with your Bluetooth
®-enabled
phone, the touch screen provides easy
interaction with audio, multimedia, navigation,
and your phone's compatible applications.
Your system is equipped with a feature that
allows you to access and control audio features
for 60 minutes after you switch the ignition off
(until the doors are locked using the remote
control).
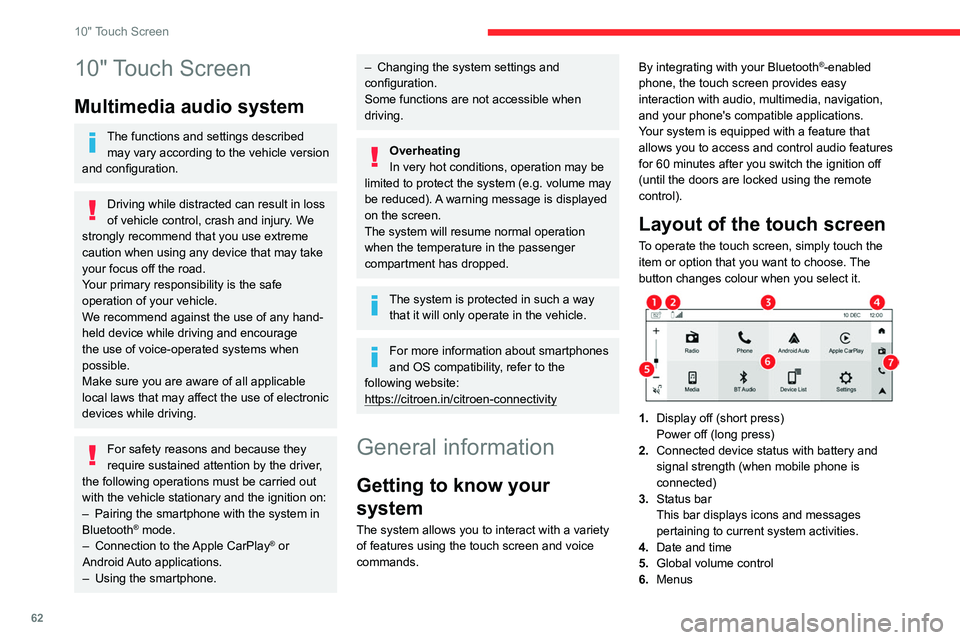
Layout of the touch screen
To operate the touch screen, simply touch the
item or option that you want to choose. The
button changes colour when you select it.
1. Display off (short press)
Power off (long press)
2. Connected device status with battery and
signal strength (when mobile phone is
connected)
3. Status bar
This bar displays icons and messages
pertaining to current system activities.
4. Date and time
5. Global volume control
6. Menus
Page 65 of 104
63
10" Touch Screen
107.Global shortcuts
The touch screen allows quick access to all of
your comfort, navigation, communication and
entertainment options. Using the status and
feature bar, you can quickly select the feature
you want to use.
Cleaning the touch screen
Remove dirt and fingerprints with a dry, clean,
soft cloth.
If dirt or fingerprints are still on the screen, apply
a small amount of cleaning alcohol to the cloth
and try to clean it again.
Do not use detergent or any type of
solvent to clean the touch screen.
Do not pour or spray alcohol onto the touch
screen.
Do not use sharp objects on the screen.
Do not touch the screen with wet hands.
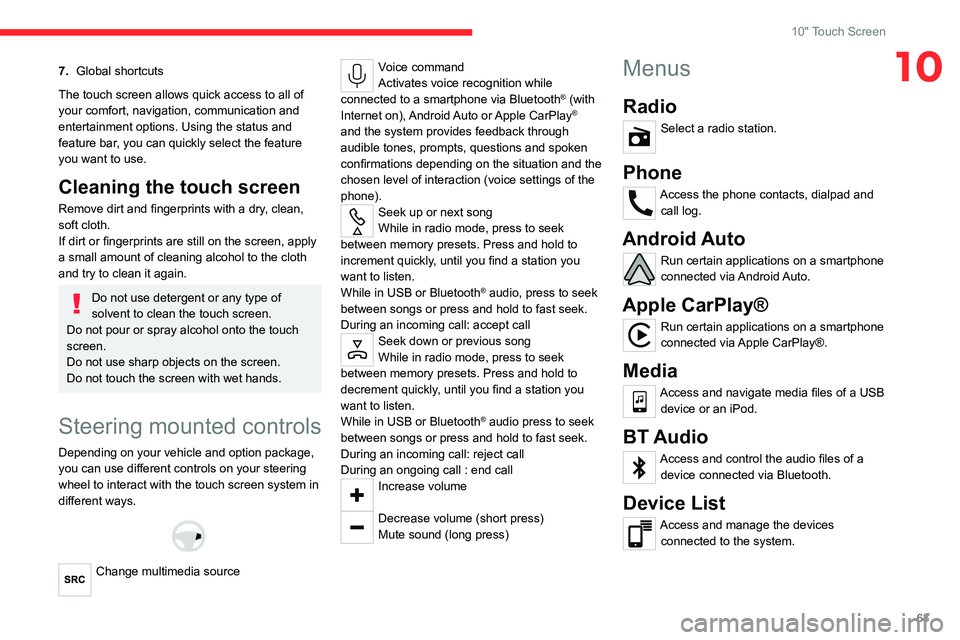
Steering mounted controls
Depending on your vehicle and option package,
you can use different controls on your steering
wheel to interact with the touch screen system in
different ways.
Change multimedia source
Voice command
Activates voice recognition while
connected to a smartphone via Bluetooth
® (with
Internet on), Android Auto or Apple CarPlay®
and the system provides feedback through
audible tones, prompts, questions and spoken
confirmations depending on the situation and the
chosen level of interaction (voice settings of the
phone).
Seek up or next song
While in radio mode, press to seek
between memory presets. Press and hold to
increment quickly, until you find a station you
want to listen.
While in USB or Bluetooth
® audio, press to seek
between songs or press and hold to fast seek.
During an incoming call: accept call
Seek down or previous song
While in radio mode, press to seek
between memory presets. Press and hold to
decrement quickly, until you find a station you
want to listen.
While in USB or Bluetooth
® audio press to seek
between songs or press and hold to fast seek.
During an incoming call: reject call
During an ongoing call : end call
Increase volume
Decrease volume (short press)
Mute sound (long press)
Menus
Radio
Select a radio station.
Phone
Access the phone contacts, dialpad and call log.
Android Auto
Run certain applications on a smartphone
connected via Android Auto.
Apple CarPlay®
Run certain applications on a smartphone
connected via Apple CarPlay®.
Media
Access and navigate media files of a USB device or an iPod.
BT Audio
Access and control the audio files of a device connected via Bluetooth.
Device List
Access and manage the devices connected to the system.
Page 66 of 104
64
10" Touch Screen
Settings
Access the settings (system, phone, audio etc.).
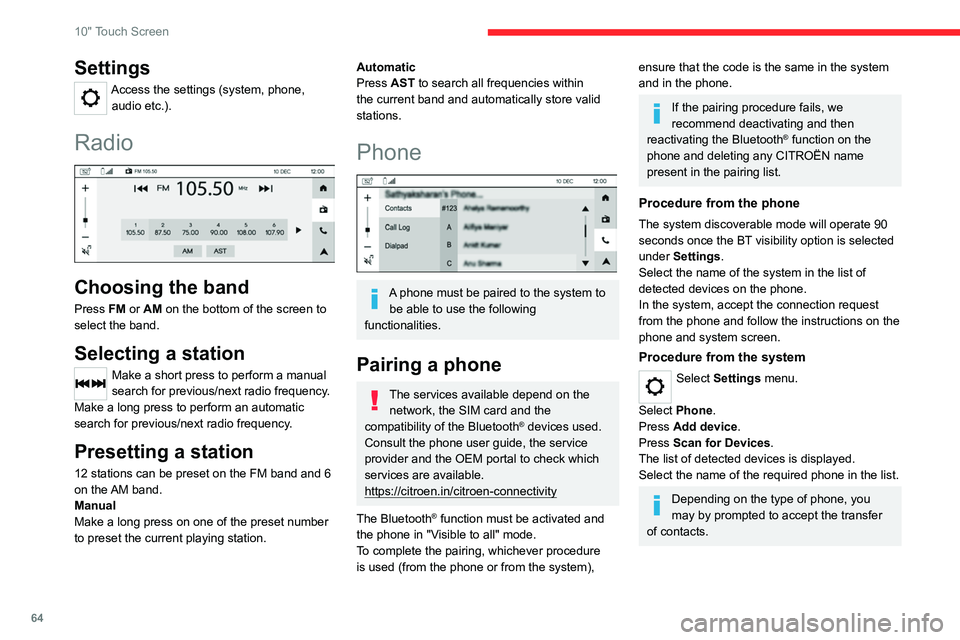
Radio
Choosing the band
Press FM or AM on the bottom of the screen to
select the band.
Selecting a station
Make a short press to perform a manual
search for previous/next radio frequency.
Make a long press to perform an automatic
search for previous/next radio frequency.
Presetting a station
12 stations can be preset on the FM band and 6
on the AM band.
Manual
Make a long press on one of the preset number
to preset the current playing station.
Automatic
Press AST to search all frequencies within
the current band and automatically store valid
stations.
Phone
A phone must be paired to the system to be able to use the following
functionalities.
Pairing a phone
The services available depend on the network, the SIM card and the
compatibility of the Bluetooth
® devices used.
Consult the phone user guide, the service
provider and the OEM portal to check which
services are available.
https://citroen.in/citroen-connectivity
The Bluetooth
® function must be activated and
the phone in "Visible to all" mode.
To complete the pairing, whichever procedure
is used (from the phone or from the system),
ensure that the code is the same in the system
and in the phone.
If the pairing procedure fails, we
recommend deactivating and then
reactivating the Bluetooth
® function on the
phone and deleting any CITROËN name
present in the pairing list.
Procedure from the phone
The system discoverable mode will operate 90
seconds once the BT visibility option is selected
under Settings.
Select the name of the system in the list of
detected devices on the phone.
In the system, accept the connection request
from the phone and follow the instructions on the
phone and system screen.
Procedure from the system
Select Settings menu.
Select Phone.
Press Add device.
Press Scan for Devices .
The list of detected devices is displayed.
Select the name of the required phone in the list.
Depending on the type of phone, you
may by prompted to accept the transfer
of contacts.
Page 67 of 104
65
10" Touch Screen
10Automatic reconnection
On returning to the vehicle, if the last phone
connected is present again (Bluetooth®
activated), it is automatically reconnected after
key on.
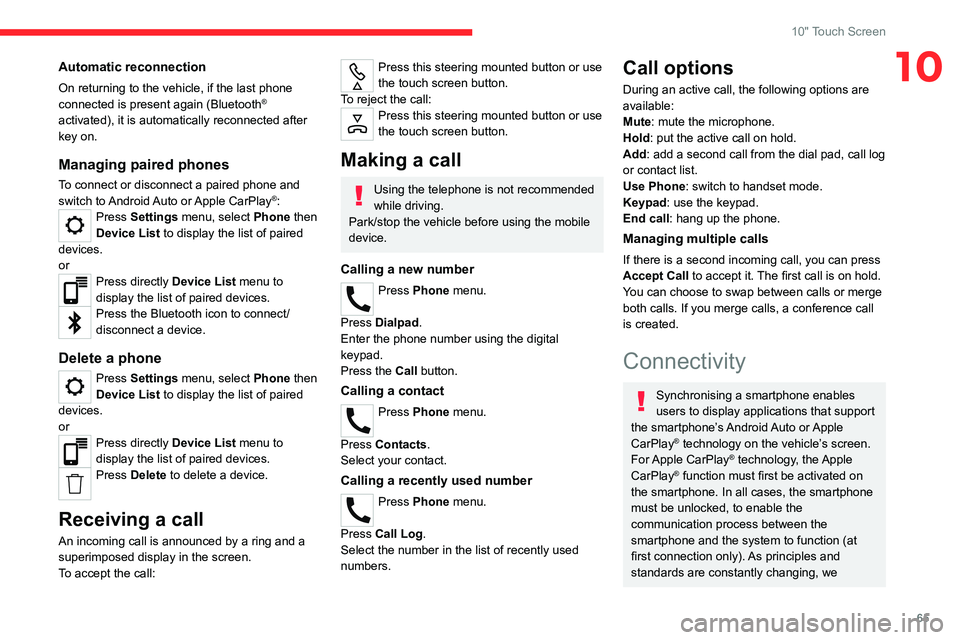
Managing paired phones
To connect or disconnect a paired phone and
switch to Android Auto or Apple CarPlay®: Press Settings menu, select Phone then
Device List to display the list of paired
devices.
or
Press directly Device List menu to
display the list of paired devices.
Press the Bluetooth icon to connect/
disconnect a device.
Delete a phone
Press Settings menu, select Phone then
Device List to display the list of paired
devices.
or
Press directly Device List menu to
display the list of paired devices.
Press Delete to delete a device.
Receiving a call
An incoming call is announced by a ring and a
superimposed display in the screen.
To accept the call:
Press this steering mounted button or use
the touch screen button.
To reject the call:
Press this steering mounted button or use
the touch screen button.
Making a call
Using the telephone is not recommended
while driving.
Park/stop the vehicle before using the mobile
device.
Calling a new number
Press Phone menu.
Press Dialpad.
Enter the phone number using the digital
keypad.
Press the Call button.
Calling a contact
Press Phone menu.
Press Contacts.
Select your contact.
Calling a recently used number
Press Phone menu.
Press Call Log .
Select the number in the list of recently used
numbers.
Call options
During an active call, the following options are
available:
Mute: mute the microphone.
Hold: put the active call on hold.
Add: add a second call from the dial pad, call log
or contact list.
Use Phone: switch to handset mode.
Keypad: use the keypad.
End call : hang up the phone.
Managing multiple calls
If there is a second incoming call, you can press
Accept Call to accept it. The first call is on hold.
You can choose to swap between calls or merge
both calls. If you merge calls, a conference call
is created.
Connectivity
Synchronising a smartphone enables
users to display applications that support
the smartphone’s Android Auto or Apple
CarPlay
® technology on the vehicle’s screen.
For Apple CarPlay® technology, the Apple
CarPlay® function must first be activated on
the smartphone. In all cases, the smartphone
must be unlocked, to enable the
communication process between the
smartphone and the system to function (at
first connection only). As principles and
standards are constantly changing, we
Page 68 of 104
66
10" Touch Screen
recommend keeping the smartphone's
operating system up-to-date, together with the
date and time on the smartphone and the
system.
Refer to your smartphone for Android Auto or
Apple CarPlay
® settings.
For the list of suitable smartphones, visit
the Android Auto and Apple CarPlay®
websites:
https://www.android.com/auto/
https://www.apple.com/in/ios/carplay/
Stop the car before connecting Android
Auto or Apple CarPlay® and follow the
instructions on your phone.
On connecting the USB cable, the
Android Auto or Apple CarPlay® function
deactivates the system's Bluetooth® mode.
Android Auto
Ensure the latest Android Auto
application is available on your
smartphone. If not, install it via "Play Store".
The Android Auto function requires the use
of a compatible smartphone and compatible
applications.
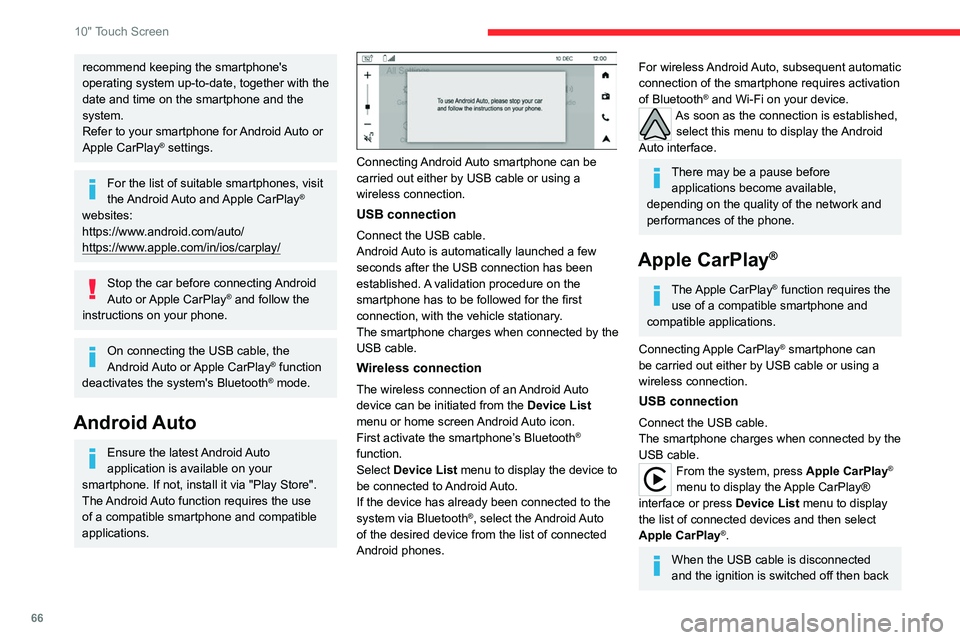
Connecting Android Auto smartphone can be
carried out either by USB cable or using a
wireless connection.
USB connection
Connect the USB cable.
Android Auto is automatically launched a few
seconds after the USB connection has been
established. A validation procedure on the
smartphone has to be followed for the first
connection, with the vehicle stationary.
The smartphone charges when connected by the
USB cable.
Wireless connection
The wireless connection of an Android Auto
device can be initiated from the Device List
menu or home screen Android Auto icon.
First activate the smartphone’s Bluetooth
®
function.
Select Device List menu to display the device to
be connected to Android Auto.
If the device has already been connected to the
system via Bluetooth
®, select the Android Auto
of the desired device from the list of connected
Android phones.
For wireless Android Auto, subsequent automatic
connection of the smartphone requires activation
of Bluetooth
® and Wi-Fi on your device.As soon as the connection is established, select this menu to display the Android
Auto interface.
There may be a pause before applications become available,
depending on the quality of the network and
performances of the phone.
Apple CarPlay®
The Apple CarPlay® function requires the
use of a compatible smartphone and
compatible applications.
Connecting Apple CarPlay
® smartphone can
be carried out either by USB cable or using a
wireless connection.
USB connection
Connect the USB cable.
The smartphone charges when connected by the
USB cable.
From the system, press Apple CarPlay®
menu to display the Apple CarPlay®
interface or press Device List menu to display
the list of connected devices and then select
Apple CarPlay
®.
When the USB cable is disconnected
and the ignition is switched off then back
Page 69 of 104
67
10" Touch Screen
10on, the system will not automatically switch to
other mode; the source must be changed
manually.
Wireless connection
The wireless connection of an Apple CarPlay®
device can only be initiated from the Device List
menu.
First activate the smartphone’s Bluetooth
®
function.
Select Device List menu to display the devices
to be connected to Apple CarPlay
®.
If the device has already been connected to the
system via Bluetooth
®, select Apple CarPlay on
the desired device from the list of connected
Apple phones.
For wireless Apple CarPlay
®, subsequent
automatic connection of the smartphone requires
activation of Bluetooth
® and Wi-Fi on your
device.
Visit the Apple CarPlay
® website at:
https://www.apple.com/ios/carplay/
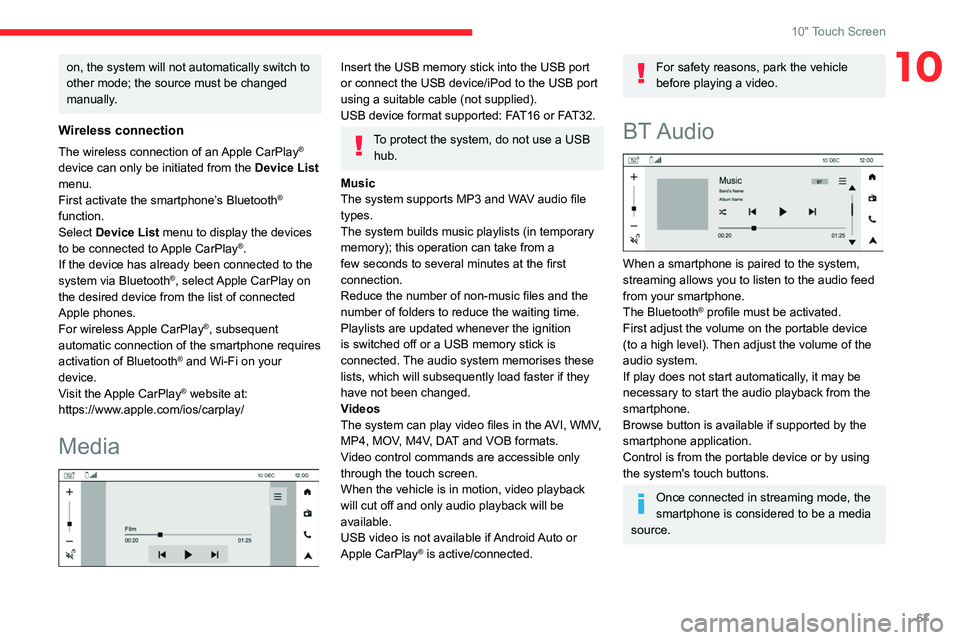
Media
Insert the USB memory stick into the USB port
or connect the USB device/iPod to the USB port
using a suitable cable (not supplied).
USB device format supported: FAT16 or FAT32.
To protect the system, do not use a USB hub.
Music
The system supports MP3 and WAV audio file
types.
The system builds music playlists (in temporary
memory); this operation can take from a
few seconds to several minutes at the first
connection.
Reduce the number of non-music files and the
number of folders to reduce the waiting time.
Playlists are updated whenever the ignition
is switched off or a USB memory stick is
connected. The audio system memorises these
lists, which will subsequently load faster if they
have not been changed.
Videos
The system can play video files in the AVI, WMV,
MP4, MOV, M4V, DAT and VOB formats.
Video control commands are accessible only
through the touch screen.
When the vehicle is in motion, video playback
will cut off and only audio playback will be
available.
USB video is not available if Android Auto or
Apple CarPlay
® is active/connected.
For safety reasons, park the vehicle
before playing a video.
BT Audio
When a smartphone is paired to the system,
streaming allows you to listen to the audio feed
from your smartphone.
The Bluetooth
® profile must be activated.
First adjust the volume on the portable device
(to a high level). Then adjust the volume of the
audio system.
If play does not start automatically, it may be
necessary to start the audio playback from the
smartphone.
Browse button is available if supported by the
smartphone application.
Control is from the portable device or by using
the system's touch buttons.
Once connected in streaming mode, the
smartphone is considered to be a media
source.
Page 70 of 104
68
10" Touch Screen
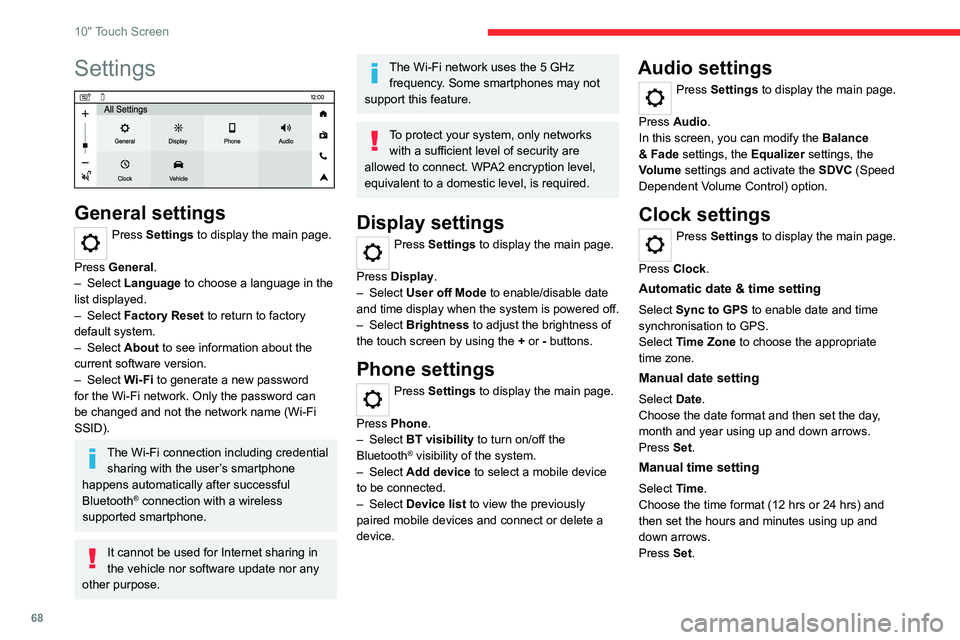
Settings
General settings
Press Settings to display the main page.
Press General.
–
Select Language to choose a language in the
list displayed.
–
Select Factory Reset to return to factory
default system.
–
Select About to see information about the
current software version.
–
Select Wi-Fi to generate a new password
for the Wi-Fi network. Only the password can
be changed and not the network name (Wi-Fi
SSID).
The Wi-Fi connection including credential sharing with the user’s smartphone
happens automatically after successful
Bluetooth
® connection with a wireless
supported smartphone.
It cannot be used for Internet sharing in
the vehicle nor software update nor any
other purpose.
The Wi-Fi network uses the 5 GHz frequency. Some smartphones may not
support this feature.
To protect your system, only networks with a sufficient level of security are
allowed to connect. WPA2 encryption level,
equivalent to a domestic level, is required.
Display settings
Press Settings to display the main page.
Press Display.
–
Select User off Mode to enable/disable date
and time display when the system is powered off.
–
Select Brightness to adjust the brightness of
the touch screen by using the + or - buttons.
Phone settings
Press Settings to display the main page.
Press Phone.
–
Select BT visibility to turn on/off the
Bluetooth
® visibility of the system.
–
Select Add device to select a mobile device
to be connected.
–
Select Device list to view the previously
paired mobile devices and connect or delete a
device.
Audio settings
Press Settings to display the main page.
Press Audio .
In this screen, you can modify the Balance
& Fade settings, the Equalizer settings, the
Volume settings and activate the SDVC (Speed
Dependent Volume Control) option.
Clock settings
Press Settings to display the main page.
Press Clock.
Automatic date & time setting
Select Sync to GPS to enable date and time
synchronisation to GPS.
Select Time Zone to choose the appropriate
time zone.
Manual date setting
Select Date.
Choose the date format and then set the day,
month and year using up and down arrows.
Press Set.
Manual time setting
Select Time.
Choose the time format (12 hrs or 24 hrs) and
then set the hours and minutes using up and
down arrows.
Press Set.