Light CITROEN C3 AIRCROSS 2020 Owner's Manual
[x] Cancel search | Manufacturer: CITROEN, Model Year: 2020, Model line: C3 AIRCROSS, Model: CITROEN C3 AIRCROSS 2020Pages: 308, PDF Size: 9.13 MB
Page 78 of 308

76
Caution, when putting the armrest back
in place, ensure that it is properly locked
and that the red indicator for each strap is
no longer visible. Otherwise, passenger
safety could be compromised if sharp
braking occurs or if there is a collision.
The contents of the boot may be thrown
forward – Risk of serious injury!
12 V accessory socket
Do not exceed the maximum power rating
of the socket (risk of damage to your
device). The connection of an electrical device
not approved by CITROËN, such as a
USB charger, may adversely affect the
operation of vehicle electrical systems,
causing faults such as poor telephone
reception or inter ference with displays in
the screens.
F
T
o connect a 12 V accessory (maximum
power: 120 watts), lift the cover and plug in
the correct adapter.
Boot fittings
1. Rear shelf.
(see details below)
2. Hooks.
(see details on following page)
3. Closed side storage compartments.
(see details on following page)
4. Boot floor (2 positions). 5.
Stowing rings.
6. Storage compar tment beneath the boot
carpet.
(see details on following page)
Rear shelf
To remove the shelf:
F
u nhook the two cords,
F
r
aise the shelf slightly to unclip it, then
remove it.
There are several options for storing the shelf:
-
ei
ther upright behind the front seats,
-
o
r upright against the rear seats in the boot.
Ease of use and comfort
Page 79 of 308

77
To refit the shelf:
F
p
osition the shelf so that the notches are
exactly on the fixing pins,
F
p
ush the shelf down on the pins to clip it,
F
h
ook the two cords.
Hooks
Take care to only hang up lightweight
bags.
Closed side storage compartments
F Pull upwards to unclip and open the removable grill.
Depending on version, the storage
compartment on the right may contain the
vehicle tools.
Boot floor (2 positions)
This two-position floor allows the boot space
to be optimised using the lateral stops at the
edges:
-
Hig
h position ( 100
kg max): to get a flat
floor up to the front seats, when the rear
seats are folded down and pulled back as
far as possible (depending on version).
-
L
ow position: maximum boot volume. To change the height:
F
L
ift and pull the floor towards you using the
central handle, then use the lateral stops to
move it.
F
P
ush the floor all the way for wards to place
it in the desired position.
Ensure that the boot is empty before
moving the boot floor.
Storage compartmentThese can be used to secure shopping bags.
3
Ease of use and comfort
Page 80 of 308

78
Depending on version, it includes:
- a t emporary puncture repair kit with the
vehicle tools,
-
a s
pare wheel with or without the vehicle
tools.
F
R
aise the boot floor as far as possible to
access the storage compartment.
Courtesy lamps
1. Front courtesy lamp
2. Front map reading lamps
3. Rear courtesy lamp
4. Rear map reading lamps
Front and rear courtesy lamps
In this position, the courtesy lamp
comes on gradually:
-
w
hen the vehicle is unlocked,
-
w
hen the key is removed from the ignition,
-
w
hen opening a door,
-
w
hen the remote control locking button is
activated, in order to locate your vehicle.
It switches off gradually:
-
w
hen the vehicle is locked,
-
w
hen the ignition is switched on,
-
3
0
seconds after the last door is closed. Permanently off.
Permanent lighting.
Front and rear map reading
lamps
F With the ignition on, operate the corresponding switch.
Take care not to put anything in contact
with the courtesy lamps.
In "permanent lighting" mode, the lighting time
varies according to the circumstances:
-
w
hen the ignition is off, approximately ten
minutes,
-
i
n energy saving mode, approximately thirty
seconds,
-
w
ith the engine running, unlimited. When the courtesy lamp is in the
"permanent lighting" position, the rear
courtesy lamp also comes on, except if it
is in the "permanently off " position.
To switch off the rear courtesy lamp, put it
in the "permanently off " position.
Ease of use and comfort
Page 81 of 308

79
Switching on
The interior mood lighting switches off
automatically when the sidelamps are
switched
off.Interior mood lighting
The dimmed passenger compartment lighting
improves visibility in the vehicle when the light
i s p o o r.
At night, the central console lighting and
panoramic roof lighting (if fitted to your vehicle)
come on automatically when the sidelamps are
switched on.
3
Ease of use and comfort
Page 82 of 308

80
Lighting control
In some weather conditions (e.g. low
temperature or humidity), the presence
of misting on the internal sur face of the
glass of the headlamps and rear lamps is
normal; it disappears after the lamps have
been on for a few minutes.
If one or more lamps fails, a message
asks you to check the lamp or lamps
concerned.
Travelling abroad
If planning to use your vehicle in a country
that drives on the other side of the road,
the headlamp dipped beams must be
adjusted to avoid dazzling oncoming
drivers. Contact a CITROËN dealer or a
qualified workshop.
Main lighting
Selection of main lighting
mode
Turn the ring to align the desired symbol with
the marking.Automatic illumination of headlamps/
daytime running lamps.
Sidelamps only.
Dipped or main beam headlamps.
Headlamp dipping
In "AUTO " and sidelamps modes, the driver
can flash the main beam headlamps by pulling
the lever.
Display
Illumination of the corresponding indicator
lamp in the instrument panel confirms that the
lighting selected is on.
Foglamps
Rear foglamp
Pull the stalk to switch between dipped and
main beam headlamps.
It operates with the sidelamps or
dipped beam headlamps on.
F
T
o switch it on, turn the ring for wards.
When the lighting is switched off automatically
(" AUTO " position), the foglamp and the dipped
beam headlamps will remain on.
F
T
o switch it off, turn the ring backwards.
Lighting and visibility
Page 83 of 308

81
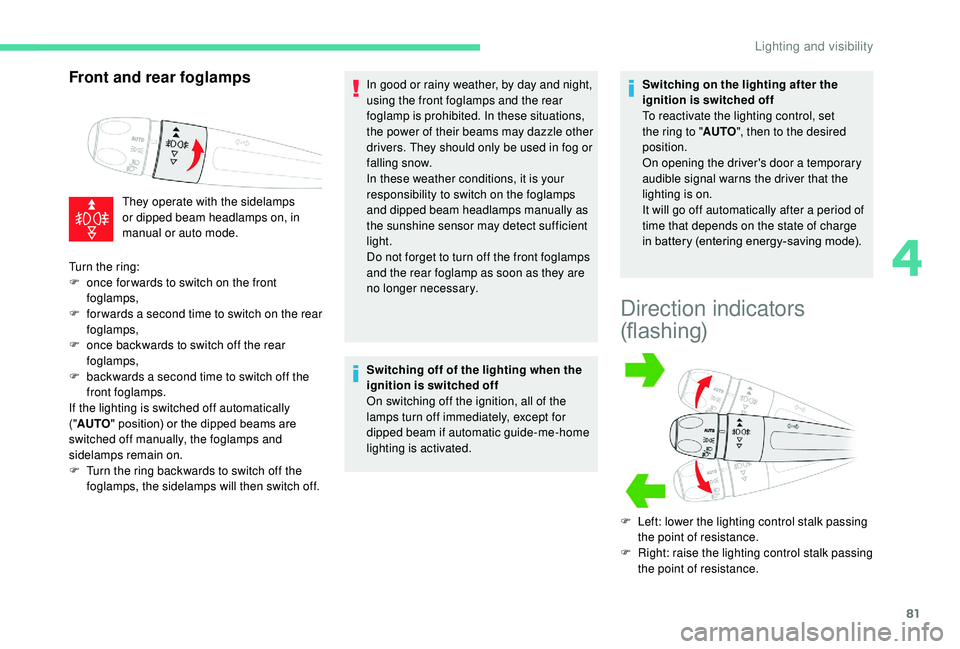
Front and rear foglamps
They operate with the sidelamps
or dipped beam headlamps on, in
manual or auto mode.In good or rainy weather, by day and night,
using the front foglamps and the rear
foglamp is prohibited. In these situations,
the power of their beams may dazzle other
drivers. They should only be used in fog or
falling snow.
In these weather conditions, it is your
responsibility to switch on the foglamps
and dipped beam headlamps manually as
the sunshine sensor may detect sufficient
light.
Do not forget to turn off the front foglamps
and the rear foglamp as soon as they are
no longer necessary.
Switching off of the lighting when the
ignition is switched off
On switching off the ignition, all of the
lamps turn off immediately, except for
dipped beam if automatic guide-me-home
lighting is activated. Switching on the lighting after the
ignition is switched off
To reactivate the lighting control, set
the ring to "
AUTO", then to the desired
position.
On opening the driver's door a temporary
audible signal warns the driver that the
lighting is on.
It will go off automatically after a period of
time that depends on the state of charge
in battery (entering energy-saving mode).
Direction indicators
(flashing)
F Left: lower the lighting control stalk passing the point of resistance.
F
R
ight: raise the lighting control stalk passing
the point of resistance.
Turn the ring:
F
o
nce for wards to switch on the front
foglamps,
F
f
or wards a second time to switch on the rear
foglamps,
F
o
nce backwards to switch off the rear
foglamps,
F
b
ackwards a second time to switch off the
front foglamps.
If the lighting is switched off automatically
(" AUTO " position) or the dipped beams are
switched off manually, the foglamps and
sidelamps remain on.
F
T
urn the ring backwards to switch off the
foglamps, the sidelamps will then switch off.
4
Lighting and visibility
Page 84 of 308

82
Three flashes
F Press briefly upwards or downwards, without going beyond the point of
resistance; the direction indicators will flash
3 times.
Automatic illumination of
headlamps
When the ring is at the " AUTO" position
and a low level of ambient light is detected
by a sunshine sensor, the number plate
lamps,
sidelamps and dipped beam headlamps
are switched on automatically, without any
action on the part of the driver. They can also
come on if rain is detected, at the same time as
automatic operation of the windscreen wipers.
As soon as the brightness returns to a
sufficient level or after the windscreen wipers
are switched off, the lamps are switched off
automatically.
Malfunction
In the event of a malfunction of the
sunshine sensor, the lighting comes
on, this warning lamp is displayed in
the instrument panel accompanied
by an audible signal and/or a
message.
Contact a CITROËN dealer or a
qualified workshop. Do not cover the sunshine sensor,
integrated with the rain sensor and located
at the top centre of the windscreen behind
the rear view mirror; the associated
functions would no longer be controlled.
In fog or snow, the sunshine sensor may
detect sufficient light. In this case, the
lighting will not come on automatically.
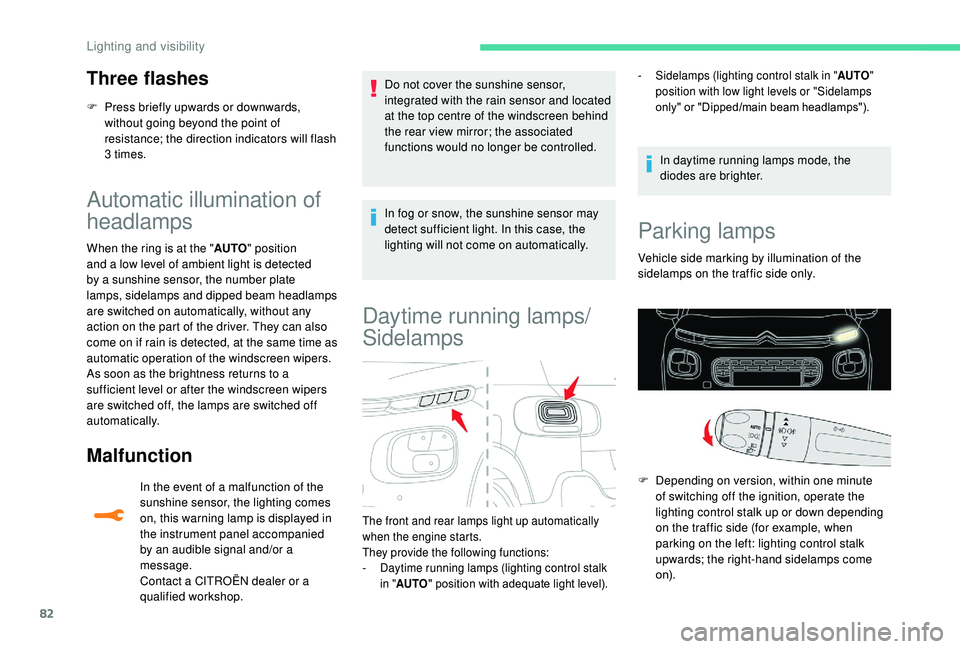
Daytime running lamps/
Sidelamps
In daytime running lamps mode, the
diodes are brighter.
The front and rear lamps light up automatically
when the engine starts.
They provide the following functions:
-
D
aytime running lamps (lighting control stalk
in " AUTO " position with adequate light level). -
S
idelamps (lighting control stalk in "
AUTO"
position with low light levels or "Sidelamps
only" or "Dipped/main beam headlamps").
Parking lamps
Vehicle side marking by illumination of the
sidelamps on the traffic side only.
F
D
epending on version, within one minute
of switching off the ignition, operate the
lighting control stalk up or down depending
on the traffic side (for example, when
parking on the left: lighting control stalk
upwards; the right-hand sidelamps come
o n).
Lighting and visibility
Page 85 of 308

83
This is confirmed by an audible signal and
illumination of the corresponding direction
indicator lamp in the instrument panel.
To switch off the parking lamps, return the
lighting control stalk to the central position.
Guide-me-home lighting
Automatic
With the "Automatic illumination of headlamps"
function activated (lighting control stalk
at the AUTO position), under low ambient
light, the dipped beam headlamps come on
automatically when the ignition is switched off.
Activation, deactivation and the duration of the
guide-me-home lighting are set in the vehicle
configuration menu.
Manual
The temporary illumination of the dipped beam
headlamps after the vehicle's ignition has been
switched off makes the driver's exit easier
when the light is poor.
Switching on
F
W
ith the ignition off, "flash" the headlamps
using the lighting control stalk.
F
A
nother "headlamp flash" switches the
function off.
Switching off
Manual guide-me-home lighting goes off
automatically at the end of a given period of time.
Automatic exterior
welcome lighting
With the "Automatic headlamp illumination"
function activated, under low ambient light, the
sidelamps and dipped beam headlamps come
on automatically when the vehicle is unlocked.
Activation, deactivation and the duration of the
exterior welcome lighting are set in the vehicle
configuration menu.
Automatic headlamp
dipping
System which automatically changes between
dipped and main beam according to the
ambient light level and the driving conditions,
using a camera located at the top of the
windscreen.
This system is a driving aid.
The driver remains responsible for the
vehicle's lighting, its correct use for the
prevailing conditions of light, visibility,
traffic and obser vation of driving and
vehicle regulations.
The system will be operational as soon as
you have exceeded 16
mph (25 km/h).
If the speed drops below 9
mph (15 km/h),
the system no longer operates.
4
Lighting and visibility
Page 86 of 308

84
Activation/Deactivation
F Turn the lighting control stalk ring to the "AUTO " position.
When deactivated, the lighting system changes
to "automatic illumination of headlamps" mode.
The system state remains in memory when the
ignition is switched off.
Operation
F In the Vehicle/Driving menu,
select the " Driving functions "
tab, then " Automatic headlamp
dip ".
If the ambient light level is sufficient and/or if
the traffic conditions do not allow illumination of
the main beam headlamps: -
d
ipped beam is maintained,
these indicator lamps come on
in the instrument panel.
-
m
ain beam comes on
automatically: these indicator
lamps come on in the instrument
panel.
If the ambient light level is very low and the
traffic conditions permit: When the system detects thick fog, it
temporarily deactivates the function.
As soon as the vehicle leaves the area of thick
fog, the function reactivates automatically.
This indicator lamp goes off while
the function is deactivated.
If the situation requires a change of headlamp
beam, the driver can take over at any time.
F
F
lashing the headlamps pauses the function
and the system changes to "automatic
illumination of headlamps" mode:
-
i
f the "AUTO" and "Dipped beam"
indicator lamps were on, the system
changes to main beam,
-
i
f the "AUTO" and "Main beam" indicator
lamps were on, the system changes to
dipped beam.
To reactivate the system, flash the headlamps
again.
Pause
Lighting and visibility
Page 87 of 308

85
The system may suffer inter ference or not
work correctly:
-
u
nder poor visibility conditions (snow,
heavy rain, etc.),
-
i
f the windscreen in front of the camera
is dirty, misted or covered (by a sticker,
e t c .),
-
i
f the vehicle is facing highly reflective
signs.
When the system detects thick fog, it
temporarily deactivates the function.
The system is not able to detect:
-
r
oad users that do not have their own
lighting, such as pedestrians,
-
v
ehicles whose lighting is obscured
(for example, vehicles driving behind a
safety barrier on a motor way),
-
v
ehicles at the top or bottom of a
steep slope, on winding roads, on
crossroads.
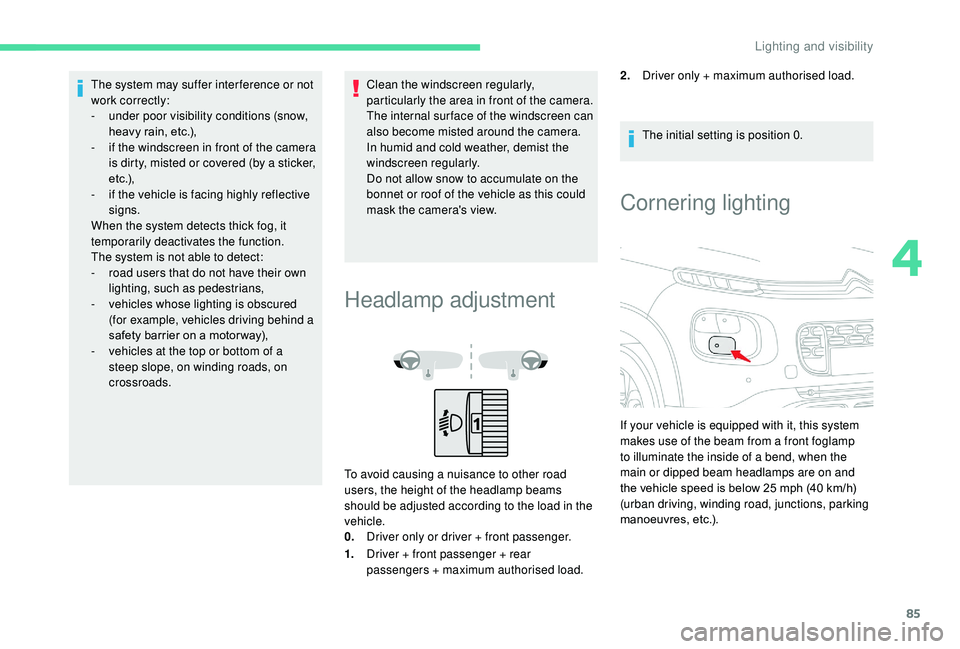
Headlamp adjustment
To avoid causing a nuisance to other road
users, the height of the headlamp beams
should be adjusted according to the load in the
vehicle.
0. Driver only or driver + front passenger.
1. Driver + front passenger + rear
passengers + maximum authorised load. The initial setting is position 0.
Cornering lighting
If your vehicle is equipped with it, this system
makes use of the beam from a front foglamp
to illuminate the inside of a bend, when the
main or dipped beam headlamps are on and
the vehicle speed is below 25 mph (40 km/h)
(urban driving, winding road, junctions, parking
manoeuvres, etc.).
Clean the windscreen regularly,
particularly the area in front of the camera.
The internal sur face of the windscreen can
also become misted around the camera.
In humid and cold weather, demist the
windscreen regularly.
Do not allow snow to accumulate on the
bonnet or roof of the vehicle as this could
mask the camera's view.
2.
Driver only + maximum authorised load.
4
Lighting and visibility