Mirror CITROEN C3 AIRCROSS 2021 Handbook (in English)
[x] Cancel search | Manufacturer: CITROEN, Model Year: 2021, Model line: C3 AIRCROSS, Model: CITROEN C3 AIRCROSS 2021Pages: 244, PDF Size: 6.29 MB
Page 4 of 244
2
Contents
■
Overview
■
Eco-driving
1Instruments
Instrument panels 7
Warning and indicator lamps 8
Indicators 13
Distance recorders 16
Equipment configuration for vehicles
without screen
16
Monochrome screen C 17
Touch screen 18
Trip computer 19
Setting the date and time 21
2Access
Remote control 23
Keyless Entry and Starting 24
Emergency procedures 26
Doors 29
Boot 29
Central locking 30
Alarm 30
Panoramic sunroof 32
Electric windows 34
3Ease of use and comfort
Front seats 36
Rear seats 38
Steering wheel adjustment 41
Mirrors 41
Ventilation 42
Heating/Manual air conditioning 43
Automatic air conditioning 44
Front demist - defrost 46
Heated windscreen 46
Rear screen demist - defrost 46
Front fittings 47
Rear fittings 50
Boot fittings 51
Courtesy lamps 53
Interior ambient lighting 53
Boot lighting 54
4Lighting and visibility
Lighting control 55
Direction indicators (flashers) 56
Automatic illumination of headlamps 57
Daytime running lamps / Sidelamps 57
Automatic headlamp dipping 58
Headlamp beam height adjustment 59
Wiper control stalk 60
Changing a wiper blade 62
Automatic wipers 62
5Safety
General safety recommendations 64
Hazard warning lamps 64
Horn 65
Emergency or assistance call 65
Electronic stability control (ESC) 67
Grip control 68
Hill Assist Descent 69
Seat belts 70
Airbags 73
Child seats 75
Deactivating the front passenger airbag 77
ISOFIX child seats 80
i-Size child seats 83
child lock 84
6Driving
Driving recommendations 86
Starting / Switching off the engine
with the key
87
Starting / Switching off the engine
with Keyless Entry and Starting
89
Parking brake 91
5-speed manual gearbox 91
6-speed manual gearbox 91
Automatic gearbox (EAT6) 92
Gear efficiency indicator 94
Hill start assist 94
Stop & Start 95
Under-inflation detection 97
Driving and manoeuvring aids - General
recommendations
98
Head-up display 99
Memorising speeds 101
Speed Limit Recognition
and Recommendation
101
Speed limiter 104
Cruise control -
particular recommendations
106
Cruise control 106
Active Safety Brake with
Collision Risk Alert and Intelligent
emergency braking assistance
108
Distraction detection 111
Lane Departure Warning System 11 2
Page 6 of 244
4
Overview
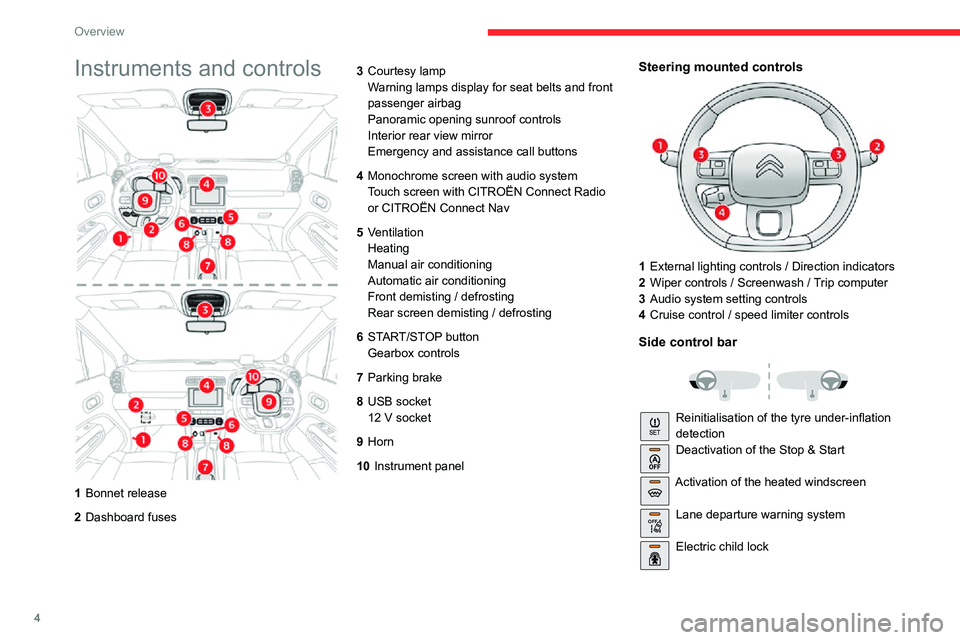
Instruments and controls
1Bonnet release
2 Dashboard fuses 3
Courtesy lamp
Warning lamps display for seat belts and front
passenger airbag
Panoramic opening sunroof controls
Interior rear view mirror
Emergency and assistance call buttons
4 Monochrome screen with audio system
Touch screen with CITROËN Connect Radio
or CITROËN Connect Nav
5 Ventilation
Heating
Manual air conditioning
Automatic air conditioning
Front demisting / defrosting
Rear screen demisting / defrosting
6 START/STOP button
Gearbox controls
7 Parking brake
8 USB socket
12 V socket
9Horn
10 Instrument panel
Steering mounted controls
1External lighting controls / Direction indicators
2 Wiper controls / Screenwash / Trip computer
3 Audio system setting controls
4 Cruise control / speed limiter controls
Side control bar
Reinitialisation of the tyre under-inflation
detectionDeactivation of the Stop & Start
Activation of the heated windscreen
OFF Lane departure warning system
Electric child lock
Page 20 of 244
18
Instruments
Menus
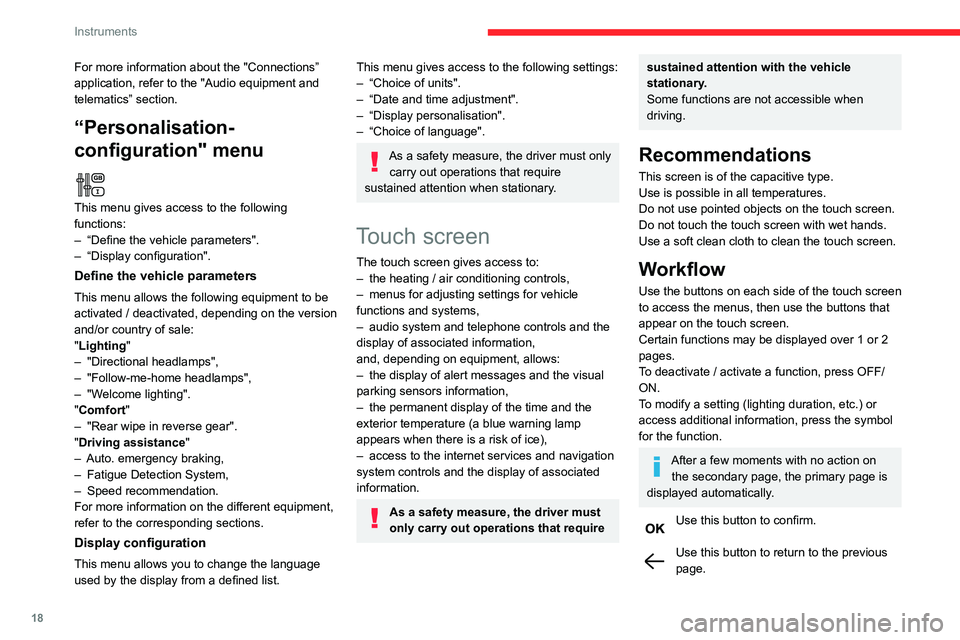
Radio Media.
See “Audio equipment and telematics”
section..
Mirror Screen or Connected navigation
(depending on equipment) .
See “Audio equipment and telematics” section..
Air conditioning.Allows adjustment of the various settings
for temperature, air flow, etc.
For more information on Heating, Manual air
conditioning and Automatic air conditioning ,
please refer to the corresponding sections.
Telephone.See “Audio equipment and telematics”
section..
Applications.
Allows the display of the connected
services available.
See “Audio equipment and telematics” section.
Vehicle or Driving (depending on
equipment) .
Allows the activation, deactivation and
adjustment of settings for certain functions.
For more information about the "Connections” application, refer to the "Audio equipment and
telematics” section.
“Personalisation-
configuration" menu
This menu gives access to the following
functions:
– “Define the vehicle parameters".– “Display configuration".
Define the vehicle parameters
This menu allows the following equipment to be
activated / deactivated, depending on the version
and/or country of sale:
"Lighting "
– "Directional headlamps",– "Follow-me-home headlamps",– "Welcome lighting"."Comfort"– "Rear wipe in reverse gear".
"Driving assistance"– Auto. emergency braking,– Fatigue Detection System,– Speed recommendation.For more information on the different equipment,
refer to the corresponding sections.
Display configuration
This menu allows you to change the language
used by the display from a defined list.
This menu gives access to the following settings:– “Choice of units".– “Date and time adjustment".– “Display personalisation".– “Choice of language".
As a safety measure, the driver must only
carry out operations that require
sustained attention when stationary.
Touch screen
The touch screen gives access to:– the heating / air conditioning controls,– menus for adjusting settings for vehicle functions and systems,– audio system and telephone controls and the display of associated information,
and, depending on equipment, allows:
– the display of alert messages and the visual parking sensors information,– the permanent display of the time and the exterior temperature (a blue warning lamp
appears when there is a risk of ice),
– access to the internet services and navigation system controls and the display of associated
information.
As a safety measure, the driver must
only carry out operations that require
sustained attention with the vehicle
stationary.
Some functions are not accessible when
driving.
Recommendations
This screen is of the capacitive type.
Use is possible in all temperatures.
Do not use pointed objects on the touch screen.
Do not touch the touch screen with wet hands.
Use a soft clean cloth to clean the touch screen.
Workflow
Use the buttons on each side of the touch screen
to access the menus, then use the buttons that
appear on the touch screen.
Certain functions may be displayed over 1 or 2
pages.
To deactivate / activate a function, press OFF/
ON.
To modify a setting (lighting duration, etc.) or
access additional information, press the symbol
for the function.
After a few moments with no action on the secondary page, the primary page is
displayed automatically.
Use this button to confirm.
Use this button to return to the previous page.
Page 21 of 244
19
Instruments
1Menus
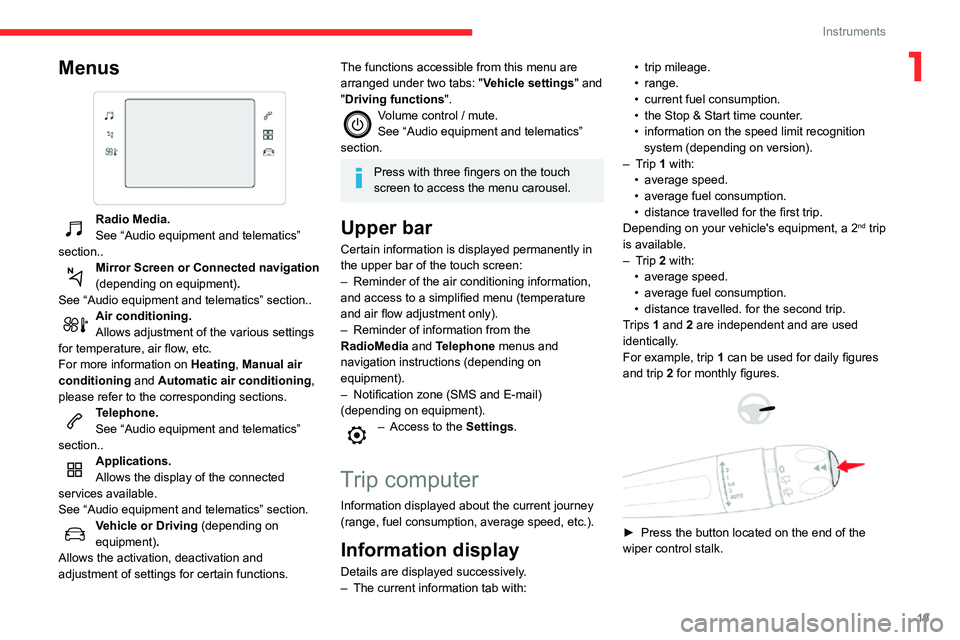
Radio Media.
See “Audio equipment and telematics”
section..
Mirror Screen or Connected navigation
(depending on equipment) .
See “Audio equipment and telematics” section..
Air conditioning.Allows adjustment of the various settings
for temperature, air flow, etc.
For more information on Heating, Manual air
conditioning and Automatic air conditioning ,
please refer to the corresponding sections.
Telephone.See “Audio equipment and telematics”
section..
Applications.
Allows the display of the connected
services available.
See “Audio equipment and telematics” section.
Vehicle or Driving (depending on
equipment) .
Allows the activation, deactivation and
adjustment of settings for certain functions.
The functions accessible from this menu are
arranged under two tabs: " Vehicle settings" and
"Driving functions ".
Volume control / mute.See “Audio equipment and telematics”
section.
Press with three fingers on the touch
screen to access the menu carousel.
Upper bar
Certain information is displayed permanently in
the upper bar of the touch screen:
– Reminder of the air conditioning information, and access to a simplified menu (temperature
and air flow adjustment only).
– Reminder of information from the RadioMedia and Telephone menus and
navigation instructions (depending on
equipment).
– Notification zone (SMS and E-mail) (depending on equipment).– Access to the Settings.
Trip computer
Information displayed about the current journey
(range, fuel consumption, average speed, etc.).
Information display
Details are displayed successively.– The current information tab with:
• trip mileage.• range.• current fuel consumption.• the Stop & Start time counter .• information on the speed limit recognition system (depending on version).– Trip 1 with:• average speed.• average fuel consumption.• distance travelled for the first trip.Depending on your vehicle's equipment, a 2nd trip
is available.
– Trip 2 with:• average speed.• average fuel consumption.• distance travelled. for the second trip.Trips 1 and 2 are independent and are used
identically.
For example, trip 1 can be used for daily figures
and trip 2 for monthly figures.
► Press the button located on the end of the
wiper control stalk.
Page 25 of 244
23
Access
2Remote control
General points
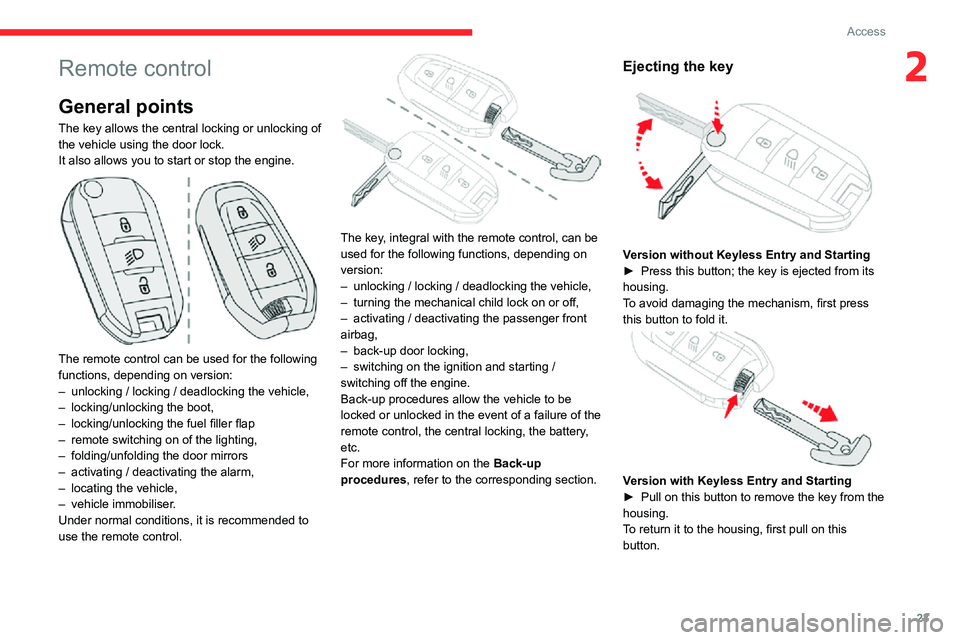
The key allows the central locking or unlocking of
the vehicle using the door lock.
It also allows you to start or stop the engine.
The remote control can be used for the following
functions, depending on version:
– unlocking / locking / deadlocking the vehicle,– locking/unlocking the boot,– locking/unlocking the fuel filler flap– remote switching on of the lighting,– folding/unfolding the door mirrors– activating / deactivating the alarm,– locating the vehicle,– vehicle immobiliser.Under normal conditions, it is recommended to
use the remote control.
The key, integral with the remote control, can be
used for the following functions, depending on
version:
– unlocking / locking / deadlocking the vehicle,– turning the mechanical child lock on or off,– activating / deactivating the passenger front airbag,– back-up door locking,– switching on the ignition and starting / switching off the engine.
Back-up procedures allow the vehicle to be
locked or unlocked in the event of a failure of the
remote control, the central locking, the battery,
etc.
For more information on the Back-up
procedures, refer to the corresponding section.
Ejecting the key
Version without Keyless Entry and Starting► Press this button; the key is ejected from its housing.
To avoid damaging the mechanism, first press
this button to fold it.
Version with Keyless Entry and Starting► Pull on this button to remove the key from the housing.
To return it to the housing, first pull on this
button.
Page 38 of 244
36
Ease of use and comfort
Correct driving position
For safety reasons, adjustments must
only be made when the vehicle is
stationary.
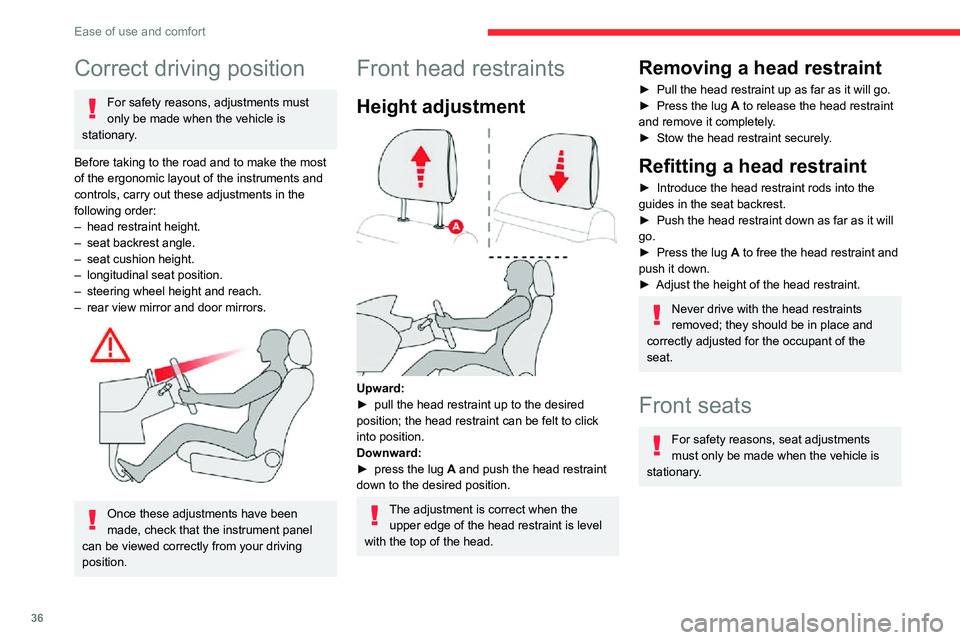
Before taking to the road and to make the most
of the ergonomic layout of the instruments and
controls, carry out these adjustments in the
following order:
– head restraint height.– seat backrest angle.– seat cushion height.– longitudinal seat position.– steering wheel height and reach.– rear view mirror and door mirrors.
Once these adjustments have been
made, check that the instrument panel
can be viewed correctly from your driving
position.
Front head restraints
Height adjustment
Upward:► pull the head restraint up to the desired position; the head restraint can be felt to click
into position.
Downward:
► press the lug A and push the head restraint
down to the desired position.
The adjustment is correct when the upper edge of the head restraint is level
with the top of the head.
Removing a head restraint
► Pull the head restraint up as far as it will go.► Press the lug A to release the head restraint
and remove it completely.
► Stow the head restraint securely .
Refitting a head restraint
► Introduce the head restraint rods into the guides in the seat backrest.► Push the head restraint down as far as it will go.► Press the lug A to free the head restraint and
push it down.
► Adjust the height of the head restraint.
Never drive with the head restraints
removed; they should be in place and
correctly adjusted for the occupant of the
seat.
Front seats
For safety reasons, seat adjustments
must only be made when the vehicle is
stationary.
Adjustments
Forwards-backwards
► Raise the control bar and slide the seat forwards or backwards.► Release the bar to lock the seat in position on one of the notches.
Before moving the seat backwards,
ensure that there is no person or object
that might prevent the full travel of the seat.
There is a risk of trapping or pinching
passengers if present in the rear seats or of
jamming the seat if large objects are placed
on the floor behind the seat.
Height
(driver only)
Page 43 of 244

41
Ease of use and comfort
3Steering wheel
adjustment
► When stationary, pull the control lever
to release the steering wheel adjustment
mechanism.
► Adjust the height and reach to suit your driving position.► Push the control lever to lock the steering wheel adjustment mechanism.
As a safety measure, these adjustments should only be carried out with the
vehicle stationary.
Mirrors
Door mirrors
Demisting - Defrosting
Demisting-defrosting of the door mirrors operates with the engine running, by
switching on the heated rear screen.
For more information on Demisting - defrosting
the rear screen , refer to the corresponding
section.
Adjustment
► Move control A or turn control C (depending
on the version you have) to the right or to the left
to select the corresponding mirror.
► Move control B or C (depending on the
version you have) in any of the four directions to
adjust.
► Return control A or C (depending on the
version you have) to its centre position.
As a safety measure, the mirrors should be adjusted to reduce the "blind spots".
The objects observed are, in reality, closer
than they appear.
Take this into account in order to correctly
judge the distance of vehicles approaching
from behind.
Manual folding
You can manually fold the mirrors (parking
obstruction, narrow garage, etc.)
Page 44 of 244
42
Ease of use and comfort
► Turn the mirror towards the vehicle.
Electric folding
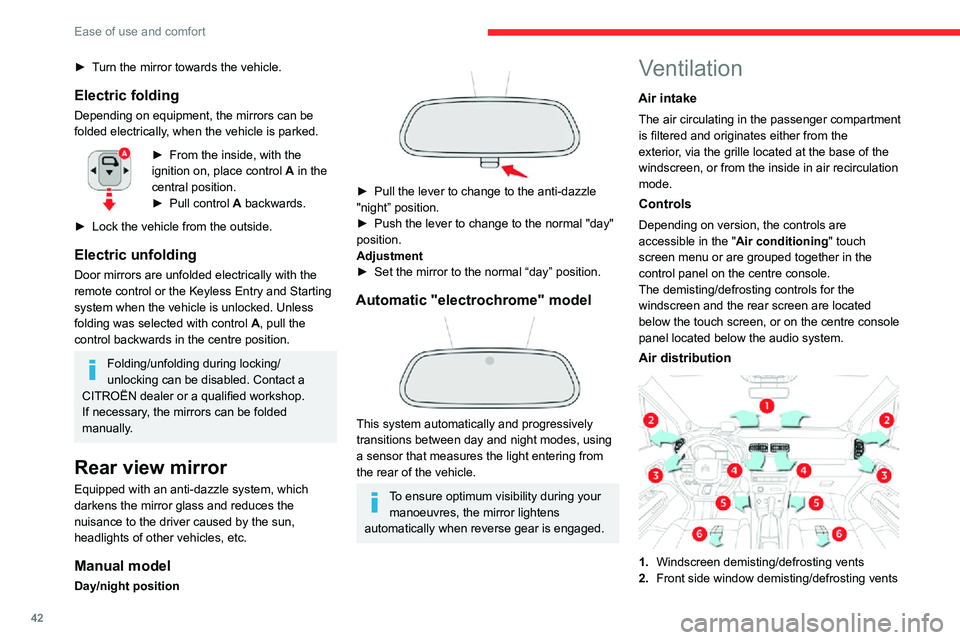
Depending on equipment, the mirrors can be
folded electrically, when the vehicle is parked.
► From the inside, with the ignition on, place control A in the
central position.
► Pull control A backwards.
► Lock the vehicle from the outside.
Electric unfolding
Door mirrors are unfolded electrically with the
remote control or the Keyless Entry and Starting
system when the vehicle is unlocked. Unless
folding was selected with control A, pull the
control backwards in the centre position.
Folding/unfolding during locking/
unlocking can be disabled. Contact a
CITROËN dealer or a qualified workshop.
If necessary, the mirrors can be folded
manually.
Rear view mirror
Equipped with an anti-dazzle system, which
darkens the mirror glass and reduces the
nuisance to the driver caused by the sun,
headlights of other vehicles, etc.
Manual model
Day/night position
► Pull the lever to change to the anti-dazzle "night” position.
► Push the lever to change to the normal "day" position.
Adjustment
► Set the mirror to the normal “day” position.
Automatic "electrochrome" model
This system automatically and progressively
transitions between day and night modes, using
a sensor that measures the light entering from
the rear of the vehicle.
To ensure optimum visibility during your manoeuvres, the mirror lightens
automatically when reverse gear is engaged.
Ventilation
Air intake
The air circulating in the passenger compartment
is filtered and originates either from the
exterior, via the grille located at the base of the
windscreen, or from the inside in air recirculation
mode.
Controls
Depending on version, the controls are
accessible in the " Air conditioning" touch
screen menu or are grouped together in the
control panel on the centre console.
The demisting/defrosting controls for the
windscreen and the rear screen are located
below the touch screen, or on the centre console
panel located below the audio system.
Air distribution
1. Windscreen demisting/defrosting vents
2. Front side window demisting/defrosting vents
3.Adjustable and closable side air vents
4. Adjustable and closable central air vents
5. Air outlets to the front footwells
6. Air outlets to the rear footwells
Advice
Using the ventilation and air
conditioning system
► To ensure that air is distributed evenly, keep the external air intake grilles at the base
of the windscreen, the nozzles, the vents, the
air outlets and the air extractor in the boot
free from obstructions.
► Do not cover the sunshine sensor located on the dashboard; this sensor is used to
regulate the automatic air conditioning
system.
► Operate the air conditioning system for at least 5 to 10 minutes once or twice a month to
keep it in perfect working order.
► If the system does not produce cold air, switch it off and contact a CITROËN dealer or
a qualified workshop.
When towing the maximum load on a steep
gradient in high temperatures, switching off
the air conditioning increases the available
engine power, enhancing the towing capacity.
Avoid driving for too long with the
ventilation off or with prolonged operation
Page 48 of 244
46
Ease of use and comfort
Front demist - defrost
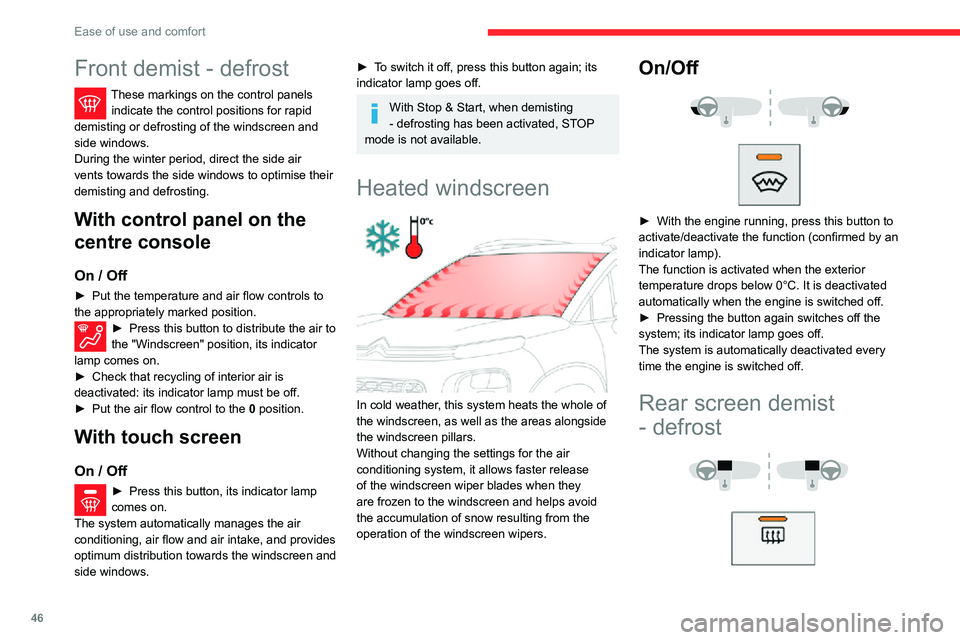
These markings on the control panels indicate the control positions for rapid
demisting or defrosting of the windscreen and
side windows.
During the winter period, direct the side air
vents towards the side windows to optimise their
demisting and defrosting.
With control panel on the
centre console
On / Off
► Put the temperature and air flow controls to the appropriately marked position.► Press this button to distribute the air to the "Windscreen" position, its indicator
lamp comes on.
► Check that recycling of interior air is deactivated: its indicator lamp must be off.► Put the air flow control to the 0 position.
With touch screen
On / Off
► Press this button, its indicator lamp comes on.
The system automatically manages the air
conditioning, air flow and air intake, and provides
optimum distribution towards the windscreen and
side windows.
► To switch it off, press this button again; its indicator lamp goes off.
With Stop & Start, when demisting
- defrosting has been activated, STOP
mode is not available.
Heated windscreen
In cold weather, this system heats the whole of
the windscreen, as well as the areas alongside
the windscreen pillars.
Without changing the settings for the air
conditioning system, it allows faster release
of the windscreen wiper blades when they
are frozen to the windscreen and helps avoid
the accumulation of snow resulting from the
operation of the windscreen wipers.
On/Off
► With the engine running, press this button to activate/deactivate the function (confirmed by an
indicator lamp).
The function is activated when the exterior
temperature drops below 0°C. It is deactivated
automatically when the engine is switched off.
► Pressing the button again switches off the system; its indicator lamp goes off.
The system is automatically deactivated every
time the engine is switched off.
Rear screen demist
- defrost
On / Off
► Press this button to demist/defrost the rear screen and, depending on version, the door
mirrors. The button indicator lamp comes on.
Defrosting switches off automatically to prevent
excessive electrical consumption.
► It is possible to stop the demisting / defrosting operation before it is switched off automatically
by pressing this button again. The button
indicator lamp goes off.
Switch off the demisting/defrosting of the rear screen and door mirrors as
soon as appropriate, as lower current
consumption results in reduced fuel
consumption.
Rear screen demisting - defrosting can
only be operated when the engine is
running.
Page 49 of 244
47
Ease of use and comfort
3On / Off
► Press this button to demist/defrost the rear screen and, depending on version, the door
mirrors. The button indicator lamp comes on.
Defrosting switches off automatically to prevent
excessive electrical consumption.
► It is possible to stop the demisting / defrosting operation before it is switched off automatically
by pressing this button again. The button
indicator lamp goes off.
Switch off the demisting/defrosting of the rear screen and door mirrors as
soon as appropriate, as lower current
consumption results in reduced fuel
consumption.
Rear screen demisting - defrosting can
only be operated when the engine is
running.
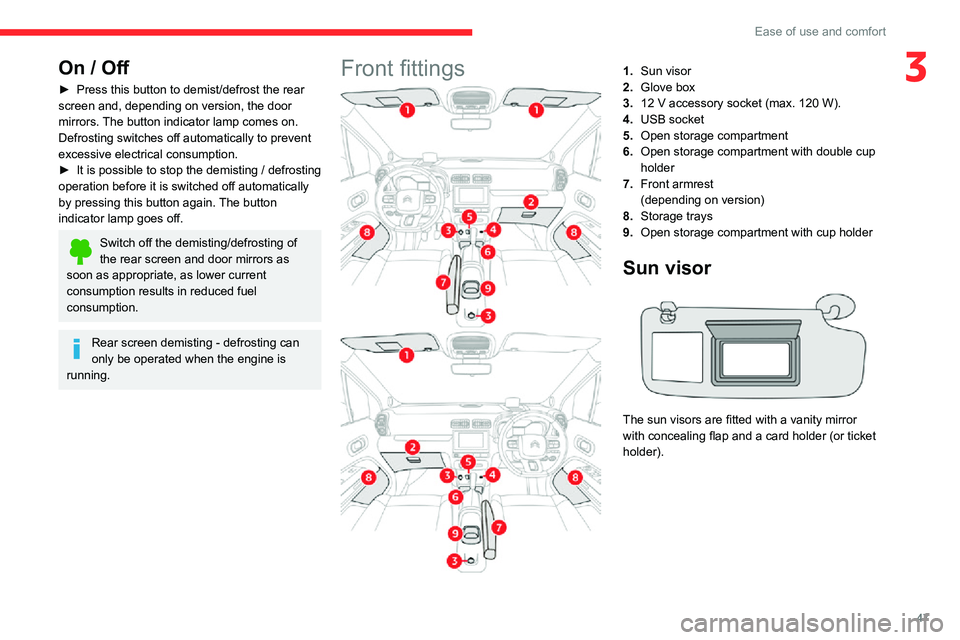
Front fittings1. Sun visor
2. Glove box
3. 12 V accessory socket (max. 120 W).
4. USB socket
5. Open storage compartment
6. Open storage compartment with double cup
holder
7. Front armrest
(depending on version)
8. Storage trays
9. Open storage compartment with cup holder
Sun visor
The sun visors are fitted with a vanity mirror
with concealing flap and a card holder (or ticket
holder).