Front lamps CITROEN C3 AIRCROSS 2023 Owners Manual
[x] Cancel search | Manufacturer: CITROEN, Model Year: 2023, Model line: C3 AIRCROSS, Model: CITROEN C3 AIRCROSS 2023Pages: 244, PDF Size: 7.09 MB
Page 4 of 244
2
Contents
■
Overview
■
Eco-driving
1InstrumentsInstrument panels 8
Warning and indicator lamps 9
Indicators 14
Distance recorders 17
Equipment configuration for vehicles without
screen
17
Monochrome screen C 18
Touch screen 19
Trip computer 20
Setting the date and time 23
2AccessRemote control / Key 24
Keyless Entry and Start 25
Back-up procedures 27
Doors 29
Boot 30
Central locking 30
Alarm 31
Panoramic sunroof 32
Electric windows 34
3Ease of use and comfortFront seats 36
Rear seats 38
Steering wheel adjustment 41
Mirrors 41
Ventilation 42
Heating/Manual air conditioning 44
Automatic air conditioning 44
Front demist - defrost 46
Heated windscreen 46
Rear screen demist - defrost 47
Front fittings 47
Rear fittings 50
Boot fittings 51
Courtesy lamps 53
Interior ambient lighting 54
4Lighting and visibilityLighting control stalk 55
Direction indicators 56
Automatic illumination of headlamps 57
Guide-me-home and welcome lighting 57
Automatic lighting systems - General
recommendations
58
Automatic headlamp dipping 58
Headlamp beam height adjustment 59
Cornering lighting 59
Wiper control stalk 60
Changing a wiper blade 62
Automatic wipers 62
5SafetyGeneral safety recommendations 64
Hazard warning lamps 64
Horn 65
Emergency or assistance 65
Electronic stability control (ESC) 67
Grip control 68
Hill Assist Descent Control 69
Seat belts 70
Airbags 73
Child seats 75
Deactivating the front passenger airbag 77
ISOFIX child seats 78
i-Size child seats 80
Installing child seats 80
Child lock 83
6DrivingDriving recommendations 84
Starting / Switching off the engine with the key 86
Starting/Switching off the engine with
Keyless Entry and Start
87
Parking brake 89
5-speed manual gearbox 89
6-speed manual gearbox 90
Automatic gearbox (EAT6) 90
Gear shift indicator 92
Hill start assist 93
Stop & Start 93
Tyre under-inflation detection 95
Driving and manoeuvring aids - General
recommendations
97
Head-up display 98
Memorising speeds 99
Road signs recognition 100
Speed limiter 102
Cruise control - Specific recommendations 104
Cruise control 104
Active Safety Brake with Collision Risk Alert and
Intelligent emergency braking assistance
106
Distraction detection 109
Lane departure warning system 11 0
Blind spot monitoring 111
Page 6 of 244
4
Overview
Instruments and controls
These illustrations and descriptions are intended
as a guide. The presence and location of some
elements vary depending on the version or trim
level.
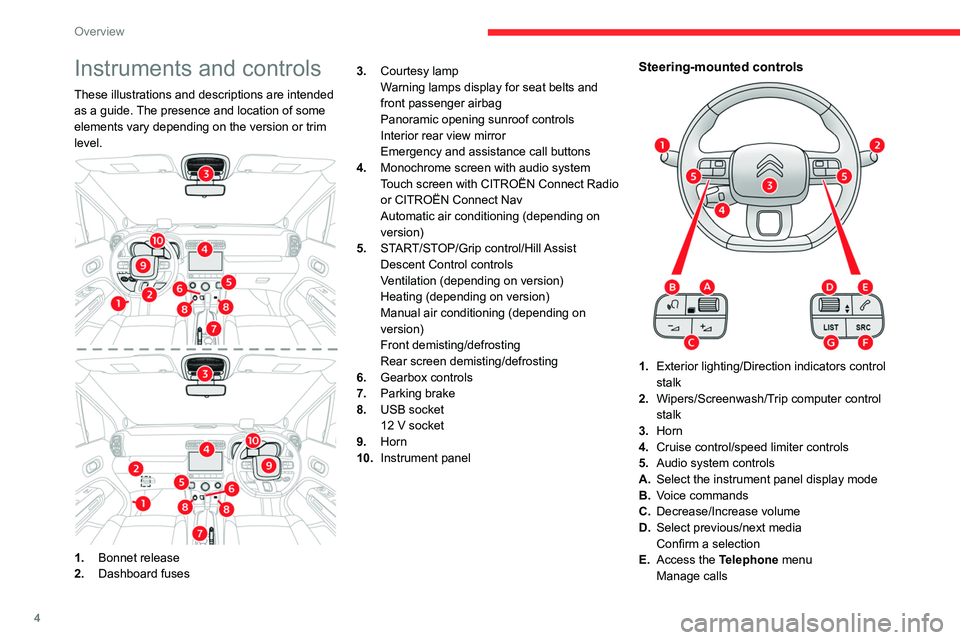
1.Bonnet release
2. Dashboard fuses 3.
Courtesy lamp
Warning lamps display for seat belts and
front passenger airbag
Panoramic opening sunroof controls
Interior rear view mirror
Emergency and assistance call buttons
4. Monochrome screen with audio system
Touch screen with CITROËN Connect Radio
or CITROËN Connect Nav
Automatic air conditioning (depending on
version)
5. START/STOP/Grip control/Hill Assist
Descent Control controls
Ventilation (depending on version)
Heating (depending on version)
Manual air conditioning (depending on
version)
Front demisting/defrosting
Rear screen demisting/defrosting
6. Gearbox controls
7. Parking brake
8. USB socket
12 V socket
9. Horn
10. Instrument panel
Steering-mounted controls
1.Exterior lighting/Direction indicators control
stalk
2. Wipers/Screenwash/Trip computer control
stalk
3. Horn
4. Cruise control/speed limiter controls
5. Audio system controls
A. Select the instrument panel display mode
B. Voice commands
C. Decrease/Increase volume
D. Select previous/next media
Confirm a selection
E. Access the Telephone menu
Manage calls
Page 7 of 244
5
Overview
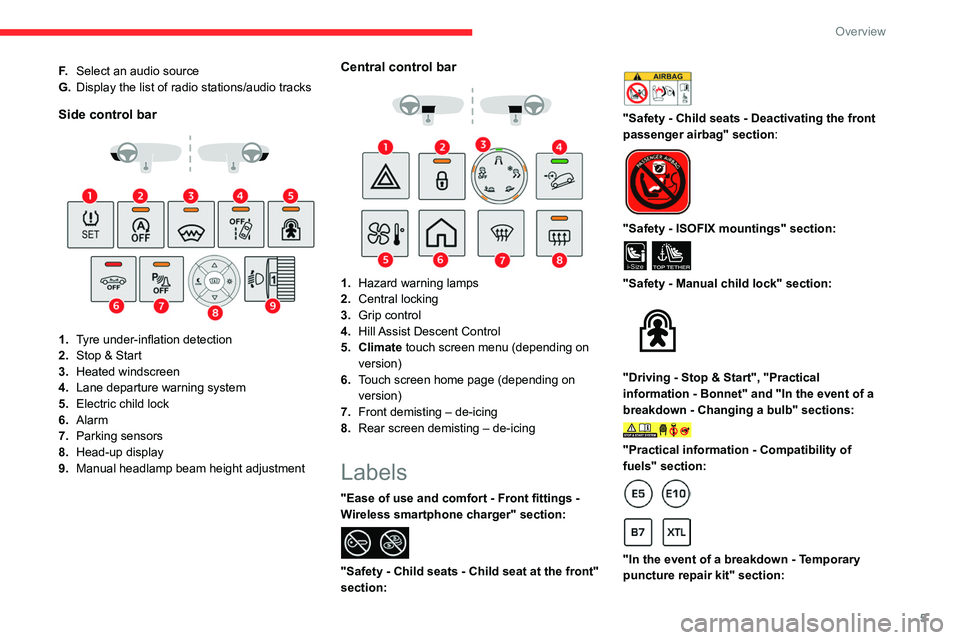
F.Select an audio source
G. Display the list of radio stations/audio tracks
Side control bar
1.Tyre under-inflation detection
2. Stop & Start
3. Heated windscreen
4. Lane departure warning system
5. Electric child lock
6. Alarm
7. Parking sensors
8. Head-up display
9. Manual headlamp beam height adjustment
Central control bar
1.Hazard warning lamps
2. Central locking
3. Grip control
4. Hill Assist Descent Control
5. Climate touch screen menu (depending on version)
6. Touch screen home page (depending on
version)
7. Front demisting – de-icing
8. Rear screen demisting – de-icing
Labels
"Ease of use and comfort - Front fittings -
Wireless smartphone charger" section:
"Safety - Child seats - Child seat at the front"
section:
"Safety - Child seats - Deactivating the front
passenger airbag" section:
"Safety - ISOFIX mountings" section:
i-SizeTOP TETHER
"Safety - Manual child lock" section:
"Driving - Stop & Start", "Practical
information - Bonnet" and "In the event of a
breakdown - Changing a bulb" sections:
"Practical information - Compatibility of
fuels" section:
"In the event of a breakdown - Temporary
puncture repair kit" section:
Page 15 of 244
13
Instruments
1Identify the cause of the fault using the message
displayed on the instrument panel.
You may be able to deal with some faults
yourself, such as changing the battery in the
remote control.
For other faults, such as with the tyre under-
inflation detection system, carry out (3).
Fixed, accompanied by the display of a
message.
One or more major faults, for which there is/are
no specific warning lamp(s), have been detected.
Identify the cause of the fault using the message
displayed on the instrument panel, then carry
out (3).
Service warning lamp fixed and
service spanner flashing then
fixed.
The servicing interval has been exceeded.
The vehicle must be serviced as soon as
possible.
Only with BlueHDi Diesel engines.
Engine pre-heating (Diesel)Temporarily on (up to approximately 30 seconds in
severe weather conditions).
When switching on the ignition, if the weather
conditions and the engine temperature make it
necessary.
Wait until the warning lamp goes off before
starting.
When the warning lamp goes off, starting will
occur immediately if you press and hold:
–
the clutch pedal with a manual gearbox. –
the brake pedal with an automatic gearbox.
If the engine does not start, make the engine
starting request again, while keeping your foot
on the pedal.
Rear foglampFixed.
The lamp is on.
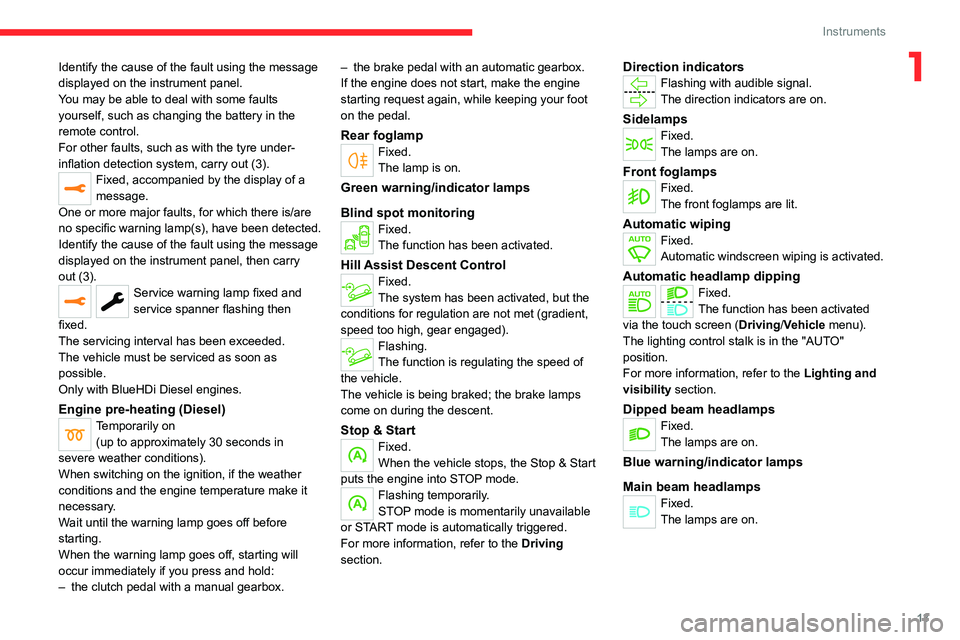
Green warning/indicator lamps
Blind spot monitoring
Fixed.
The function has been activated.
Hill Assist Descent ControlFixed.
The system has been activated, but the
conditions for regulation are not met (gradient,
speed too high, gear engaged).
Flashing.
The function is regulating the speed of
the vehicle.
The vehicle is being braked; the brake lamps
come on during the descent.
Stop & StartFixed.
When the vehicle stops, the Stop & Start
puts the engine into STOP mode.
Flashing temporarily.
STOP mode is momentarily unavailable
or START mode is automatically triggered.
For more information, refer to the Driving
section.
Direction indicatorsFlashing with audible signal.
The direction indicators are on.
SidelampsFixed.
The lamps are on.
Front foglampsFixed.
The front foglamps are lit.
Automatic wipingFixed.
Automatic windscreen wiping is activated.
Automatic headlamp dippingFixed.
The function has been activated
via the touch screen (Driving/Vehicle menu).
The lighting control stalk is in the "AUTO"
position.
For more information, refer to the Lighting and
visibility section.
Dipped beam headlampsFixed.
The lamps are on.
Blue warning/indicator lamps
Main beam headlamps
Fixed.
The lamps are on.
Page 16 of 244
14
Instruments
Black/white warning lamps
Foot on the brake
Fixed.
Insufficient or no pressure on the brake
pedal.
With an automatic gearbox, with the engine
running, before releasing the parking brake, to
move out of position P.
Automatic wipingFixed.
Automatic front wiping is activated.
Indicators
Coolant temperature indicator
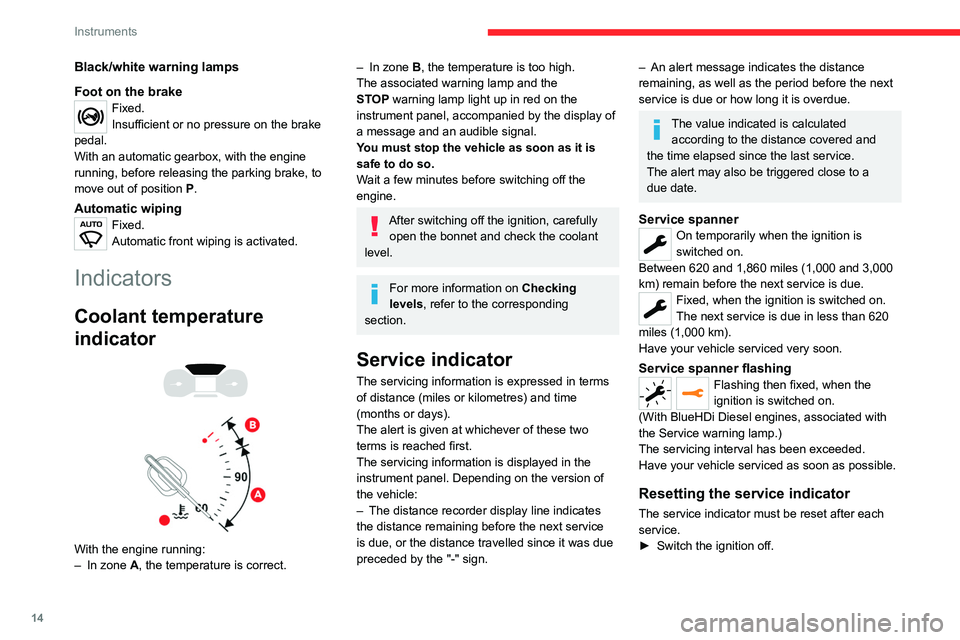
With the engine running:
– In zone A, the temperature is correct.
– In zone B, the temperature is too high.
The associated warning lamp and the
STOP
warning lamp light up in red on the
instrument panel, accompanied by the display of
a message and an audible signal.
You must stop the vehicle as soon as it is
safe to do so.
Wait a few minutes before switching off the
engine.
After switching off the ignition, carefully open the bonnet and check the coolant
level.
For more information on Checking
levels, refer to the corresponding
section.
Service indicator
The servicing information is expressed in terms
of distance (miles or kilometres) and time
(months or days).
The alert is given at whichever of these two
terms is reached first.
The servicing information is displayed in the
instrument panel. Depending on the version of
the vehicle:
–
The distance recorder display line indicates
the distance remaining before the next service
is due, or the distance travelled since it was due
preceded by the "-" sign.
– An alert message indicates the distance
remaining, as well as the period before the next
service is due or how long it is overdue.
The value indicated is calculated according to the distance covered and
the time elapsed since the last service.
The alert may also be triggered close to a
due date.
Service spannerOn temporarily when the ignition is
switched on.
Between 620 and 1,860 miles (1,000 and 3,000
km) remain before the next service is due.
Fixed, when the ignition is switched on.
The next service is due in less than 620
miles (1,000 km).
Have your vehicle serviced very soon.
Service spanner flashingFlashing then fixed, when the
ignition is switched on.
(With
BlueHDi Diesel engines, associated with
the Service warning lamp.)
The servicing interval has been exceeded.
Have your vehicle serviced as soon as possible.
Resetting the service indicator
The service indicator must be reset after each
service.
►
Switch the ignition off.
CHECK
► Press and hold this button.
► Switch on the ignition; the distance recorder
display begins a countdown.
► Release the button when =0 is displayed; the
spanner disappears.
If you have to disconnect the battery
following this operation, lock the vehicle
and wait at least 5 minutes for the reset to be
registered.
Reminder of the servicing information
You can access the servicing information at any
time.
► Press the trip distance recorder reset button.
The servicing information is displayed for a few
seconds, then disappears.
Engine oil level indicator
(Depending on version)
On versions fitted with an electric gauge, the
engine oil level status is displayed on the
instrument panel for a few seconds when
Page 55 of 244
53
Ease of use and comfort
3
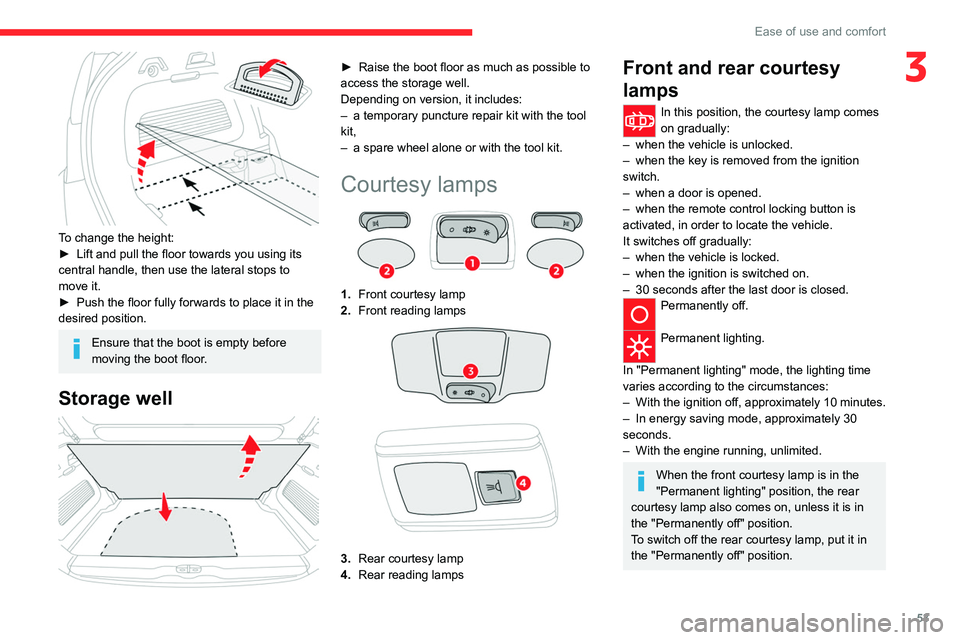
To change the height:
► Lift and pull the floor towards you using its
central handle, then use the lateral stops to
move it.
►
Push the floor fully forwards to place it in the
desired position.
Ensure that the boot is empty before
moving the boot floor.
Storage well
► Raise the boot floor as much as possible to
access the storage well.
Depending on version, it includes:
–
a temporary puncture repair kit with the tool
kit,
–
a spare wheel alone or with the tool kit.
Courtesy lamps
1. Front courtesy lamp
2. Front reading lamps
3.Rear courtesy lamp
4. Rear reading lamps
Front and rear courtesy
lamps
In this position, the courtesy lamp comes
on gradually:
–
when the vehicle is unlocked.
–
when the key is removed from the ignition
switch.
–
when a door is opened.
–
when the remote control locking button is
activated, in order to locate the vehicle.
It switches off gradually:
–
when the vehicle is locked.
–
when the ignition is switched on.
–
30 seconds after the last door is closed.
Permanently off.
Permanent lighting.
In "Permanent lighting" mode, the lighting time
varies according to the circumstances:
–
With
the ignition off, approximately 10 minutes.
–
In energy saving mode, approximately 30
seconds.
–
With the engine running, unlimited.
When the front courtesy lamp is in the
"Permanent lighting" position, the rear
courtesy lamp also comes on, unless it is in
the "Permanently off" position.
To switch off the rear courtesy lamp, put it in
the "Permanently off" position.
Page 56 of 244
54
Ease of use and comfort
Front and rear map reading
lamps
► With the ignition on, operate the
corresponding switch.
Take care not to put anything in contact with the courtesy lamps.
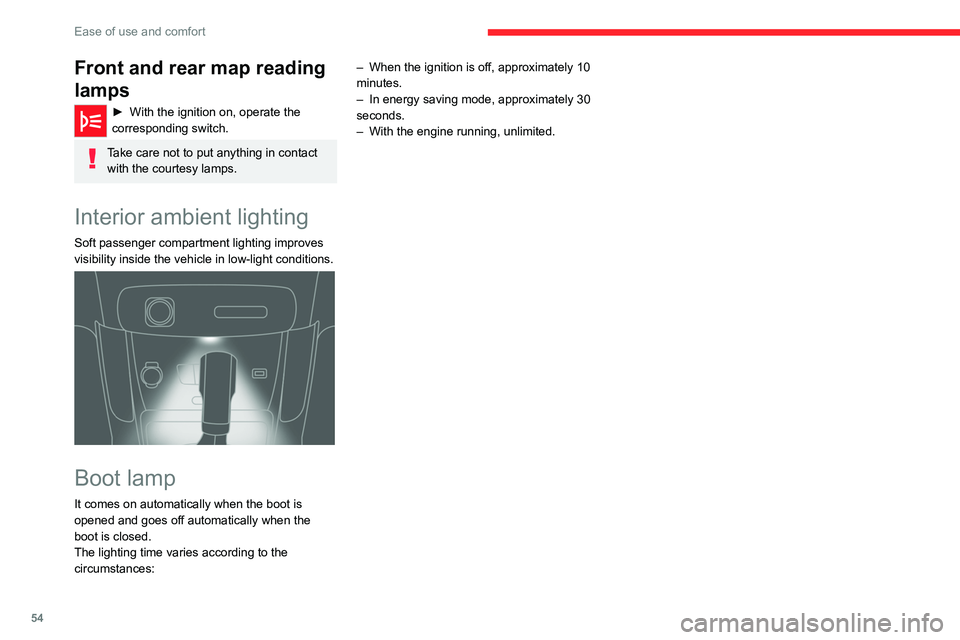
Interior ambient lighting
Soft passenger compartment lighting improves
visibility inside the vehicle in low-light conditions.
Boot lamp
It comes on automatically when the boot is
opened and goes off automatically when the
boot is closed.
The lighting time varies according to the
circumstances: –
When the ignition is off, approximately 10
minutes.
–
In energy saving mode, approximately 30
seconds.
–
With the engine running, unlimited.
Page 58 of 244
56
Lighting and visibility
upwards or downwards, depending on the side
of the traffic (e.g. when parking on the right, push
the lighting control stalk down to light up on the
left).
This is confirmed by an audible signal and the
lighting of the corresponding direction indicator
lamp on the instrument panel.
► To switch off the parking lamps, return the
lighting control stalk to the central position.
Automatic illumination of lamps
With the lighting control stalk in the “ AUTO”
position and if a low level of exterior brightness
is detected by the rain/sunshine sensor, the
number plate lamps, sidelamps and dipped
beam headlamps are switched on automatically,
without any action on the part of the driver. They
may also come on if rain is detected, at the same
time as automatic operation of the windscreen
wipers.
As soon as the brightness returns to a sufficient
level or after the windscreen wipers are switched
off, the lamps are switched off automatically.
Malfunction
In the event of a malfunction of the rain/
sunshine sensor, the vehicle’s lamps
come on and this warning lamp is displayed on
the instrument panel, accompanied by an
audible signal and/or the display of a message.
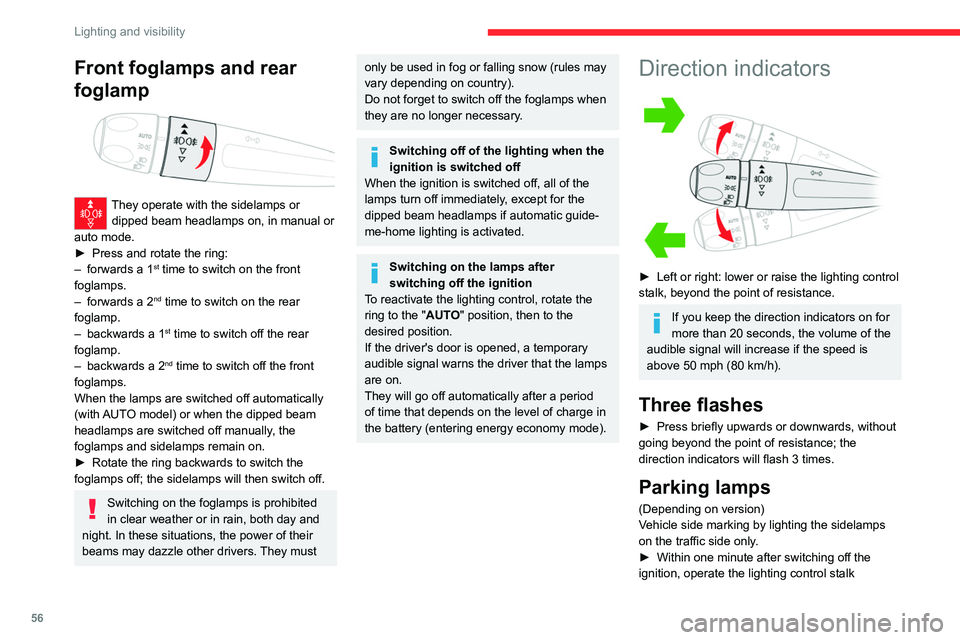
Front foglamps and rear
foglamp
They operate with the sidelamps or dipped beam headlamps on, in manual or
auto mode.
►
Press and rotate the ring:
–
forwards a 1st time to switch on the front
foglamps.
–
forwards a 2nd time to switch on the rear
foglamp.
–
backwards a 1st time to switch off the rear
foglamp.
–
backwards
a 2
nd time to switch off the front
foglamps.
When the lamps are switched off automatically
(with AUTO model) or when the dipped beam
headlamps are switched off manually, the
foglamps and sidelamps remain on.
►
Rotate the ring backwards to switch the
foglamps off; the sidelamps will then switch off.
Switching on the foglamps is prohibited
in clear weather or in rain, both day and
night. In these situations, the power of their
beams may dazzle other drivers. They must
only be used in fog or falling snow (rules may
vary depending on country).
Do not forget to switch off the foglamps when
they are no longer necessary.
Switching off of the lighting when the
ignition is switched off
When the ignition is switched off, all of the
lamps turn off immediately, except for the
dipped beam headlamps if automatic guide-
me-home lighting is activated.
Switching on the lamps after
switching off the ignition
To reactivate the lighting control, rotate the
ring to the "AUTO" position, then to the
desired position.
If the driver's door is opened, a temporary
audible signal warns the driver that the lamps
are on.
They will go off automatically after a period
of time that depends on the level of charge in
the battery (entering energy economy mode).
Direction indicators
► Left or right: lower or raise the lighting control
stalk, beyond the point of resistance.
If you keep the direction indicators on for
more than 20 seconds, the volume of the
audible signal will increase if the speed is
above 50 mph (80 km/h).
Three flashes
► Press briefly upwards or downwards, without
going beyond the point of resistance; the
direction indicators will flash 3 times.
Parking lamps
(Depending on version)
Vehicle side marking by lighting the sidelamps
on the traffic side only.
►
Within one minute after switching off the
ignition, operate the lighting control stalk
Page 59 of 244
57
Lighting and visibility
4upwards or downwards, depending on the side
of the traffic (e.g. when parking on the right, push
the lighting control stalk down to light up on the
left).
This is confirmed by an audible signal and the
lighting of the corresponding direction indicator
lamp on the instrument panel.
►
T
o switch off the parking lamps, return the
lighting control stalk to the central position.
Automatic illumination of lamps
With the lighting control stalk in the “ AUTO”
position and if a low level of exterior brightness
is detected by the rain/sunshine sensor, the
number plate lamps, sidelamps and dipped
beam headlamps are switched on automatically,
without any action on the part of the driver. They
may also come on if rain is detected, at the same
time as automatic operation of the windscreen
wipers.
As soon as the brightness returns to a sufficient
level or after the windscreen wipers are switched
off, the lamps are switched off automatically.
Malfunction
In the event of a malfunction of the rain/
sunshine sensor, the vehicle’s lamps
come on and this warning lamp is displayed on
the instrument panel, accompanied by an
audible signal and/or the display of a message.
Have it checked by a CITROËN dealer or a
qualified workshop.
Do not cover the rain/sunshine sensor
located at the top centre of the
windscreen behind the interior rear view
mirror; the associated functions would no
longer be controlled.
In fog or snow, the rain/sunshine sensor
may detect sufficient light. For this
reason, the lighting will not come on
automatically.
The inner surface of the windscreen may become misted up and affect the proper
operation of the rain/sunshine sensor.
In humid and cold weather, demist the
windscreen regularly.
Daytime running lamps/
Sidelamps
These LED lamps at the front and rear of the
vehicle light up automatically when the engine
starts.
They perform the following functions:
–
Daytime running lamps (lighting control stalk
at position
"AUTO" with adequate ambient light).
–
Sidelamps (lighting control stalk at position
"
AUTO" with low ambient light or "Sidelamps
only" or "Dipped/main beam headlamps").
In daytime running lamps mode, the
diodes are brighter.
Guide-me-home and
welcome lighting
Guide-me-home lighting
Automatic
With the ring of the lighting control stalk in the
"AUTO" position and when the light is poor, the
dipped beam headlamps come on automatically
when the ignition is switched off.
You can activate/deactivate this function and
adjust the guide-me-home lighting duration in the
vehicle configuration menu.
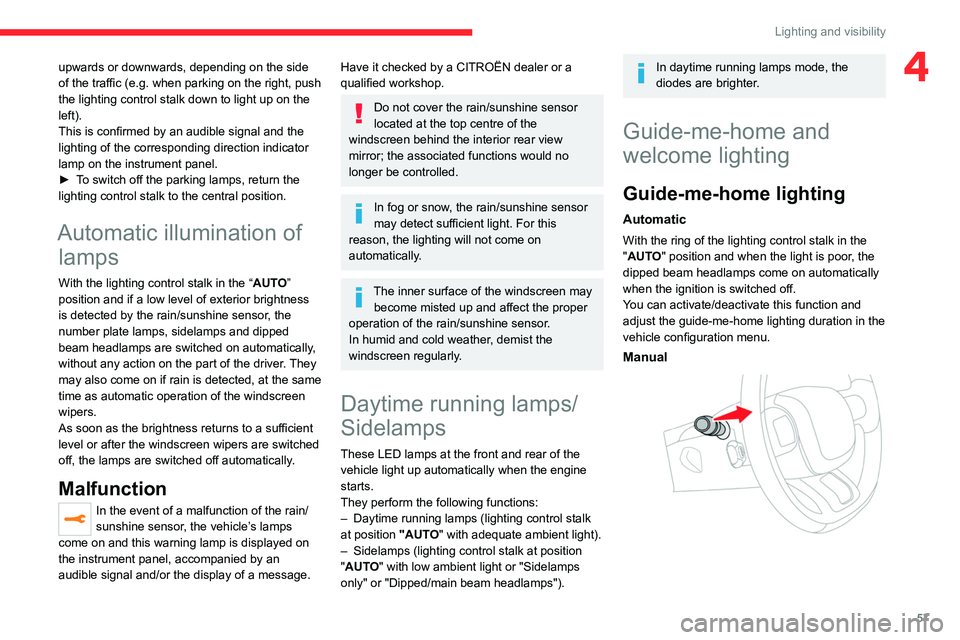
Manual
Page 61 of 244
59
Lighting and visibility
4The state of the system stays in the memory
when switching off the ignition.
Operation
If the ambient light level is very low and traffic
conditions permit:
– The main beam headlamps
come on automatically. These
indicator lamps light up on the instrument panel.
If the ambient light level is sufficient and/or the
traffic conditions do not allow the main beam
headlamps to be lit:
– The dipped beam head lamps
remain lit. These indicator lamps
light up on the instrument panel.
The function is deactivated if the foglamps
are switched on or if the system detects poor
visibility conditions (e.g.
fog, heavy rain,
snowfall).
When the foglamps are switched off or when the
visibility conditions become favourable again, the
function is automatically reactivated.
This indicator lamp goes out when the function is deactivated.
Pause
If the situation requires a change of headlamp
beam, the driver can take over at any time.
►
Switch the headlamps manually between
dipped and main beam to pause the function.
If the "AUT
O" and "Dipped beam" indicator
lamps were on, the system changes to main
beam. If the "AUTO" and "Main beam" indicator
lamps
were on, the system changes to dipped beam.
►
T
o reactivate the function, once again switch
the headlamps manually between dipped and
main beam.
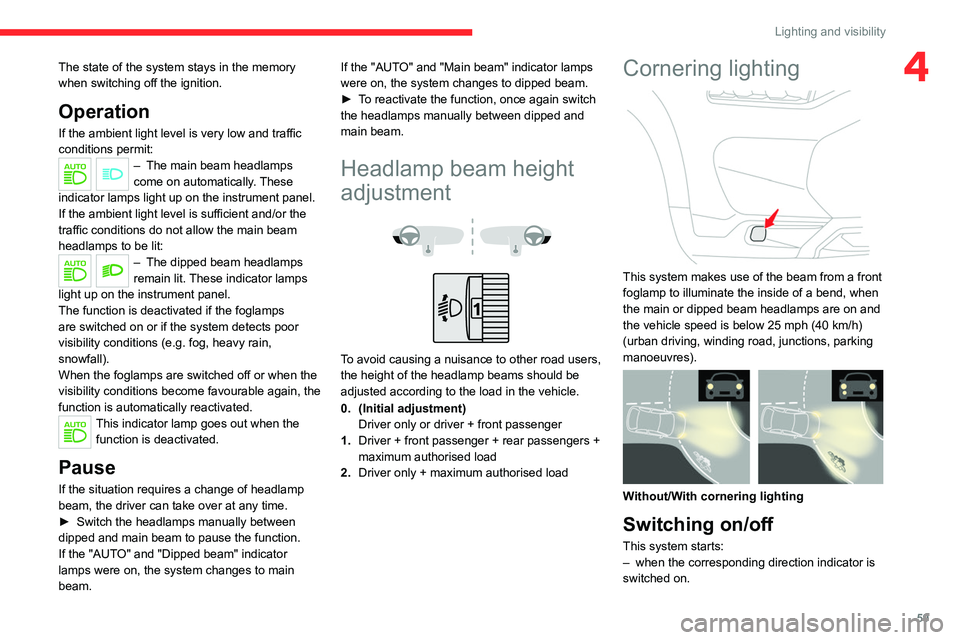
Headlamp beam height
adjustment
To avoid causing a nuisance to other road users,
the height of the headlamp beams should be
adjusted according to the load in the vehicle.
0. (Initial adjustment) Driver only or driver + front passenger
1. Driver + front passenger + rear passengers +
maximum authorised load
2. Driver only + maximum authorised load
Cornering lighting
This system makes use of the beam from a front
foglamp to illuminate the inside of a bend, when
the main or dipped beam headlamps are on and
the vehicle speed is below 25 mph (40
km/h)
(urban driving, winding road, junctions, parking
manoeuvres).
Without/With cornering lighting
Switching on/off
This system starts:
– when the corresponding direction indicator is
switched on.