change Citroen C3 PICASSO RHD 2012 1.G Owner's Guide
[x] Cancel search | Manufacturer: CITROEN, Model Year: 2012, Model line: C3 PICASSO RHD, Model: Citroen C3 PICASSO RHD 2012 1.GPages: 244, PDF Size: 8.31 MB
Page 186 of 244
184
04
4
3
2
1
7
6
5
NAVIGATION - GUIDANCE
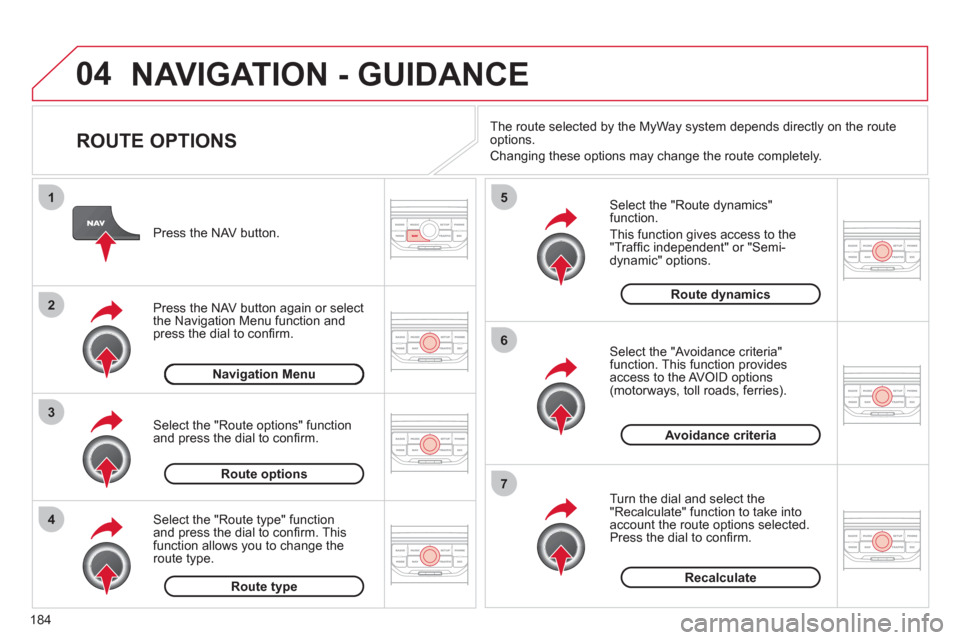
ROUTE OPTIONS
Select the "Route dynamics"function.
This
function gives access to the "Traffi c independent" or "Semi-
dynamic" options.
Select the "Avoidance criteria"function. This function provides
access to the AVOID options (motorways, toll roads, ferries).
T
urn the dial and select the "Recalculate" function to take intoaccount the route options selected.
Press the dial to confi rm. Pr
ess the NAV button.
Press the NAV button a
gain or select
the Navigation Menu function andpress the dial to confi rm.
Select the "Route type" functionand press the dial to confi rm. Thisfunction allows you to change theroute type.
Select the "Route options" functionand press the dial to confi rm.
Recalculate
Avoidance criteria
Route dynamics
Route type
Route options
Navigation MenuThe route selected b
y the MyWay system depends directly on the route
options.
Chan
ging these options may change the route completely.
Page 197 of 244
195
08
1
2
3
4
BLUETOOTH TELEPHONE
*
The services available depend on the network, the SIM card and thecompatibility of the Bluetooth telephone used. Check the telephone
manual and with your network provider for details of the servicesavailable to you.
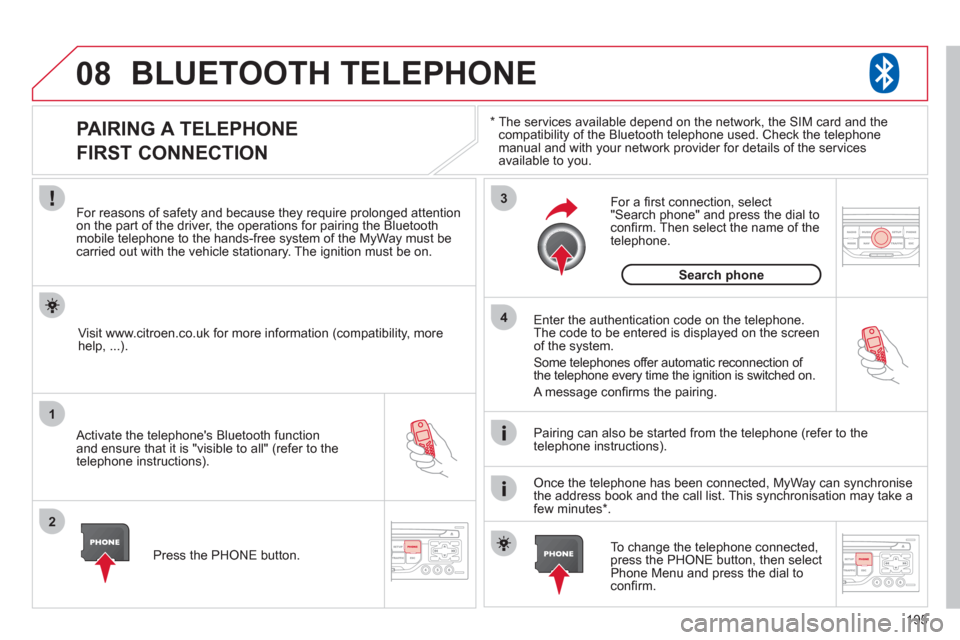
PAIRING A TELEPHONE
FIRST CONNECTION
For reasons of safety and because they require prolonged attentionon the part of the driver, the operations for pairing the Bluetooth mobile telephone to the hands-free system of the MyWay must be carried out with the vehicle stationary. The ignition must be on.
Activate the telephone's Bluetooth
function
and ensure that it is "visible to all" (refer to the
telephone instructions). Enter the authentication code on the tele
phone.
The code to be entered is displayed on the screen
of the system.
Some telephones offer automatic reconnection o
f
the telephone every time the ignition is switched on.
A messa
ge confi rms the pairing.
To change the telephone connected, press the PHONE button, then select Phone Menu and press the dial toconfi rm.
Once the telephone has been connected, MyWay can synchronise
the address book and the call list. This synchronisation may take a few minutes * . Pairin
g can also be started from the telephone (refer to the
telephone instructions). Visit www.citroen.co.uk
for more information (compatibility, more
help, ...).
Press the PH
ONE button.
For a
fi rst connection, select"Search phone" and press the dial to confi rm. Then select the name of thetelephone.
Search
phone
Page 198 of 244
196
08
1
2
2
1
*
The services available depend on the network, the SIM card and the compatibility of the Bluetooth telephone used. Check the telephone manual and with your network provider for details of the services
available to you.
BLUETOOTH TELEPHONE
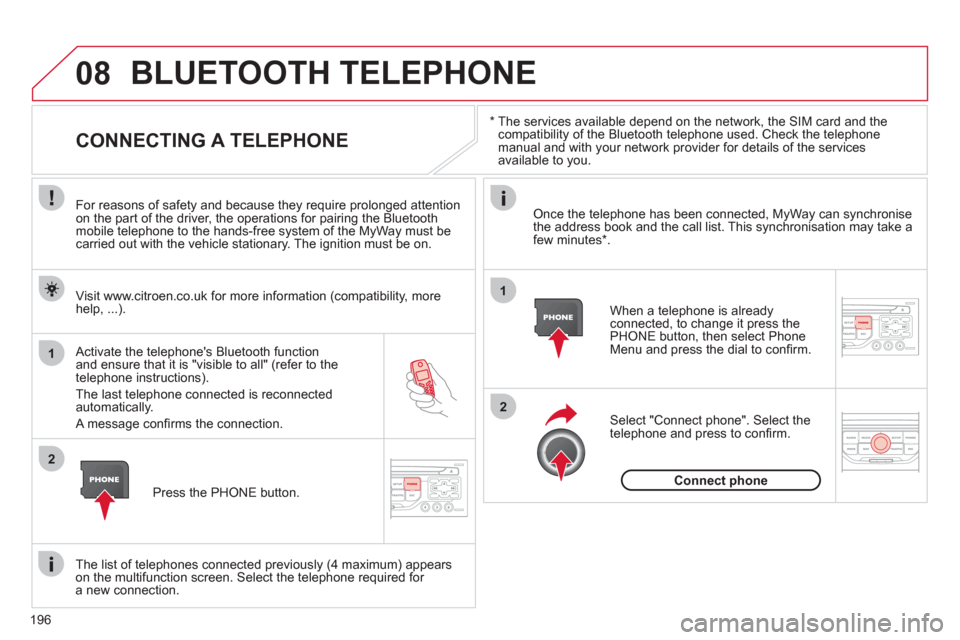
CONNECTING A TELEPHONE
For reasons of safety and because they require prolonged attention
on the part of the driver, the operations for pairing the Bluetooth
mobile telephone to the hands-free system of the MyWay must becarried out with the vehicle stationary. The ignition must be on.
Activate the tele
phone's Bluetooth function and ensure that it is "visible to all" (refer to the
telephone instructions).
The last telephone connected is reconnected automatically.
A messa
ge confi rms the connection. When a telephone is alread
yconnected, to change it press the
PHONE button, then select PhoneMenu and press the dial to confi rm.
Once the telephone has been connected, MyWay can synchronise
the address book and the call list. This synchronisation may take afew minutes * .
The list o
f telephones connected previously (4 maximum) appearson the multifunction screen. Select the telephone required for a new connection. Visit www.citroen.co.uk
for more information (compatibility, more
help, ...).
Press the PH
ONE button.Select "Connect
phone". Select the
telephone and press to confi rm.
Connect
phone
Page 210 of 244
208
01 FIRST STEPS
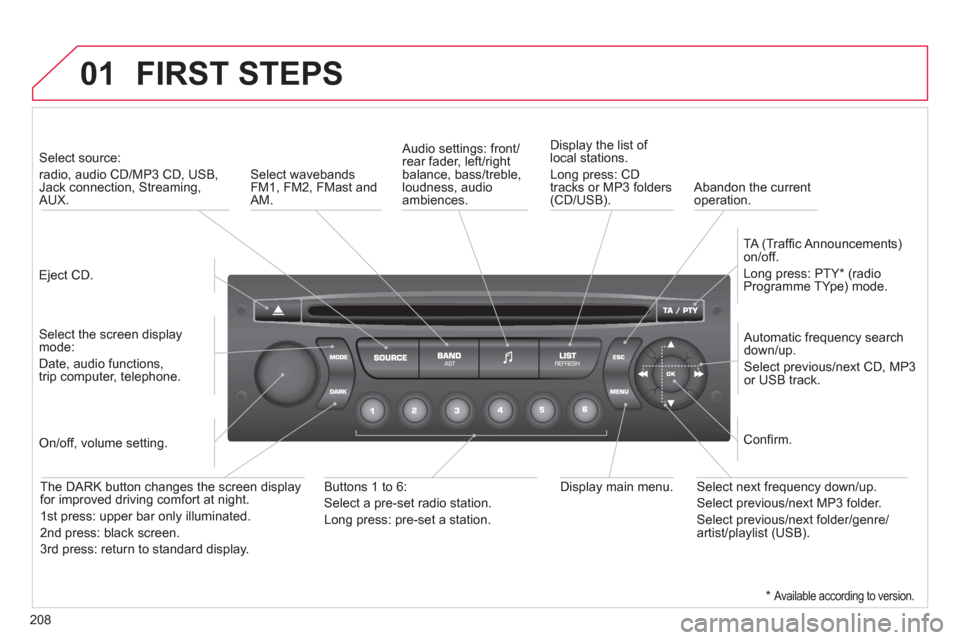
Eject CD.
Select source:
radio, audio CD/MP3 CD, USB, Jack connection, Streaming,AUX.
Select the screen displaymode:
Date, audio functions,trip computer, telephone.
Automatic frequency search
down/up.
Select previous/next CD, MP3
or USB track.
Audio settings: front/rear fader, left/right
balance, bass/treble, loudness, audio ambiences. Displa
y the list of local stations.
Lon
g press: CD
tracks or MP3 folders(CD/USB).
TA
(Traffi c Announcements)
on/off.
Lon
g press: PTY * (radio
Programme TYpe) mode.
Display main menu. The DARK button changes the screen display
for improved driving comfort at night.
1stpress: upper bar only illuminated.
2ndpress: black screen.
3rdpress: return to standard display.
On/off, volume setting.
Buttons 1 to 6:
Select a pre-set radio station.
Lon
g press: pre-set a station.
Select next frequency down/up.
Select previous/next MP3 folder.
Select previous/next folder/genre/artist/playlist (USB).
Confi rm.
Select wavebandsFM1, FM2, FMast and AM.
Abandon the current
operation.
*
Available according to version.
Page 213 of 244
211
04
1
2
3
4
1
2
3
4
SOURCE
BANDAST
LISTREFRESH
MENU
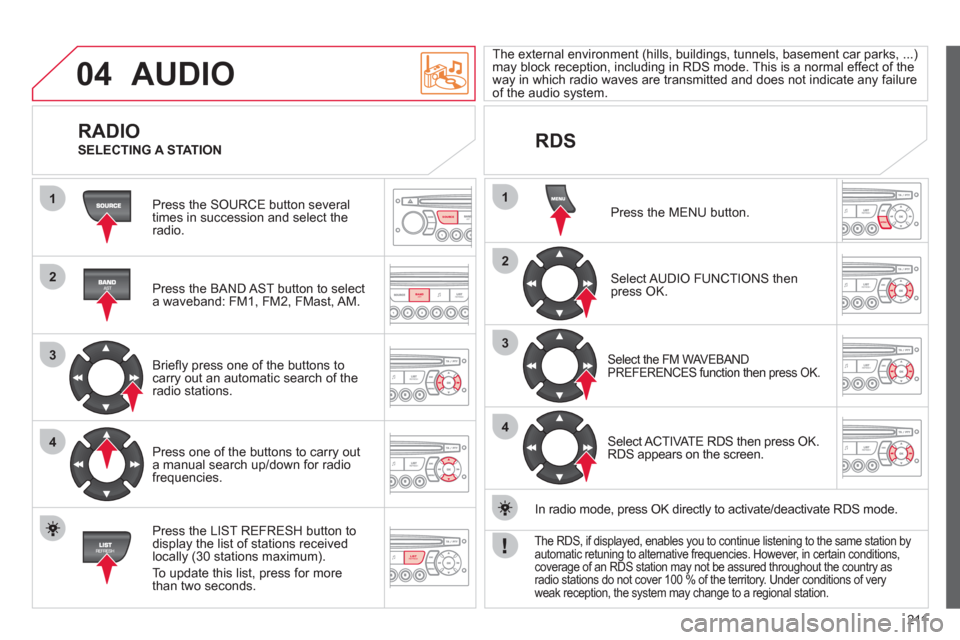
AUDIO
Press the SOURCE button several
times in succession and select theradio.
Press the BAND A
ST button to select
a waveband: FM1, FM2, FMast, AM.
Briefl
y press one of the buttons tocarry out an automatic search of theradio stations.
Press one o
f the buttons to carry out
a manual search up/down for radiofrequencies.
Press the LI
ST REFRESH button to
display the list of stations received
locally (30 stations maximum).
To update this list, press for more
t
han two seconds.
The external environment
(hills, buildings, tunnels, basement car parks, ...)may block reception, including in RDS mode. This is a normal effect of the
way in which radio waves are transmitted and does not indicate any failure of the audio system.
RDS
RADIO
SELECTING A STATION
Press the MENU button.
Select AUDIO FUNCTIONS thenpress OK.
Select the FM WAVEBAND
PREFERENCES function then press OK.
Select ACTIVATE RDS then press OK.
RDS appears on the screen.
In radio mode, press
OK directly to activate/deactivate RDS mode.
The RDS, if displayed, enables you to continue listening to the same station by automatic retuning to alternative frequencies. However, in certain conditions, coverage of an RDS station may not be assured throughout the country asradio stations do not cover 100 % of the territory. Under conditions of very
weak reception, the system may change to a regional station.