ignition Citroen C3 PICASSO RHD 2012 1.G Service Manual
[x] Cancel search | Manufacturer: CITROEN, Model Year: 2012, Model line: C3 PICASSO RHD, Model: Citroen C3 PICASSO RHD 2012 1.GPages: 244, PDF Size: 8.31 MB
Page 123 of 244

9
121
DRIVING
CRUISE CONTROL
System which automatically maintains
the speed of the vehicle at the value
programmed by the driver, without any
action on the accelerator pedal.
The cruise control is switched on
manually: it requires a minimum vehicle
speed of 25 mph (40 km/h) and the en-
gaging of at least 4th gear.
The controls of this system are grouped
together on control stalk A
. The programmed information is grouped
together in the instrument panel screen.
Steering mounted controls
Displays in the instrument panel
The cruise control cannot, in any
circumstances, replace the need
to respect speed limits, nor can
it replace the need for vigilance
and responsibility on the part of
the driver. The cruise control is switched off
manu-
ally or by pressing the brake or clutch
pedal or on triggering of the ESP system
for safety reasons.
It is possible to exceed the programmed
speed temporarily by pressing the ac-
celerator pedal.
To return to the programmed speed,
simply release the accelerator pedal.
Switching off the ignition cancels any
programmed speed value.
1.
Cruise control mode selection dial
2.
Speed programming/value decrease
button
3.
Speed programming/value increase
button
4.
Cruise control off/resume button
5.
Cruise control off/resume indication
6.
Cruise control mode selection indi-
cation
7.
Programmed speed value
Page 132 of 244
10
130
CHECKS
CHECKING LEVELS
Brake fluid level
Oil level
The reading will only be correct if the
vehicle is on level ground and the
engine has been off for more than
30 minutes.
The check is carried out either when the ignition
is switched on using the oil level indicator in the
instrument panel, or using the dipstick.
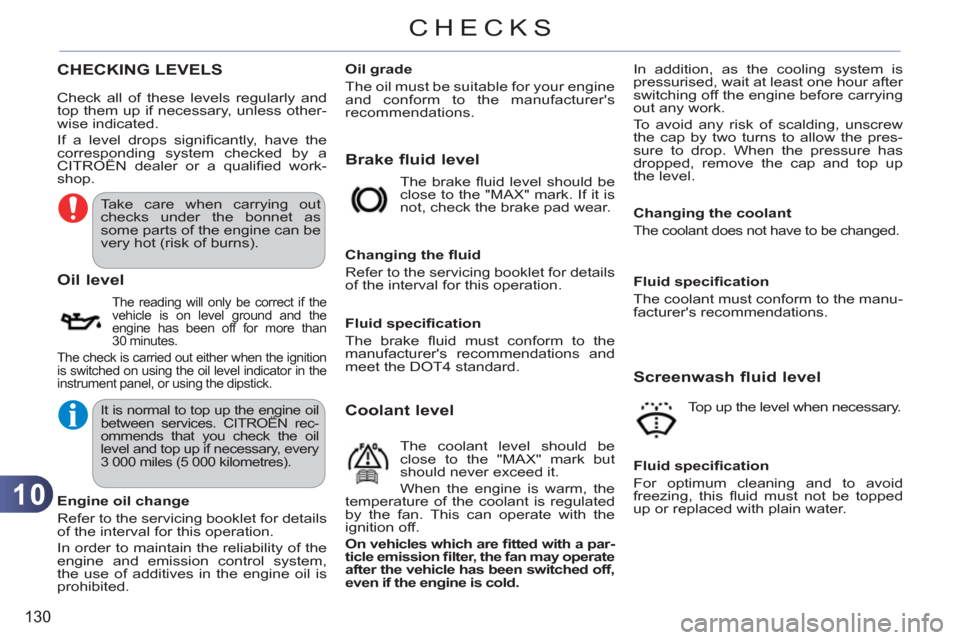
The brake fl uid level should be
close to the "MAX" mark. If it is
not, check the brake pad wear.
Changing the fl uid
Refer to the servicing booklet for details
of the interval for this operation.
Coolant level
The coolant level should be
close to the "MAX" mark but
should never exceed it.
When the engine is warm, the
temperature of the coolant is regulated
by the fan. This can operate with the
ignition off.
On vehicles which are fi tted with a par-
ticle emission fi lter, the fan may operate
after the vehicle has been switched off,
even if the engine is cold.
Fluid specifi cation
For optimum cleaning and to avoid
freezing, this fl uid must not be topped
up or replaced with plain water.
Engine oil change
Refer to the servicing booklet for details
of the interval for this operation.
In order to maintain the reliability of the
engine and emission control system,
the use of additives in the engine oil is
prohibited.
Oil grade
The oil must be suitable for your engine
and conform to the manufacturer's
recommendations.
Fluid specifi cation
The brake fl uid must conform to the
manufacturer's recommendations and
meet the DOT4 standard.
Fluid specifi cation
The coolant must conform to the manu-
facturer's recommendations.
Changing the coolant
The coolant does not have to be changed.
Screenwash fluid level
Check all of these levels regularly and
top them up if necessary, unless other-
wise indicated.
If a level drops signifi cantly, have the
corresponding system checked by a
CITROËN dealer or a qualifi ed work-
shop. In addition, as the cooling system is
pressurised, wait at least one hour after
switching off the engine before carrying
out any work.
To avoid any risk of scalding, unscrew
the cap by two turns to allow the pres-
sure to drop. When the pressure has
dropped, remove the cap and top up
the level.
Top up the level when necessary.
Take care when carrying out
checks under the bonnet as
some parts of the engine can be
very hot (risk of burns).
It is normal to top up the engine oil
between services. CITROËN rec-
ommends that you check the oil
level and top up if necessary, every
3 000 miles (5 000 kilometres).
Page 136 of 244

11
134
PRACTICAL INFORMATION
Repair procedure
1. Sealing
Avoid removing any foreign bodies
which have penetrated into the tyre.
Take care, this product is harmful
(e.g. ethylene-glycol, colophony...)
if swallowed and causes irritation
to the eyes.
Keep it out of reach of children.
�)
Switch off the ignition.
�)
Turn the selector A
to the
"sealant" position.
�)
Check that the switch B
is in
position "O"
.
�)
Uncoil the white pipe G
fully.
�)
Unscrew the cap from the white pipe.
�)
Connect the white pipe to the valve
of the tyre to be repaired.
�)
Connect the compressor's electric
plug to the vehicle's 12 V socket.
�)
Start the vehicle and leave the engine
running.
Do not start the compressor before
connecting the white pipe to the tyre
valve: the sealant product would be
expelled through the pipe.
Page 142 of 244
11
PRACTICAL INFORMATION
Parking the vehicle
Immobilise the vehicle where it
does not block traffi c: the ground
must be level, stable and non-
slippery.
Apply the parking brake, switch
off the ignition and engage fi rst
gear to lock the wheels.
If necessary, place a chock un-
der the wheel diagonally oppo-
site the wheel to be changed.
You must ensure that the occu-
pants get out of the vehicle and
wait where they are safe.
Never go underneath a vehicle
raised using a jack; use an axle
stand.
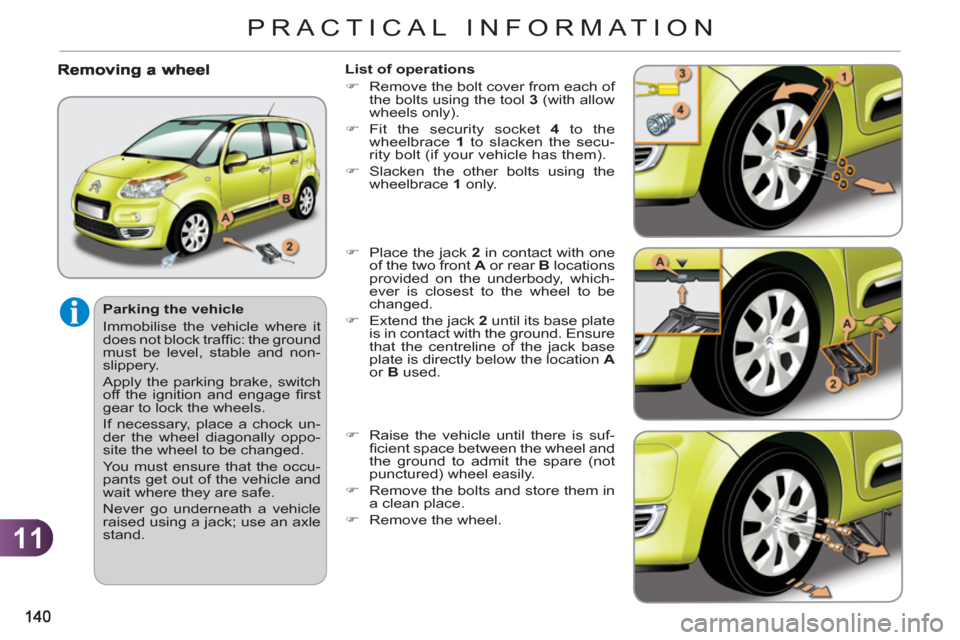
List of operations
�)
Remove the bolt cover from each of
the bolts using the tool 3
(with allow
wheels only).
�)
Fit the security socket 4
to the
wheelbrace 1
to slacken the secu-
rity bolt (if your vehicle has them).
�)
Slacken the other bolts using the
wheelbrace 1
only.
�)
Place the jack 2
in contact with one
of the two front A
or rear B
locations
provided on the underbody, which-
ever is closest to the wheel to be
changed.
�)
Extend the jack 2
until its base plate
is in contact with the ground. Ensure
that the centreline of the jack base
plate is directly below the location A
or B
used.
�)
Raise the vehicle until there is suf-
fi cient space between the wheel and
the ground to admit the spare (not
punctured) wheel easily.
�)
Remove the bolts and store them in
a clean place.
�)
Remove the wheel.
Page 152 of 244
11
150
PRACTICAL INFORMATION
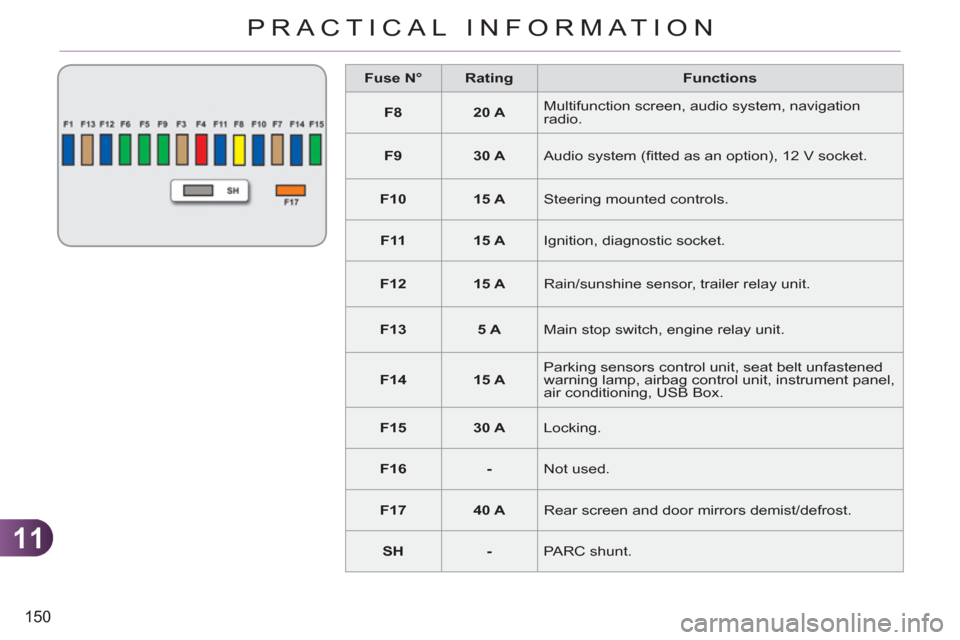
Fuse N°
Rating
Functions
F8
20 A
Multifunction screen, audio system, navigation
radio.
F9
30 A
Audio system (fi tted as an option), 12 V socket.
F10
15 A
Steering mounted controls.
F11
15 A
Ignition, diagnostic socket.
F12
15 A
Rain/sunshine sensor, trailer relay unit.
F13
5 A
Main stop switch, engine relay unit.
F14
15 A
Parking sensors control unit, seat belt unfastened
warning lamp, airbag control unit, instrument panel,
air conditioning, USB Box.
F15
30 A
Locking.
F16
-
Not used.
F17
40 A
Rear screen and door mirrors demist/defrost.
SH
-
PARC shunt.
Page 154 of 244

11
152
PRACTICAL INFORMATION
Fuse N°
Rating
Functions
F1
20 A
Engine control unit supply, cooling fan unit control, multifunction engine control main
relay.
F2
15 A
Horn.
F3
10 A
Front/rear wash-wipe.
F4
20 A
Daytime running lamps.
F5
15 A
Diesel fuel heater (Diesel engine), fuel pump (petrol engine)
F6
10 A
ABS/ESP control unit, ABS/ESP cut-off relay, secondary stop switch.
F7
10 A
Electrical power steering.
F8
25 A
Starter control.
F9
10 A
Switching and protection unit (Diesel).
F10
30 A
Diesel engine injection pump valve, injectors and ignition coils (petrol engine)
F11
40 A
Air conditioning fan.
Fuse table
Page 155 of 244

11
PRACTICAL INFORMATION
Fuse N°
Rating
Functions
F12
30 A
Windscreen wipers slow/fast speed.
F13
40 A
Built-in systems interface supply (ignition positive).
F14
30 A
Valvetronic supply (petrol).
F15
10 A
Right-hand main beam headlamp.
F16
10 A
Left-hand main beam headlamp.
F17
15 A
Left-hand dipped headlamp.
F18
15 A
Right-hand dipped headlamp.
F19
15 A
Multifunction engine control supply (petrol engine),
air cooling electrovalves (Diesel).
F20
10 A
Multifunction engine control supply (petrol engine),
Turbo pressure regulation valve (Diesel), engine
coolant level detector (Diesel).
F21
5 A
Fan assembly control supply, APC, ABS ESP
relays.
Page 159 of 244
11
157
PRACTICAL INFORMATION
A fl at battery prevents the en-
gine from starting (refer to the
corresponding paragraph).
If the telephone is being used
at the same time on the MyWay
audio navigation system, it will
be interrupted after 10 minutes.
ENERGY ECONOMY MODE
System which manages the period of
use of certain functions to conserve a
suffi cient level of charge in the battery.
After the engine has stopped, you can
still use functions such as the audio
equipment, windscreen wipers, dipped
beam headlamps, courtesy lamps, etc.
for a maximum combined period of
thirty minutes.
This period may be greatly reduced if
the battery is not fully charged.
Exiting economy mode
These functions are reactivated auto-
matically the next time the vehicle is
driven.
�)
In order to resume the use of these
functions immediately, start the en-
gine and let it run for a few minutes.
The time available to you will then be dou-
ble the period for which the engine is left
running. However, this period will always
be between fi ve and thirty minutes.
Switching to economy mode
Once this period has elapsed, a mes-
sage appears on the multifunction
screen indicating that the vehicle has
switched to economy mode and the
active functions are put on standby.
CHANGING A FRONT OR REARWIPER BLADE
Procedure for replacing a worn wiper
blade with a new one without the use
of tools.
Removal
�)
Raise the corresponding wiper arm.
�)
Unclip the wiper blade and remove it.
Fitting
�)
At the front, check the size of the
wiper blade as the shorter blade is
fi tted to the passenger side of the
vehicle.
�)
Put the corresponding new wiper
blade in place and clip it.
�)
Fold down the wiper arm carefully.
Before removing a front wiper blade
�)
Within one minute after switching off
the ignition, operate the wiper stalk
to position the wiper blades in the
vertical position.
This position must be used in order to
avoid damaging the wiper blade and the
bonnet.
After fitting a front wiper blade
�)
Switch on the ignition.
�)
Operate the wiper stalk again to
park the wiper blades.
Page 176 of 244

174
EMERGENCY OR ASSISTANCE CALL
CITROËN LOCALISED EMERGENCY CALL
In an emergency, press this button for more than2 seconds. Flashing of the green LED and a voice message confi rm that the call has been made to the CITROËN Emergency team * .gg
Pressing this button again immediately cancels the request. The green LED goes off.
A press
(at any time) of more than 8 seconds on this button, cancels the
request.
CITROËN LOCALISED ASSISTANCE CALL
When the ignition is switched on, thegreen LED comes on for 3 seconds
indicating that the system is operating correctly.
If the oran
ge LED fl ashes: there is asystem fault.
If the oran
ge LED is on continuously: thebackup battery must be replaced.
In either case, contact a CITRO
ËN. Pressin
g this button again immediately cancels the request.
The cancellation is confi rmed b
y a voice message.
Press this button for more than 2 seconds to request
assistance if the vehicle breaks down.
A voice message confi rms that the call has been made *
.
OPERATION OF THE SYSTEM
The green LED remains on (without fl ashing) when communication is established. It goes off at the end of communication.
This call is dealt with b
y the CITROËN Emergency team which receiveslocating information from the vehicle and can send a detailed alert to theappropriate emergency services. In countries in which the team is not
operational, or when the locating service has been expressly declined,
the call is dealt with directl
y by the emergency services (11 2) without the
vehicle location.
If an impact is detected b
y the airbag ECU, and independentlyof the deployment of any airbags, an emergency call is made
automatically.
*
These services are subject to conditions and availability.
Consult a CITROËN dealer.If you purchased your vehicle outside the CITROËN dealer network,
we invite
you to have a dealer check the confi guration of these servicesand, if desired, modifi ed to suit your wishes. In a multi-lingual country, confi guration is possible in the offi cial national language of your choice.
For technical reasons, particularl
y to improve the quality of Telematic services to customers, the manufacturer reserves the right to carry out
updates to the vehicle's on-board telematic system.
If you benefi t from the CITROËN eTouch offer, you also have availableadditional services in your MyCITROEN personal space, via the CITROËN y,y
Internet website www.citroen.co.uk.
Page 197 of 244
195
08
1
2
3
4
BLUETOOTH TELEPHONE
*
The services available depend on the network, the SIM card and thecompatibility of the Bluetooth telephone used. Check the telephone
manual and with your network provider for details of the servicesavailable to you.
PAIRING A TELEPHONE
FIRST CONNECTION
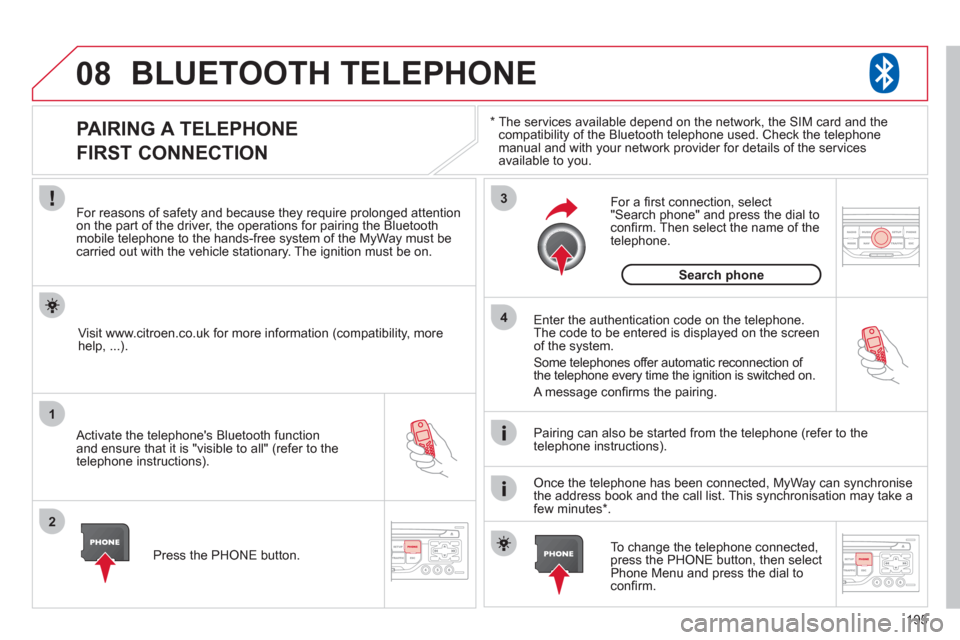
For reasons of safety and because they require prolonged attentionon the part of the driver, the operations for pairing the Bluetooth mobile telephone to the hands-free system of the MyWay must be carried out with the vehicle stationary. The ignition must be on.
Activate the telephone's Bluetooth
function
and ensure that it is "visible to all" (refer to the
telephone instructions). Enter the authentication code on the tele
phone.
The code to be entered is displayed on the screen
of the system.
Some telephones offer automatic reconnection o
f
the telephone every time the ignition is switched on.
A messa
ge confi rms the pairing.
To change the telephone connected, press the PHONE button, then select Phone Menu and press the dial toconfi rm.
Once the telephone has been connected, MyWay can synchronise
the address book and the call list. This synchronisation may take a few minutes * . Pairin
g can also be started from the telephone (refer to the
telephone instructions). Visit www.citroen.co.uk
for more information (compatibility, more
help, ...).
Press the PH
ONE button.
For a
fi rst connection, select"Search phone" and press the dial to confi rm. Then select the name of thetelephone.
Search
phone