warning Citroen C3 PICASSO RHD 2016 1.G Owner's Guide
[x] Cancel search | Manufacturer: CITROEN, Model Year: 2016, Model line: C3 PICASSO RHD, Model: Citroen C3 PICASSO RHD 2016 1.GPages: 296, PDF Size: 9.13 MB
Page 36 of 296
34
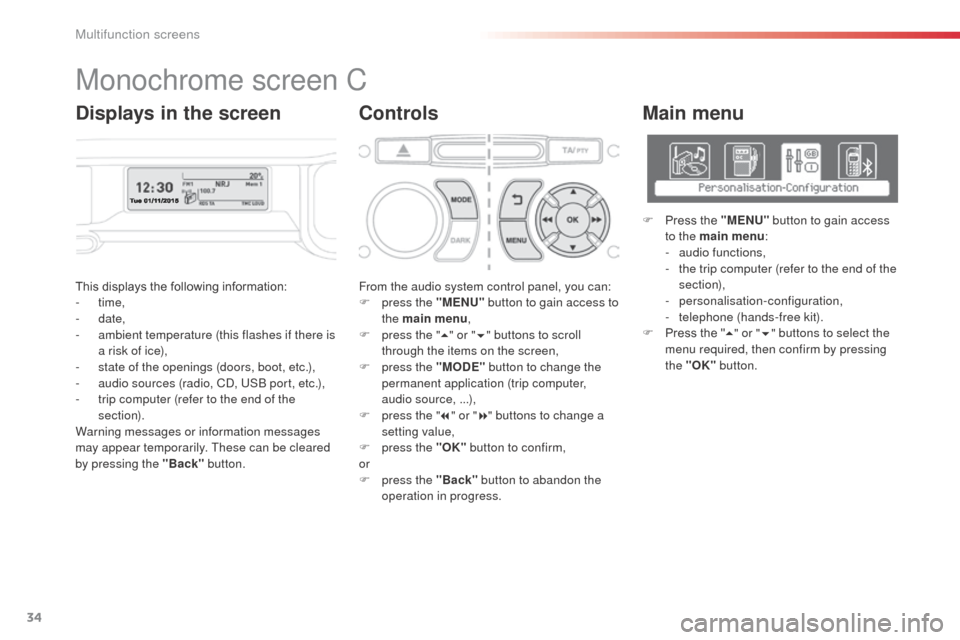
This displays the following information:
- time,
-
date,
-
a
mbient temperature (this flashes if there is
a risk of ice),
-
s
tate of the openings (doors, boot, etc.),
-
a
udio sources (radio, CD, USB port, etc.),
-
t
rip computer (refer to the end of the
section).
Warning messages or information messages
may appear temporarily. These can be cleared
by pressing the "Back" button. From the audio system control panel, you can:
F
p ress the "MENU" button to gain access to
the main menu ,
F
p
ress the "5" or " 6" buttons to scroll
through the items on the screen,
F
p
ress the "MODE" button to change the
permanent application (trip computer,
audio source, ...),
F
p
ress the "7" or " 8" buttons to change a
setting value,
F
p
ress the "OK" button to confirm,
or
F
p
ress the "Back" button to abandon the
operation in progress.
Main menu
F Press the "MENU" button to gain access
to the main menu :
-
a
udio functions,
-
t
he trip computer (refer to the end of the
section),
-
personalisation-configuration,
-
t
elephone (hands-free kit).
F
P
ress the " 5" or " 6" buttons to select the
menu required, then confirm by pressing
the "OK" button.
Monochrome screen C
ControlsDisplays in the screen
Multifunction screens
Page 37 of 296
35
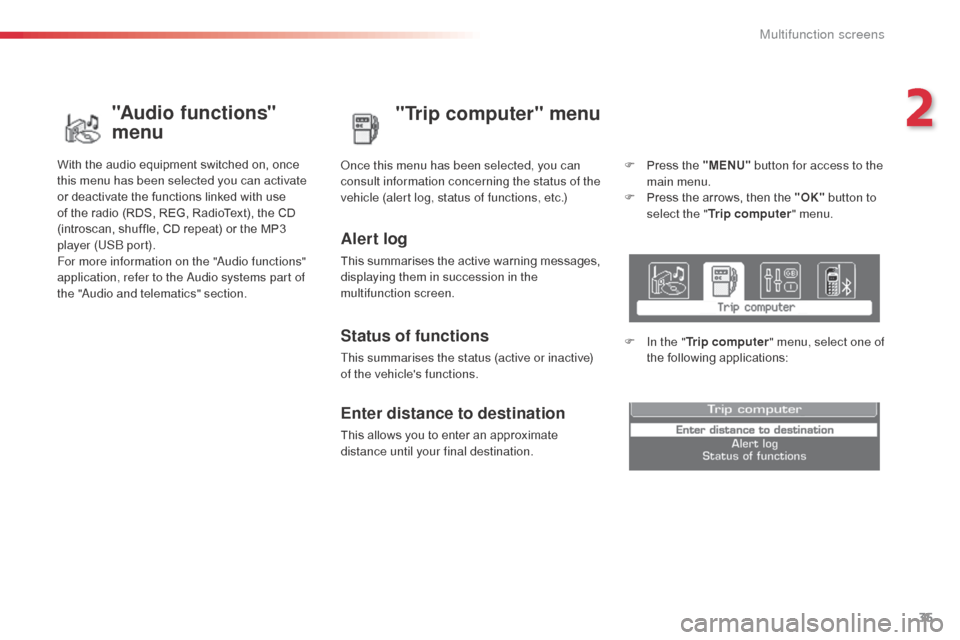
"Trip computer" menu
Alert log
This summarises the active warning messages,
displaying them in succession in the
multifunction screen. Once this menu has been selected, you can
consult information concerning the status of the
vehicle (alert log, status of functions, etc.)
Status of functions
This summarises the status (active or inactive)
of the vehicle's functions.
Enter distance to destination
This allows you to enter an approximate
distance until your final destination.F
P
ress the "MENU"
button for access to the
main menu.
F
P
ress the arrows, then the "OK"
button to
select the " Trip computer " menu.
F
I
n the "
Trip computer " menu, select one of
the following applications:
"Audio functions"
menu
With the audio equipment switched on, once
this menu has been selected you can activate
or deactivate the functions linked with use
of the radio (RDS, REG, RadioText), the CD
(introscan, shuffle, CD repeat) or the MP3
player (USB port).
For more information on the "Audio functions"
application, refer to the Audio systems part of
the "Audio and telematics" section.
2
Multifunction screens
Page 61 of 296

59
Remote control problem
Following disconnection of the vehicle battery,
replacement of the remote control battery or in
the event of a remote control fault you can no
longer unlock, lock or locate your vehicle.
F
F
irst of all, use the key in the lock to unlock
or lock your vehicle.
F
T
hen, reinitialise the remote control.Changing the battery
Battery ref.: CR1620 / 3 volts.Reinitialisation
F Switch off the ignition.
F T urn the key to position 2 (Ignition on) .
F
P
ress the closed padlock immediately for a
few seconds.
F
S
witch off the ignition and remove the key
from the ignition switch.
The remote control is fully operational again. If the battery is flat, you are
informed by illumination of this
warning lamp, an audible signal
and a message.
F
U
nclip the casing using a coin at the notch.
F
S
lide the flat battery out of its location.
F
S
lide the new battery into its location
observing the original direction.
F
C
lip the casing.
F
R
einitialise the remote control.
If the problem persists, contact a CITROËN
dealer as soon as possible.
Locating your vehicle
F Press the closed padlock to locate your
locked vehicle in a car park.
This is indicated by lighting of the courtesy
lamps and flashing of the direction indicators
for a few seconds.
Folding the key
F First press this button to fold the key.
If you do not press the button when folding
the key, there is a risk of damage to the
mechanism.
4
Access
Page 64 of 296
62
Reinitialisation
Deactivating the rear window and
door controls
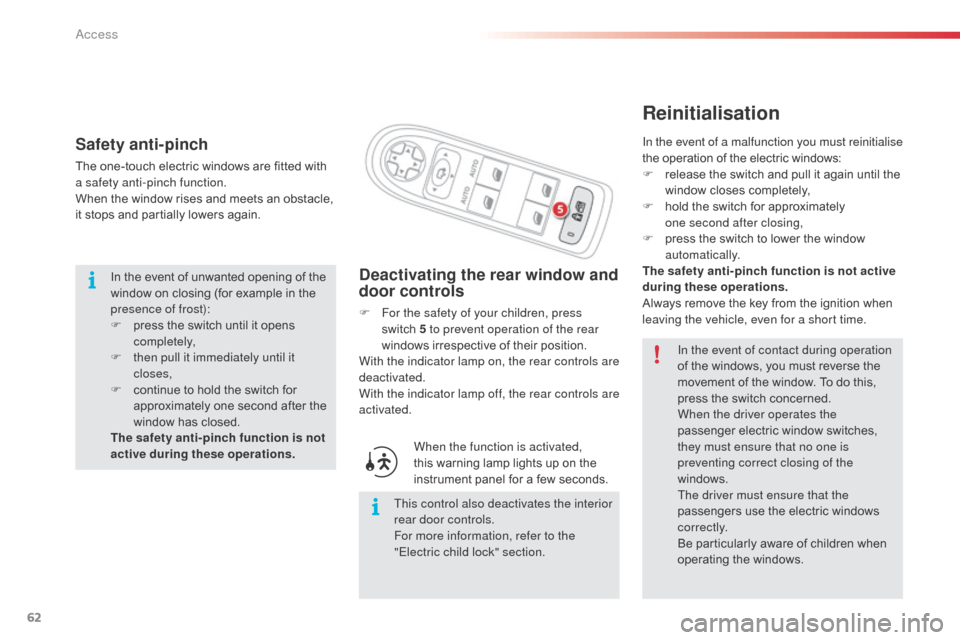
F For the safety of your children, press switch 5 to prevent operation of the rear
windows irrespective of their position.
With the indicator lamp on, the rear controls are
deactivated.
With the indicator lamp off, the rear controls are
activated.
When the function is activated,
this warning lamp lights up on the
instrument panel for a few seconds.
This control also deactivates the interior
rear door controls.
For more information, refer to the
"Electric child lock" section. In the event of contact during operation
of the windows, you must reverse the
movement of the window. To do this,
press the switch concerned.
When the driver operates the
passenger electric window switches,
they must ensure that no one is
preventing correct closing of the
windows.
The driver must ensure that the
passengers use the electric windows
c o r r e c t l y.
Be particularly aware of children when
operating the windows.
Safety anti-pinch
The one-touch electric windows are fitted with
a safety anti-pinch function.
When the window rises and meets an obstacle,
it stops and partially lowers again.
In the event of unwanted opening of the
window on closing (for example in the
presence of frost):
F
p
ress the switch until it opens
completely,
F
t
hen pull it immediately until it
closes,
F
c
ontinue to hold the switch for
approximately one second after the
window has closed.
The safety anti-pinch function is not
active during these operations. In the event of a malfunction you must reinitialise
the operation of the electric windows:
F
r elease the switch and pull it again until the
window closes completely,
F
h
old the switch for approximately
one
second after closing,
F
p
ress the switch to lower the window
automatically.
The safety anti-pinch function is not active
during these operations.
Always remove the key from the ignition when
leaving the vehicle, even for a short time.
Access
Page 65 of 296
63
Doors
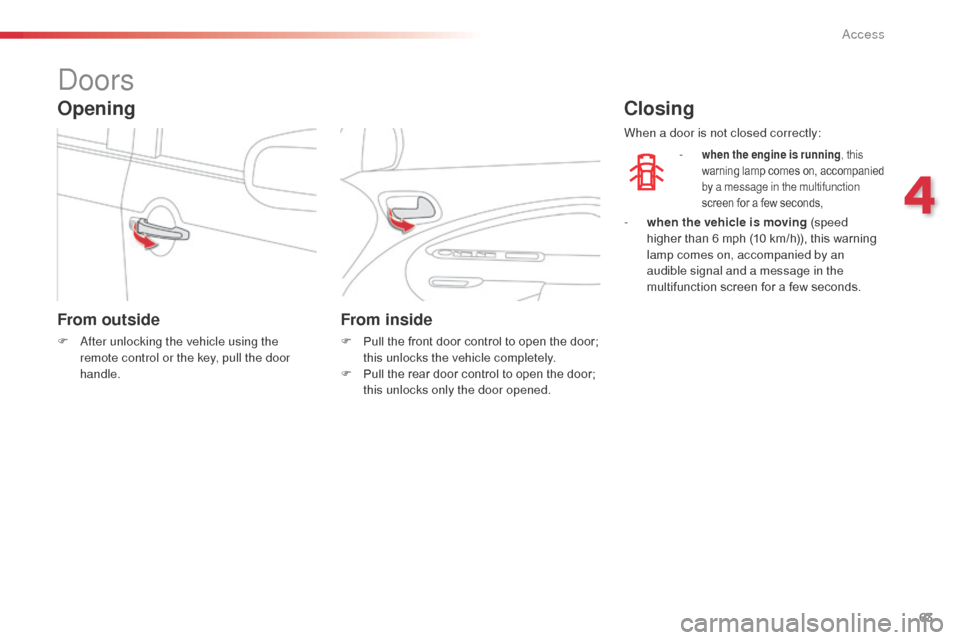
From outside
F After unlocking the vehicle using the remote control or the key, pull the door
handle.
From inside
F Pull the front door control to open the door; this unlocks the vehicle completely.
F
P
ull the rear door control to open the door;
this unlocks only the door opened.
Closing
- when the engine is running , this
warning lamp comes on, accompanied
by a message in the multifunction
screen for a few seconds,
Opening
When a door is not closed correctly:
-
w
hen the vehicle is moving (speed
higher than 6 mph (10 km/h)), this warning
lamp comes on, accompanied by an
audible signal and a message in the
multifunction screen for a few seconds.
4
Access
Page 68 of 296
66
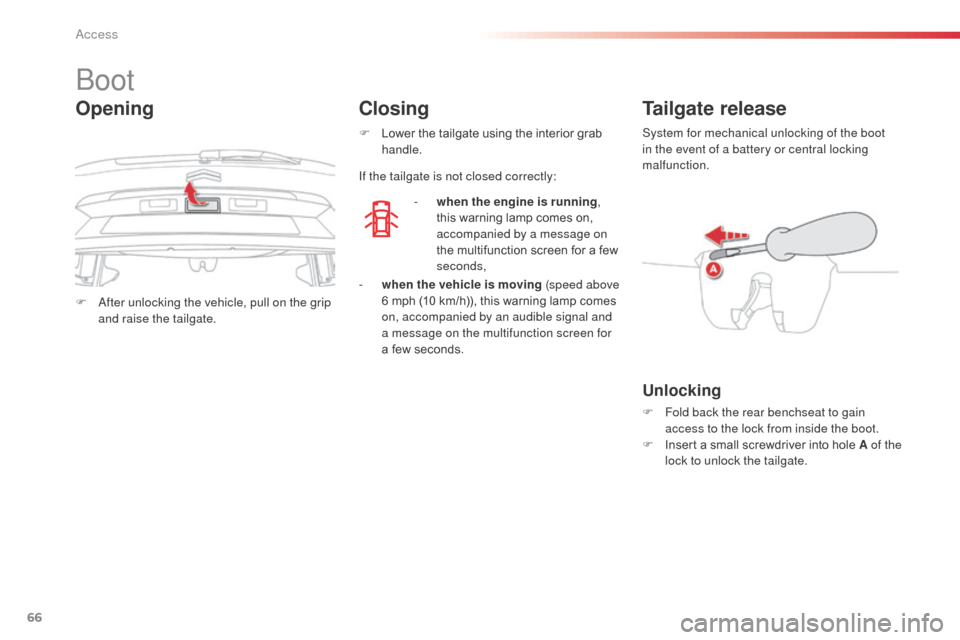
F After unlocking the vehicle, pull on the grip and raise the tailgate.
Boot
- when the engine is running ,
this warning lamp comes on,
accompanied by a message on
the multifunction screen for a few
seconds,
Tailgate release
Unlocking
F Fold back the rear benchseat to gain access to the lock from inside the boot.
F
I
nsert a small screwdriver into hole A of the
lock to unlock the tailgate.
Closing
If the tailgate is not closed correctly:
Opening
- when the vehicle is moving (speed above 6 mph (10 km/h)), this warning lamp comes
on, accompanied by an audible signal and
a message on the multifunction screen for
a few seconds.
F
L
ower the tailgate using the interior grab
handle. System for mechanical unlocking of the boot
in the event of a battery or central locking
malfunction.
Access
Page 70 of 296
68
Fuel tank
Low fuel levelFilling
A label affixed to the inside of the flap reminds
you of the type of fuel to be used depending on
your engine.
When the low fuel level is reached
this warning lamp comes on in the
instrument panel. When it first comes
on there remains approximately
5
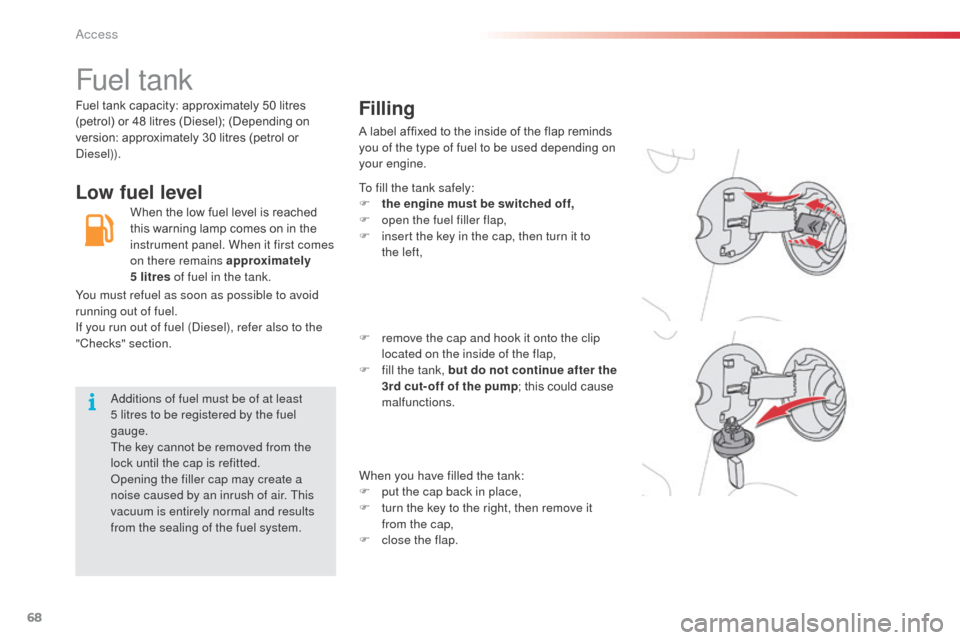
litres of fuel in the tank. To fill the tank safely:
F
t
he engine must be switched off,
F
o
pen the fuel filler flap,
F
i
nsert the key in the cap, then turn it to
the
left,
F
r
emove the cap and hook it onto the clip
located on the inside of the flap,
F
f
ill the tank, but do not continue after the
3rd cut- off of the pump ; this could cause
malfunctions.
When you have filled the tank:
F
p
ut the cap back in place,
F
t
urn the key to the right, then remove it
from the cap,
F
c
lose the flap.
Additions of fuel must be of at least
5
litres to be registered by the fuel
gauge.
The key cannot be removed from the
lock until the cap is refitted.
Opening the filler cap may create a
noise caused by an inrush of air. This
vacuum is entirely normal and results
from the sealing of the fuel system.
Fuel tank capacity: approximately 50 litres
(petrol) or 48 litres (Diesel); (Depending on
version: approximately 30 litres (petrol or
Diesel)).
You must refuel as soon as possible to avoid
running out of fuel.
If you run out of fuel (Diesel), refer also to the
"Checks" section.
Access
Page 75 of 296

73
Manual guide-me-home
lighting
The temporary illumination of the dipped beam
headlamps after the vehicle's ignition has been
switched off makes the driver's exit easier
when the light is poor.
Switching on
F With the ignition off, "flash" the headlamps using the lighting stalk.
F
A f
urther "headlamp flash" switches the
function off.
Switching off
The manual guide-me-home lighting switches
off automatically after a set time.
Lighting on audible warning
When the ignition is switched off, all
of the lamps switch off automatically,
unless guide-me-home lighting is
activated.
If the lighting is switched on manually
after switching off the ignition, there
is an audible signal when a front door
is opened to warn the driver that they
have forgotten to switch off the vehicle's
lighting, with the ignition off.
In some weather conditions (e.g. low
temperature or humidity), the presence
of misting on the internal sur face of the
glass of the headlamps and rear lamps
is normal; it disappears after the lamps
have been on for a few minutes.
5
Visibility
Page 76 of 296
74
Linked with the Guide-me-home
lighting
Association with the automatic illumination
of headlamps provides the guide-me-home
lighting with the following additional options:
-
a
utomatic activation of guide-me-home
lighting when automatic illumination of
headlamps is switched on (in the vehicle
parameters of the multifunction screen
configuration menu),
-
s
election of the duration of maintaining of
the lighting for 15, 30 or 60 seconds in the
vehicle parameters of the multifunction
screen configuration menu (except for
monochrome screen A where this is
preset).
Operating fault
In the event of a malfunction of the
sunshine sensor, the lamps come
on, this warning lamp is displayed
in the instrument panel and/or a message appears
in the multifunction screen, accompanied by an
audible signal.
Contact a CITROËN dealer or a qualified workshop.
In fog or snow, the sunshine
sensor may detect sufficient light.
Therefore, the lamps will not come on
automatically.
Do not cover the sunshine sensor,
linked with the rain sensor and located
in the centre of the windscreen behind
the rear view mirror; the associated
functions would no longer be controlled.
Automatic illumination of
headlamps
The sidelamps and dipped beam headlamps are
switched on automatically, without any action on the part
of the driver, when a low level of external light is detected
or in certain cases of activation of the windscreen wipers.
As soon as the brightness returns to a sufficient level or
after the windscreen wipers are switched off, the lamps
are switched off automatically.
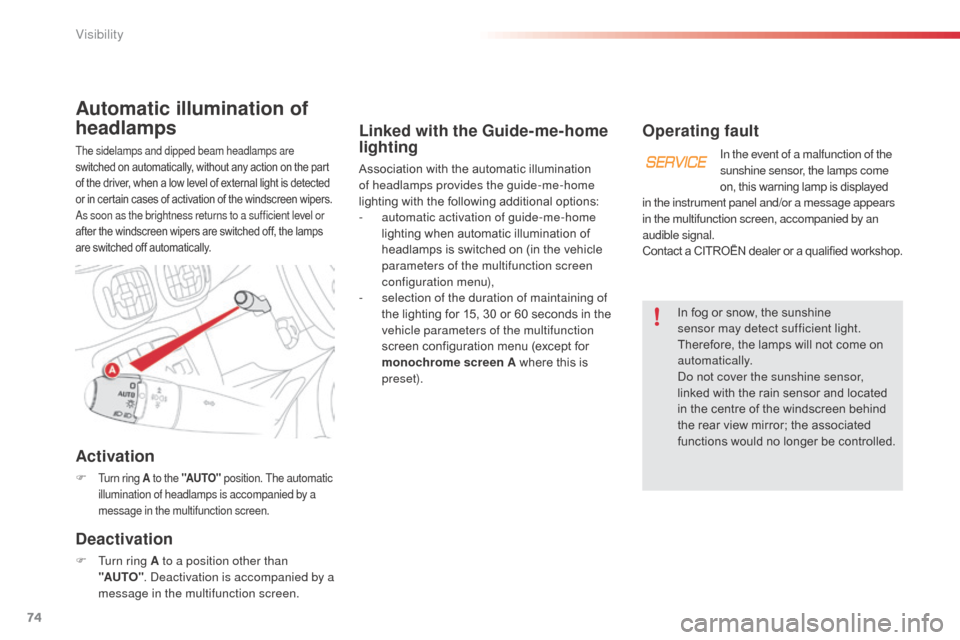
Activation
F Turn ring A to the "AUTO" position. The automatic
illumination of headlamps is accompanied by a
message in the multifunction screen.
Deactivation
F Turn ring A to a position other than "AUTO" . Deactivation is accompanied by a
message in the multifunction screen.
Visibility
Page 98 of 296
96
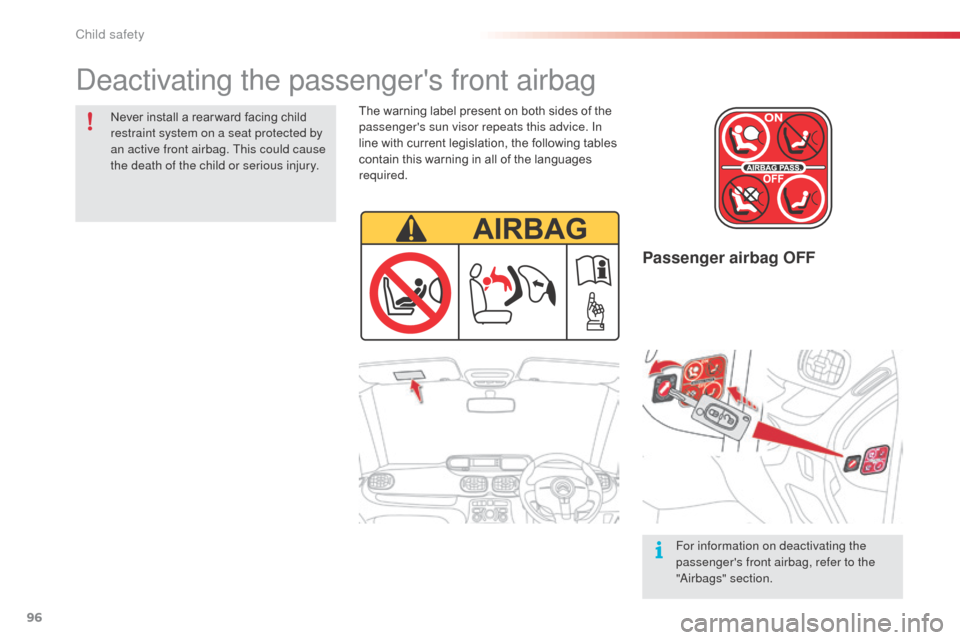
Passenger airbag OFF
Never install a rear ward facing child
restraint system on a seat protected by
an active front airbag. This could cause
the death of the child or serious injury.For information on deactivating the
passenger's front airbag, refer to the
"Airbags" section.
Deactivating the passenger's front airbag
The warning label present on both sides of the
passenger's sun visor repeats this advice. In
line with current legislation, the following tables
contain this warning in all of the languages
required.
Child safety