display Citroen C3 RHD 2014 2.G Owner's Guide
[x] Cancel search | Manufacturer: CITROEN, Model Year: 2014, Model line: C3 RHD, Model: Citroen C3 RHD 2014 2.GPages: 284, PDF Size: 8.99 MB
Page 47 of 284
45
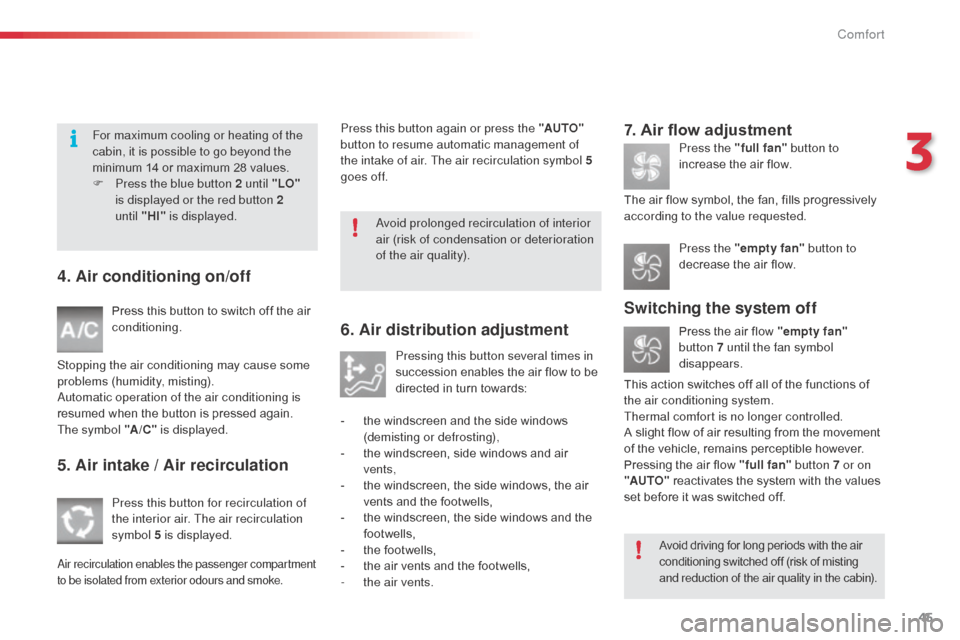
4. Air conditioning on/off
Press this button to switch off the air
conditioning.
Stopping the air conditioning may cause some
problems (humidity, misting).
au
tomatic operation of the air conditioning is
resumed when the button is pressed again.
The
symbol "A /C " is displayed.
5. Air intake / Air recirculation
Press this button for recirculation of
the interior air. The air recirculation
symbol 5 is displayed.
air recirculation enables the passenger compartment
to be isolated from exterior odours and smoke.
6. Air distribution adjustment
Pressing this button several times in
succession enables the air flow to be
directed in turn towards:
-
t
he windscreen and the side windows
(demisting or defrosting),
-
t
he windscreen, side windows and air
vents,
-
t
he windscreen, the side windows, the air
vents and the footwells,
-
t
he windscreen, the side windows and the
footwells,
-
t
he footwells,
-
t
he air vents and the footwells,
-
t
he air vents.
7. Air flow adjustment
Press the "full fan" button to
increase the air flow.
The air flow symbol, the fan, fills progressively
according to the value requested.
Switching the system off
Press the air flow "empty fan"
button 7 until the fan symbol
disappears.
This action switches off all of the functions of
the air conditioning system.
Thermal comfort is no longer controlled.
A
slight flow of air resulting from the movement
of the vehicle, remains perceptible however.
Pressing the air flow "full fan" button 7 or on
"AUTO" reactivates the system with the values
set before it was switched off. Press the "empty fan"
button to
decrease the air flow.
Press this button again or press the "AUTO"
button to resume automatic management of
the intake of air. The air recirculation symbol 5
goes off.
Avoid driving for long periods with the air
conditioning switched off (risk of misting
and reduction of the air quality in the cabin).
For maximum cooling or heating of the
cabin, it is possible to go beyond the
minimum 14 or maximum 28 values.
F
P
ress the blue button 2 until "LO"
is displayed or the red button 2
until
"HI" is displayed.
av
oid prolonged recirculation of interior
air (risk of condensation or deterioration
of the air quality).
3
Comfort
Page 71 of 284

69
Lighting controls
Main lighting
The various front and rear lamps of the vehicle
are designed to adapt the driver's visibility
progressively according to climatic conditions:
-
s
idelamps, to be seen,
-
d
ipped beam headlamps to see without
dazzling other drivers,
-
m
ain beam headlamps to see clearly when
the road is clear.
Additional lighting
other lamps are installed to fulfil the
requirements of particular conditions of
visibility:
-
a r
ear foglamp to be seen from afar,
-
f
ront foglamps for even better for ward
vision.
Programming
Various automatic lighting control modes
are also available according to the following
options:
-
gu
ide-me-home lighting,
-
a
utomatic illumination of headlamps.
Model without AUTO lighting
Model with AUTO lighting
Lighting off / daytime running
lam ps.
automatic illumination of headlamps.
Sidelamps only.
dip
ped or main beam headlamps.
B.
S
talk for switching the headlamp beam:
pull the stalk to switch between dipped and
main beam headlamps.
In the lamps off and sidelamps modes,
the
driver can switch on the main beam
headlamps temporarily ("headlamp flash") by
maintaining a pull on the stalk.
Displays
Lighting of the corresponding indicator lamp on
the instrument panel confirms the switching on
of the lighting selected.
dep
ending on version, the instrument panel
may have permanent back-lighting. Illumination
of the instrument panel is therefore not linked to
the exterior lighting.
Manual controls
The lighting is controlled directly by the driver
by means of the ring A and the stalk B .A.
M
ain lighting mode selection ring: turn it
to position the symbol required facing the
mark.
System for selection and control of the various front and rear lamps providing the vehicle's lighting.
5
Visibility
Page 74 of 284

72
Association with the automatic
"Guide-me-home" lighting
Association with the automatic illumination of
headlamps provides "guide-me-home" lighting
with the following additional options:
-
s
election of the lighting duration to 15, 30 or
60 seconds in the functions that can be set
in the vehicle configuration menu (except in
the case of the monochrome screen
a
, f
or
which the duration is set: 60 seconds),
-
a
utomatic activation of "guide-me-home"
lighting when automatic illumination of
headlamps is in operation.
Operating fault
In the event of a fault with the
sunshine sensor, the lighting
come on, this warning lamp is displayed in the
instrument panel and/or a message appears in
the screen, accompanied by an audible signal.
Contact a CITR
oËn
dealer or a qualified
workshop.
In fog or snow, the sunshine sensor
may detect sufficient light. Therefore,
the lighting will not come on
automatically.
do n
ot cover the sunshine sensor,
coupled with the rain sensor and
located in the centre of the windscreen
behind the rear view mirror; the
associated functions would no longer
be controlled.
Automatic illumination of headlamps
Activation
F Turn ring to the "AUTO" position. The
automatic illumination of headlamps is
accompanied by a message in the screen.
Deactivation
F Turn ring to a position other than "AUTO" . de
activation is accompanied by a message
in the screen.
The sidelamps and dipped beam headlamps
are switched on automatically, without any
action on the part of the driver, when a low level
of external light is detected or in certain cases
of activation of the windscreen wipers.
as s
oon as the brightness returns to a sufficient
level or after the windscreen wipers are switched
off, the lamps are switched off automatically.
Visibility
Page 84 of 284

82
USb Player
The USb port is located in the "AUX " box on
the centre console.
It permits the connection of a portable device,
such as a digital audio player of the iPod
®
generation 5 and later type or USB memory
stick type.
It reads the audio file formats (mp3, ogg,
wma, wav...) which are transmitted to your
audio equipment and played via the vehicle's
speakers.
You can manage these files using the steering
mounted controls or the audio equipment
control panel and display them on the
multifunction screen.
For more information on the use of this
equipment, refer to the "
au
dio system" section.
12 V accessory
socket
F To connect a 12 V accessory (max power: 120 W), lift the cover and connect a
suitable adaptor.
auxiliary socket
The auxiliary socket is located in the " AUX" box
on the centre console.
It permits the connection of a portable device,
such as a digital audio player of the iPod
® type,
to listen to your music files using the vehicle's
speakers.
For more information on the use of this
equipment, refer to the "
au
dio system" or
"eMyWay" section. The management of the files is done
using your portable device.
When it is in use, the portable device
charges automatically.
Fittings
Page 104 of 284
102
Under-inflation alert
This is given by fixed illumination of
this warning lamp, accompanied by
an audible signal and, depending on
equipment, the display of a message.
F
R
educe speed immediately, avoid
excessive steering movements and sudden
braking
F
S
top the vehicle as soon as it is safe to do
so.
The loss of pressure detected does not
always cause visible bulging of the tyre.
Do not satisfy yourself with just a visual
check. The alert is maintained until the system
is reinitialised.
F
I n the event of a puncture, use the
temporary puncture repair kit or the spare
wheel (depending on equipment),
or
F
i
f you have a compressor, such as the one
in the temporary puncture repair kit, check
the pressures of the four tyres when cold,
or
F
i
f it is not possible to make this check
immediately, drive carefully at reduced
speed.
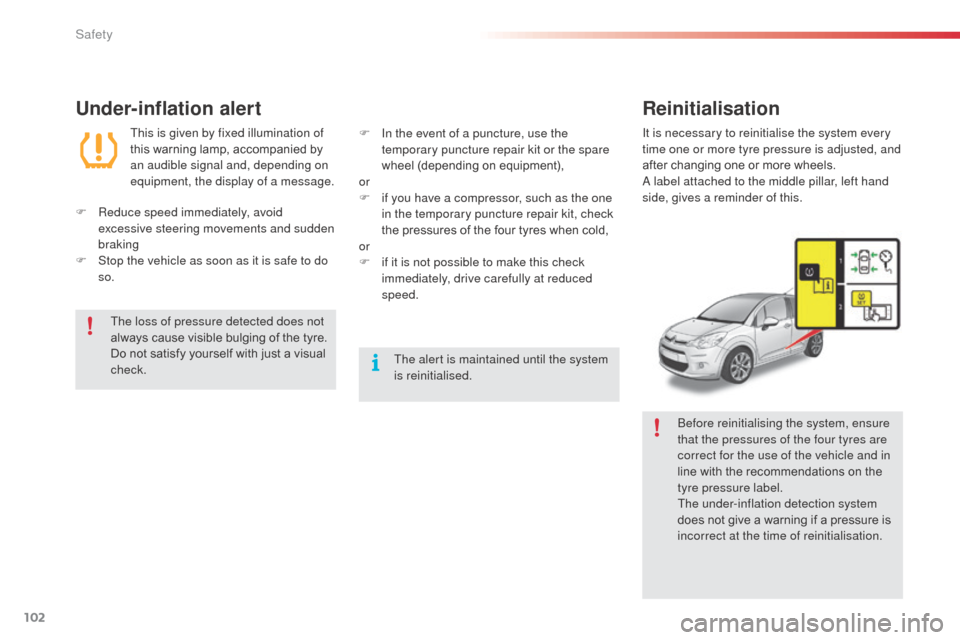
Reinitialisation
It is necessary to reinitialise the system every
time one or more tyre pressure is adjusted, and
after changing one or more wheels.
a
label attached to the middle pillar, left hand
side, gives a reminder of this.
be
fore reinitialising the system, ensure
that the pressures of the four tyres are
correct for the use of the vehicle and in
line with the recommendations on the
tyre pressure label.
The under-inflation detection system
does not give a warning if a pressure is
incorrect at the time of reinitialisation.
Safety
Page 105 of 284
103
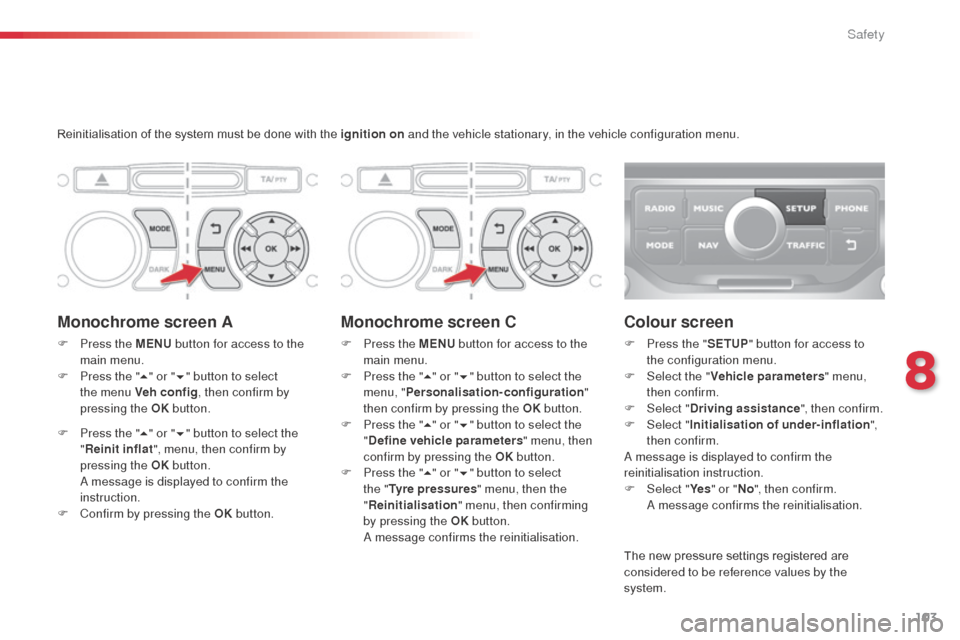
Reinitialisation of the system must be done with the ignition on and the vehicle stationary, in the vehicle configuration menu.
Monochrome screen A
F Press the MENU button for access to the
main menu.
F
P
ress the " 5" or " 6" button to select
the menu Veh conf ig , then confirm by
pressing the OK button.
F
P
ress the " 5" or " 6" button to select the
" Reinit inflat ", menu, then confirm by
pressing the OK button.
a message is displayed to confirm the
instruction.
F
C
onfirm by pressing the OK button.
Monochrome screen C
F Press the MENU button for access to the
main menu.
F
P
ress the " 5" or " 6" button to select the
menu, " Personalisation-configuration "
then confirm by pressing the OK button.
F
P
ress the " 5" or " 6" button to select the
" Define vehicle parameters " menu, then
confirm by pressing the OK button.
F
P
ress the " 5" or " 6" button to select
the " Tyre pressures " menu, then the
" Reinitialisation " menu, then confirming
by pressing the OK button.
a
m
essage confirms the reinitialisation.
Colour screen
F Press the " SETUP" button for access to
the configuration menu.
F
Sel
ect the " Vehicle parameters " menu,
then confirm.
F
Sel
ect "Driving assistance ", then confirm.
F
Sel
ect "Initialisation of under-inflation ",
then confirm.
a
message is displayed to confirm the
reinitialisation instruction.
F
Sel
ect "Ye s" or " No", then confirm.
a
m
essage confirms the reinitialisation.
The new pressure settings registered are
considered to be reference values by the
system.
8
Safety
Page 117 of 284
115
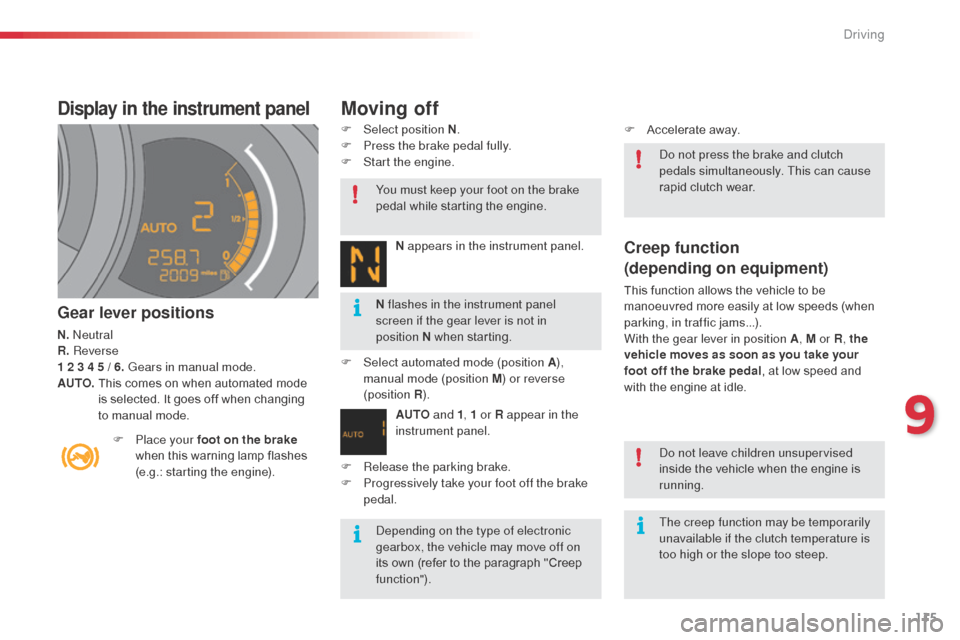
Display in the instrument panel
Gear lever positions
N. neutral
R. Reverse
1 2 3 4 5 / 6. Gears in manual mode.
AUTO.
T
his comes on when automated mode
is selected. It goes off when changing
to manual mode. F
Sel
ect position N
.
F
P
ress the brake pedal fully.
F
S
tart the engine.
N appears in the instrument panel.
F
Sel
ect automated mode (position A),
manual mode (position M) or reverse
(position R ).
AUTO and 1, 1 or R appear in the
instrument panel.
F
P
lace your foot on the brake
when this warning lamp flashes
(e.g.: starting the engine).
Creep function
(depending on equipment)
This function allows the vehicle to be
manoeuvred more easily at low speeds (when
parking, in traffic jams...).
With the gear lever in position A , M or R, the
vehicle moves as soon as you take your
foot off the brake pedal , at low speed and
with the engine at idle.
F
R
elease the parking brake.
F
P
rogressively take your foot off the brake
pedal. F
A
ccelerate away.
de
pending on the type of electronic
gearbox, the vehicle may move off on
its own (refer to the paragraph "Creep
function").
do n
ot leave children unsupervised
inside the vehicle when the engine is
running.
You must keep your foot on the brake
pedal while starting the engine.
do n
ot press the brake and clutch
pedals simultaneously. This can cause
rapid clutch wear.
N flashes in the instrument panel
screen if the gear lever is not in
position
N when starting.
The creep function may be temporarily
unavailable if the clutch temperature is
too high or the slope too steep.
Moving off
9
Driving
Page 120 of 284
118
automatic gearbox
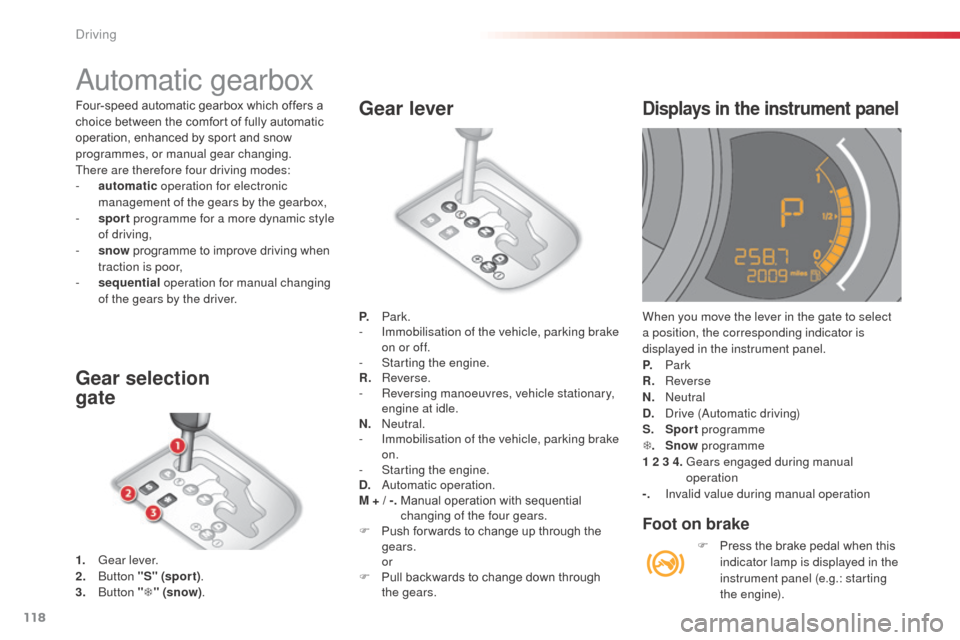
1. Gear lever.
2. bu tton "S" (spor t) .
3.
bu
tton "T " (snow) .
Gear selection
gate
P. Park.
- I mmobilisation of the vehicle, parking brake
on or off.
-
S
tarting the engine.
R.
R
everse.
-
R
eversing manoeuvres, vehicle stationary,
engine at idle.
N.
n
e
utral.
-
I
mmobilisation of the vehicle, parking brake
on.
-
S
tarting the engine.
D.
a
u
tomatic operation.
M + / -.
M
anual operation with sequential
changing of the four gears.
F
P
ush for wards to change up through the
gears.
or
F
P
ull backwards to change down through
the gears.
Gear lever
When you move the lever in the gate to select
a position, the corresponding indicator is
displayed in the instrument panel.
P.
Park
R.
Reverse
N.
n
e
utral
D.
d
r
ive (
au
tomatic driving)
S.
Sp
ort programme
T .
S
now programme
1 2 3 4.
G
ears engaged during manual
operation
-.
I
nvalid value during manual operation
Displays in the instrument panel
Foot on brake
F Press the brake pedal when this indicator lamp is displayed in the
instrument panel (e.g.: starting
the engine).
Four-speed automatic gearbox which offers a
choice between the comfort of fully automatic
operation, enhanced by sport and snow
programmes, or manual gear changing.
There are therefore four driving modes:
-
a
utomatic
operation for electronic
management of the gears by the gearbox,
-
sp
ort
programme for a more dynamic style
of driving,
-
s
now
programme to improve driving when
traction is poor,
-
s
equential
operation for manual changing
of the gears by the driver.
driving
Page 121 of 284
119
Moving off
F apply the parking brake.
F Sel ect position P or N .
F
S
tart the engine.
If this procedure is not followed, there is an
audible signal, accompanied by the display of
an warning message.
F
W
ith the engine running, press the brake
pedal.
F
R
elease the parking brake.
F
Sel
ect position R , D or M.
F
G
radually release the brake pedal.
The vehicle moves off immediately.
Automatic operation
F Select position D for automatic changing
of the four gears.
The gearbox then operates in auto-adaptive
mode, without any intervention on the part
of the driver. It continuously selects the most
suitable gear according to the style of driving,
the profile of the road and the load in the
vehicle.
For maximum acceleration without touching the
gear lever, press the accelerator pedal down
fully (kick down). The gearbox changes down
automatically or maintains the gear selected
until the maximum engine speed is reached.
On braking, the gearbox changes down
automatically to provide efficient engine
braking.
If you release the accelerator sharply, the
gearbox will not change to a higher gear for
safety reasons.
Sport and snow programmes
These two special programmes supplement the
automatic operation in very specific conditions
of use.
Sport programme "S"
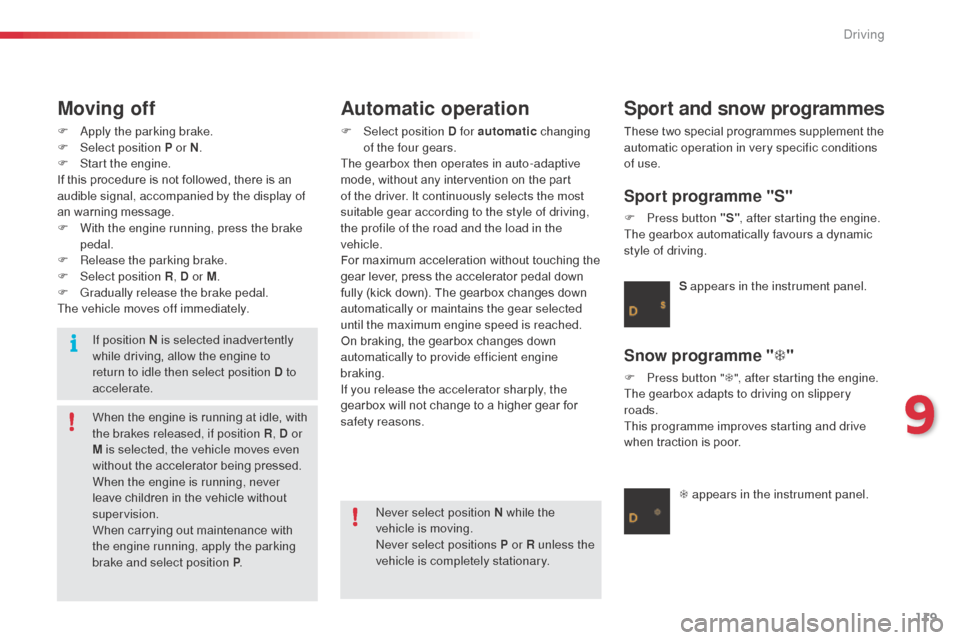
F Press button "S" , after starting the engine.
The gearbox automatically favours a dynamic
style of driving.
Snow programme " T"
F Press button " T", after starting the engine.
The gearbox adapts to driving on slippery
roads.
This programme improves starting and drive
when traction is poor. S appears in the instrument panel.
T appears in the instrument panel.
ne
ver select position N while the
vehicle is moving.
ne
ver select positions P or R unless the
vehicle is completely stationary.
If position N is selected inadvertently
while driving, allow the engine to
return to idle then select position D to
accelerate.
When the engine is running at idle, with
the brakes released, if position R
, D or
M is selected, the vehicle moves even
without the accelerator being pressed.
When the engine is running, never
leave children in the vehicle without
supervision.
When carrying out maintenance with
the engine running, apply the parking
brake and select position P .
9
Driving
Page 122 of 284
120
Manual operation
It is only possible to change from one gear to
another if the vehicle speed and engine speed
permit; other wise, the gearbox will operate
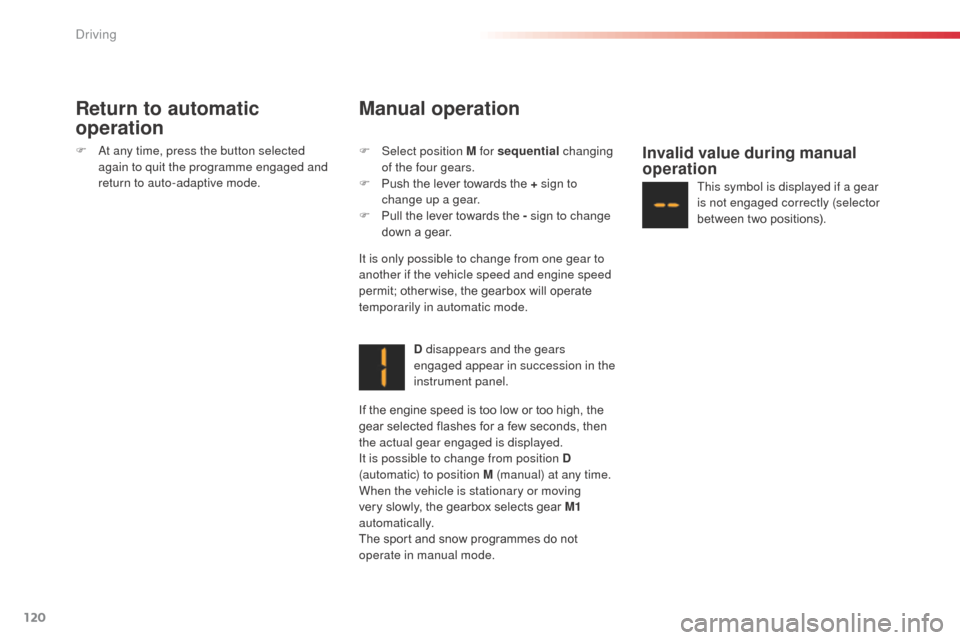
temporarily in automatic mode.D disappears and the gears
engaged appear in succession in the
instrument panel.
Invalid value during manual
operation
This symbol is displayed if a gear
is not engaged correctly (selector
between two positions).
If the engine speed is too low or too high, the
gear selected flashes for a few seconds, then
the actual gear engaged is displayed.
It is possible to change from position D
(automatic) to position M (manual) at any time.
When the vehicle is stationary or moving
very slowly, the gearbox selects gear M1
automatically.
The sport and snow programmes do not
operate in manual mode.
Return to automatic
operation
F at any time, press the button selected again to quit the programme engaged and
return to auto-adaptive mode. F
Sel ect position M for sequential changing
of the four gears.
F
P
ush the lever towards the + sign to
change up a gear.
F
P
ull the lever towards the - sign to change
down a gear.
Driving