Citroen C3 RHD 2014 2.G Repair Manual
Manufacturer: CITROEN, Model Year: 2014, Model line: C3 RHD, Model: Citroen C3 RHD 2014 2.GPages: 284, PDF Size: 8.99 MB
Page 61 of 284
59
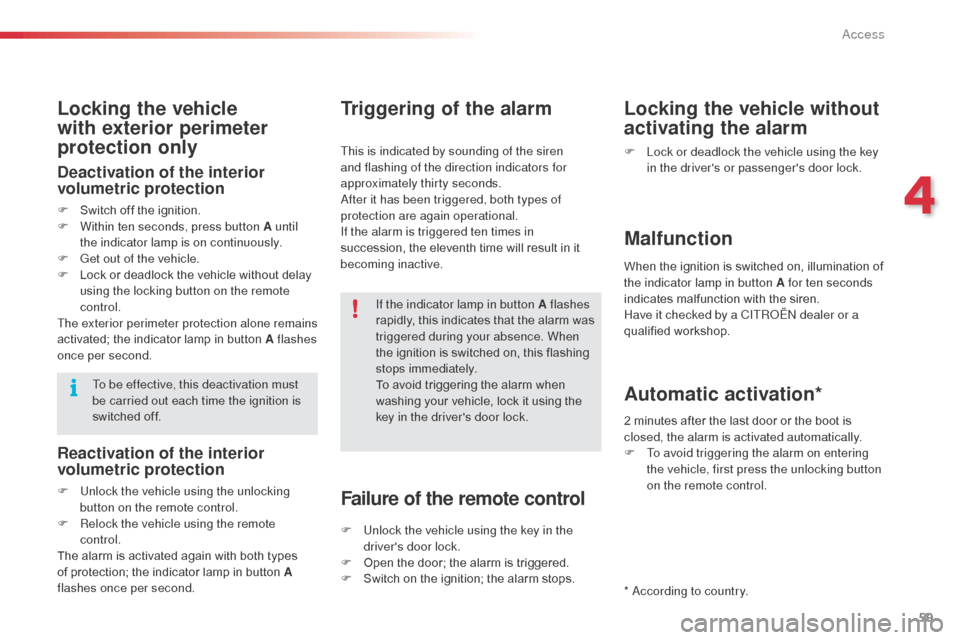
Locking the vehicle
with exterior perimeter
protection only
Deactivation of the interior
volumetric protection
F Switch off the ignition.
F W ithin ten seconds, press button A until
the indicator lamp is on continuously.
F
G
et out of the vehicle.
F
L
ock or deadlock the vehicle without delay
using the locking button on the remote
control.
The exterior perimeter protection alone remains
activated; the indicator lamp in button A flashes
once per second. If the indicator lamp in button A flashes
rapidly, this indicates that the alarm was
triggered during your absence. When
the ignition is switched on, this flashing
stops immediately.
To avoid triggering the alarm when
washing your vehicle, lock it using the
key in the driver's door lock.
To be effective, this deactivation must
be carried out each time the ignition is
switched off.
Reactivation of the interior
volumetric protection
F Unlock the vehicle using the unlocking
button on the remote control.
F
R
elock the vehicle using the remote
control.
The alarm is activated again with both types
of protection; the indicator lamp in button A
flashes once per second.
Triggering of the alarm
This is indicated by sounding of the siren
and flashing of the direction indicators for
approximately thirty seconds.
af
ter it has been triggered, both types of
protection are again operational.
If the alarm is triggered ten times in
succession, the eleventh time will result in it
becoming inactive.
Failure of the remote control
F Unlock the vehicle using the key in the driver's door lock.
F
O
pen the door; the alarm is triggered.
F
S
witch on the ignition; the alarm stops.
Locking the vehicle without
activating the alarm
F Lock or deadlock the vehicle using the key in the driver's or passenger's door lock.
Malfunction
When the ignition is switched on, illumination of
the indicator lamp in button A for ten seconds
indicates malfunction with the siren.
Have it checked by a CITR
oËn
dealer or a
qualified workshop.
*
a
c
cording to country.
Automatic activation*
2 minutes after the last door or the boot is
closed, the alarm is activated automatically.
F
T
o avoid triggering the alarm on entering
the vehicle, first press the unlocking button
on the remote control.
4
Access
Page 62 of 284
60
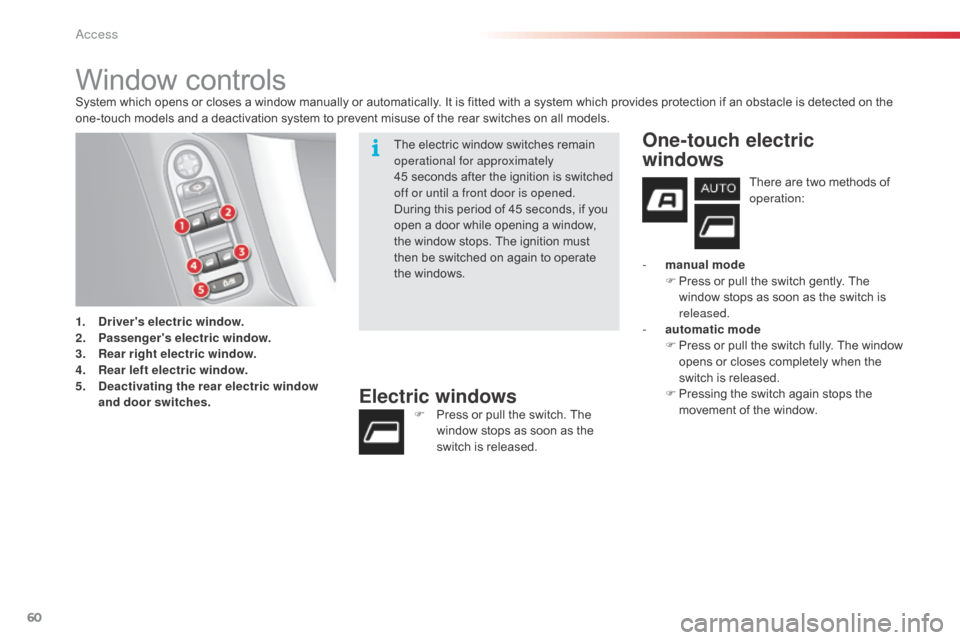
Window controlsSystem which opens or closes a window manually or automatically. It is fitted with a system which provides protection if an obstacle is detected on the
one-touch models and a deactivation system to prevent misuse of the rear switches on all models.
1.
D
river's electric window.
2.
P
assenger's electric window.
3.
R
ear right electric window.
4.
R
ear left electric window.
5.
D
eactivating the rear electric window
and door switches.
Electric windowsF Press or pull the switch. The window stops as soon as the
switch is released.
One-touch electric
windows
There are two methods of
operation:
-
m
anual mode
F
P
ress or pull the switch gently. The
window stops as soon as the switch is
released.
-
a
utomatic mode
F
P
ress or pull the switch fully. The window
opens or closes completely when the
switch is released.
F
P
ressing the switch again stops the
movement of the window.
The electric window switches remain
operational for approximately
45 seconds after the ignition is switched
off or until a front door is opened.
During this period of 45 seconds, if you
open a door while opening a window,
the window stops. The ignition must
then be switched on again to operate
the windows.
Access
Page 63 of 284
61
Safety anti-pinch
The one-touch front electric windows are fitted
with a safety anti-pinch function.
When the window rises and meets an obstacle,
it stops and partially lowers again.
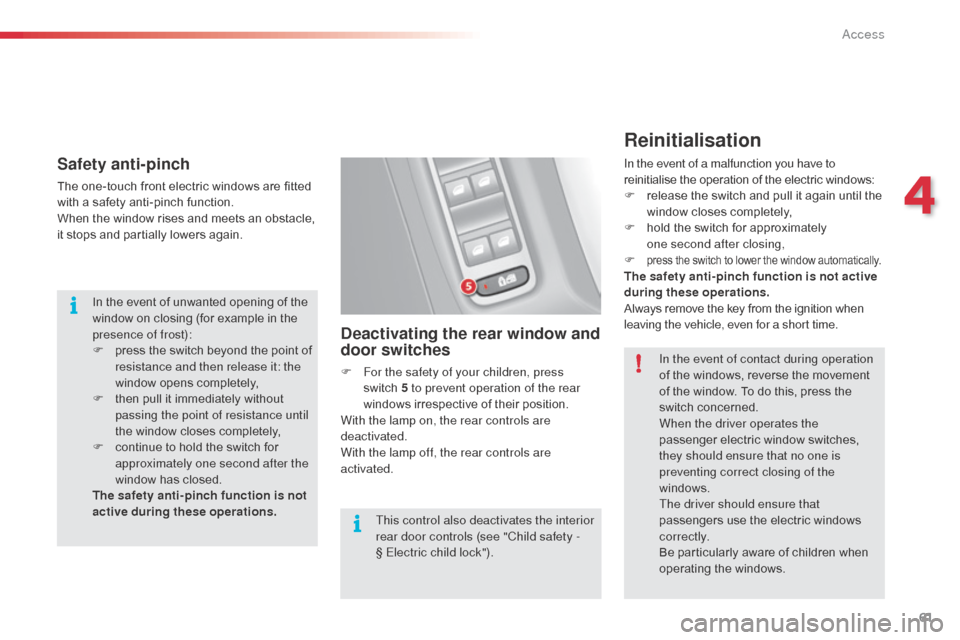
Deactivating the rear window and
door switches
F For the safety of your children, press switch 5 to prevent operation of the rear
windows irrespective of their position.
With the lamp on, the rear controls are
deactivated.
With the lamp off, the rear controls are
activated.
Reinitialisation
In the event of a malfunction you have to
reinitialise the operation of the electric windows:
F
r
elease the switch and pull it again until the
window closes completely,
F
h
old the switch for approximately
one
second after closing,
F
press the switch to lower the window automatically.The safety anti-pinch function is not active
during these operations.
Always remove the key from the ignition when
leaving the vehicle, even for a short time.
In the event of unwanted opening of the
window on closing (for example in the
presence of frost):
F
p
ress the switch beyond the point of
resistance and then release it: the
window opens completely,
F
t
hen pull it immediately without
passing the point of resistance until
the window closes completely,
F
c
ontinue to hold the switch for
approximately one second after the
window has closed.
The safety anti-pinch function is not
active during these operations. In the event of contact during operation
of the windows, reverse the movement
of the window. To do this, press the
switch concerned.
When the driver operates the
passenger electric window switches,
they should ensure that no one is
preventing correct closing of the
windows.
The driver should ensure that
passengers use the electric windows
c o r r e c t l y.
Be particularly aware of children when
operating the windows.
This control also deactivates the interior
rear door controls (see "Child safety -
§
Electric child lock").
4
Access
Page 64 of 284
62
doors
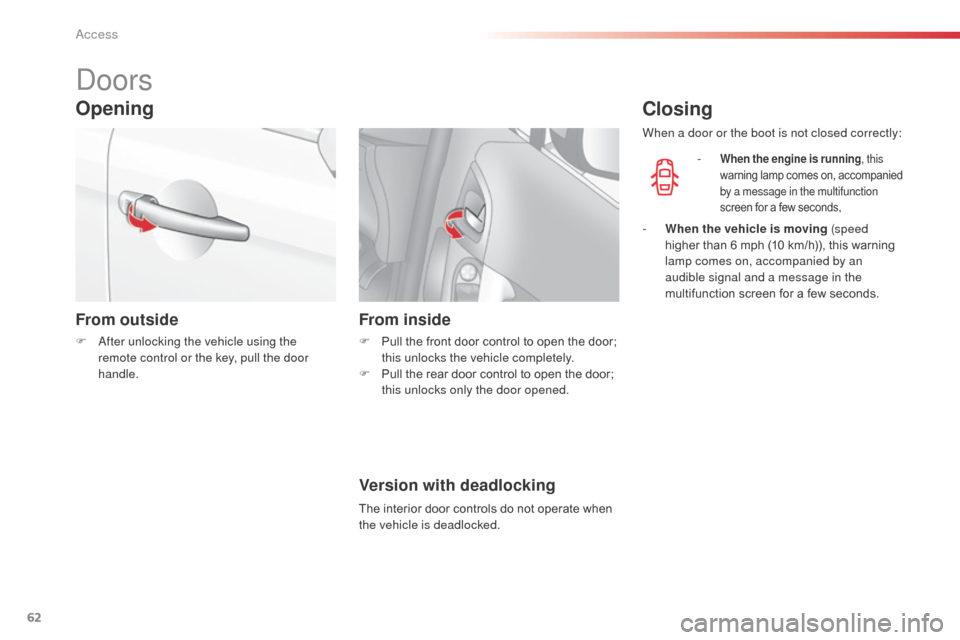
Opening
From outside
F after unlocking the vehicle using the remote control or the key, pull the door
handle.
From inside
F Pull the front door control to open the door; this unlocks the vehicle completely.
F
P
ull the rear door control to open the door;
this unlocks only the door opened.
Closing
- When the engine is running , this
warning lamp comes on, accompanied
by a message in the multifunction
screen for a few seconds,
When a door or the boot is not closed correctly:
-
W
hen the vehicle is moving (speed
higher than 6 mph (10 km/h)), this warning
lamp comes on, accompanied by an
audible signal and a message in the
multifunction screen for a few seconds.
Version with deadlocking
The interior door controls do not operate when
the vehicle is deadlocked.
access
Page 65 of 284
63
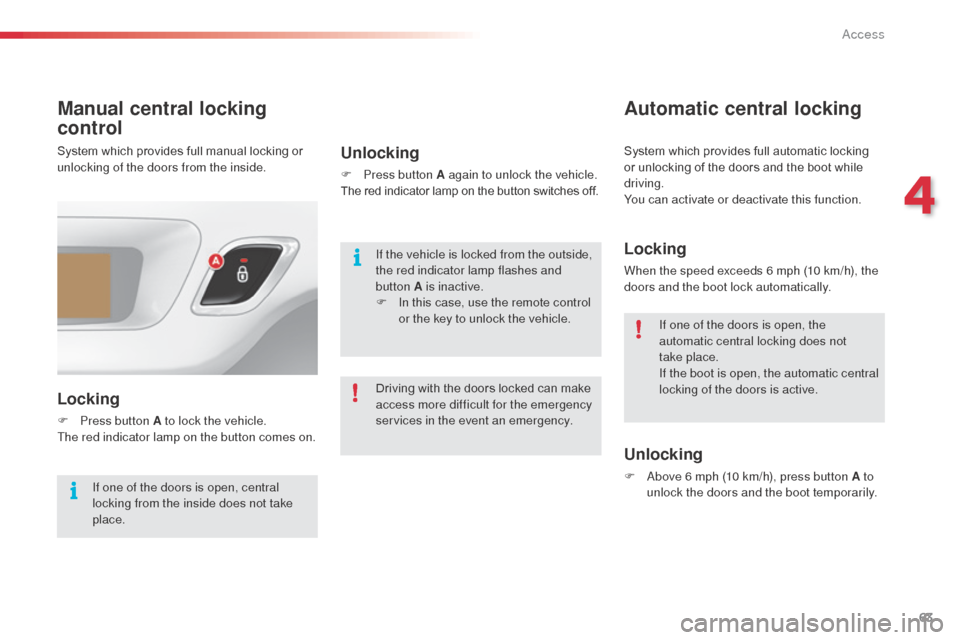
Manual central locking
control
Locking
F Press button A to lock the vehicle.
The red indicator lamp on the button comes on.
Unlocking
F Press button A again to unlock the vehicle.
The red indicator lamp on the button switches off.
Automatic central locking
Locking
When the speed exceeds 6 mph (10 km/h), the
doors and the boot lock automatically.
Unlocking
F above 6 mph (10 km/h), press button A to unlock the doors and the boot temporarily.
If the vehicle is locked from the outside,
the red indicator lamp flashes and
button A is inactive.
F
I
n this case, use the remote control
or the key to unlock the vehicle. If one of the doors is open, the
automatic central locking does not
take place.
If the boot is open, the automatic central
locking of the doors is active.
If one of the doors is open, central
locking from the inside does not take
place.
System which provides full manual locking or
unlocking of the doors from the inside.
System which provides full automatic locking
or unlocking of the doors and the boot while
driving.
You can activate or deactivate this function.
Driving with the doors locked can make
access more difficult for the emergency
services in the event an emergency.
4
Access
Page 66 of 284
64
Emergency control
Locking the driver's door
F Insert the key in the lock, then turn it to the left.
Unlocking the driver's door
F Insert the key in the lock, then turn it to the right.
Locking the front and rear
passenger doors
F Remove the black cap, located on the edge of the door, using the key.
F
I
nsert the key in the recess, then turn it as
far as it will go.
F
R
emove the key and refit the cap.
Unlocking the front and rear
passenger doors
F Pull the interior door opening control.
In the event of a malfunction with the
central locking system, the battery must
be disconnected to lock the boot and so
secure the vehicle completely.
Check that the rear doors child lock is
not on.
To lock or unlock the doors manually in the
event of a malfunction of the central locking
system or failure of the battery.
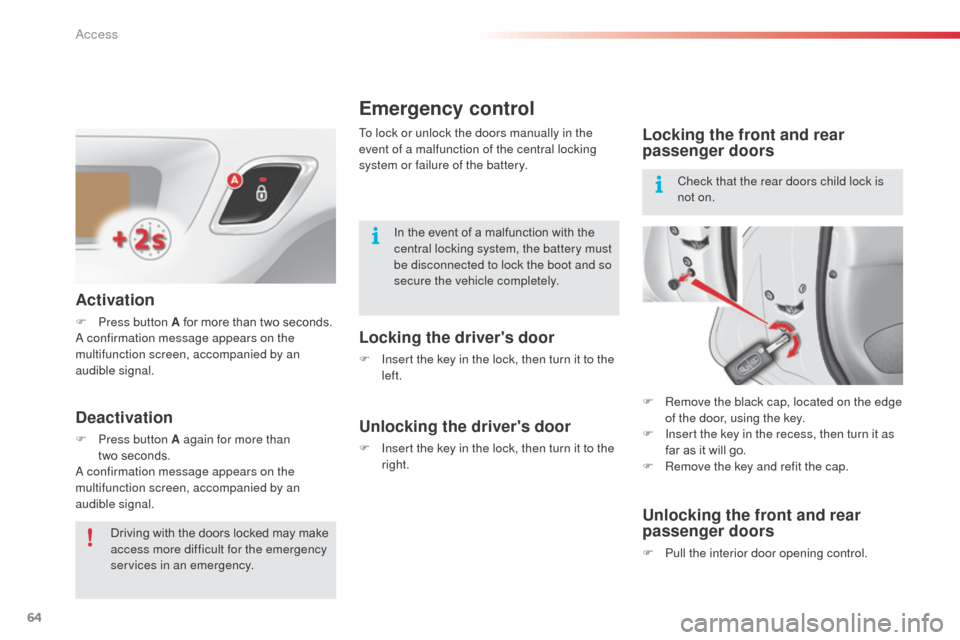
Activation
F Press button A for more than two seconds.a
confirmation message appears on the
multifunction screen, accompanied by an
audible signal.
Deactivation
F Press button A again for more than two seconds.
a
confirmation message appears on the
multifunction screen, accompanied by an
audible signal.
Driving with the doors locked may make
access more difficult for the emergency
services in an emergency.
Access
Page 67 of 284
65
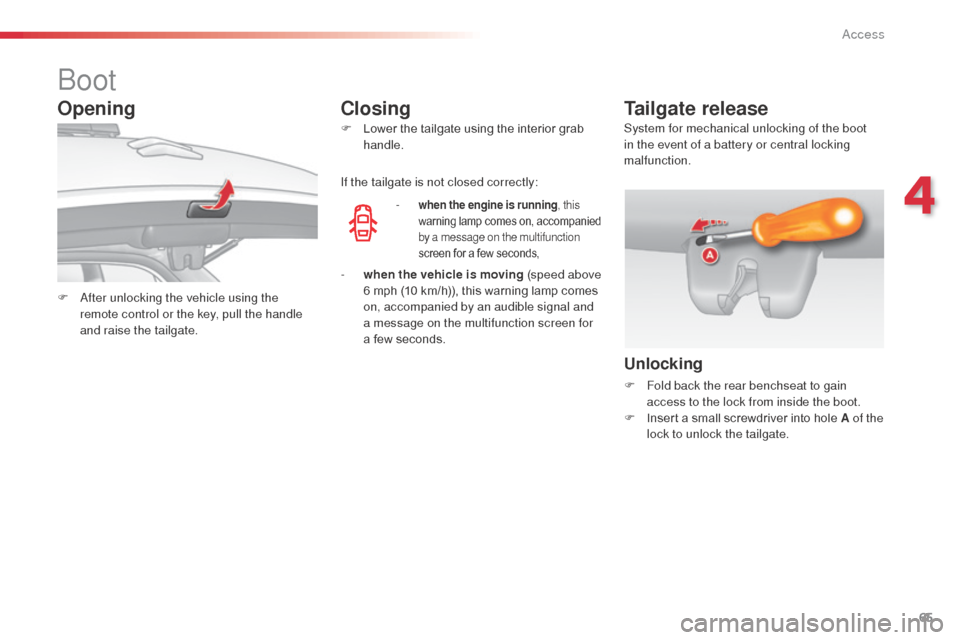
boot
F after unlocking the vehicle using the remote control or the key, pull the handle
and raise the tailgate. F
L
ower the tailgate using the interior grab
handle.
-
when the engine is running
, this
warning lamp comes on, accompanied
by a message on the multifunction
screen for a few seconds,
Tailgate release
Unlocking
F Fold back the rear benchseat to gain access to the lock from inside the boot.
F
I
nsert a small screwdriver into hole A of the
lock to unlock the tailgate.
If the tailgate is not closed correctly:
Opening
Closing
- when the vehicle is moving (speed above
6 mph (10 km/h)), this warning lamp comes
on, accompanied by an audible signal and
a message on the multifunction screen for
a few seconds. System for mechanical unlocking of the boot
in the event of a battery or central locking
malfunction.
4
access
Page 68 of 284
66
Fuel tank
Low fuel level
When the fuel tank minimum level is
reached this warning lamp comes on
on the instrument panel. When it first
comes on there remains approximately
5 litres of fuel in the tank.
Filling
a label affixed to the inside of the flap reminds
y ou of the type of fuel to be used depending on
your engine.
Additions of fuel must be of at least 7 litres, in
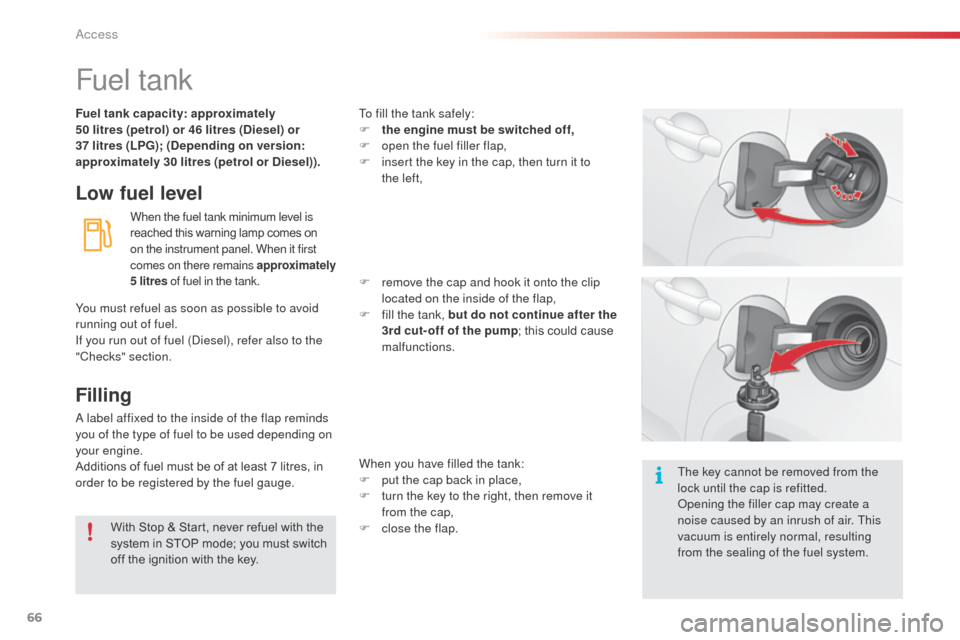
order to be registered by the fuel gauge. To fill the tank safely:
F
t
he engine must be switched off,
F
o
pen the fuel filler flap,
F
i
nsert the key in the cap, then turn it to
the left,
F
r
emove the cap and hook it onto the clip
located on the inside of the flap,
F
f
ill the tank, but do not continue after the
3rd cut- off of the pump ; this could cause
malfunctions.
When you have filled the tank:
F
p
ut the cap back in place,
F
t
urn the key to the right, then remove it
from the cap,
F
c
lose the flap.
You must refuel as soon as possible to avoid
running out of fuel.
If you run out of fuel (
di
esel), refer also to the
"Checks" section. Fuel tank capacity: approximately
50 litres (petrol) or 46 litres (Diesel) or
37
litres (LPG); (Depending on version:
approximately 30 litres (petrol or Diesel)).
With Stop & Start, never refuel with the
system in STOP mode; you must switch
off the ignition with the key. The key cannot be removed from the
lock until the cap is refitted.
op
ening the filler cap may create a
noise caused by an inrush of air. This
vacuum is entirely normal, resulting
from the sealing of the fuel system.
access
Page 69 of 284
67
Fuel used for petrol
engines
The petrol engines are compatible with
E10 bio-petrol (containing 10 % ethanol),
conforming to European standards EN 228
and EN 15376.
E85 type fuels (containing up to 85 % ethanol)
are reserved exclusively for vehicles marketed
for the use of this type of fuel (
bi
oFlex
vehicles). The quality of the ethanol must
comply with European standard EN 15293.
Fuel used for Diesel
engines
The Diesel engines are per fectly with biofuels
which conform to current and future European
standards (Diesel fuel which complies with
standard EN 590 mixed with a biofuel which
complies with standard EN 14214) available
at the pumps (containing up to 7 % Fatty Acid
Methyl Ester).
The
b
3
0 biofuel can be used in certain d
i
esel
engines; however, this use is subject to strict
application of the special servicing conditions
indicated in the maintenance and warranty
guide. Contact a CITR
oËn
dealer or a qualified
workshop.
The use of any other type of (bio)fuel
(vegetable or animal oils, pure or diluted,
domestic fuel...) is strictly prohibited (risk of
damage to the engine and fuel system).
4
Access
Page 70 of 284
68
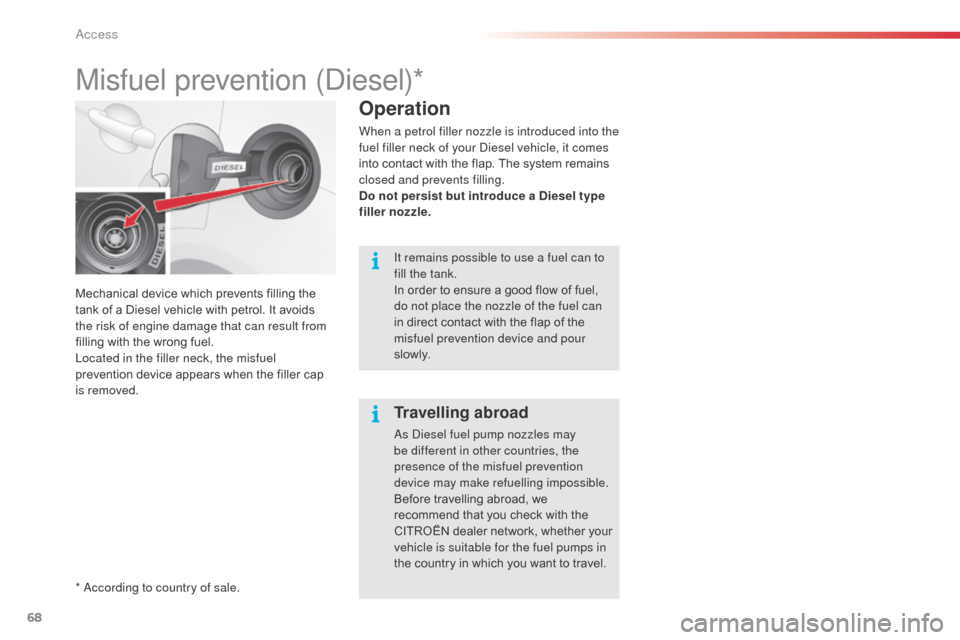
Mechanical device which prevents filling the
tank of a Diesel vehicle with petrol. It avoids
the risk of engine damage that can result from
filling with the wrong fuel.
Located in the filler neck, the misfuel
prevention device appears when the filler cap
is removed.
Misfuel prevention (diesel)*
Operation
When a petrol filler nozzle is introduced into the
fuel filler neck of your
di esel vehicle, it comes
into contact with the flap. The system remains
closed and prevents filling.
Do not persist but introduce a Diesel type
filler nozzle.
*
a
c
cording to country of sale. It remains possible to use a fuel can to
fill the tank.
In order to ensure a good flow of fuel,
do not place the nozzle of the fuel can
in direct contact with the flap of the
misfuel prevention device and pour
s l ow l y.
Travelling abroad
as
diesel fuel pump nozzles may
be different in other countries, the
presence of the misfuel prevention
device may make refuelling impossible.
Before travelling abroad, we
recommend that you check with the
CITROËN dealer network, whether your
vehicle is suitable for the fuel pumps in
the country in which you want to travel.
access