tow Citroen C4 2014.5 2.G Owner's Manual
[x] Cancel search | Manufacturer: CITROEN, Model Year: 2014.5, Model line: C4, Model: Citroen C4 2014.5 2.GPages: 494, PDF Size: 21.47 MB
Page 5 of 494
Technical data
Checks
Practical
i
nformation
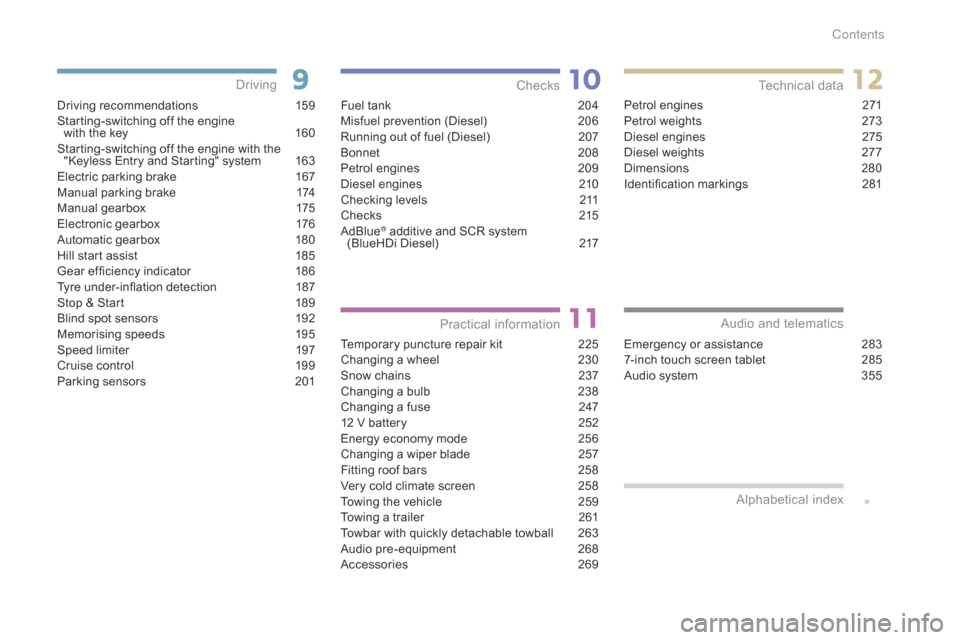
Driving recommendations 1 59
Starting-switching off the engine
with
the key
1
60
Starting-switching
off the engine with the
"
Keyless Entry and Starting" system
1
63
Electric
parking brake
1
67
Manual
par
king
b
rake
1
74
Manual
g
earbox
1
75
Electronic
gearbox
1
76
Automatic
gearbox
1
80
Hill
start assist
1
85
Gear
ef ficiency indicator
1
86
Tyre
under-inflation detection
1
87
Stop
& Start
1
89
Blind
spot sensors
1
92
Memorising
speeds
1
95
Speed
limiter
1
97
Cruise
control
1
99
Parking
sensors
2
01
Driving
Emergency or assistance 283
7-inch touch screen tablet 2 85
Audio
system
3
55
Audio and telematics
Alphabetical
in
dex
Fuel tank 2 04
Misfuel prevention (Diesel) 2 06
Running
out of fuel (Diesel)
2
07
Bonnet
20
8
Petrol
engines
2
09
Diesel
engines
2
10
Checking
levels
2
11
Checks
2
15
AdBlue
® additive and SCR system (
BlueHDi Diesel) 2 17
Temporary
puncture repair kit
2
25
Changing
a wheel
2
30
Snow
chains
2
37
Changing
a bulb
2
38
Changing
a fuse
2
47
12
V
battery
2
52
Energy
economy mode
2
56
Changing
a wiper blade
2
57
Fitting
roof bars
2
58
Very
cold climate screen
2
58
Towing
the vehicle
2
59
Towing
a trailer
2
61
Towbar
with quickly detachable towball
2
63
Audio
pre-equipment
2
68
Accessories
2
69Petrol
engines
2
71
Petrol weights
2
73
Diesel engines
2
75
Diesel weights
2
77
Dimensions
2
80
Identification
ma
rkings
2
81
Contents
Page 6 of 494
4
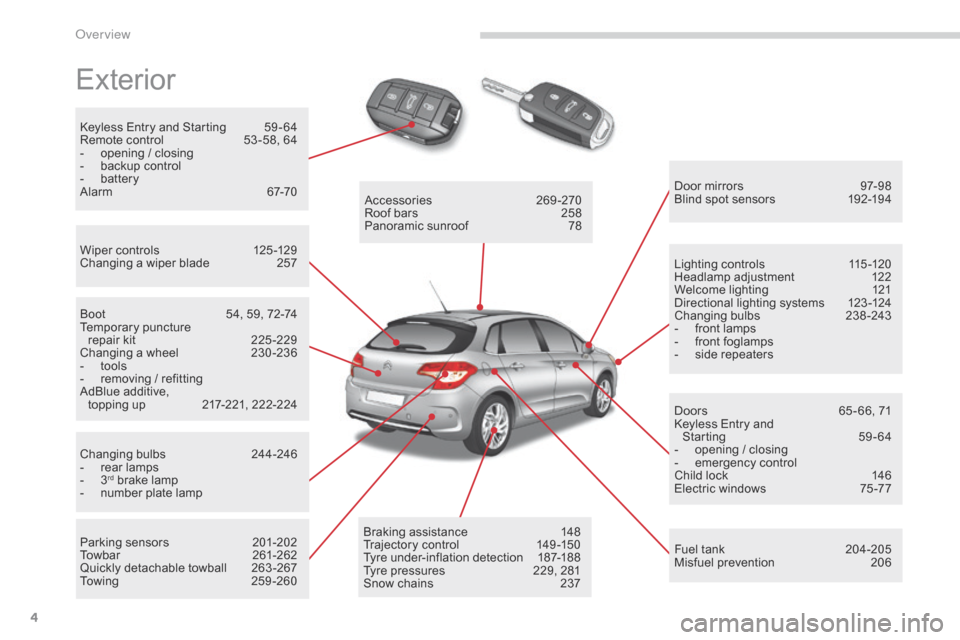
Exterior
Keyless Entry and Starting 59 - 64
Remote control 5 3 -58, 64
-
o
pening / closing
-
b
ackup control
-
b
attery
Alarm
6
7-70
Wiper
controls
1
25 -129
Changing
a wiper blade
2
57 Door
mirrors
9
7-98
Blind
spot sensors
1
92-194
Boot
5
4, 59, 72-74
Temporary
pu
ncture
r
epair kit
2
25 -229
Changing
a wheel
2
30 -236
-
t
ools
-
r
emoving / refitting
AdBlue
additive,
topping
up
2
17-221, 222-224
Changing
bu
lbs
2
44-246
-
r
ear lamps
-
3rd brake lamp
-
n
umber plate lamp
Parking
sensors
2
01-202
Towbar
26
1-262
Quickly
detachable towball
2
63 -267
To w i n g
2
5 9 - 2 6 0Accessories
2
69-270
Roof bars
2
58
Panoramic sunroof
7
8
Braking assistance
1
48
Trajectory
c
ontrol
1
49-150
Tyre
under-inflation detection
1
87-188
Tyre
pressures
2
29, 281
Snow
chains
2
37Lighting
controls
1
15 -120
Headlamp
adj
ustment
1
22
Welcome lighting
1
21
Directional lighting systems
1
23 -124
Changing
bu
lbs
2
38-243
-
f
ront lamps
-
f
ront foglamps
-
s
ide repeaters
Doors
6
5 - 66, 71
Keyless Entry and
Starting
5
9-64
-
o
pening / closing
-
em
ergency
c
ontrol
Child lock 1 46
Electric windows 7 5 -77
Fuel
tank
2
04-205
Misfuel
prevention
2
06
over view
Page 12 of 494
10
Eco-driving is a range of everyday practices that allow the motorist to optimise their fuel consumption and CO2 emissions.
Optimise the use of your
gearbox
With a manual gearbox, move off gently and change up without waiting. During acceleration change up early.
With
an automatic or electronic gearbox, give preference to automatic
m
ode and avoid pressing the accelerator pedal heavily or suddenly.
Drive smoothly
Maintain a safe distance between vehicles, use engine braking rather than the brake pedal, and press the accelerator progressively. These
p
ractices contribute towards a reduction in fuel consumption and
C
o
2 emissions and also helps reduce the background traffic noise.
I
f
your vehicle has cruise control, make use of the system at speeds
a
bove 25 mph (40 km/h) when the traffic is flowing well.
Control the use of your electrical
equipment
Before moving off, if the passenger compartment is too warm, ventilate it by opening the windows and air vents before using the air conditioning.
Above
30 mph (50 km/h), close the windows and leave the air vents
ope
n.
Remember
to make use of equipment that can help keep the
t
emperature in the passenger compartment down (sunroof and window
b
linds...).
Switch
off the air conditioning, unless it has automatic regulation, as
s
oon as the desired temperature is attained.
Switch
off the demisting and defrosting controls, if not automatic.
Switch
off the heated seat as soon as possible.
Switch
off the headlamps and front foglamps when the level of light
d
oes not require their use.
Avoid
running the engine before moving off, particularly in winter; your
v
ehicle will warm up much faster while driving.
As
a passenger, if you avoid connecting your multimedia devices
(
film, music, video game...), you will contribute towards limiting the
c
onsumption of electrical energy, and so of fuel.
Disconnect
your portable devices before leaving the vehicle.
Eco-driving
The gear efficiency indicator invites you engage the most suitable gear: as soon as the indication is displayed in the instrument panel, follow it
s
traight away.
For
vehicles fitted with an electronic or automatic gearbox, this
i
ndicator appears only in manual mode.
Eco-driving
Page 22 of 494
20
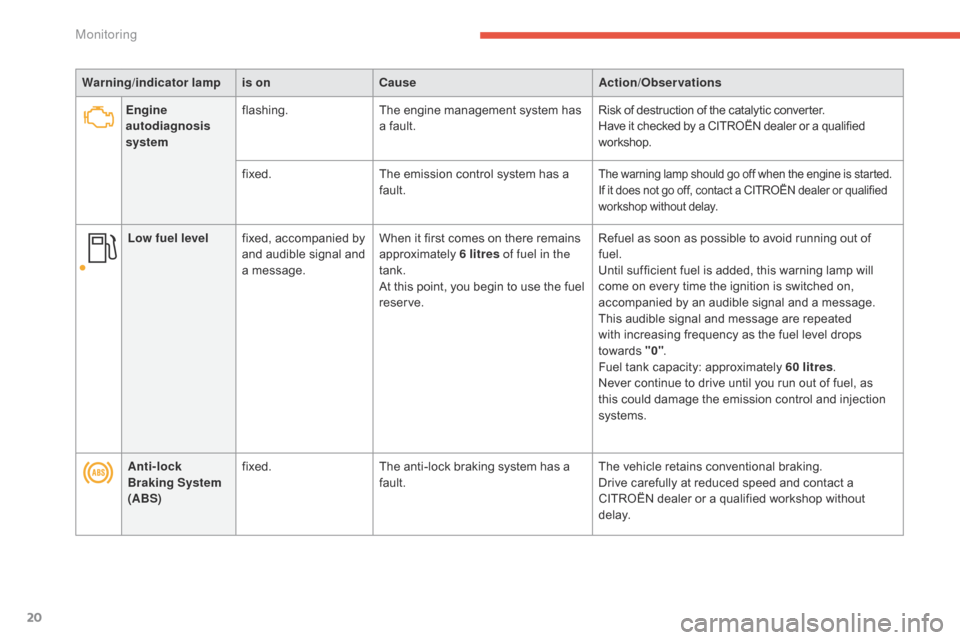
Warning/indicator lampis on Cause Action/Observations
Anti-lock
Braking System
(ABS) fixed.
The
anti-lock braking system has a
f
ault.The
vehicle retains conventional braking.
Drive
carefully at reduced speed and contact a
C
ITROËN dealer or a qualified workshop without
d
e l ay.
Engine
autodiagnosis
system
flashing.
The
engine management system has
a
fault.Risk
of destruction of the catalytic converter.
Have
it checked by a CITROËN dealer or a qualified
w
orkshop.
fixed. The
emission control system has a
f
ault.
The warning lamp should go off when the engine is started.
I f it does not go off, contact a CITROËN dealer or qualified w
orkshop without delay.
Low fuel level fixed, accompanied by a
nd audible signal and
a
message. When
it first comes on there remains a
pproximately 6 litres of fuel in the
tank.
At
this point, you begin to use the fuel
r
eserve.Refuel
as soon as possible to avoid running out of f
uel.
Until
sufficient fuel is added, this warning lamp will
c
ome on every time the ignition is switched on,
a
ccompanied by an audible signal and a message.
T
his audible signal and message are repeated
with
increasing frequency as the fuel level drops
tow
ards
"
0".
Fuel
tank capacity: approximately 60 litres.
Never
continue to drive until you run out of fuel, as
t
his could damage the emission control and injection
s
ystems.
Monitoring
Page 27 of 494
25
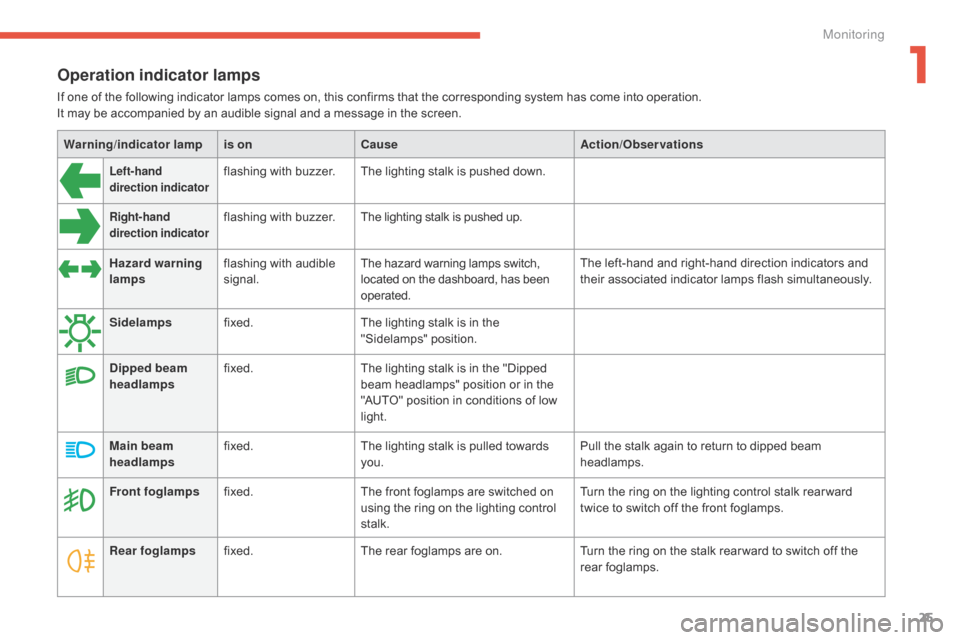
Operation indicator lamps
If one of the following indicator lamps comes on, this confirms that the corresponding system has come into operation.
I t may be accompanied by an audible signal and a message in the screen.
Warning /indicator lampis on Cause Action/Observations
Left-hand
direction indicatorflashing with buzzer.The lighting stalk is pushed down.
Right-hand
direction indicatorflashing with buzzer.The lighting stalk is pushed up.
Hazard warning
lamps flashing
with audible
s
ignal. The
hazard warning lamps switch,
l
ocated on the dashboard, has been
ope
rated. The
left-hand and right-hand direction indicators and
t
heir associated indicator lamps flash simultaneously.
Sidelamps fixed. The
lighting stalk is in the
"
Sidelamps"
p
osition.
Dipped beam
headlamps fixed.
The
lighting stalk is in the "Dipped
b
eam headlamps" position or in the
"
AUTO" position in conditions of low
l
ight.
Main beam
headlamps fixed.
The
lighting stalk is pulled towards
yo
u. Pull
the stalk again to return to dipped beam
h
eadlamps.
Front foglamps fixed. The
front foglamps are switched on
u
sing the ring on the lighting control
st
alk. Turn
the ring on the lighting control stalk rear ward
t
wice to switch off the front foglamps.
Rear foglamps fixed. The
rear foglamps are on.Turn
the ring on the stalk rear ward to switch off the
r
ear
fo
glamps.
1
Monitoring
Page 56 of 494
54
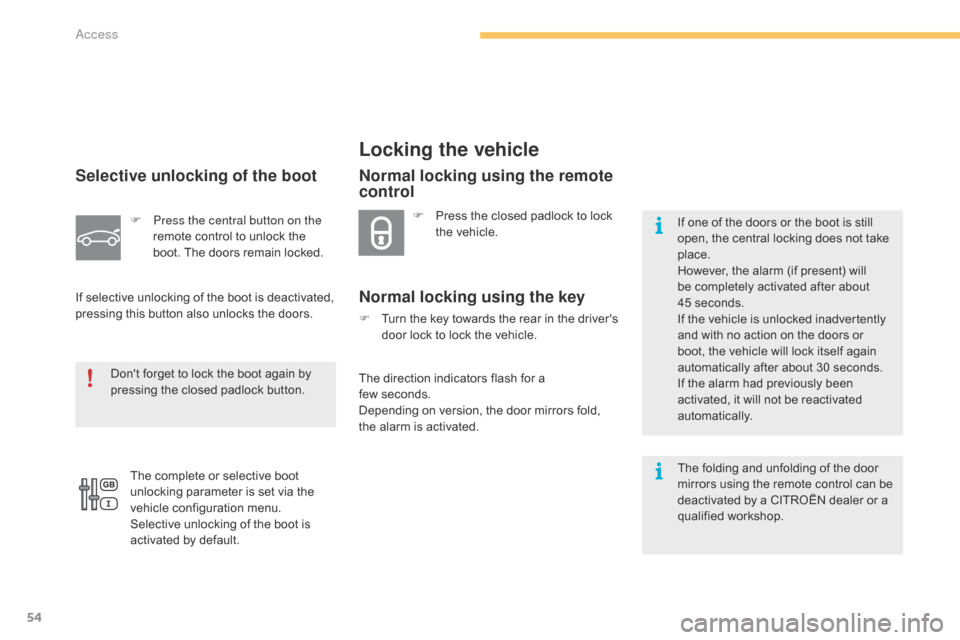
Selective unlocking of the boot
F Press the central button on the remote control to unlock the
b
oot. The doors remain locked.
If
selective unlocking of the boot is deactivated,
p
ressing
this button also unlocks the doors.
Don't
forget to lock the boot again by
p
ressing the closed padlock button.
Locking the vehicle
F Press the closed padlock to lock t
he vehicle.
Normal locking using the remote
control
Normal locking using the key
F Turn the key towards the rear in the driver's d
oor lock to lock the vehicle.
The
direction indicators flash for a
f
ew seconds.
Depending
on version, the door mirrors fold,
t
he alarm is activated. If
one of the doors or the boot is still
o
pen, the central locking does not take
p
lace.
However, the alarm (if present) will
b
e completely activated after about 4
5 seconds.
If the vehicle is unlocked inadvertently
a
nd with no action on the doors or
b
oot, the vehicle will lock itself again
a
utomatically after about 30 seconds.
If
the alarm had previously been
a
ctivated, it will not be reactivated
au
tomatically.
The
folding and unfolding of the door
m
irrors using the remote control can be
d
eactivated by a CITROËN dealer or a
q
ualified
w
orkshop.
The
complete
or
selective
boot
u
nlocking
parameter
is
set
via
the
v
ehicle
configuration
menu.
Selective
unlocking
of
the
boot
is
a
ctivated
by
default.
Access
Page 59 of 494
57
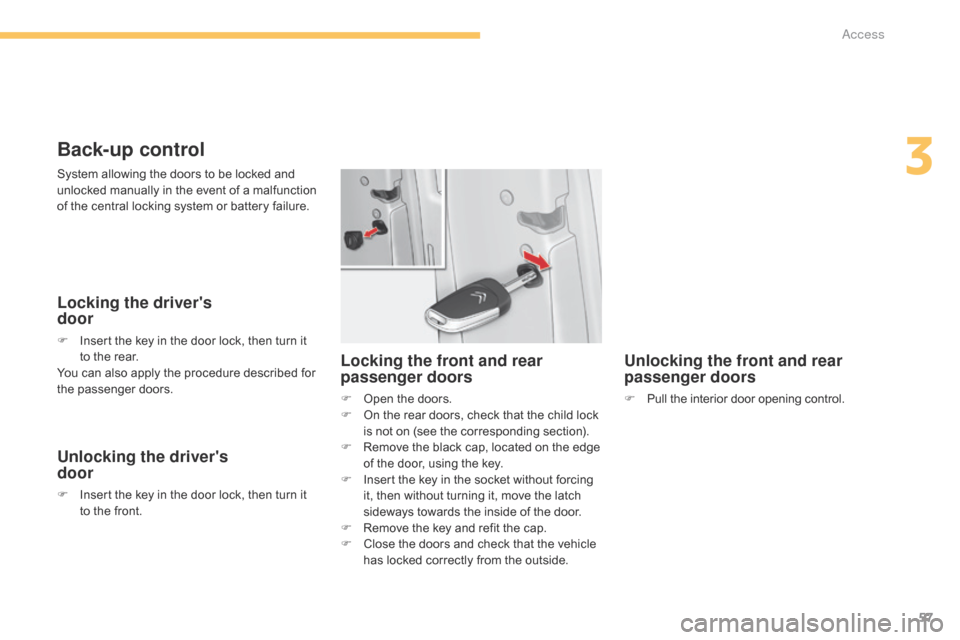
Back-up control
Locking the driver's
door
F Insert the key in the door lock, then turn it t
o the rear.
You
can also apply the procedure described for
t
he
p
assenger
do
ors.
Unlocking the driver's
door
F Insert the key in the door lock, then turn it t
o the front.
Unlocking the front and rear
passenger doors
F Pull the interior door opening control.
Locking the front and rear
passenger doors
F Open the doors.
F O n the rear doors, check that the child lock
i
s not on (see the corresponding section).
F
R
emove the black cap, located on the edge
o
f the door, using the key.
F
I
nsert the key in the socket without forcing
i
t, then without turning it, move the latch
s
ideways towards the inside of the door.
F
R
emove the key and refit the cap.
F
C
lose the doors and check that the vehicle
h
as locked correctly from the outside.
System
allowing
the
doors
to
be
locked
and
u
nlocked
manually
in
the
event
of
a
malfunction
o
f
the
central
locking
system
or
battery
failure.
3
Access
Page 64 of 494
62
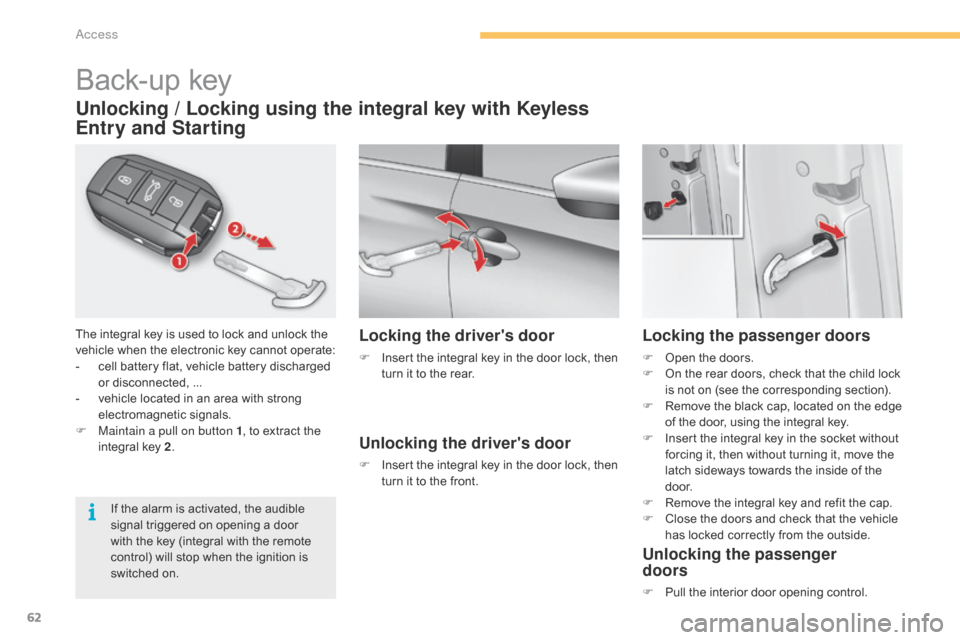
Back-up key
The integral key is used to lock and unlock the vehicle when the electronic key cannot operate:
-
c
ell battery flat, vehicle battery discharged
o
r disconnected, ...
-
v
ehicle located in an area with strong
e
lectromagnetic
si
gnals.
F
M
aintain a pull on button 1 ,
to extract the
i
ntegral key 2.
Unlocking / Locking using the integral key with Keyless
Entry and Starting
If the alarm is activated, the audible s
ignal triggered on opening a door
w
ith the key (integral with the remote
c
ontrol) will stop when the ignition is
s
witched on.
Locking the driver's door
F Insert the integral key in the door lock, then t
urn it to the rear.
Unlocking the driver's door
F Insert the integral key in the door lock, then t
urn it to the front.
Locking the passenger doors
F Open the doors.
F O n the rear doors, check that the child lock
i
s not on (see the corresponding section).
F
R
emove the black cap, located on the edge
o
f the door, using the integral key.
F
I
nsert the integral key in the socket without
f
orcing it, then without turning it, move the
l
atch sideways towards the inside of the
d
o o r.
F
R
emove the integral key and refit the cap.
F
C
lose the doors and check that the vehicle
h
as locked correctly from the outside.
Unlocking the passenger
doors
F Pull the interior door opening control.
access
Page 71 of 494
69
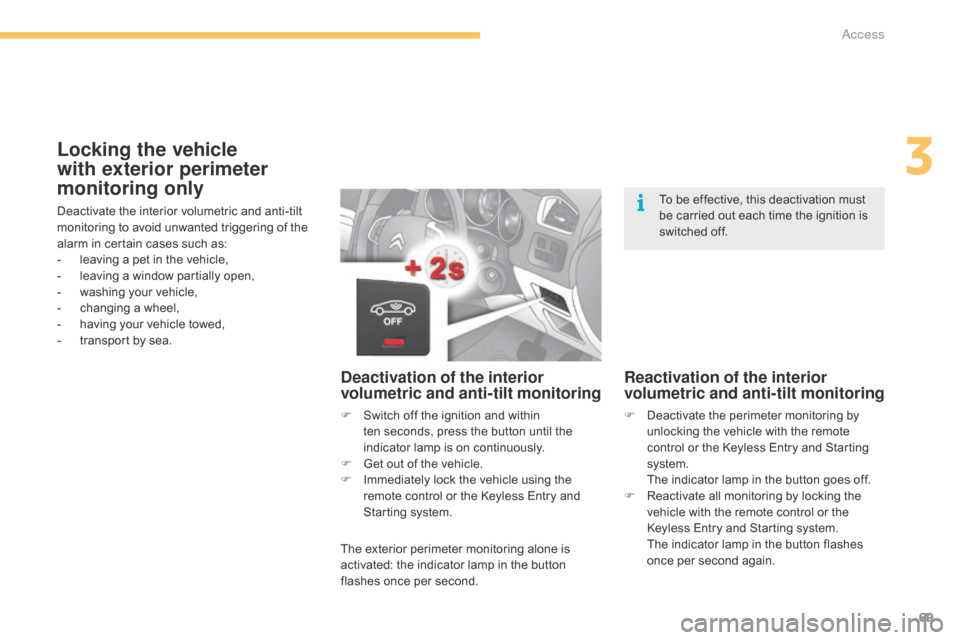
Locking the vehicle
with exterior perimeter
monitoring only
Deactivate the interior volumetric and anti-tilt monitoring to avoid unwanted triggering of the
a
larm in certain cases such as:
-
l
eaving a pet in the vehicle,
-
l
eaving a window partially open,
-
w
ashing your vehicle,
-
c
hanging a wheel,
-
h
aving your vehicle towed,
-
t
ransport by sea.
Deactivation of the interior
volumetric and anti-tilt monitoring
F Switch off the ignition and within t
en seconds, press the button until the
i
ndicator lamp is on continuously.
F
G
et out of the vehicle.
F
I
mmediately lock the vehicle using the
r
emote control or the Keyless Entry and
S
tarting system.
The
exterior perimeter monitoring alone is
a
ctivated: the indicator lamp in the button
f
lashes once per second.
Reactivation of the interior
volumetric and anti-tilt monitoring
F Deactivate the perimeter monitoring by u
nlocking the vehicle with the remote
c
ontrol or the Keyless Entry and Starting
s
ystem.
T
he indicator lamp in the button goes off.
F
R
eactivate all monitoring by locking the
v
ehicle with the remote control or the
K
eyless Entry and Starting system.
T
he indicator lamp in the button flashes
o
nce per second again.
To
be effective, this deactivation must
b
e carried out each time the ignition is
s
witched off.
3
Access
Page 82 of 494
80
Stop & Start
The heating and air conditioning systems only work when the engine
i
s running. To maintain a comfortable
t
emperature in the passenger
c
ompartment, you can temporarily
d
eactivate the Stop & Start system (see
t
he corresponding section).
In
order
for
these
systems
to
be
fully
effective,
follow
the
operation
and
maintenance
g
uidelines
belo
w:
F
T
o
obtain
an
even
air
distribution,
take
care
not
to
obstruct
the
exterior
air
intake
grilles
l
ocated
at
the
base
of
the
windscreen,
the
nozzles,
the
vents
and
the
air
outlets,
as
well
a
s
the
air
extractor
located
in
the
boot.
F
D
o
not
cover
the
sunshine
sensor,
located
on
the
dashboard;
this
is
used
for
regulation
o
f
the
air
conditioning
system.
F
O
perate
the
air
conditioning
system
for
at
least
5
to
10
minutes,
once
or
twice
a
month
t
o
keep
it
in
per fect
working
order.
F
E
nsure
that
the
passenger
compartment
filter
is
in
good
condition
and
have
the
filter
e
lements
replaced
regularly.
W
e
recommend
the
use
of
a
combined
passenger
compartment
filter.
Thanks
to
its
s
pecial
active
additive,
it
contributes
to
the
purification
of
the
air
breathed
by
the
o
ccupants
and
the
cleanliness
of
the
passenger
compartment
(reduction
of
allergic
s
ymptoms,
bad
odours
and
greasy
deposits).
F
T
o
ensure
correct
operation
of
the
air
conditioning
system,
you
are
also
advised
to
have
i
t
checked
regularly
as
recommended
in
the
maintenance
and
warranty
guide.
F
I
f
the
system
does
not
produce
cold
air,
switch
it
off
and
contact
a
CITROËN
dealer
or
a
q
ualified
w
orkshop.
When
towing
the
maximum
load
on
a
steep
gradient
in
high
temperatures,
switching
off
the
a
ir
conditioning
increases
the
available
engine
power
and
so
improves
the
towing
ability. The
condensation created by the air
c
onditioning results in a discharge
o
f water under the vehicle which is
p
er fectly normal.
If after an extended stop in sunshine,
t
he interior temperature is very
h
igh, first ventilate the passenger
c
ompartment for a few moments.
Put the air flow control at a setting high
e
nough to quickly change the air in the
p
assenger
c
ompartment.
The air conditioning system does not
c
ontain chlorine and does not present
a
ny danger to the ozone layer.
Recommendations for ventilation and air conditioning
Comfort