boot Citroen C4 2014.5 2.G User Guide
[x] Cancel search | Manufacturer: CITROEN, Model Year: 2014.5, Model line: C4, Model: Citroen C4 2014.5 2.GPages: 494, PDF Size: 21.47 MB
Page 67 of 494
65
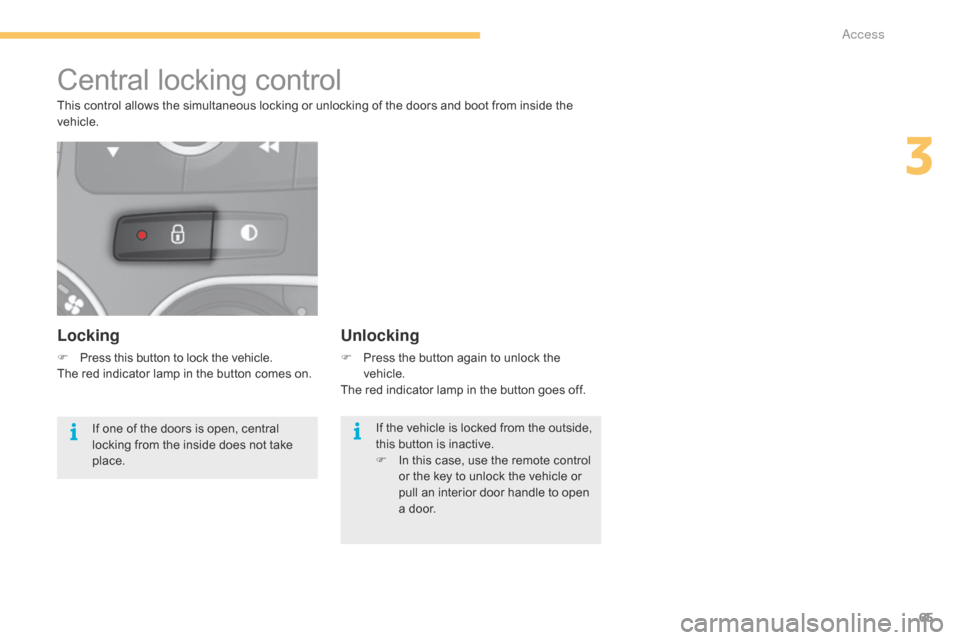
Central locking control
Locking
F Press this button to lock the vehicle.
The red indicator lamp in the button comes on.
Unlocking
F Press the button again to unlock the v
ehicle.
The
red indicator lamp in the button goes off.
This
control
allows
the
simultaneous
locking
or
unlocking of the doors and boot from inside the
v
ehicle.
If
one
of
the
doors
is
open,
central
l
ocking
from
the
inside
does
not
take
p
lace. If
the vehicle is locked from the outside,
t
his button is inactive.
F
I
n this case, use the remote control
o
r the key to unlock the vehicle or
p
ull an interior door handle to open
a
door.
3
Access
Page 68 of 494
66
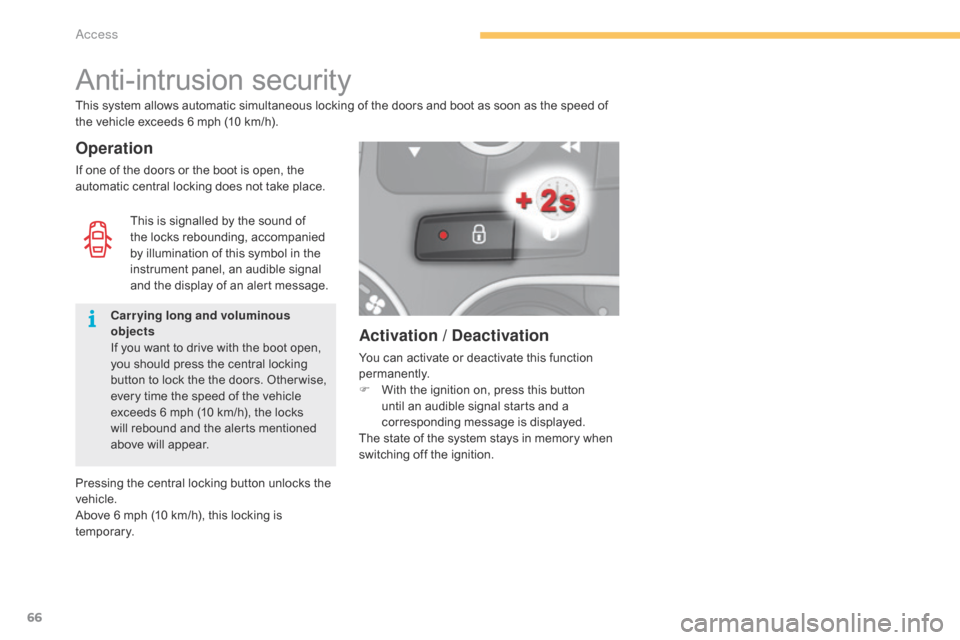
Activation / Deactivation
You can activate or deactivate this function permanently.
F
W
ith the ignition on, press this button
u
ntil an audible signal starts and a
c
orresponding message is displayed.
The
state of the system stays in memory when
s
witching off the ignition.
Anti-intrusion security
Operation
If one of the doors or the boot is open, the a
utomatic central locking does not take place.
This
system allows automatic simultaneous locking of the doors and boot as soon as the speed of
t
he vehicle exceeds 6 mph (10 km/h).
Pressing the central locking button unlocks the
v
ehicle.
Above
6 mph (10 km/h), this locking is
t
e m p o r a r y. This
is signalled by the sound of
t
he locks rebounding, accompanied
b
y illumination of this symbol in the
i
nstrument panel, an audible signal
a
nd the display of an alert message.
Carrying long and voluminous
objects
If
you want to drive with the boot open,
y
ou should press the central locking
b
utton to lock the the doors. Other wise,
e
very time the speed of the vehicle
e
xceeds 6 mph (10 km/h), the locks
w
ill rebound and the alerts mentioned
a
bove will appear.
Access
Page 69 of 494
67
* According to country of sale.
Alarm*
- exterior perimeter
The system checks for opening of the vehicle.
T he alarm is triggered if anyone tries to open a
d
oor, the boot, the bonnet...
- interior volumetric
The system checks for any variation in the volume in the passenger compartment.
The
alarm is triggered if anyone breaks a
w
indow, enters the passenger compartment or
m
oves inside the vehicle.
- tilt
The system checks for any change in the attitude of the vehicle.
The
alarm is triggered if the vehicle is lifted,
m
oved or knocked.
Self-protection function
The system checks for the putting out of service of its components.
The
alarm is triggered if the battery, the central
c
ontrol or the siren wiring are put out of service
o
r damaged. For
all work on the alarm system,
c
ontact a CITROËN dealer or a
q
ualified
w
orkshop.
System
which
protects
and
provides
a
deterrent
against theft and break-ins. It provides the
f
ollowing
types
of
monitoring:
3
Access
Page 70 of 494
68
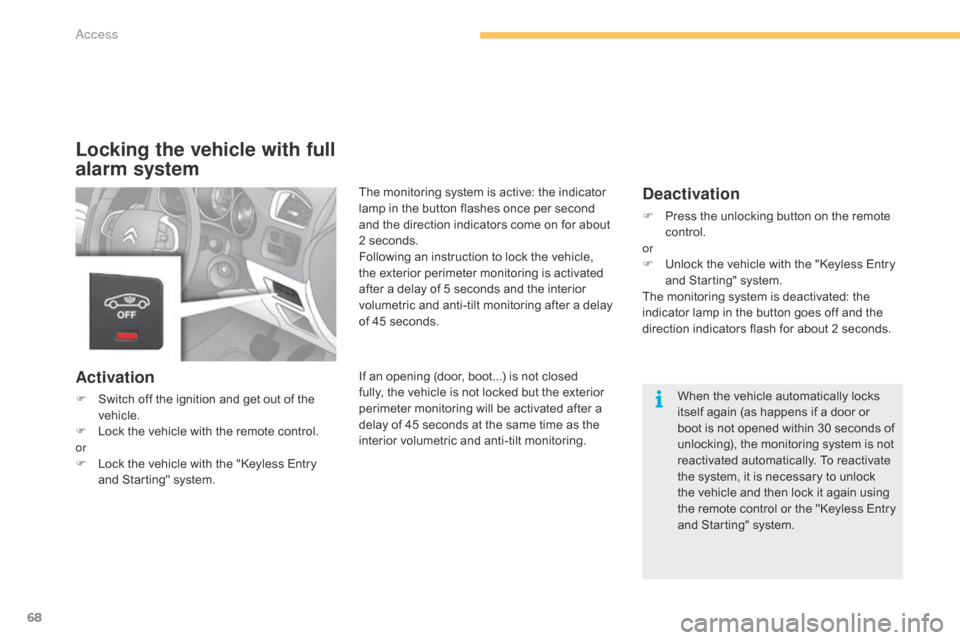
Locking the vehicle with full
alarm system
Activation
F Switch off the ignition and get out of the v
ehicle.
F
L
ock the vehicle with the remote control.
or
F
L
ock the vehicle with the "Keyless Entry
a
nd Starting" system.
Deactivation
F Press the unlocking button on the remote c
ontrol.
or
F
U
nlock the vehicle with the "Keyless Entry
a
nd Starting" system.
The
monitoring system is deactivated: the
i
ndicator lamp in the button goes off and the
d
irection indicators flash for about 2 seconds.
If
an
opening
(door,
boot...)
is
not
closed
f
ully,
the
vehicle
is
not
locked
but
the
exterior
p
erimeter
monitoring
will
be
activated
after
a
d
elay
of
45
seconds
at
the
same
time
as
the
i
nterior
volumetric
and
anti-tilt
monitoring. When
the vehicle automatically locks
i
tself again (as happens if a door or
b
oot is not opened within 30 seconds of
u
nlocking), the monitoring system is not
r
eactivated automatically. To reactivate
t
he system, it is necessary to unlock
t
he vehicle and then lock it again using
t
he remote control or the "Keyless Entry
a
nd Starting" system.
The
monitoring
system
is
active:
the
indicator
l
amp
in
the
button
flashes
once
per
second
a
nd
the
direction
indicators
come
on
for
about
2
seconds.
Following
an
instruction
to
lock
the
vehicle,
t
he
exterior
perimeter
monitoring
is
activated
a
fter
a
delay
of
5
seconds
and
the
interior
v
olumetric
and
anti-tilt
monitoring
after
a
delay
o
f
45 seconds.
Access
Page 74 of 494
72
boot
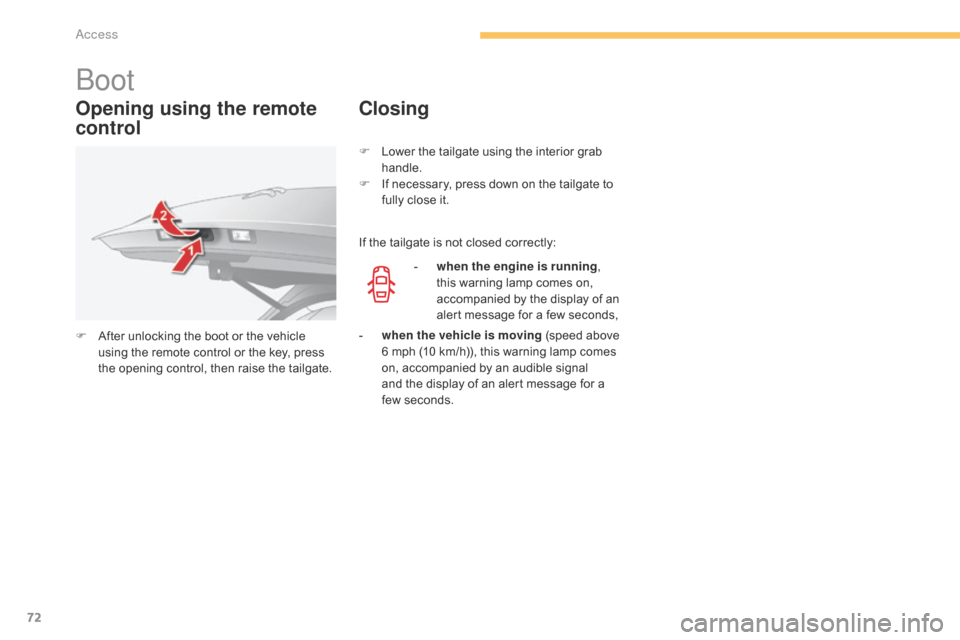
Opening using the remote
control
F After unlocking the boot or the vehicle u
sing the remote control or the key, press
t
he opening control, then raise the tailgate.
Closing
If the tailgate is not closed correctly:
-
w
hen the engine is running ,
this
warning lamp comes on,
a
ccompanied by the display of an
a
lert message for a few seconds,
F
L
ower the tailgate using the interior grab
han
dle.
F
I
f necessary, press down on the tailgate to
f
ully close it.
-
w
hen the vehicle is moving (speed above
6
mph (10 km/h)), this warning lamp comes
o
n, accompanied by an audible signal
and
the display of an alert message for a
f
ew seconds.
access
Page 75 of 494
73
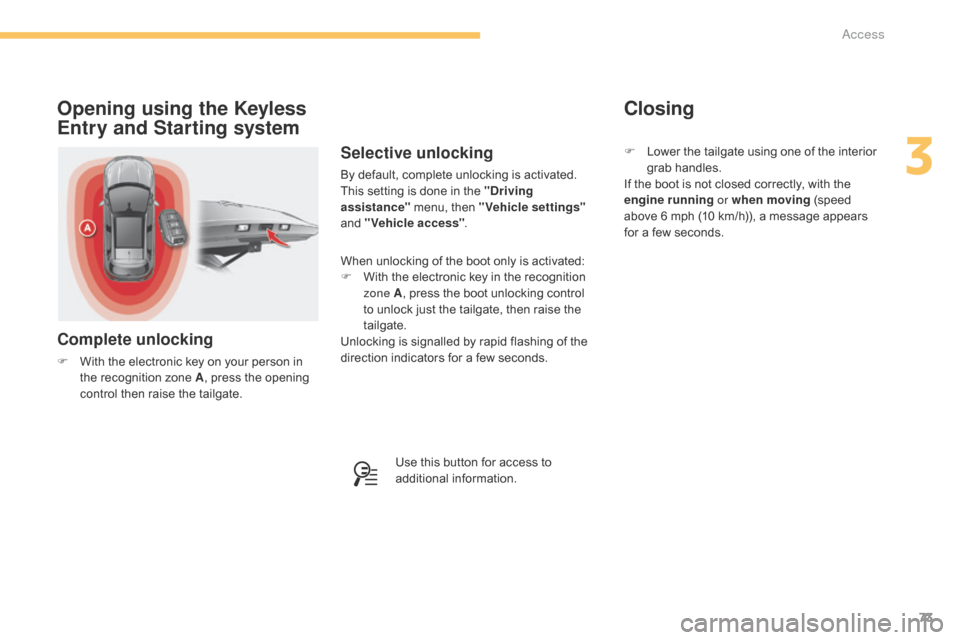
Opening using the Keyless
Entry and Starting system
Complete unlocking
F With the electronic key on your person in t
he recognition zone A,
press the opening
c
ontrol then raise the tailgate.
Selective unlocking
By default, complete unlocking is activated.
T his setting is done in the "Driving
assistance"
menu, then "Vehicle settings"
and
"Vehicle access" .
Use
this button for access to
a
dditional
in
formation.
When
unlocking of the boot only is activated:
F
W
ith the electronic key in the recognition
z
one A ,
press the boot unlocking control
t
o unlock just the tailgate, then raise the
t
ailgate.
Unlocking
is signalled by rapid flashing of the
d
irection indicators for a few seconds.F
L
ower the tailgate using one of the interior g
rab han dles.
If the boot is not closed correctly, with the
e
ngine running or when moving
(speed
a
bove 6 mph (10 km/h)), a message appears
f
or a few seconds.
Closing
3
Access
Page 76 of 494
74
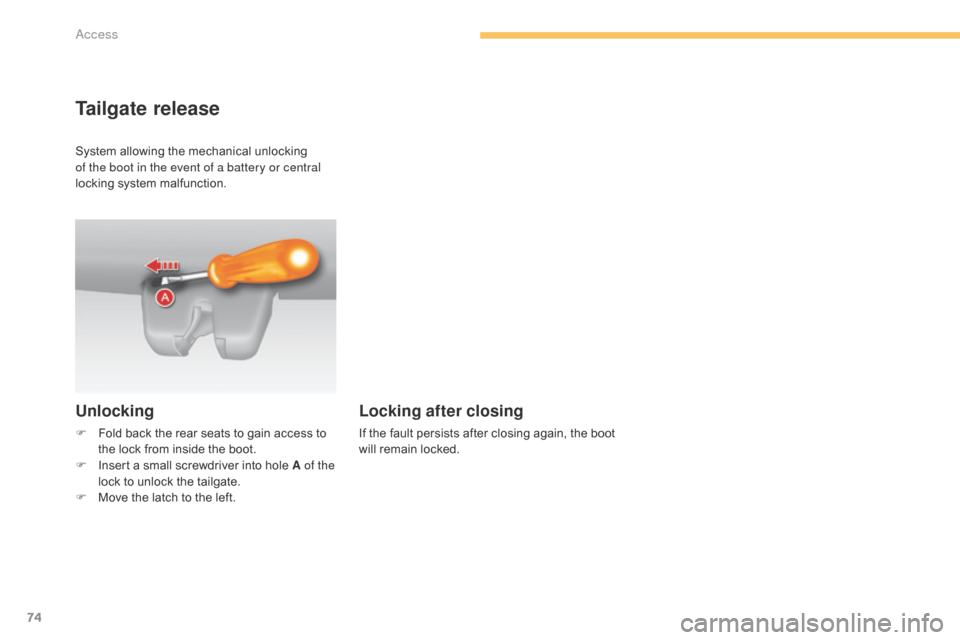
Tailgate release
Unlocking
F Fold back the rear seats to gain access to t
he lock from inside the boot.
F
I
nsert a small screwdriver into hole A of the
lock
to unlock the tailgate.
F
M
ove the latch to the left.
Locking after closing
If the fault persists after closing again, the boot will remain locked.
System
allowing
the
mechanical
unlocking
o
f the boot in the event of a battery or central
locking
system
malfunction.
Access
Page 82 of 494
80
Stop & Start
The heating and air conditioning systems only work when the engine
i
s running. To maintain a comfortable
t
emperature in the passenger
c
ompartment, you can temporarily
d
eactivate the Stop & Start system (see
t
he corresponding section).
In
order
for
these
systems
to
be
fully
effective,
follow
the
operation
and
maintenance
g
uidelines
belo
w:
F
T
o
obtain
an
even
air
distribution,
take
care
not
to
obstruct
the
exterior
air
intake
grilles
l
ocated
at
the
base
of
the
windscreen,
the
nozzles,
the
vents
and
the
air
outlets,
as
well
a
s
the
air
extractor
located
in
the
boot.
F
D
o
not
cover
the
sunshine
sensor,
located
on
the
dashboard;
this
is
used
for
regulation
o
f
the
air
conditioning
system.
F
O
perate
the
air
conditioning
system
for
at
least
5
to
10
minutes,
once
or
twice
a
month
t
o
keep
it
in
per fect
working
order.
F
E
nsure
that
the
passenger
compartment
filter
is
in
good
condition
and
have
the
filter
e
lements
replaced
regularly.
W
e
recommend
the
use
of
a
combined
passenger
compartment
filter.
Thanks
to
its
s
pecial
active
additive,
it
contributes
to
the
purification
of
the
air
breathed
by
the
o
ccupants
and
the
cleanliness
of
the
passenger
compartment
(reduction
of
allergic
s
ymptoms,
bad
odours
and
greasy
deposits).
F
T
o
ensure
correct
operation
of
the
air
conditioning
system,
you
are
also
advised
to
have
i
t
checked
regularly
as
recommended
in
the
maintenance
and
warranty
guide.
F
I
f
the
system
does
not
produce
cold
air,
switch
it
off
and
contact
a
CITROËN
dealer
or
a
q
ualified
w
orkshop.
When
towing
the
maximum
load
on
a
steep
gradient
in
high
temperatures,
switching
off
the
a
ir
conditioning
increases
the
available
engine
power
and
so
improves
the
towing
ability. The
condensation created by the air
c
onditioning results in a discharge
o
f water under the vehicle which is
p
er fectly normal.
If after an extended stop in sunshine,
t
he interior temperature is very
h
igh, first ventilate the passenger
c
ompartment for a few moments.
Put the air flow control at a setting high
e
nough to quickly change the air in the
p
assenger
c
ompartment.
The air conditioning system does not
c
ontain chlorine and does not present
a
ny danger to the ozone layer.
Recommendations for ventilation and air conditioning
Comfort
Page 97 of 494
95
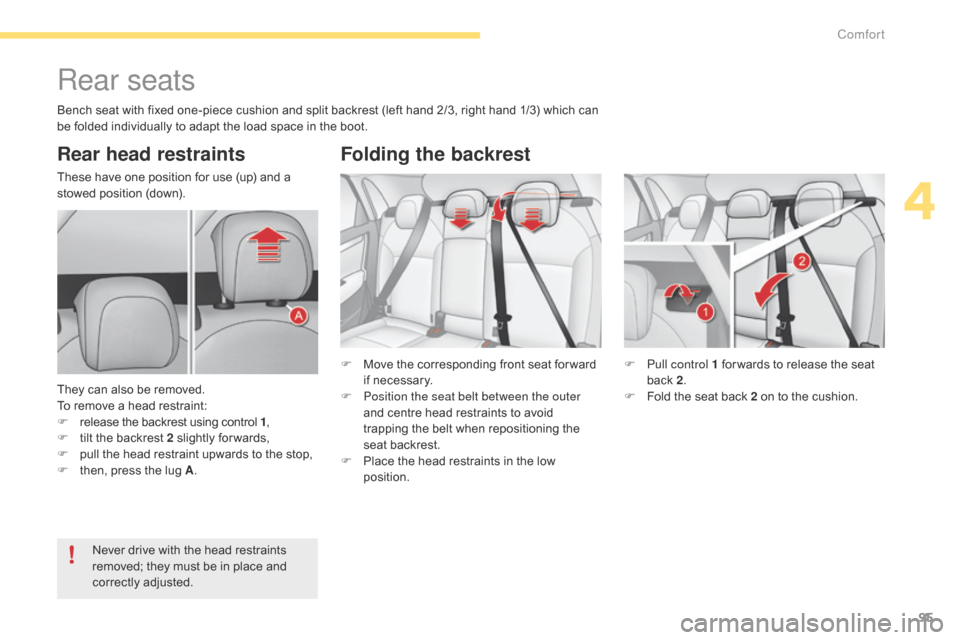
Rear seats
Rear head restraints
These have one position for use (up) and a stowed position (down).
They
can also be removed.
To
remove a head restraint:
F
r
elease the backrest using control 1,
F
t
ilt the backrest 2 slightly for wards,
F
p
ull the head restraint upwards to the stop,
F
t
hen, press the lug A. F
M
ove the corresponding front seat for ward
i
f necessary.
F
P
osition the seat belt between the outer
and
centre head restraints to avoid
t
rapping the belt when repositioning the
s
eat backrest.
F
P
lace the head restraints in the low
p
osition.F
P
ull control 1 for wards to release the seat
b
ack 2.
F
F
old the seat back 2 on to the cushion.
Never
drive with the head restraints
r
emoved; they must be in place and
c
orrectly
adj
usted.
Folding the backrest
Bench seat with fixed one-piece cushion and split backrest (left hand 2/3, right hand 1/3) which can be folded individually to adapt the load space in the boot.
4
Comfort
Page 112 of 494
110
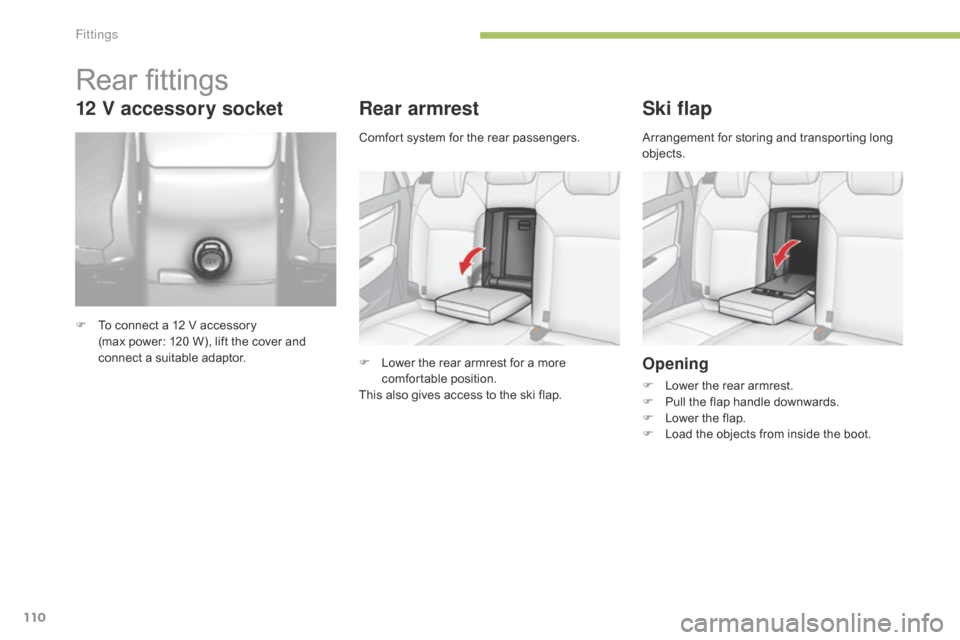
Rear armrest
F Lower the rear armrest for a more c
omfortable p osition.
This
also gives access to the ski flap.
Ski flap
Opening
F Lower the rear armrest.
F P ull the flap handle downwards.
F
L
ower the flap.
F
L
oad the objects from inside the boot.
Comfort
system
for
the
rear
passengers.
Arrangement for storing and transporting long
ob
jects.
Rear fittings
F To
connect a 12 V accessory
(max power: 120 W), lift the cover and
c
onnect a suitable adaptor.
12 V accessory socket
Fittings