tow bar Citroen C4 2014.5 2.G Owner's Manual
[x] Cancel search | Manufacturer: CITROEN, Model Year: 2014.5, Model line: C4, Model: Citroen C4 2014.5 2.GPages: 494, PDF Size: 21.47 MB
Page 5 of 494
Technical data
Checks
Practical
i
nformation
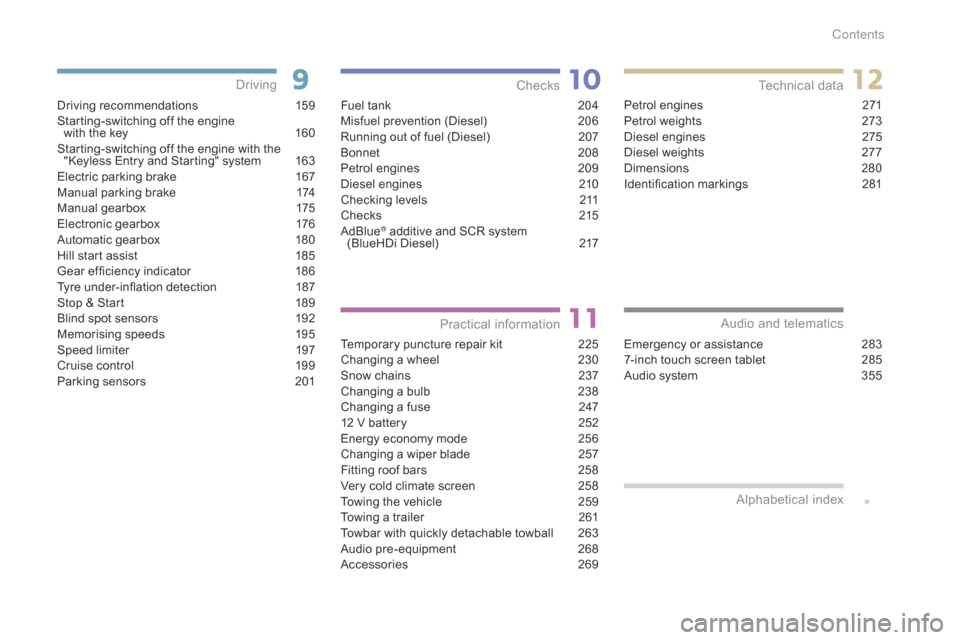
Driving recommendations 1 59
Starting-switching off the engine
with
the key
1
60
Starting-switching
off the engine with the
"
Keyless Entry and Starting" system
1
63
Electric
parking brake
1
67
Manual
par
king
b
rake
1
74
Manual
g
earbox
1
75
Electronic
gearbox
1
76
Automatic
gearbox
1
80
Hill
start assist
1
85
Gear
ef ficiency indicator
1
86
Tyre
under-inflation detection
1
87
Stop
& Start
1
89
Blind
spot sensors
1
92
Memorising
speeds
1
95
Speed
limiter
1
97
Cruise
control
1
99
Parking
sensors
2
01
Driving
Emergency or assistance 283
7-inch touch screen tablet 2 85
Audio
system
3
55
Audio and telematics
Alphabetical
in
dex
Fuel tank 2 04
Misfuel prevention (Diesel) 2 06
Running
out of fuel (Diesel)
2
07
Bonnet
20
8
Petrol
engines
2
09
Diesel
engines
2
10
Checking
levels
2
11
Checks
2
15
AdBlue
® additive and SCR system (
BlueHDi Diesel) 2 17
Temporary
puncture repair kit
2
25
Changing
a wheel
2
30
Snow
chains
2
37
Changing
a bulb
2
38
Changing
a fuse
2
47
12
V
battery
2
52
Energy
economy mode
2
56
Changing
a wiper blade
2
57
Fitting
roof bars
2
58
Very
cold climate screen
2
58
Towing
the vehicle
2
59
Towing
a trailer
2
61
Towbar
with quickly detachable towball
2
63
Audio
pre-equipment
2
68
Accessories
2
69Petrol
engines
2
71
Petrol weights
2
73
Diesel engines
2
75
Diesel weights
2
77
Dimensions
2
80
Identification
ma
rkings
2
81
Contents
Page 6 of 494
4
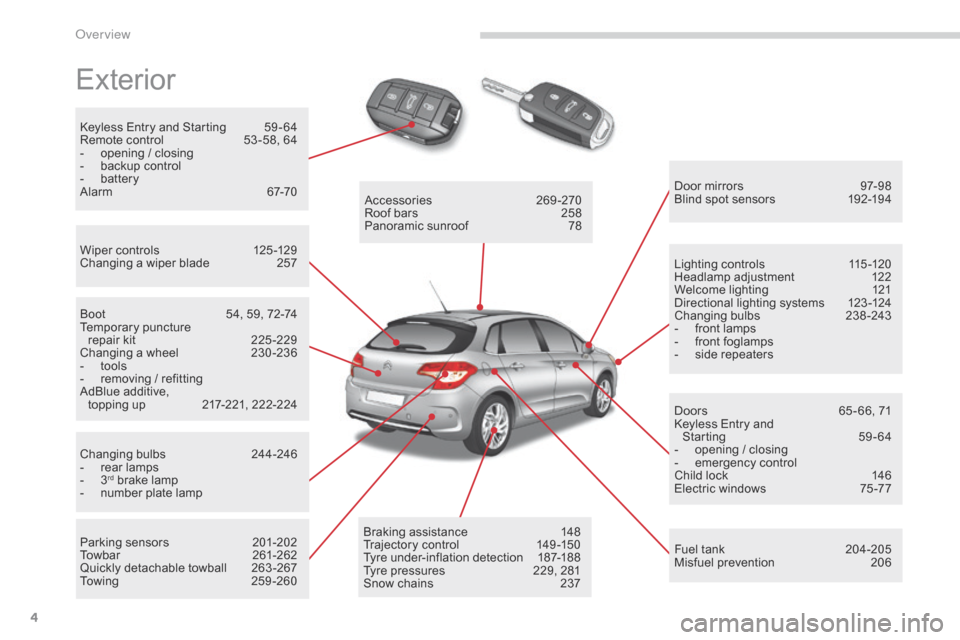
Exterior
Keyless Entry and Starting 59 - 64
Remote control 5 3 -58, 64
-
o
pening / closing
-
b
ackup control
-
b
attery
Alarm
6
7-70
Wiper
controls
1
25 -129
Changing
a wiper blade
2
57 Door
mirrors
9
7-98
Blind
spot sensors
1
92-194
Boot
5
4, 59, 72-74
Temporary
pu
ncture
r
epair kit
2
25 -229
Changing
a wheel
2
30 -236
-
t
ools
-
r
emoving / refitting
AdBlue
additive,
topping
up
2
17-221, 222-224
Changing
bu
lbs
2
44-246
-
r
ear lamps
-
3rd brake lamp
-
n
umber plate lamp
Parking
sensors
2
01-202
Towbar
26
1-262
Quickly
detachable towball
2
63 -267
To w i n g
2
5 9 - 2 6 0Accessories
2
69-270
Roof bars
2
58
Panoramic sunroof
7
8
Braking assistance
1
48
Trajectory
c
ontrol
1
49-150
Tyre
under-inflation detection
1
87-188
Tyre
pressures
2
29, 281
Snow
chains
2
37Lighting
controls
1
15 -120
Headlamp
adj
ustment
1
22
Welcome lighting
1
21
Directional lighting systems
1
23 -124
Changing
bu
lbs
2
38-243
-
f
ront lamps
-
f
ront foglamps
-
s
ide repeaters
Doors
6
5 - 66, 71
Keyless Entry and
Starting
5
9-64
-
o
pening / closing
-
em
ergency
c
ontrol
Child lock 1 46
Electric windows 7 5 -77
Fuel
tank
2
04-205
Misfuel
prevention
2
06
over view
Page 196 of 494
194
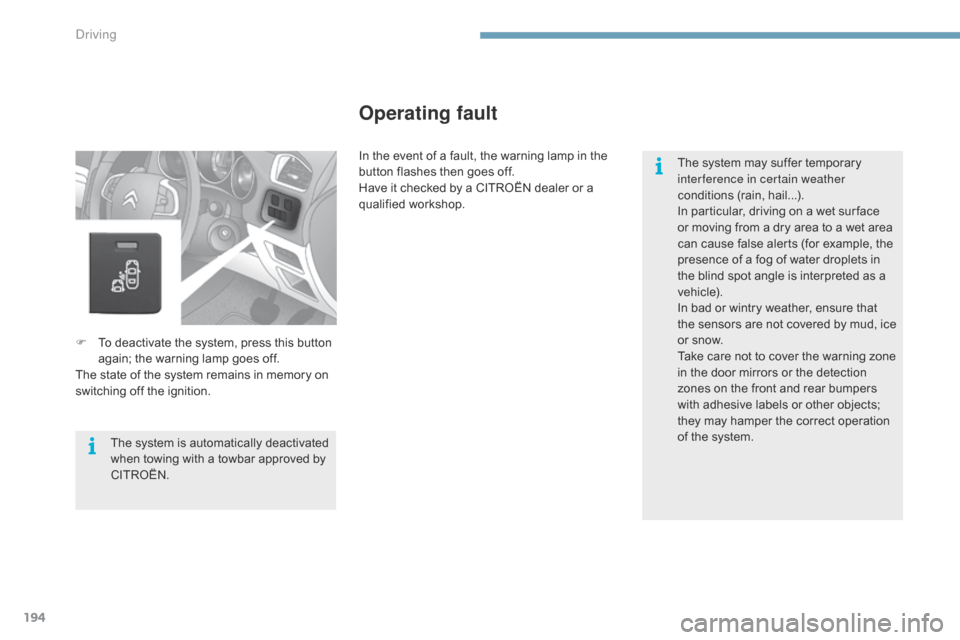
F To deactivate the system, press this button a
gain; the warning lamp goes off.
The
state of the system remains in memory on
s
witching off the ignition.
Operating fault
The system is automatically deactivated when towing with a towbar approved by
CIT
ROËN. The
system may suffer temporary
i
nterference in certain weather
conditions (rain, hail...).
In particular, driving on a wet sur face
o
r moving from a dry area to a wet area
c
an cause false alerts (for example, the
p
resence of a fog of water droplets in
t
he blind spot angle is interpreted as a
v
ehicle).
In bad or wintry weather, ensure that
t
he sensors are not covered by mud, ice
o
r snow.
Take care not to cover the warning zone
i
n the door mirrors or the detection
z
ones on the front and rear bumpers
w
ith adhesive labels or other objects;
t
hey may hamper the correct operation o
f the system.
In the event of a fault, the warning lamp in the
b
utton flashes then goes off.
Have it checked by a CITROËN dealer or a
q
ualified
w
orkshop.
Driving
Page 204 of 494
202
In addition to the rear parking sensors, the front parking sensors are triggered when an obstacle i
s detected in front and the speed of the vehicle is
s
till below 6 mph (10 km/h).
The
front parking sensors are interrupted if the
v
ehicle stops for more than three seconds in
f
or ward gear, if no further obstacles are detected
o
r when the speed of the vehicle exceeds 6 mph
(
10 km/h).
Front parking sensors
Deactivation/Activation of the
front and rear parking sensors
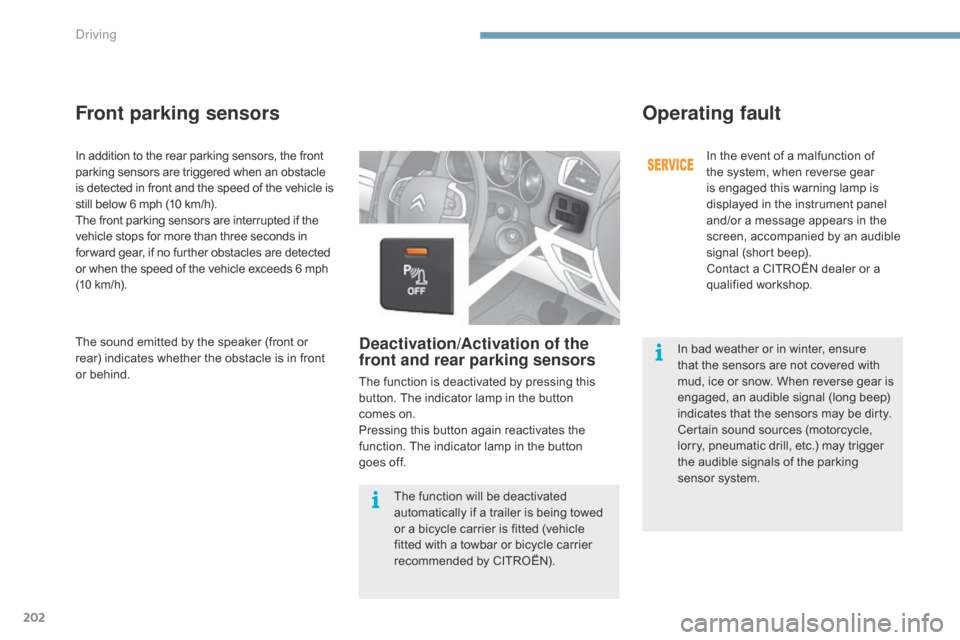
The function is deactivated by pressing this button. The indicator lamp in the button
comes
on.
Pressing
this button again reactivates the
f
unction. The indicator lamp in the button
goes
off.
Operating fault
In the event of a malfunction of the system, when reverse gear
i
s engaged this warning lamp is
d
isplayed in the instrument panel
a
nd/or a message appears in the
s
creen, accompanied by an audible
s
ignal (short beep).
Contact
a CITROËN dealer or a
q
ualified
w
orkshop.
The
sound
emitted
by
the
speaker
(front
or
r
ear)
indicates
whether
the
obstacle
is
in
front
o
r
behind. The
function
will
be
deactivated
a
utomatically
if
a
trailer
is
being
towed
o
r
a
bicycle
carrier
is
fitted
(vehicle
f
itted
with
a
towbar
or
bicycle
carrier
r
ecommended
by
CITROËN). In
bad weather or in winter, ensure
t
hat
the sensors are not covered with
m
ud,
ice or snow. When reverse gear is
e
ngaged, an audible signal (long beep)
i
ndicates that the sensors may be dirty.
Certain
sound sources (motorcycle,
l
orry,
pneumatic drill, etc.) may trigger
t
he
audible signals of the parking
s
ensor system.
Driving
Page 260 of 494
258
Very cold climate screen*
* According to country.
Fitting
F Offer up the very cold climate screen to t
he front of the lower section of the front
b u m p e r.
F
P
ress around its edge to engage its fixing
c
lips one by one.
Removal
F Use a screwdriver as a lever to release e
ach fixing clip in turn.
Removable
protective screen which prevents
t
he accumulation of snow at the radiator
c
ooling fan.
Fitting roof bars
For safety reasons and to avoid damaging the roof, it is essential to use the transverse bars a
pproved for your vehicle.
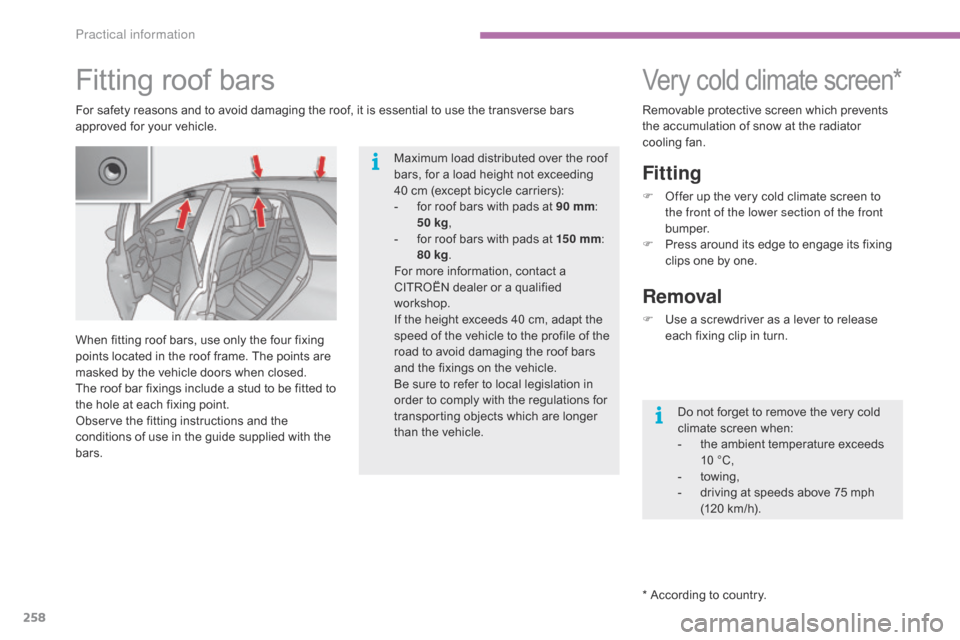
When
fitting roof bars, use only the four fixing
p
oints located in the roof frame. The points are
m
asked by the vehicle doors when closed.
The
roof bar fixings include a stud to be fitted to
t
he hole at each fixing point.
Observe
the fitting instructions and the
c
onditions of use in the guide supplied with the
b
ars. Do
not forget to remove the very cold
c
limate screen when:
-
t
he ambient temperature exceeds
1
0 °C,
-
tow
ing,
-
d
riving at speeds above 75 mph
(
120 km/h).
Maximum
load distributed over the roof
b
ars, for a load height not exceeding
4
0 cm (except bicycle carriers):
-
f
or roof bars with pads at 90 mm:
5
0 kg,
-
f
or roof bars with pads at 15 0
mm:
8
0 kg.
For
more information, contact a
C
ITROËN dealer or a qualified
w
orkshop.
If
the height exceeds 40 cm, adapt the
s
peed of the vehicle to the profile of the
r
oad to avoid damaging the roof bars
a
nd the fixings on the vehicle.
Be
sure to refer to local legislation in
o
rder to comply with the regulations for
t
ransporting objects which are longer
t
han the vehicle.
Practical information
Page 262 of 494
260
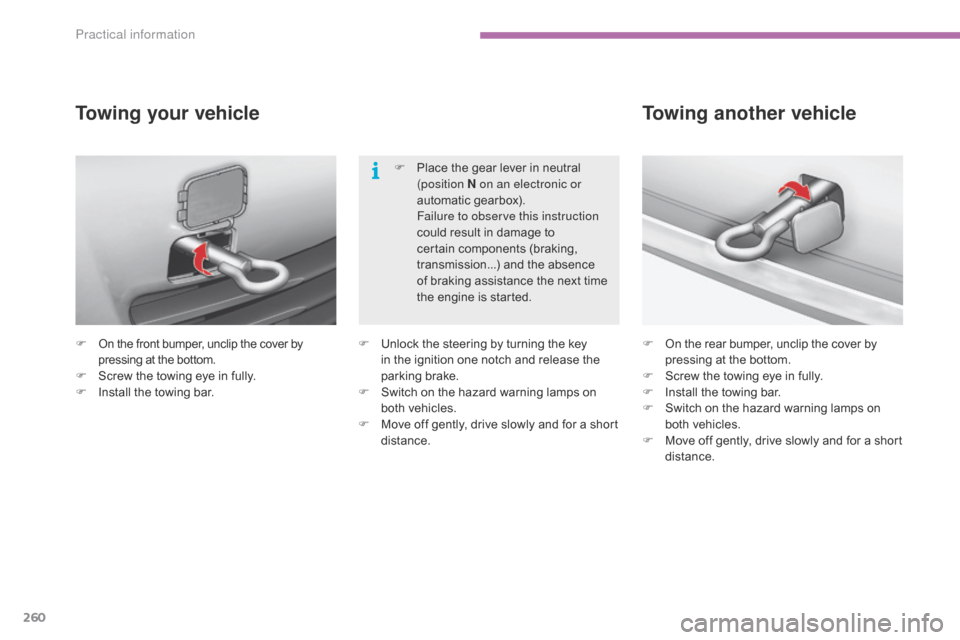
F On the front bumper, unclip the cover by p
ressing at the bottom.
F
S
crew the towing eye in fully.
F
I
nstall the towing bar.
Towing your vehicle
F On the rear bumper, unclip the cover b y p
ressing at the bottom.
F
S
crew the towing eye in fully.
F
I
nstall the towing bar.
F
S
witch on the hazard warning lamps on
b
oth vehicles.
F
M
ove off gently, drive slowly and for a short
di
stance.
Towing another vehicle
F Unlock the steering by turning the key i
n the ignition one notch and release the
par
king
b
rake.
F
S
witch on the hazard warning lamps on
b
oth vehicles.
F
M
ove off gently, drive slowly and for a short
di
stance.F
P
lace the gear lever in neutral
(
position N on an electronic or
automatic gearbox).
F
ailure to observe this instruction
could result in damage to
c
ertain components (braking,
t
ransmission...) and the absence
o
f braking assistance the next time
t
he engine is started.
Practical information
Page 263 of 494
261
Towing a trailer
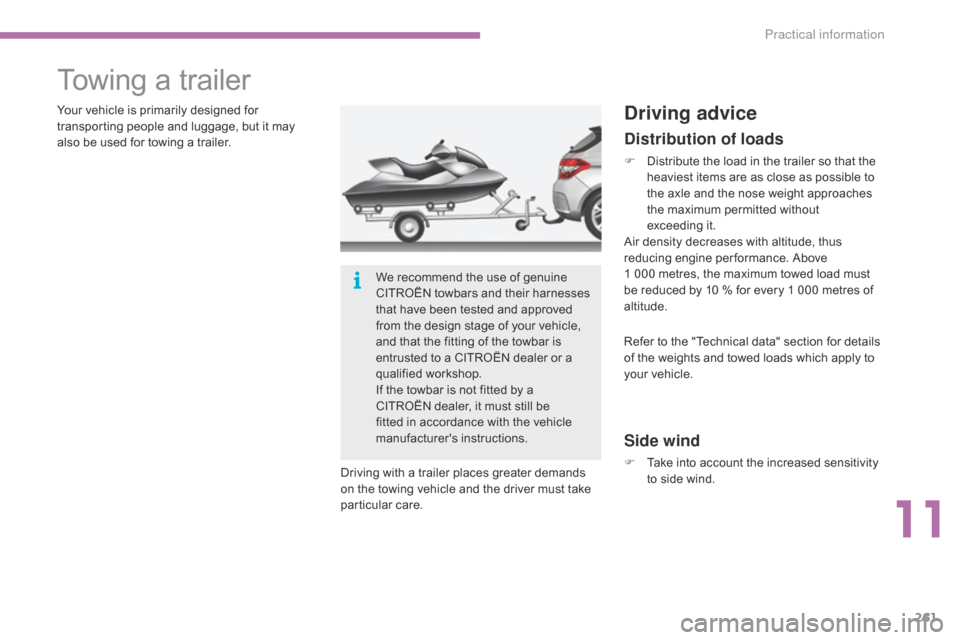
Your vehicle is primarily designed for transporting people and luggage, but it may
a
lso be used for towing a trailer.
Driving
with a trailer places greater demands
o
n the towing vehicle and the driver must take
par
ticular
c
are.Driving advice
Distribution of loads
F Distribute the load in the trailer so that the h
eaviest items are as close as possible to
t
he axle and the nose weight approaches
t
he maximum permitted without
e
xceeding it.
Air
density decreases with altitude, thus
r
educing engine per formance. Above
1 0
00 metres, the maximum towed load must
b
e reduced by 10 % for every 1 000 metres of
al
titude.
Side wind
F Take into account the increased sensitivity t
o side wind.
Refer
to the "Technical data" section for details
o
f the weights and towed loads which apply to
y
our vehicle.
We
recommend
the
use
of
genuine
C
ITROËN
towbars
and
their
harnesses
t
hat
have
been
tested
and
approved
f
rom
the
design
stage
of
your
vehicle,
a
nd
that
the
fitting
of
the
towbar
is
e
ntrusted
to
a
CITROËN
dealer
or
a
q
ualified
w
orkshop.
If
the
towbar
is
not
fitted
by
a
C
ITROËN
dealer,
it
must
still
be
f
itted
in
accordance
with
the
vehicle
m
anufacturer's
i
nstructions.
11
Practical information
Page 264 of 494
262
F If the warning lamp and the S
TOP warning lamp come on,
s
top the vehicle and switch off
t
he engine as soon as possible.
Braking
Towing a trailer increases the braking distance.
T o avoid overheating of the brakes on a long
m
ountain type of descent, the use of engine
b
raking is recommended.
Ty r e s
F Check the tyre pressures of the
towing vehicle and of the trailer, observing
t
he
re
commended
p
ressures.
Lighting
F Check the electrical lighting and signalling o
n the trailer.
The
rear parking sensors will be
d
eactivated automatically if a genuine
C
ITROËN towbar is used.
Cooling
Towing a trailer on a slope increases the temperature of the coolant.
As
the fan is electrically controlled, its cooling
c
apacity is not dependent on the engine speed.
F
T
o lower the engine speed, reduce your
s
peed.
The
maximum towed load on a long incline
d
epends on the gradient and the ambient
t
emperature.
In
all cases, keep a check on the
c
oolant
t
emperature.
Practical information
Page 265 of 494
263
Towbar with quickly detachable towball
Presentation
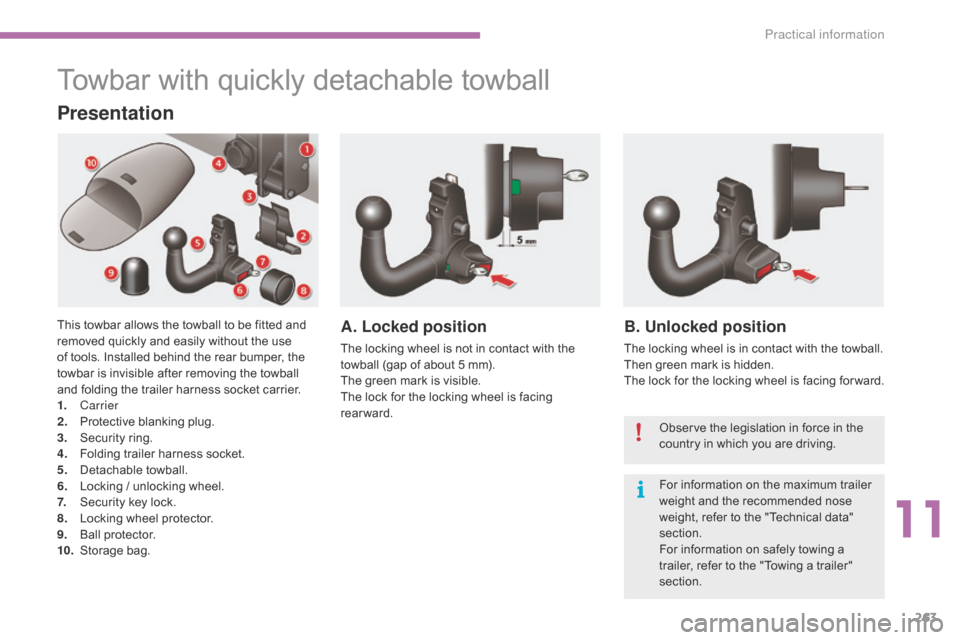
This towbar allows the towball to be fitted and removed quickly and easily without the use
o
f tools. Installed behind the rear bumper, the
t
owbar is invisible after removing the towball
a
nd folding the trailer harness socket carrier.
1.
Carrier
2.
P
rotective blanking plug.
3.
S
ecurity ring.
4.
F
olding trailer harness socket.
5.
D
etachable
t
owball.
6.
L
ocking / unlocking wheel.
7.
S
ecurity key lock.
8.
L
ocking wheel protector.
9.
Ba
ll
pro
tector.
10.
St
orage
b
ag.A. Locked position
The locking wheel is not in contact with the towball (gap of about 5 mm).
The
green mark is visible.
The
lock for the locking wheel is facing
r
earward.
B. Unlocked position
The locking wheel is in contact with the towball.
T hen green mark is hidden.
The
lock for the locking wheel is facing for ward.
Observe
the legislation in force in the
c
ountry in which you are driving.
For
information on the maximum trailer
w
eight and the recommended nose
w
eight, refer to the "Technical data"
s
ection.
For
information on safely towing a
t
railer, refer to the "Towing a trailer"
s
ection.
11
Practical information
Page 267 of 494
265
Fitting the towball
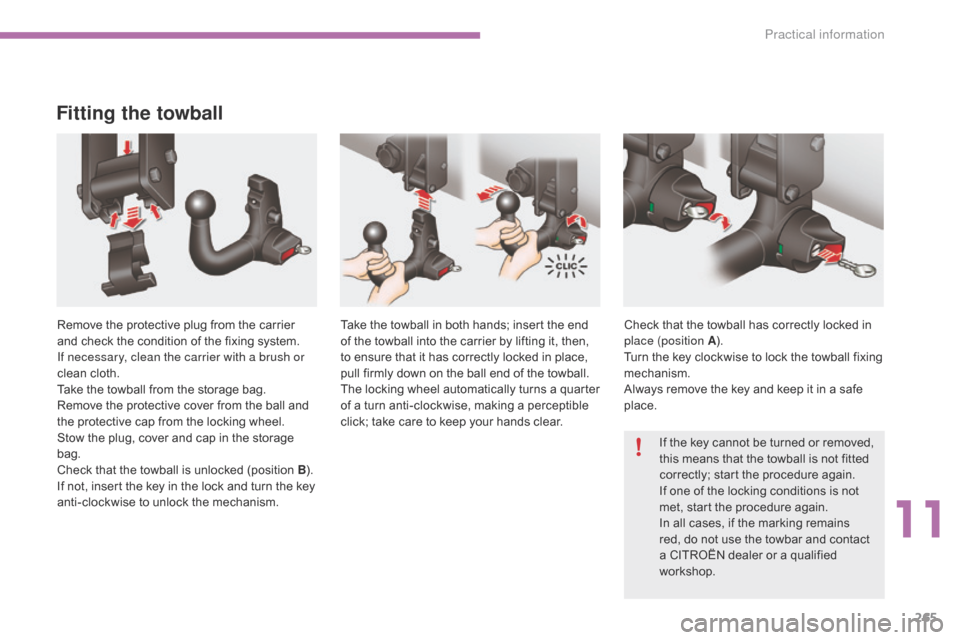
Remove the protective plug from the carrier and check the condition of the fixing system.
I
f necessary, clean the carrier with a brush or
clean
cloth.
Take
the towball from the storage bag.
Remove
the protective cover from the ball and
t
he protective cap from the locking wheel.
Stow
the plug, cover and cap in the storage
b
ag.
Check
that the towball is unlocked (position B).
I
f not, insert the key in the lock and turn the key
a
nti-clockwise to unlock the mechanism.Take
the towball in both hands; insert the end o
f the towball into the carrier by lifting it, then,
t
o ensure that it has correctly locked in place,
p
ull firmly down on the ball end of the towball.
The
locking wheel automatically turns a quarter
o
f a turn anti-clockwise, making a perceptible
c
lick; take care to keep your hands clear.Check
that the towball has correctly locked in p
lace (position A).
Turn
the key clockwise to lock the towball fixing
m
echanism.
Always
remove the key and keep it in a safe
p
lace.If
the key cannot be turned or removed,
t
his means that the towball is not fitted
c
orrectly; start the procedure again.
If
one of the locking conditions is not
m
et, start the procedure again.
In
all cases, if the marking remains
r
ed, do not use the towbar and contact
a
CITROËN dealer or a qualified
w
orkshop.
11
Practical information