warning light Citroen C4 2014.5 2.G Owner's Manual
[x] Cancel search | Manufacturer: CITROEN, Model Year: 2014.5, Model line: C4, Model: Citroen C4 2014.5 2.GPages: 494, PDF Size: 21.47 MB
Page 4 of 494
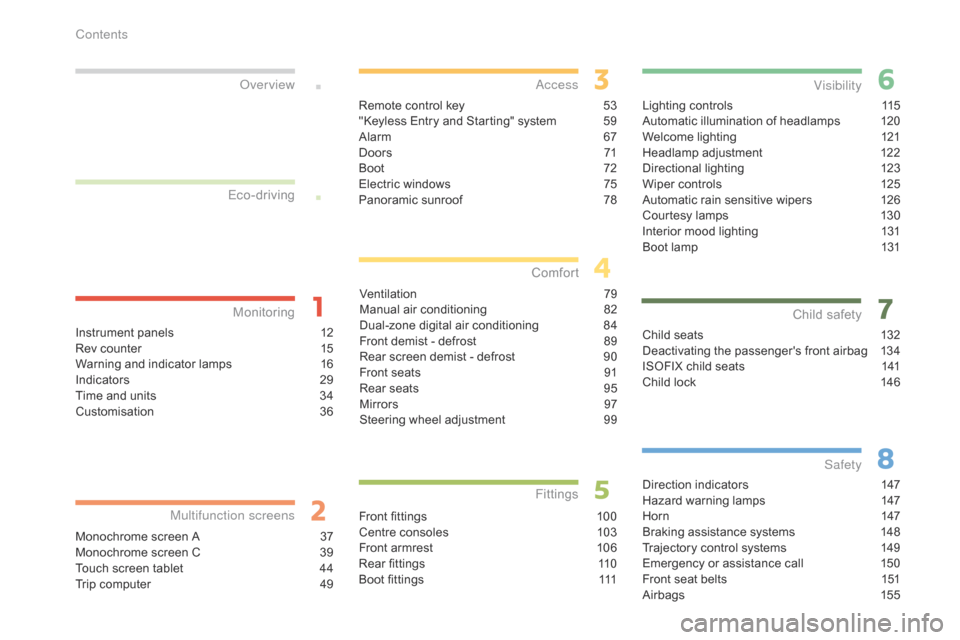
Lighting controls 115
Automatic illumination of headlamps 1 20
Welcome
lighting
1
21
Headlamp
adj
ustment
1
22
Directional
l
ighting
1
23
Wiper
controls
1
25
Automatic
rain sensitive wipers
1
26
Courtesy
lamps
1
30
Interior
mood lighting
1
31
Boot
lamp
1
31
Visibility
Child seats 132
Deactivating the passenger's front airbag 1 34
ISOFIX
child seats
1
41
Child
lock
1
46
Child safety
Direction indicators 1 47
Hazard warning lamps 1 47
Hor n
14
7
Braking
assistance systems
1
48
Trajectory
control systems
1
49
Emergency
or assistance call
1
50
Front
seat belts
1
51
Airbags
1
55
Safety
Instrument panels 1 2
Rev counter 1 5
Warning
and indicator lamps
1
6
Indicators
2
9
Time
and units
3
4
Customisation
3
6
Monitoring
ove
r view
Monochrome screen A 3
7
Monochrome screen C 3 9
Touch
screen tablet
4
4
Trip
computer
4
9
Multifunction screens
Remote control key 53
"Keyless Entry and Starting" system 5 9
Alarm
6
7
D o o r s
71
Boo
t
7
2
Electric
windows
7
5
Panoramic
sunroof
7
8
access
Ventilation 7 9
Manual a ir c onditioning 8 2
Dual-zone
d
igital
a
ir
c
onditioning
8
4
Front
demist - defrost
8
9
Rear
screen demist - defrost
9
0
Front
seats
9
1
Rear
seats
9
5
Mirrors
97
S
teering wheel adjustment
9
9
Comfort
Front fittings 100
Centre consoles 1 03
Front
armrest
1
06
Rear
fittings
1
10
Boot
fittings
1
11
Fittings
Eco-driving
Contents
Page 8 of 494
6
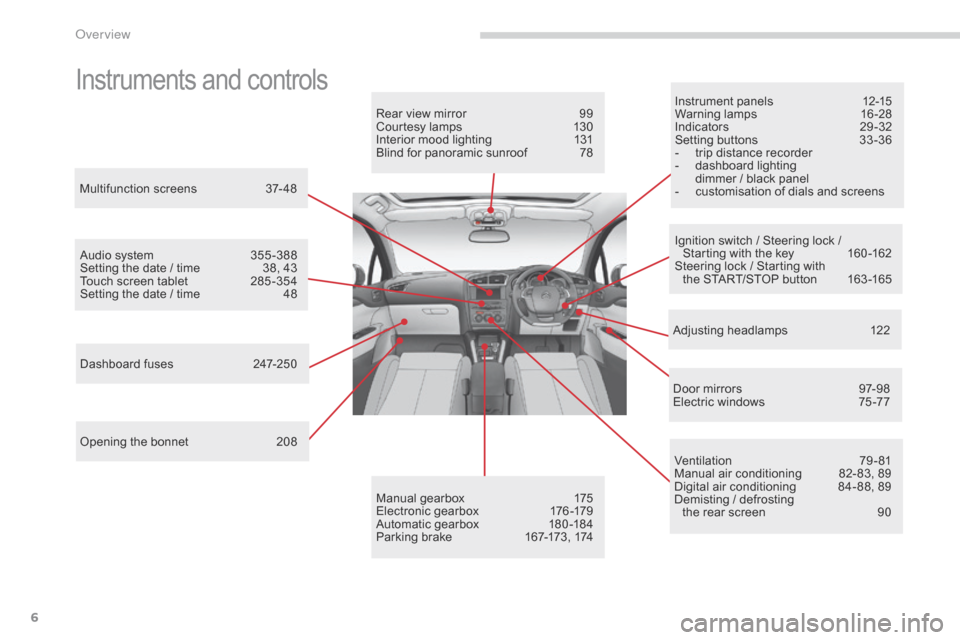
Instruments and controlsInstrument panels 12-15
Warning lam ps 1 6-28
Indicators
2
9-32
Setting
buttons
3
3 -36
-
t
rip distance recorder
-
d
ashboard lighting
d
immer / black panel
-
c
ustomisation of dials and screens
Adjusting
h
eadlamps
1
22
Door
mirrors
9
7-98
Electric
windows
7
5 -77
Dashboard
fuses
2
47-250
Opening
the
bonnet
2
08
Audio
system
3
55 -388
Setting
the
date
/
time
3
8,
43
Touch
screen
tablet
2
85 -354
Setting
the
date
/
time
4
8
Manual
g
earbox
1
75
Electronic
gearbox
1
76 -179
Automatic
gearbox
1
80 -184
Parking
brake
1
67-173,
174
Rear
view
mirror
9
9
Courtesy
lamps
1
30
Interior
mood
lighting
1
31
Blind
for
panoramic
sunroof
7
8
Multifunction
screens
3
7- 48
Ventilation
7
9-81
Manual
air conditioning
8
2- 83, 89
Digital
air conditioning
8
4- 88, 89
Demisting
/ defrosting
the
rear screen
9
0
Ignition
switch / Steering lock /
S
tarting with the key
1
60 -162
Steering
lock / Starting with
the
START/STOP button
1
63 -165
over view
Page 27 of 494
25
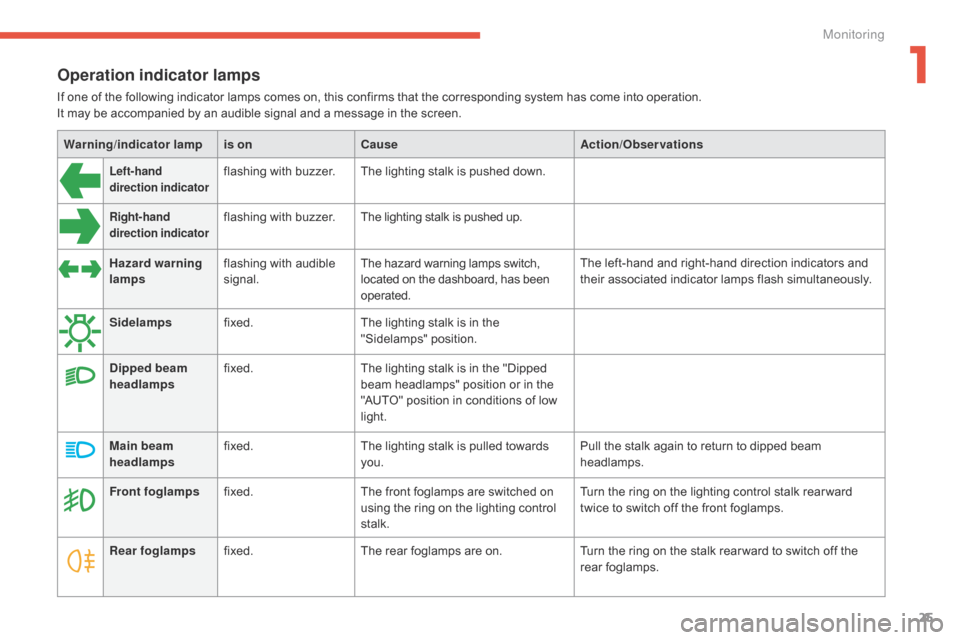
Operation indicator lamps
If one of the following indicator lamps comes on, this confirms that the corresponding system has come into operation.
I t may be accompanied by an audible signal and a message in the screen.
Warning /indicator lampis on Cause Action/Observations
Left-hand
direction indicatorflashing with buzzer.The lighting stalk is pushed down.
Right-hand
direction indicatorflashing with buzzer.The lighting stalk is pushed up.
Hazard warning
lamps flashing
with audible
s
ignal. The
hazard warning lamps switch,
l
ocated on the dashboard, has been
ope
rated. The
left-hand and right-hand direction indicators and
t
heir associated indicator lamps flash simultaneously.
Sidelamps fixed. The
lighting stalk is in the
"
Sidelamps"
p
osition.
Dipped beam
headlamps fixed.
The
lighting stalk is in the "Dipped
b
eam headlamps" position or in the
"
AUTO" position in conditions of low
l
ight.
Main beam
headlamps fixed.
The
lighting stalk is pulled towards
yo
u. Pull
the stalk again to return to dipped beam
h
eadlamps.
Front foglamps fixed. The
front foglamps are switched on
u
sing the ring on the lighting control
st
alk. Turn
the ring on the lighting control stalk rear ward
t
wice to switch off the front foglamps.
Rear foglamps fixed. The
rear foglamps are on.Turn
the ring on the stalk rear ward to switch off the
r
ear
fo
glamps.
1
Monitoring
Page 29 of 494
27
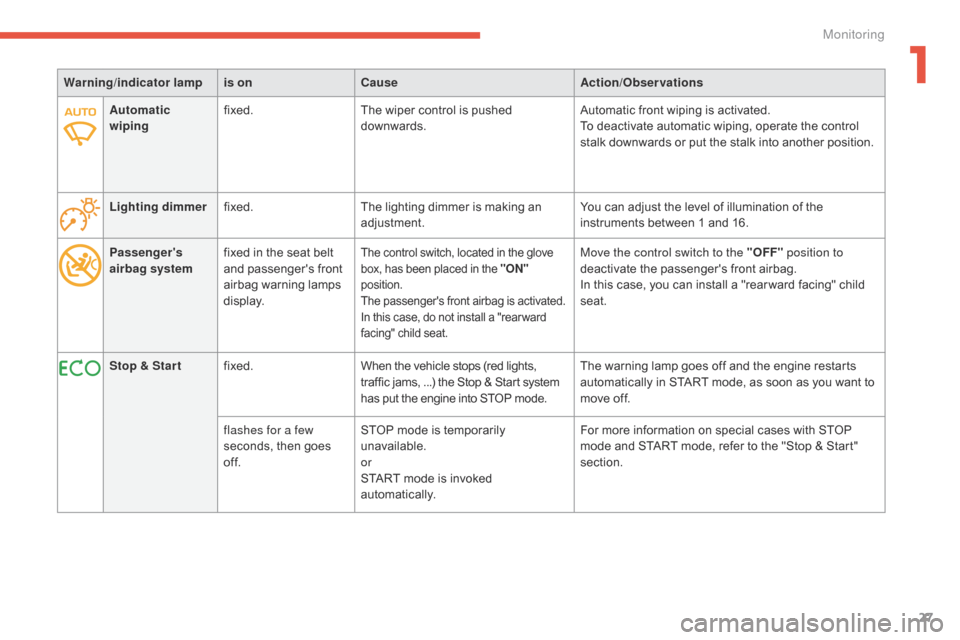
Passenger's
airbag systemfixed
in the seat belt a
nd passenger's front
a
irbag
w
arning
lam
ps
d
isplay.The control switch, located in the glove box, has been placed in the "ON"
position.
The
passenger's front airbag is activated.
In
this case, do not install a "rear ward
f
acing" child seat.Move the control switch to the "OFF" position to
deactivate the passenger's front airbag.
In
this case, you can install a "rear ward facing" child
sea
t.
Warning
/indicator lampis on Cause Action/Observations
Stop & Star t fixed. When
the
vehicle
stops
(red
lights,
t
raffic
jams,
...)
the
Stop
&
Start
system
h
as
put
the
engine
into
STOP
mode. The
warning lamp goes off and the engine restarts
a
utomatically in START mode, as soon as you want to
m
ove off.
flashes for a few
seconds,
then
goes
o
f f. STOP
mode
is
temporarily
u
navailable.
or
START
mode
is
invoked
au
tomatically. For
more information on special cases with STOP
m
ode and START mode, refer to the "Stop & Start"
s
ection.
Automatic
wiping
fixed.
The
wiper
control
is
pushed
d
ownwards.
Automatic front wiping is activated.
To deactivate automatic wiping, operate the control
s
talk downwards or put the stalk into another position.
Lighting dimmer fixed. The
lighting
dimmer
is
making
an
adj
ustment.
You can adjust the level of illumination of the
i
nstruments between 1 and 16.
1
Monitoring
Page 121 of 494
119
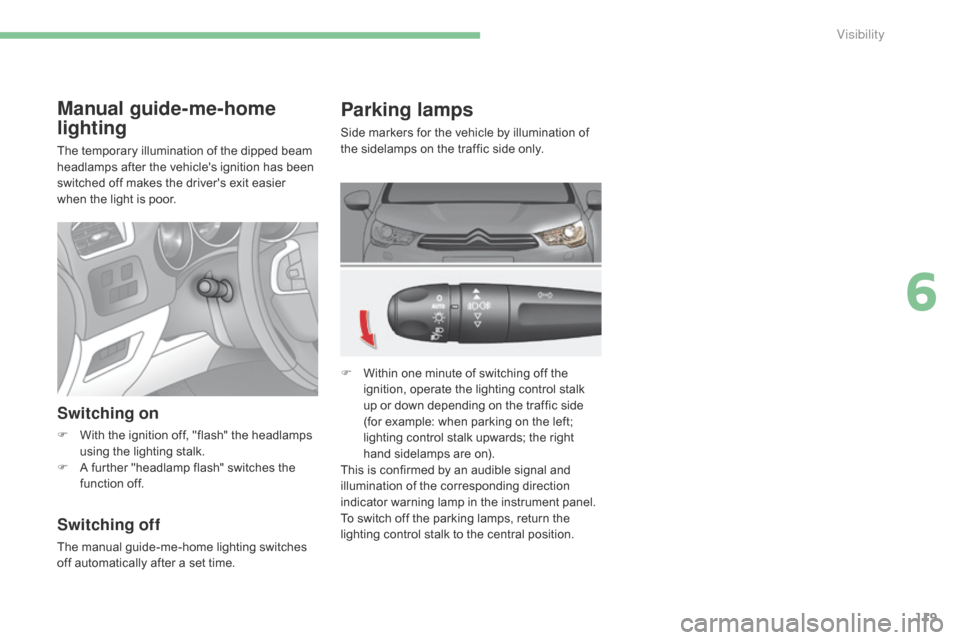
Parking lamps
Side markers for the vehicle by illumination of the sidelamps on the traffic side only.
F
W
ithin one minute of switching off the
i
gnition, operate the lighting control stalk
u
p or down depending on the traffic side
(
for example: when parking on the left;
l
ighting control stalk upwards; the right
h
and sidelamps are on).
This
is confirmed by an audible signal and
i
llumination of the corresponding direction
i
ndicator warning lamp in the instrument panel.
To
switch off the parking lamps, return the
l
ighting control stalk to the central position.
Manual guide-me-home
lighting
The temporary illumination of the dipped beam headlamps after the vehicle's ignition has been
s
witched off makes the driver's exit easier
w
hen the light is poor.
Switching on
F With the ignition off, "flash" the headlamps u
sing the lighting stalk.
F
A
further "headlamp flash" switches the
f
unction off.
Switching off
The manual guide-me-home lighting switches off automatically after a set time.
6
Visibility
Page 122 of 494
120
Automatic illumination of
headlamps
The sidelamps and dipped beam headlamps are switched on automatically, without any
a
ction on the part of the driver, when a low level
o
f external light is detected or in certain cases
o
f activation of the windscreen wipers.
As
soon as the brightness returns to an
a
dequate level or after the windscreen wipers
a
re switched off, these lamps are switched off
a
utomatically and the daytime running lamps
c
ome on.
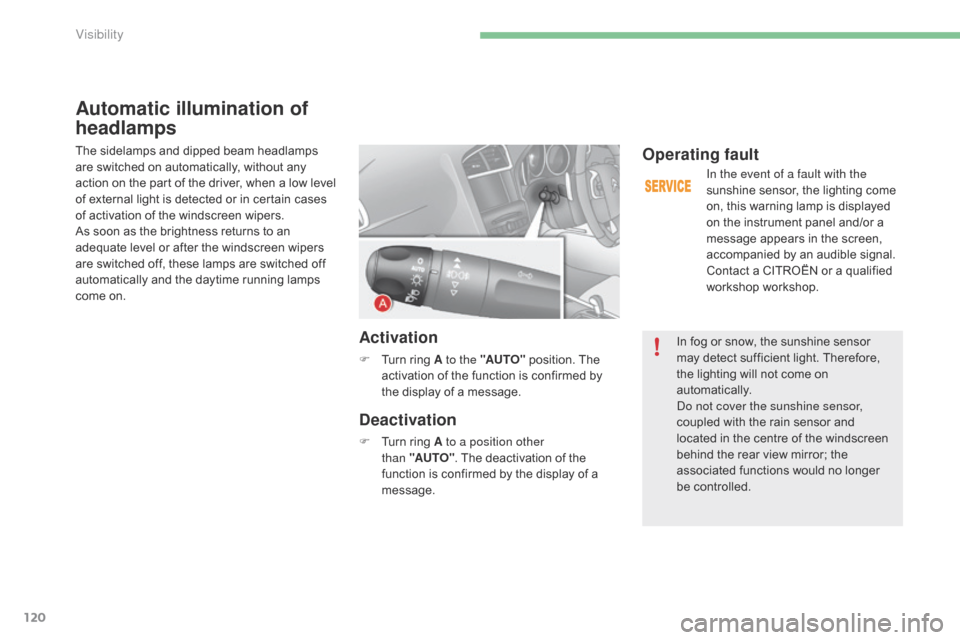
Activation
F Turn ring A to the "AUTO" position. The a
ctivation of the function is confirmed by
t
he display of a message.
Deactivation
F Turn ring A to a position other
than "AUTO". The deactivation of the
f
unction is confirmed by the display of a
m
essage.
Operating fault
In the event of a fault with the
sunshine sensor, the lighting come
o
n, this warning lamp is displayed
o
n the instrument panel and/or a
m
essage appears in the screen,
a
ccompanied by an audible signal.
Contact
a CITROËN or a qualified
w
orkshop workshop.
In
fog or snow, the sunshine sensor
m
ay
detect sufficient light. Therefore,
t
he
lighting will not come on
au
tomatically.
do n
ot cover the sunshine sensor,
coupled
with the rain sensor and
l
ocated in the centre of the windscreen
b
ehind the rear view mirror; the
a
ssociated functions would no longer
be c
ontrolled.
Visibility
Page 125 of 494
123
Directional lighting
Programming
with directional lighting
without directional lighting
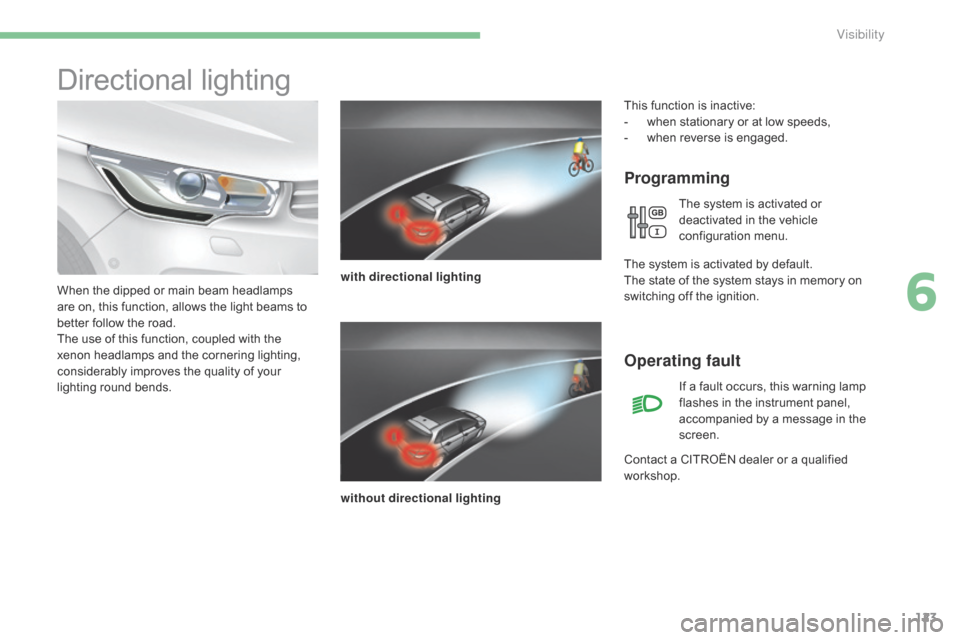
When
the
dipped
or
main
beam
headlamps
a
re
on,
this
function,
allows
the
light
beams
to
b
etter
follow
the
road.
The
use
of
this
function,
coupled
with
the
x
enon
headlamps
and
the
cornering
lighting,
c
onsiderably
improves
the
quality
of
your
l
ighting
r
ound
b
ends.
Operating fault
If a fault occurs, this warning lamp f lashes in the instrument panel,
a
ccompanied by a message in the
sc
reen.
Contact
a
CITROËN dealer or a qualified
w
orkshop.
This
function is inactive:
-
w
hen
stationary or at low speeds,
-
w
hen
r
everse
i
s
enga
ged.
The system is activated or
d
eactivated in the vehicle
c
onfiguration
m
enu.
T
he
system is activated by default.
The
state
of the system stays in memory on
s
witching
off the ignition.
6
Visibility
Page 149 of 494
147
Direction indicators
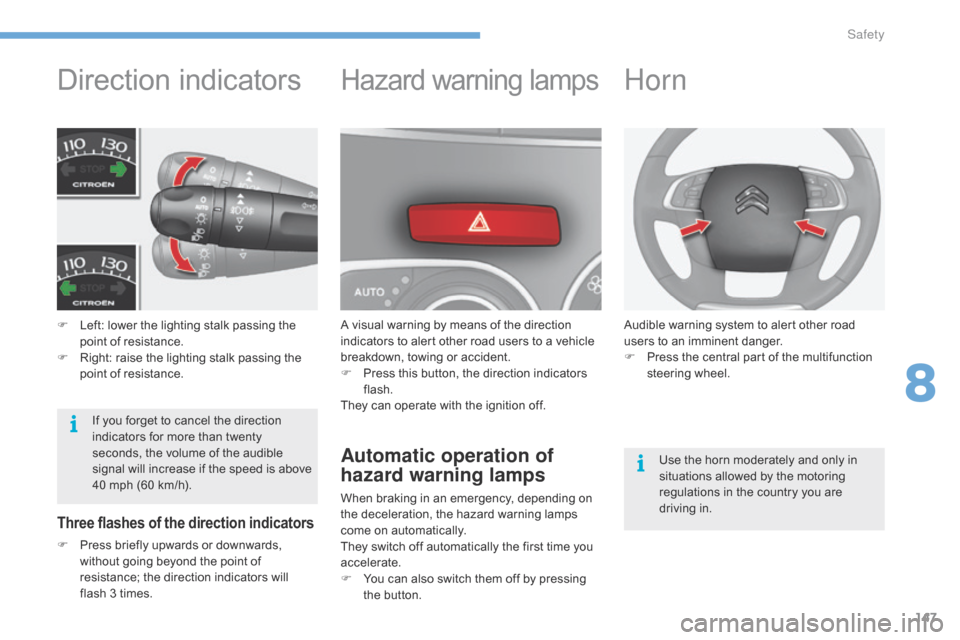
F Left: lower the lighting stalk passing the p
oint of resistance.
F
R
ight: raise the lighting stalk passing the
p
oint of resistance.
Hazard warning lam ps
A visual warning by means of the direction i
ndicators to alert other road users to a vehicle
b
reakdown, towing or accident.
F
P
ress this button, the direction indicators
f
lash.
They
can operate with the ignition off.
Automatic operation of
hazard warning lamps
When braking in an emergency, depending on the deceleration, the hazard warning lamps
c
ome on automatically.
They
switch off automatically the first time you
a
ccelerate.
F
Y
ou can also switch them off by pressing
t
he button.
Horn
Three flashes of the direction indicators
F Press briefly upwards or downwards, w
ithout going beyond the point of
r
esistance; the direction indicators will
f
lash 3 times. Audible
warning system to alert other road
u
sers to an imminent danger.
F
P
ress the central part of the multifunction
s
teering
w
heel.
Use the horn moderately and only in
s
ituations allowed by the motoring
r
egulations in the country you are
d
riving in.
If you forget to cancel the direction
i
ndicators for more than twenty
s
econds, the volume of the audible
s
ignal will increase if the speed is above
4
0 mph (60 km/h).
8
Safety
Page 150 of 494
148
Group of supplementary systems which help you to obtain optimum braking in complete
s
afety in emergency situations:
-
a
nti-lock braking system (ABS),
-
e
lectronic brake force distribution (EBFD),
-
e
mergency braking assistance (EBA).
Anti-lock braking system
and electronic brake force
distribution
Linked systems which improve the stability and manoeuvrability of your vehicle when braking, in p
articular on poor or slippery sur faces.
Activation
The anti-lock braking system comes into operation automatically when there is a risk of
w
heel lock.
Normal
operation of the ABS may make itself
f
elt by slight vibration of the brake pedal.
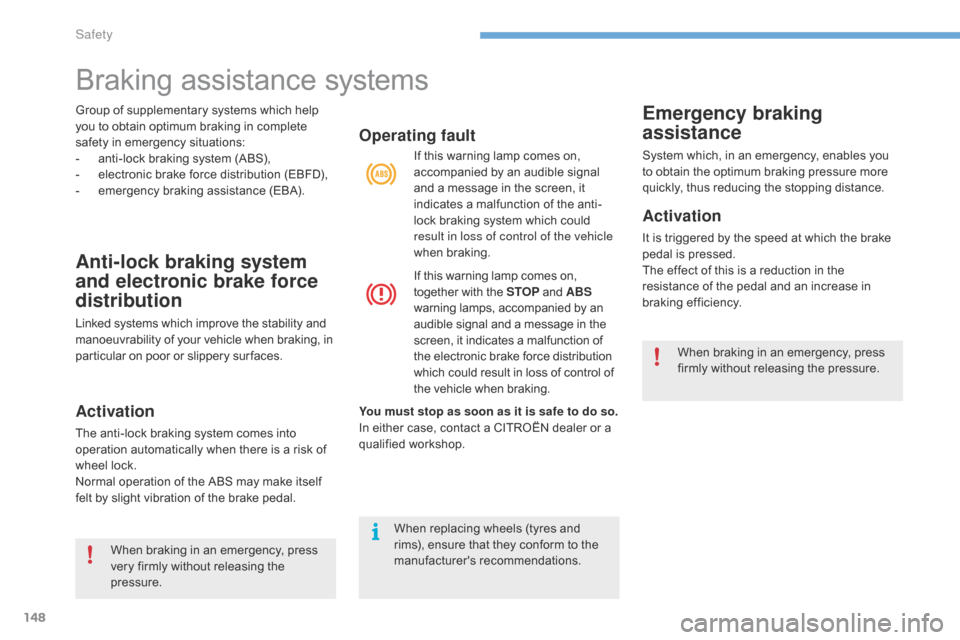
Operating fault
If this warning lamp comes on, accompanied by an audible signal
a
nd a message in the screen, it
i
ndicates a malfunction of the anti-
lock
braking system which could
r
esult in loss of control of the vehicle
when
b
raking.
If
this warning lamp comes on,
t
ogether with the STOP
and ABS
warning
lamps, accompanied by an
a
udible signal and a message in the
s
creen, it indicates a malfunction of
t
he electronic brake force distribution
w
hich could result in loss of control of
t
he vehicle when braking.
Emergency braking
assistance
System which, in an emergency, enables you to obtain the optimum braking pressure more
q
uickly, thus reducing the stopping distance.
Activation
It is triggered by the speed at which the brake pedal is pressed.
The
effect of this is a reduction in the
r
esistance of the pedal and an increase in
b
raking
e
fficiency.
You must stop as soon as it is safe to do so.
In
either
case,
contact
a
CITROËN
dealer
or
a
q
ualified
w
orkshop.
When
braking
in
an
emergency,
press
v
ery
firmly
without
releasing
the
p
ressure. When
braking in an emergency, press
f
irmly without releasing the pressure.
When
replacing
wheels
(tyres
and
r
ims),
ensure
that
they
conform
to
the
ma
nufacturer's
r
ecommendations.
Braking assistance systems
Safety
Page 156 of 494
154
The driver must ensure that passengers use the seat belts correctly and that they are all
r
estrained securely before setting off.
Wherever
you are seated in the vehicle,
a
lways fasten your seat belt, even for short
journeys.
Do
not interchange the seat belt buckles as
t
hey will not fulfil their role fully.
The
seat belts are fitted with an inertia reel
p
ermitting automatic adjustment of the length
o
f the strap to your size. The seat belt is
s
towed automatically when not in use.
Before
and after use, ensure that the seat belt
i
s reeled in correctly.
The
lower part of the strap must be positioned
a
s low as possible on the pelvis.
The
upper part must be positioned in the
h
ollow of the shoulder.
The
inertia reels are fitted with an automatic
l
ocking device which comes into operation in
t
he event of a collision, emergency braking
o
r if the vehicle rolls over. You can release
t
he device by pulling the strap firmly and then
r
eleasing it so that it reels in slightly.In
order to be effective, a seat belt must:
- b e tightened as close to the body as
p
ossible,
-
b
e pulled in front of you with a smooth
m
ovement, checking that it does not
t
wist,
-
b
e used to restrain only one person,
-
n
ot bear any trace of cuts or fraying,
-
n
ot be converted or modified to avoid
a
ffecting
it
s
p
erformance.
In
accordance with current safety
r
egulations, for all repairs on your vehicle's
s
eat belts, go to a qualified workshop with
t
he skills and equipment needed, which a
C
ITROËN dealer is able to provide.
Have
your seat belts checked regularly by
a
CITROËN dealer or a qualified workshop,
p
articularly if the straps show signs of
d
amage.
Clean the seat belt straps with soapy
water
or a textile cleaning product, sold by
C
ITROËN dealers.
After
folding or moving a seat or rear bench
s
eat, ensure that the seat belt is positioned
a
nd reeled in correctly.Recommendations for children
Use a suitable child seat if the passenger is less than 12 years old or shorter than one
a
nd a half metres.
Never
use the same seat belt to secure more
t
han one person.
Never
allow a child to travel on your lap.
For
more information, refer to the "Child
sea
ts"
se
ction.
In the event of an impact
Depending on the nature and seriousness
of the impact ,
the pretensioning device may
b
e deployed before and independently of the
a
irbags. Deployment of the pretensioners
i
s accompanied by a slight discharge of
h
armless smoke and a noise, due to the
a
ctivation of the pyrotechnic cartridge
i
ncorporated in the system.
In
all cases, the airbag warning lamp
comes
on.
Following
an impact, have the seat belts
s
ystem checked, and if necessary replaced,
b
y a CITROËN dealer or a qualified
w
orkshop.
Safety