sensor Citroen C4 2015 2.G Owner's Manual
[x] Cancel search | Manufacturer: CITROEN, Model Year: 2015, Model line: C4, Model: Citroen C4 2015 2.GPages: 494, PDF Size: 20.49 MB
Page 5 of 494
C4-2_en_Chap00a_sommaire_ed01-2015
C4-2_en_Chap00a_sommaire_ed01-2015
Technical data
Checks
Practical
i
nformation
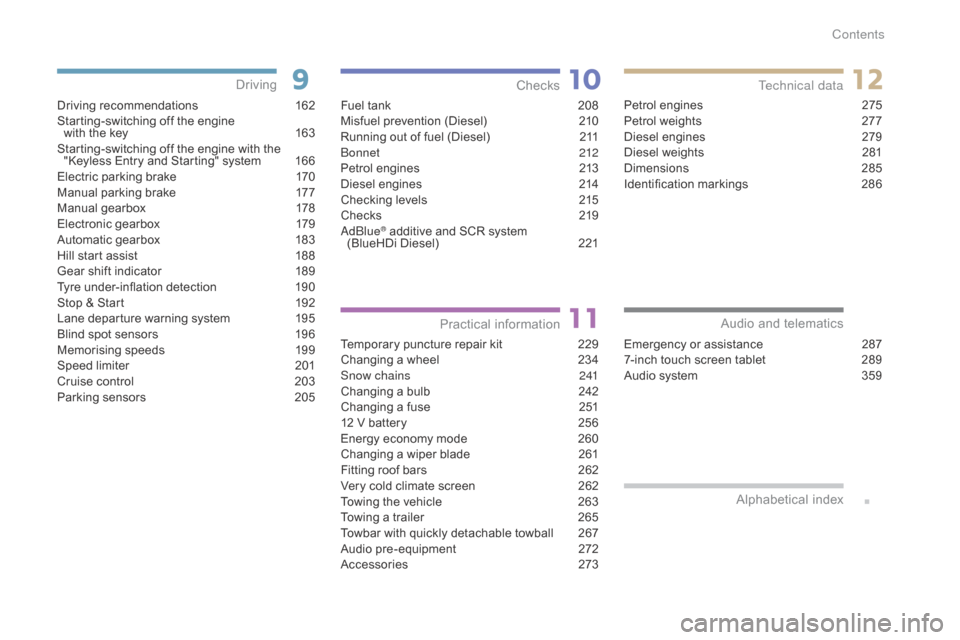
Driving recommendations 1 62
Starting-switching off the engine
with
the key
1
63
Starting-switching
off the engine with the
"
Keyless Entry and Starting" system
1
66
Electric
parking brake
1
70
Manual
par
king
b
rake
1
77
Manual
g
earbox
1
78
Electronic
gearbox
1
79
Automatic
gearbox
1
83
Hill
start assist
1
88
Gear
shift indicator
1
89
Tyre
under-inflation detection
1
90
Stop
& Start
1
92
Lane
departure warning system
1
95
Blind
spot sensors
1
96
Memorising
speeds
1
99
Speed
l
imiter
20
1
Cruise
control
2
03
Parking
sensors
2
05
Driving
Emergency or assistance 2 87
7-inch touch screen tablet 2 89
Audio
system
3
59
Audio and telematics
Alphabetical
in
dex
Fuel tank 2 08
Misfuel prevention (Diesel) 2 10
Running
out of fuel (Diesel)
2
11
bo
nnet
212
Petrol
engines
2
13
Diesel
engines
2
14
Checking
levels
2
15
Checks
2
19
a
d
blu
e
® additive and SCR system
(
BlueHDi Diesel) 2 21
Temporary
puncture repair kit
2
29
Changing
a wheel
2
34
Snow chains
2
41
Changing
a bulb
2
42
Changing
a fuse
2
51
12
V
battery
2
56
Energy
economy mode
2
60
Changing
a wiper blade
2
61
Fitting
roof bars
2
62
Very
cold climate screen
2
62
Towing
the vehicle
2
63
Towing
a trailer
2
65
Towbar
with quickly detachable towball
2
67
Audio
pre-equipment
2
72
Accessories
2
73Petrol
engines
2
75
Petrol weights
2
77
Diesel engines
2
79
Diesel weights
2
81
Dimensions
2
85
Identification
ma
rkings
2
86
Contents
Page 6 of 494
4
C4-2_en_Chap00b_vue-ensemble_ed01-2015
C4-2_en_Chap00b_vue-ensemble_ed01-2015
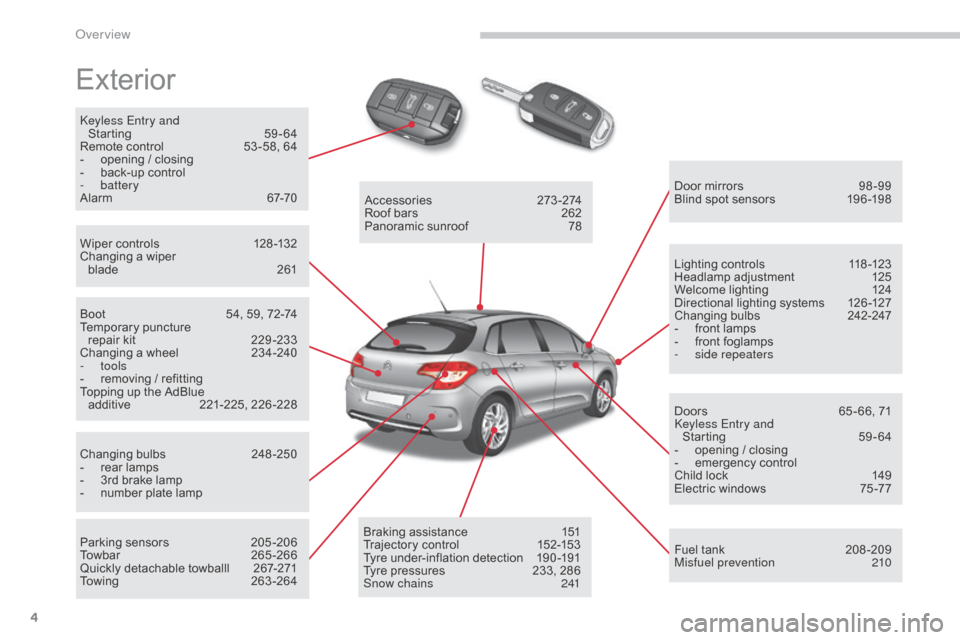
Exterior
keyless Entry and Starting 5 9-64
Remote
control
5
3 -58, 64
-
o
pening / closing
-
b
ack-up control
-
battery
Alarm
6
7-70
Wiper
controls
1
28 -132
Changing
a wiper
blade
2
61 Door
mirrors
9
8 -99
Blind
spot sensors
1
96 -198
Boot
5
4, 59, 72-74
Temporary
pu
ncture
r
epair kit
2
29 -233
Changing
a wheel
2
34-240
-
tools
-
r
emoving / refitting
Topping
up the AdBlue
a
dditive
2
21-225,
2
26-228
Changing
bu
lbs
2
48-250
-
r
ear lamps
-
3
rd brake lamp
-
n
umber plate lamp
Parking
sensors
2
05 -206
Towbar
26
5-266
Quickly
detachable towballl
2
67-271
Towing
26
3-264Accessories
2
73-274
Roof
bars
2
62
Panoramic
sunroof
7
8
Braking
assistance
1
51
Trajectory
control
1
52-153
Tyre
under-inflation detection
1
90 -191
Tyre
pressures
2
33, 286
Snow chains
2
41Lighting
controls
1
18 -123
Headlamp
adj
ustment
1
25
Welcome
lighting
1
24
Directional
lighting systems
1
26 -127
Changing
bu
lbs
2
42-247
-
f
ront lamps
-
f
ront foglamps
-
si
de repeaters
Doors
6
5 - 66, 71
ke
yless Entry and
Starting
5
9-64
-
o
pening / closing
-
em
ergency
c
ontrol
Child
lock
1
49
Electric
windows
7
5 -77
Fuel
tank
2
08 -209
Misfuel prevention
2
10
over view
Page 10 of 494
8
C4-2_en_Chap00b_vue-ensemble_ed01-2015
C4-2_en_Chap00b_vue-ensemble_ed01-2015
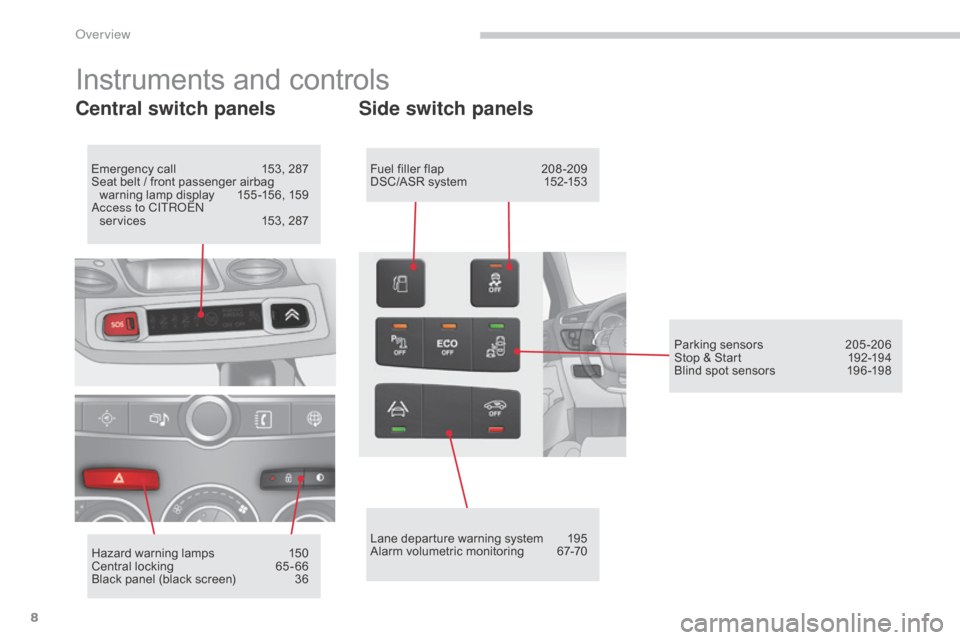
Instruments and controls
Central switch panels
Emergency call 153, 287
Seat belt / front passenger airbag
w
arning lamp display
1
55 -156, 159
ac
cess to CITR
oËn
services
1
53, 287
Hazard
warning lamps
1
50
Central
locking
6
5 - 66
Black
panel (black screen)
3
6
Side switch panels
Fuel filler flap 208 -209
DSC/ASR system 1 52-153
Lane
departure warning system
1
95
Alarm
volumetric monitoring
6
7-70Parking
sensors
2
05 -206
Stop
& Start
1
92-194
Blind
spot sensors
1
96 -198
Over view
Page 23 of 494
21
C4-2_en_Chap01_controle-de-marche_ed01-2015
C4-2_en_Chap01_controle-de-marche_ed01-2015
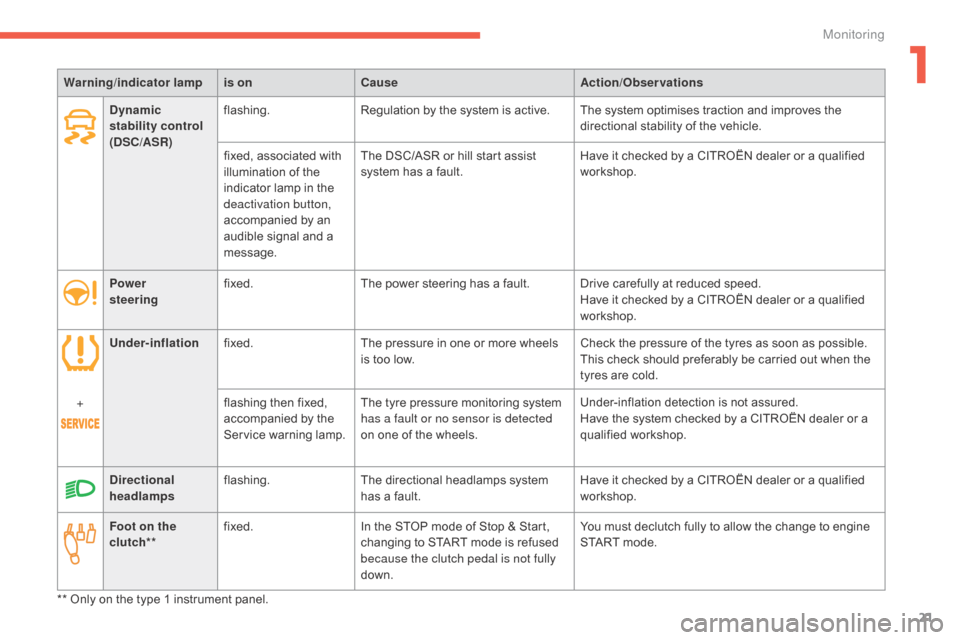
Warning/indicator lampis on Cause Action/Observations
Foot on the
clutch** fixed.
In
the STOP mode of Stop & Start,
c
hanging to START mode is refused
b
ecause the clutch pedal is not fully
down. You
must declutch fully to allow the change to engine
S
TART mode.
**
Only on the type 1 instrument panel.
Dynamic
stability control
(DSC/ASR)
flashing.
Regulation
by the system is active. The system optimises traction and improves the
d
irectional stability of the vehicle.
fixed,
associated with
i
llumination of the
i
ndicator lamp in the
d
eactivation button,
accompanied
by an
a
udible signal and a
m
essage.The
DSC/ASR or hill start assist
s
ystem has a fault.Have
it checked by a CITROËN dealer or a qualified
w
orkshop.
Power
steering fixed.
The
power steering has a fault. Drive carefully at reduced speed.
Have
it checked by a CITROËN dealer or a qualified
w
orkshop.
Under-inflation fixed. The
pressure in one or more wheels
i
s too low.Check
the pressure of the tyres as soon as possible.
This
check should preferably be carried out when the
t
yres are cold.
+ flashing
then fixed,
a
ccompanied by the
S
ervice warning lamp.The
tyre pressure monitoring system
h
as a fault or no sensor is detected
on
one of the wheels.Under-inflation
detection is not assured.
Have
the system checked by a CITROËN dealer or a
q
ualified
w
orkshop.
Directional
headlamps flashing.
The
directional headlamps system
h
as a fault.Have
it checked by a CITROËN dealer or a qualified
w
orkshop.
1
Monitoring
Page 41 of 494
39
C4-2_en_Chap02_ecran-multifonction_ed01-2015
C4-2_en_Chap02_ecran-multifonction_ed01-2015
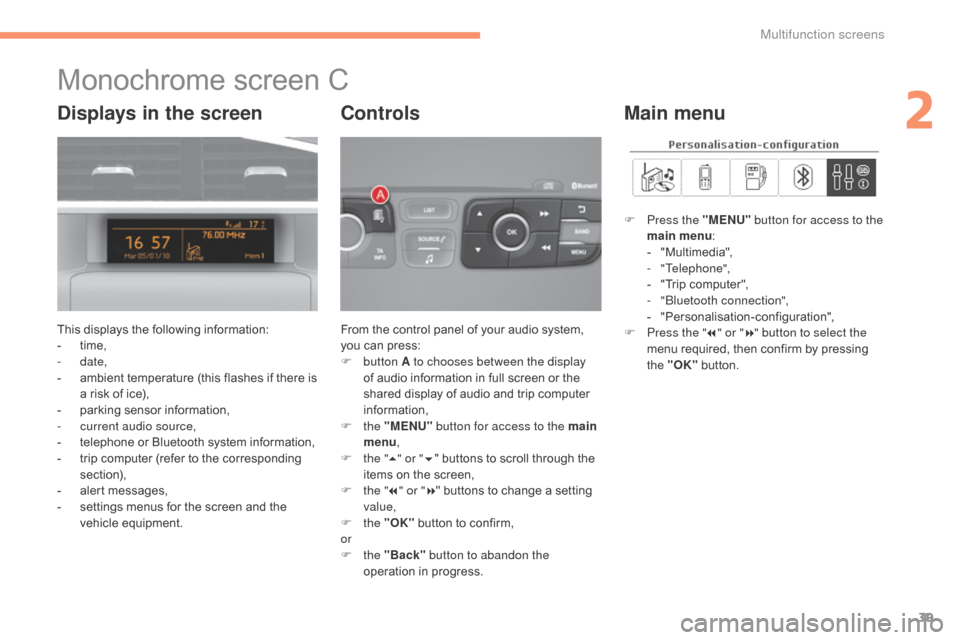
Monochrome screen C
This displays the following information:
- t ime,
-
date,
-
a
mbient temperature (this flashes if there is
a
risk of ice),
-
p
arking sensor information,
-
c
urrent audio source,
-
t
elephone or Bluetooth system information,
-
t
rip computer (refer to the corresponding
s
ection),
-
a
lert messages,
-
s
ettings menus for the screen and the
v
ehicle
e
quipment. From
the control panel of your audio system, y
ou can press:
F
button A to chooses between the display
of
audio information in full screen or the
s
hared display of audio and trip computer
i
nformation,
F
the "MENU" button for access to the main
menu ,
F
t
he "5" or " 6"
buttons to scroll through the
i
tems on the screen,
F
t
he "7" or " 8"
buttons to change a setting
va
lue,
F
the "OK"
button to confirm,
or
F
the "Back" button to abandon the
operation
in progress.
Controls
F Press the "MENU" button for access to the
main menu :
-
"
Multimedia",
-
"Telephone",
-
"
Trip computer",
-
"bl
uetooth connection",
-
"
Personalisation-configuration",
F
P
ress the " 7" or " 8" button to select the
menu
required, then confirm by pressing
t
he "OK"
button.
Main menuDisplays in the screen
2
Multifunction screens
Page 46 of 494
44
C4-2_en_Chap02_ecran-multifonction_ed01-2015
C4-2_en_Chap02_ecran-multifonction_ed01-2015
Touch screen tablet
General operation
Principles
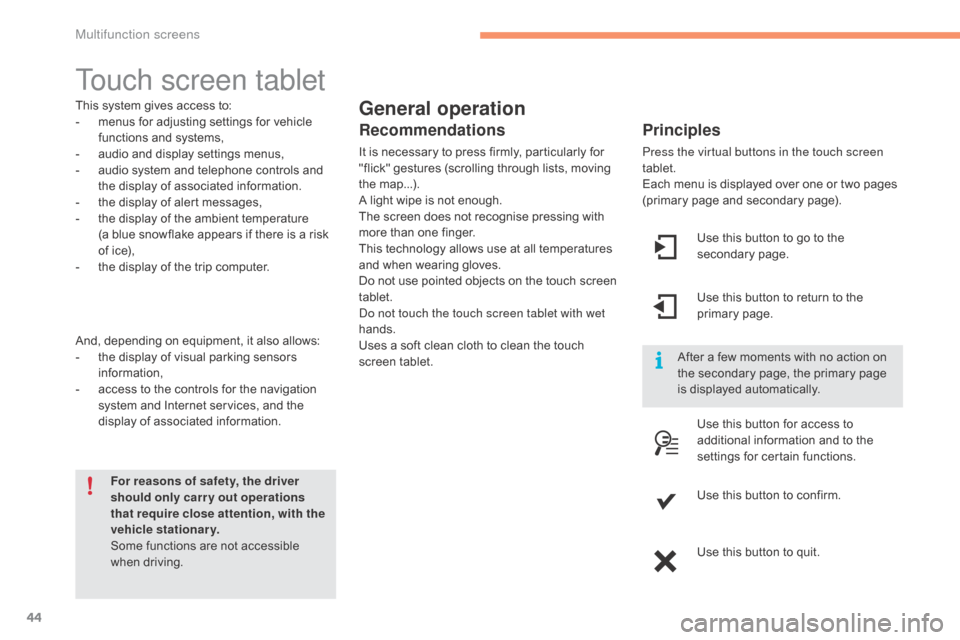
Press the virtual buttons in the touch screen
tablet.
Each menu is displayed over one or two pages
(
primary page and secondary page).
For reasons of safety, the driver
should only carr y out operations
that require close attention, with the
vehicle stationary.
Some
functions
are
not
accessible
w
hen
d
riving.
This
system
gives
access
to:
-
m
enus
for
adjusting
settings
for
vehicle
f
unctions
and
systems,
-
a
udio
and
display
settings
menus,
-
a
udio
system
and
telephone
controls
and
t
he
display
of
associated
information.
-
t
he
display
of
alert
messages,
-
t
he
display
of
the
ambient
temperature
(a
blue
snowflake
appears
if
there
is
a
risk
o
f
ice),
-
t
he
display
of
the
trip
computer.
And,
depending
on
equipment,
it
also
allows:
-
t
he
display
of
visual
parking
sensors
i
nformation,
-
a
ccess
to
the
controls
for
the
navigation
s
ystem
and
Internet
services,
and
the
d
isplay
of
associated
information.
Recommendations
It is necessary to press firmly, particularly for " flick" gestures (scrolling through lists, moving
t
he
m
ap...).
A
light wipe is not enough.
The
screen does not recognise pressing with
m
ore than one finger.
This
technology allows use at all temperatures
a
nd when wearing gloves.
Do
not use pointed objects on the touch screen
t
ablet.
do n
ot touch the touch screen tablet with wet
hands.
Uses
a soft clean cloth to clean the touch
s
creen
t
ablet. Use
this button to go to the
s
econdary
pag
e.
After
a few moments with no action on
t
he secondary page, the primary page
i
s displayed automatically.
Use
this button to return to the
p
rimary
pag
e.
Use
this button for access to
a
dditional information and to the
s
ettings for certain functions.
Use
this button to confirm.
Use
this button to quit.
Multifunction screens
Page 82 of 494
80
C4-2_en_Chap04_confort_ed01-2015
C4-2_en_Chap04_confort_ed01-2015
Stop & Start
The heating and air conditioning systems only work when the engine
i
s running. To maintain a comfortable
t
emperature in the passenger
c
ompartment, you can temporarily
d
eactivate the Stop & Start system (see
t
he corresponding section).
In
order
for
these
systems
to
be
fully
effective,
follow
the
operation
and
maintenance
g
uidelines
belo
w:
F
T
o
obtain
an
even
air
distribution,
take
care
not
to
obstruct
the
exterior
air
intake
grilles
l
ocated at the base of the windscreen, the nozzles, the vents and the air outlets, as well
as
the
air
extractor
located
in
the
boot.
F
D
o
not
cover
the
sunshine
sensor,
located
on
the
dashboard;
this
is
used
for
regulation
o
f
the
air
conditioning
system.
F
O
perate
the
air
conditioning
system
for
at
least
5
to
10
minutes,
once
or
twice
a
month
t
o
keep
it
in
per fect
working
order.
F
E
nsure
that
the
passenger
compartment
filter
is
in
good
condition
and
have
the
filter
e
lements
replaced
regularly.
W
e
recommend
the
use
of
a
combined
passenger
compartment
filter.
Thanks
to
its
s
pecial active additive, it contributes to the purification of the air breathed by the
occupants
and
the
cleanliness
of
the
passenger
compartment
(reduction
of
allergic
s
ymptoms,
bad
odours
and
greasy
deposits).
F
T
o
ensure
correct
operation
of
the
air
conditioning
system,
you
are
also
advised
to
have
i
t
checked
regularly
as
recommended
in
the
maintenance
and
warranty
guide.
F
I
f
the
system
does
not
produce
cold
air,
switch
it
off
and
contact
a
CITROËN
dealer
or
a
q
ualified
w
orkshop.
When
towing
the
maximum
load
on
a
steep
gradient
in
high
temperatures,
switching
off
the
a
ir
conditioning
increases
the
available
engine
power
and
so
improves
the
towing
ability. The condensation created by the air
conditioning
results in a discharge
o
f water under the vehicle which is
per fectly normal.
If after an extended stop in sunshine,
t
he interior temperature is very
h
igh, first ventilate the passenger
c
ompartment for a few moments.
Put the air flow control at a setting high
e
nough to quickly change the air in the
p
assenger
c
ompartment.
The air conditioning system does not
c
ontain chlorine and does not present
any danger to the ozone layer.
Recommendations for ventilation and air conditioning
Comfort
Page 102 of 494
100
C4-2_en_Chap04_confort_ed01-2015
C4-2_en_Chap04_confort_ed01-2015
Automatic day/night model
By means of a sensor, which measures the light from the rear of the vehicle, this system
a
utomatically and progressively changes
b
etween the day and night uses.
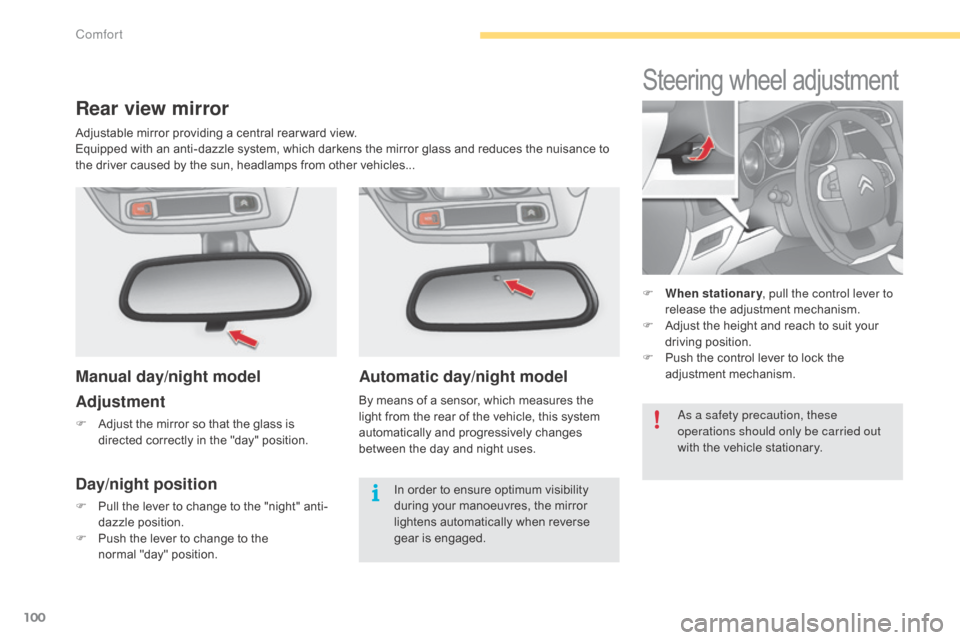
Steering wheel adjustment
F When stationary , pull the control lever to
release the adjustment mechanism.
F
A
djust the height and reach to suit your
d
riving position.
F
P
ush the control lever to lock the
a
djustment
m
echanism.
Rear view mirror
Manual day/night model
Adjustment
F Adjust the mirror so that the glass is
directed correctly in the "day" position.
Day/night position
F Pull the lever to change to the "night" anti-
dazzle position.
F
P
ush the lever to change to the
normal
"day" position.
as a s
afety precaution, these
operations should only be carried out
with the vehicle stationary.
In order to ensure optimum visibility d
uring your manoeuvres, the mirror l
ightens automatically when reverse
g
ear
i
s
enga
ged.
Adjustable
mirror providing a central rear ward view.
Equipped with an anti-dazzle system, which darkens the mirror glass and reduces the nuisance to
t
he driver caused by the sun, headlamps from other vehicles...
Comfort
Page 123 of 494
121
C4-2_en_Chap06_visibilite_ed01-2015
C4-2_en_Chap06_visibilite_ed01-2015
In good or rainy weather, by both day and night, the front foglamps and the
r
ear foglamps are prohibited. In these
s
ituations, the power of their beams
m
ay dazzle other drivers. They should
o
nly be used in fog or falling snow.
In these weather conditions, you should
switch
on the foglamps and dipped
b
eam headlamps manually, as the
s
unshine sensor may detect sufficient
l
ight.
Do
not forget to switch off the front and
r
ear foglamps when they are no longer
n
ecessary.Switching off the lighting when
switching off the ignition
When the ignition is switched off, all of the lamps switch off immediately, except for t
he dipped beam headlamps if automatic
g
uide-me-home lighting is activated.
Switching on the lighting when
switching on the ignition
To reactivate the lighting control stalk, turn the ring A to position "0"
- lighting off, then to t
he position of your choice.
If
the lighting is switched on manually after
s
witching off the ignition, there is an audible
s
ignal when a front door is opened to warn
t
he driver that they have forgotten to switch
o
ff the vehicle's lighting, with the ignition off.
They
switch off automatically after a period
w
hich depends on the state of charge of the
b
attery (entry to energy economy mode).
6
Visibility
Page 125 of 494
123
C4-2_en_Chap06_visibilite_ed01-2015
C4-2_en_Chap06_visibilite_ed01-2015
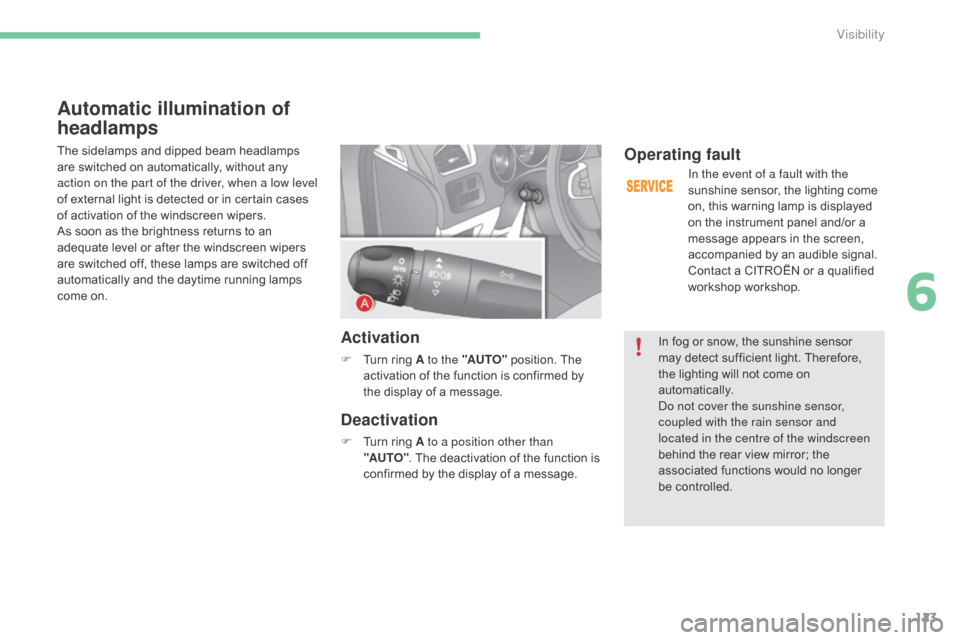
Automatic illumination of
headlamps
The sidelamps and dipped beam headlamps are switched on automatically, without any
a
ction on the part of the driver, when a low level
of
external light is detected or in certain cases
o
f activation of the windscreen wipers.
As
soon as the brightness returns to an
a
dequate level or after the windscreen wipers
a
re switched off, these lamps are switched off
a
utomatically and the daytime running lamps
c
ome on.
Activation
F Turn ring A to the "AUTO" position. The a
ctivation of the function is confirmed by
t
he display of a message.
Deactivation
F Turn ring A to a position other than
"AUTO" .
The deactivation of the function is
c
onfirmed by the display of a message.
Operating fault
In the event of a fault with the
sunshine sensor, the lighting come
o
n, this warning lamp is displayed
o
n the instrument panel and/or a
m
essage appears in the screen,
a
ccompanied by an audible signal.
Contact
a CITROËN or a qualified
w
orkshop workshop.
In
fog or snow, the sunshine sensor
m
ay
detect sufficient light. Therefore,
t
he
lighting will not come on
au
tomatically.
do n
ot cover the sunshine sensor,
coupled with the rain sensor and
located in the centre of the windscreen
behind
the rear view mirror; the
a
ssociated functions would no longer
be c
ontrolled.
6
Visibility