changing CITROEN C4 2022 Owner's Manual
[x] Cancel search | Manufacturer: CITROEN, Model Year: 2022, Model line: C4, Model: CITROEN C4 2022Pages: 292, PDF Size: 7.79 MB
Page 174 of 292
172
Practical information
Oil grade
Before topping up or changing the
engine oil, check that the oil is suitable
for your engine and complies with the
recommendations in the service schedule
supplied with the vehicle (or available from
your CITROËN dealer or qualified workshop).
Use of non-recommended oil may invalidate
your warranty in the event of engine failure.
Topping up the engine oil level
For the location of the engine oil filler cap, please
refer to the corresponding engine compartment
illustration.
►
Add oil in small quantities, avoiding any spills
on engine components (risk of fire).
►
W
ait a few minutes before checking the level
again using the dipstick.
►
T
op up the level if necessary.
►
After checking the level, carefully screw the
oil filler cap back on
and replace the dipstick in
its tube.
The oil level indication displayed on the instrument panel when the ignition is
switched on is not valid for 30 minutes
following an addition of oil.
Brake fluid
The level of this fluid should be close to
the "MAX" mark. If not, check the brake
pads for wear.
To know how often the brake fluid should be
replaced, refer to the manufacturer's servicing
schedule.
Clean the cap before removing it to refill.
Use only DOT4 brake fluid from a sealed
container.
Engine coolant
(Petrol or Diesel)
It is normal to top up this fluid between
two services.
The check and top-up must only be done with
the engine cold.
A level of coolant that is too low risks causing
major damage to the engine; the coolant level
must be close to the "MAX" mark without ever
going above it.
If the level is close to or below the " MIN" mark, it
is essential to top it up.
When the engine is hot, the temperature of the
coolant is regulated by the fan.
As the cooling system is pressurised, wait at
least one hour after switching off the engine
before carrying out any work.
In order to avoid the risk of scalding if you need
to top up in an emergency, wrap a cloth around
the cap and unscrew the cap by two turns to
allow the pressure to drop.
Once the pressure has dropped, remove the cap
and top up to the required level.
(Electric)
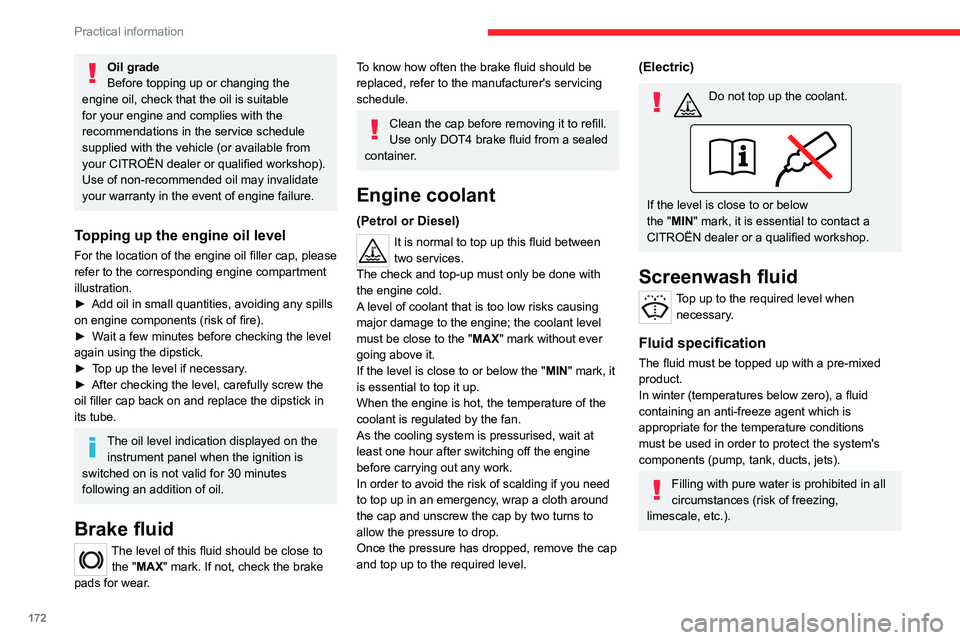
Do not top up the coolant.
If the level is close to or below
the "MIN" mark, it is essential to contact a
CITROËN dealer or a qualified workshop.
Screenwash fluid
Top up to the required level when necessary.
Fluid specification
The fluid must be topped up with a pre-mixed
product.
In winter (temperatures below zero), a fluid
containing an anti-freeze agent which is
appropriate for the temperature conditions
must be used in order to protect the system's
components (pump, tank, ducts, jets).
Filling with pure water is prohibited in all
circumstances (risk of freezing,
limescale, etc.).
Page 179 of 292
177
Practical information
7The system only registers AdBlue®
intermediate top-ups of 5
litres or more.
If the AdBlue® tank is completely empty
– which is confirmed by the message
“Top up AdBlue: Starting impossible ” – it is
essential to add at least 10
litres.
Top-up detection may not be instantaneous
after addition. It may take a few minutes of
driving before the top-up detection is effective.
Changing to free-wheeling
In certain situations, it is necessary to put the
vehicle into free-wheeling mode (e.g. towing, on
a rolling road, automatic car wash (Wash mode),
rail or sea transport).
The procedure varies according to the type of
gearbox and parking brake.
Never leave the vehicle unattended with
the vehicle into free-wheeling mode.
Keyless Entry and Start
You must not depress the brake pedal
while switching the ignition on again, then
switching it off. If you do, the engine will start,
requiring you to restart the procedure.
With a manual gearbox and
electric parking brake
/
To release them
► With the engine running and while depressing
the brake pedal, move the gear selector to the
neutral position.
►
While depressing the brake pedal, switch off
the engine.
►
Release the brake pedal, then switch on the
ignition.
►
While depressing the brake pedal, press the
control to release the parking brake.
►
Release the brake pedal, then switch off the
ignition.
Reverting to normal operation
► While depressing the brake pedal, restart the
engine and apply the parking brake.
With EAT8 automatic
gearbox or drive selector
and electric parking brake
/
Release procedure
► With the vehicle stationary and the engine
running, depress the brake pedal and select
mode
N.
Within 5 seconds:
► Depress and hold the brake pedal, then
observe this order: switch off the engine and
move the push selector forwards or backwards.
►
Release the brake pedal, then switch on the
ignition.
►
Place your foot on the brake and press the
electric parking brake control to release it.
►
Release the brake pedal, then switch off the
ignition.
A message is displayed on the instrument panel to confirm the unlocking
of the wheels for 15
minutes.
After 15 minutes or reverting to normal
operation
► While depressing the brake pedal, restart the
engine and select mode P .
Advice on care and maintenance
General recommendations
Observe the following recommendations to avoid
damaging the vehicle.
Page 189 of 292
187
In the event of a breakdown
8After changing a wheel
With a "space-saver" type spare wheel
Deactivate certain driving aid functions
(Active Safety Brake, Adaptive cruise control,
etc.).
Do not exceed the maximum authorised
speed of 50 mph (80 km/h).
Driving with more than one "space-saver"
type spare wheel is prohibited.
Visit a CITROËN dealer or a qualified
workshop.
Have the tightening of the spare wheel's bolts
and its tyre pressure checked.
Have the punctured tyre examined. After
inspection, the technician will advise you on
whether the tyre can be repaired or if it must
be replaced.
Changing a bulb
In some weather conditions (e.g. low
temperature or humidity), misting on the
internal surface of the glass of the headlamps
and rear lamps is normal, and will disappear
after the lamps have been on for a few
minutes.
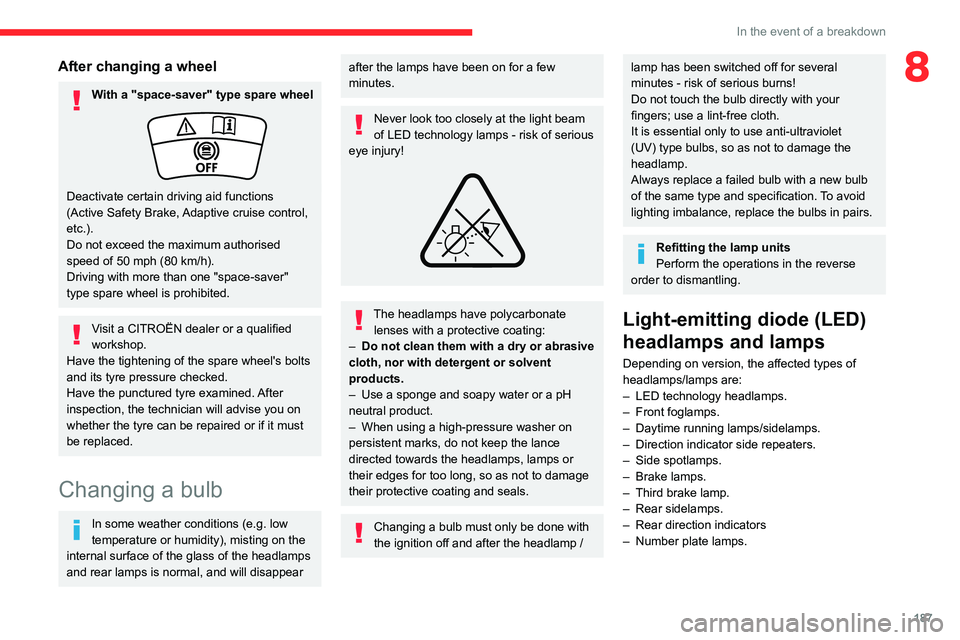
Never look too closely at the light beam
of LED technology lamps - risk of serious
eye injury!
The headlamps have polycarbonate lenses with a protective coating:
–
Do not clean them with a dry or abrasive
cloth, nor with detergent or solvent
products.
–
Use a sponge and soapy water or a pH
neutral product.
–
When using a high-pressure washer on
persistent marks, do not keep the lance
directed towards the headlamps, lamps or
their edges for too long, so as not to damage
their protective coating and seals.
Changing a bulb must only be done with
the ignition off and after the headlamp /
lamp has been switched off for several
minutes - risk of serious burns!
Do not touch the bulb directly with your
fingers; use a lint-free cloth.
It is essential only to use anti-ultraviolet
(UV) type bulbs, so as not to damage the
headlamp.
Always replace a failed bulb with a new bulb
of the same type and specification. To avoid
lighting imbalance, replace the bulbs in pairs.
Refitting the lamp units
Perform the operations in the reverse
order to dismantling.
Light-emitting diode (LED)
headlamps and lamps
Depending on version, the affected types of
headlamps/lamps are:
–
LED technology headlamps.
–
Front foglamps.
–
Daytime running lamps/sidelamps.
–
Direction indicator side repeaters.
–
Side spotlamps.
–
Brake lamps.
–
Third brake lamp.
–
Rear sidelamps.
–
Rear direction indicators
–
Number plate lamps.
Page 192 of 292
190
In the event of a breakdown
3.Direction indicators (LED)
4. Foglamp (P21W) or Reversing lamp (W16W)
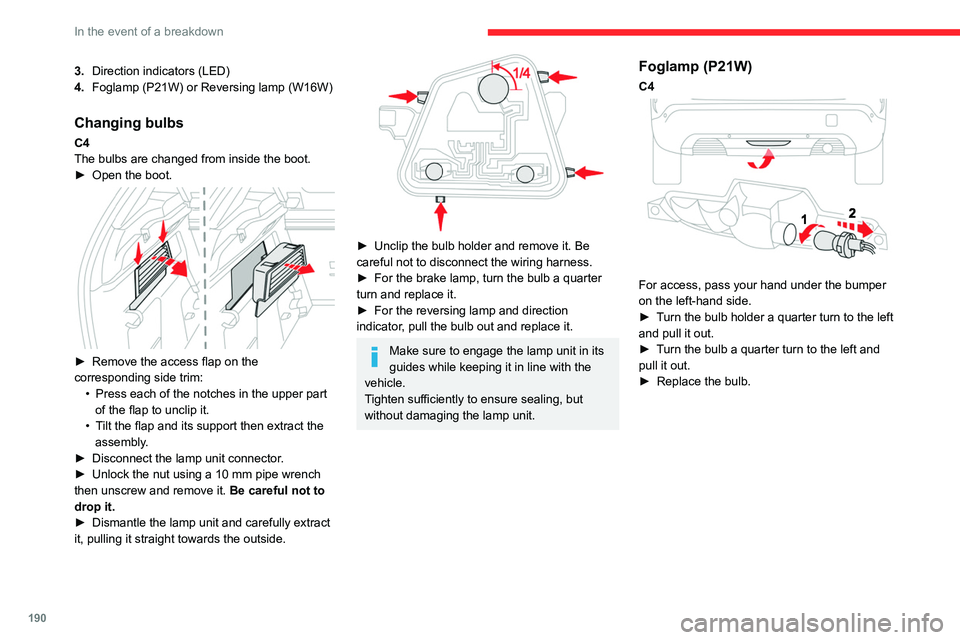
Changing bulbs
C4
The bulbs are changed from inside the boot.
►
Open the boot.
► Remove the access flap on the
corresponding side trim: •
Press each of the notches in the upper part
of the flap to unclip it.
•
T
ilt the flap and its support then extract the
assembly.
►
Disconnect the lamp unit connector
.
►
Unlock the nut using a 10 mm pipe wrench
then unscrew and remove it. Be careful not to
drop it.
►
Dismantle the lamp unit and carefully extract
it, pulling it straight towards the outside.
► Unclip the bulb holder and remove it. Be
careful not to disconnect the wiring harness.
►
For the brake lamp, turn the bulb a quarter
turn and replace it.
►
For the reversing lamp and direction
indicator
, pull the bulb out and replace it.
Make sure to engage the lamp unit in its
guides while keeping it in line with the
vehicle.
Tighten sufficiently to ensure sealing, but
without damaging the lamp unit.
Foglamp (P21W)
C4
For access, pass your hand under the bumper
on the left-hand side.
►
T
urn the bulb holder a quarter turn to the left
and pull it out.
►
T
urn the bulb a quarter turn to the left and
pull it out.
►
Replace the bulb.
Page 193 of 292
191
In the event of a breakdown
8Reversing lamp/Foglamp
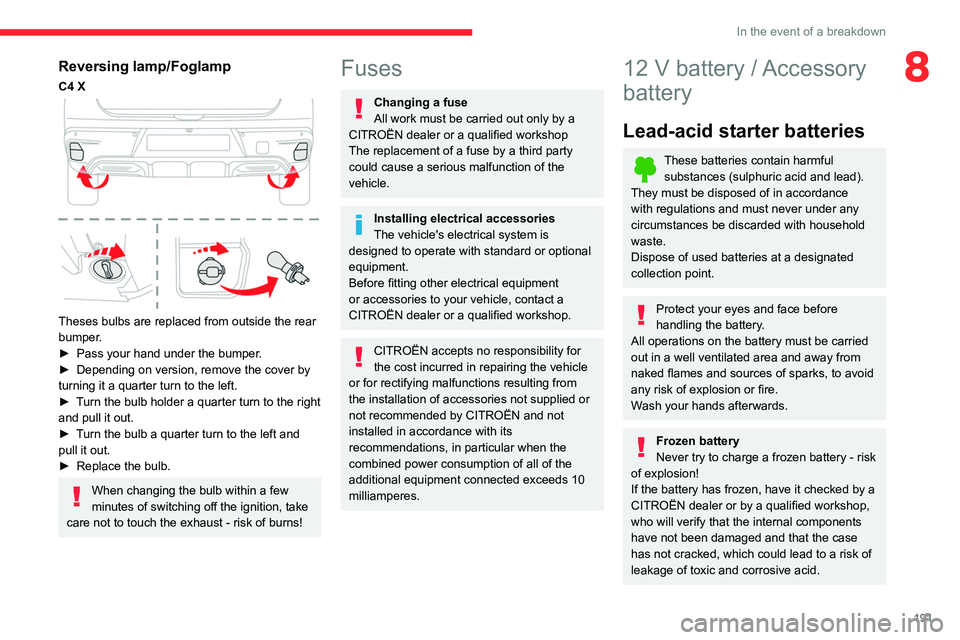
C4 X
Theses bulbs are replaced from outside the rear
bumper.
►
Pass your hand under the bumper
.
►
Depending on version, remove the cover by
turning it a quarter turn to the left.
►
T
urn the bulb holder a quarter turn to the right
and pull it out.
►
T
urn the bulb a quarter turn to the left and
pull it out.
►
Replace the bulb.
When changing the bulb within a few
minutes of switching off the ignition, take
care not to touch the exhaust - risk of burns!
Fuses
Changing a fuse
All work must be carried out only by a
CITROËN dealer or a qualified workshop
The replacement of a fuse by a third party
could cause a serious malfunction of the
vehicle.
Installing electrical accessories
The vehicle's electrical system is
designed to operate with standard or optional
equipment.
Before fitting other electrical equipment
or accessories to your vehicle, contact a
CITROËN dealer or a qualified workshop.
CITROËN accepts no responsibility for
the cost incurred in repairing the vehicle
or for rectifying malfunctions resulting from
the installation of accessories not supplied or
not recommended by CITROËN and not
installed in accordance with its
recommendations, in particular when the
combined power consumption of all of the
additional equipment connected exceeds 10
milliamperes.
12 V battery / Accessory
battery
Lead-acid starter batteries
These batteries contain harmful
substances (sulphuric acid and lead).
They must be disposed of in accordance
with regulations and must never under any
circumstances be discarded with household
waste.
Dispose of used batteries at a designated
collection point.
Protect your eyes and face before
handling the battery.
All operations on the battery must be carried
out in a well ventilated area and away from
naked flames and sources of sparks, to avoid
any risk of explosion or fire.
Wash your hands afterwards.
Frozen battery
Never try to charge a frozen battery - risk
of explosion!
If the battery has frozen, have it checked by a
CITROËN dealer or by a qualified workshop,
who will verify that the internal components
have not been damaged and that the case
has not cracked, which could lead to a risk of
leakage of toxic and corrosive acid.
Page 206 of 292
204
Touch screen BLUETOOTH audio system
Touch screen BLUETOOTH audio
system
Multimedia audio system -
Bluetooth
® telephone
The functions and settings described
vary according to the vehicle version and
configuration.
For safety reasons and because they
require sustained attention by the driver,
the following operations must be carried out
with the vehicle stationary and the ignition
on:
–
Pairing the smartphone with the system in
Bluetooth mode.
–
Using the smartphone.
–
Changing the system settings and
configuration.
The system is protected in such a way that it will only operate in the vehicle.
The Energy Economy Mode message is
displayed when the system is about to enter
the corresponding mode.
First steps
With the engine running, a press mutes
the sound.
With the ignition off, a press turns the system on.
Increase or decrease the volume using
the thumbwheel on the left-hand side.
To access the menus, press this button on the touch screen.
Press the back arrow to go back a level.
To clean the screen, use a soft, non-abrasive cloth (e.g. spectacles cloth)
with no additional product.
Do not use sharp objects on the screen.
Do not touch the screen with wet hands.
Certain information is displayed permanently in
the upper bar of the touch screen:
–
Air conditioning information (depending on
version).
–
Bluetooth connection.
–
Indication of location data sharing.
Selection of the audio source:
–
FM/AM/DAB radio stations (depending on
equipment).
–
T
elephone connected via Bluetooth and
Bluetooth multimedia broadcast (streaming).
–
USB memory stick.
–
Media player connected via the auxiliary
socket (depending on equipment).
In very hot conditions, the volume may
be limited to protect the system. It may
go into standby (screen and sound off) for at
least 5 minutes.
The return to normal takes place when the
temperature in the passenger compartment
has dropped.
Steering mounted controls
Voice control: smartphone voice
commands.
Increase volume.
Decrease volume.
Mute by pressing the volume increase
and decrease buttons simultaneously.
Restore the sound by pressing one of the two
volume buttons.
Incoming call (short press): accept the
call.
Incoming call (long press): refuse the incoming
call.
Call in progress (short press): hang up.
Out of call (short press): access the call log of
the telephone connected via
Bluetooth
®.Radio (up/down): automatic search for
the next/previous station (in the list of
radio stations sorted by name or by frequencies).
Media (up/down): next/previous track, movement
in the lists.
Phone (up/down): browse the telephone's call
log.
Page 214 of 292
212
Touch screen BLUETOOTH audio system
Some telephones offer display options.
Depending on the settings chosen, contacts can
be transferred in a specific order.
►
Modify the telephone directory display
settings.
Settings
When the treble and bass settings are
changed, the ambience is deselected.
When the ambience is changed, the treble
and bass settings are reset.
Selecting an ambience imposes the treble and
bass settings, and vice versa.
►
Modify the treble and bass or ambience
settings to obtain the desired musical ambience.
There is a difference in sound quality
between audio sources.
T
o allow for optimal listening quality, the sound
settings can be tailored to different audio
sources, which can generate audible differences
when changing source.
►
Check that the sound settings are appropriate
to the sources listened to.
Adjust the sound
functions to the middle position.
When the engine is off, the system switches
off after several minutes of use.
When the engine is switched off, the system's
operating time depends on the state of charge of
the battery.
The switch-off is normal: the system
automatically goes into energy economy mode
and switches off to maintain an adequate charge
in the battery. ►
Start the vehicle’
s engine to increase the
charge of the battery.
Page 215 of 292
213
MyCitroën Play
11MyCitroën Play
Multimedia audio system -
Applications - Bluetooth
®
telephone
The functions and settings described
vary according to the vehicle version and
configuration, as well as the country of sale.
For safety reasons and because they
require sustained attention by the driver,
the following operations must be carried out
with the vehicle stationary and the ignition
on:
–
Connecting the smartphone via Bluetooth,
USB or Wi-Fi.
–
Using the smartphone.
–
Connecting to the CarPlay® or Android
Auto applications (certain applications stop
displaying when the vehicle is moving).
–
Changing the system settings and
configuration.
Any intervention or modification on the vehicle's system is strictly forbidden
- Risk of serious burns or electric shock
(short-circuit) that could lead to death
(electrocution)!
In the event of a problem, always contact a
CITROËN dealer or a qualified workshop.
The system is protected so that it only operates in the vehicle.
The message Energy economy mode is
displayed when the system is about to go into
standby.
The system’s Open Source Software (OSS) source codes are available at the
following addresses:
https://www.groupe-psa.com/fr/oss/
https://www.groupe-psa.com/en/oss/
The system transmits and/or receives radio waves subject to the Directive
2014/53/EU.
The manufacturers of the mentioned system
declare the conformity with the Directive
2014/53/EU.
The full text of the EU declaration of
conformity for each system is available at the
following address:
http://service.citroen.com/ACddb/
First steps
With the engine running, a press mutes
the sound.
With the ignition off, a press turns the system on.
Increase or decrease the volume using
the wheel or the "plus" or "minus" buttons
(depending on the equipment).
Use the buttons on either side of or below the
touch screen to access the menus, then press
the virtual buttons on the touch screen.
Depending on the model, use the " HOME" and
"Vehicle" buttons below the touch screen to
access the menus, then press the virtual buttons
on the touch screen.
At all times it is possible to display the rolling
menus by pressing the screen briefly with three
fingers.
On pages with multiple tabs at the bottom of the
screen, you can switch between pages either
by tapping the tab for the desired page or by
swiping the pages to the left or right with your
finger.
Press the back arrow to go back a level or
confirm.
The touch screen is of the "capacitive" type.
To clean the screen, use a soft, non-abrasive
cloth (e.g. spectacles cloth) with no additional
product.
Do not use sharp objects on the screen.
Do not touch the screen with wet hands.
Certain information is displayed permanently on
the main screen:
–
Air conditioning status information (depending
on version), and direct access to the
corresponding menu.
–
Radio Media and
Telephone menu status
information.
–
Privacy status information.
Page 217 of 292
215
MyCitroën Play
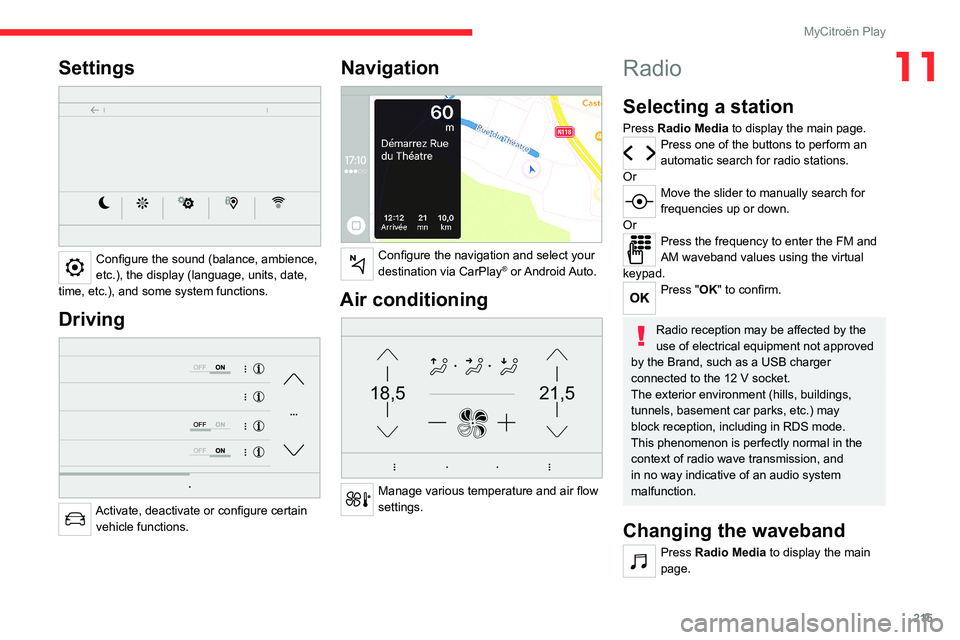
11Settings
Configure the sound (balance, ambience,
etc.), the display (language, units, date,
time, etc.), and some system functions.
Driving
Activate, deactivate or configure certain vehicle functions.
Navigation
Configure the navigation and select your
destination via CarPlay® or Android Auto.
Air conditioning
21,518,5
Manage various temperature and air flow
settings.
Radio
Selecting a station
Press Radio Media to display the main page.Press one of the buttons to perform an
automatic search for radio stations.
Or
Move the slider to manually search for
frequencies up or down.
Or
Press the frequency to enter the FM and
AM waveband values using the virtual
keypad.
Press "OK" to confirm.
Radio reception may be affected by the
use of electrical equipment not approved
by the Brand, such as a USB charger
connected to the 12 V socket.
The exterior environment (hills, buildings,
tunnels, basement car parks, etc.) may
block reception, including in RDS mode.
This phenomenon is perfectly normal in the
context of radio wave transmission, and
in no way indicative of an audio system
malfunction.
Changing the waveband
Press Radio Media to display the main
page.
Page 222 of 292
220
MyCitroën Play
Making a call
Using the telephone is not recommended
while driving.
Parking the vehicle.
Make the call using the steering mounted
controls.
Calling a new number
Press Telephone to display the main
page.
Enter the phone number using the digital
keypad.
Press "Call" to start the call.
Calling a contact
Press Telephone to display the main
page.
Or press and hold
the steering mounted PHONE button.
Press "Contacts".
Select the desired contact from the displayed list.
Press "Call".
Calling a recently used
number
Press Telephone to display the main
page.
OrPress and hold
the steering mounted button.
Press "Recent calls".
Select the desired contact from the displayed list.
It is always possible to make a call
directly from the telephone; as a safety
measure, first park the vehicle.
Setting the ringtone
Press Telephone to display the main
page.
Press the "OPTIONS " button to access the
secondary page.
Press "Ring volume" to display the
volume bar.
Press the arrows or move the slider to set
the ring volume.
Using CarPlay® or Android
Auto
Synchronising a smartphone enables users
to display applications that support the
smartphone’s CarPlay
® or Android Auto
technology on the vehicle’s screen. For CarPlay®
technology, the CarPlay® function must first be
activated on the smartphone.
The smartphone can be connected via USB
cable or via a wireless connection.
Unlock the smartphone for the
communication process between the
smartphone and the system to work.
As principles and standards are constantly
changing, we recommend keeping the
smartphone's operating system up-to-
date, together with the date and time on
the smartphone and the system.
For the list of compatible smartphones,
visit the Manufacturer's website in your
country.
USB sockets
Depending on equipment, for more information
on the USB sockets compatible with CarPlay® or
Android Auto applications, refer to the "Ease of
use and comfort" section.
Wireless connection
Before using CarPlay® or Android Auto
wirelessly, ensure the Wi-Fi regulatory
restrictions of your geographic location are
met, as indicated by a message on the touch
screen.
If the 5 GHz Wi-Fi network frequency is not
allowed in your location, select 2.4 GHz at the
first connection.
Check the Wi-Fi restrictions again when you
travel to different locations and set the Wi-Fi
frequency accordingly.