boot CITROEN C4 2023 User Guide
[x] Cancel search | Manufacturer: CITROEN, Model Year: 2023, Model line: C4, Model: CITROEN C4 2023Pages: 292, PDF Size: 7.79 MB
Page 44 of 292
42
Access
Reactivating interior volumetric
monitoring
► Deactivate exterior perimeter monitoring by
unlocking the vehicle using the remote control or
the "Keyless Entry and Start" system.
The indicator lamp in the button goes off.
►
Reactivate the full alarm system by locking
the vehicle using the remote control or by
pressing the driver
’s door handle.
The red indicator lamp in the button once again
flashes every second.
Triggering of the alarm
This is indicated by sounding of the siren
and flashing of the direction indicators for 30
seconds.
Depending on the country of sale, certain
monitoring functions remain active until the alarm
has been triggered eleven times consecutively.
When the vehicle is unlocked using the remote
control or the Keyless Entry and Start system,
rapid flashing of the red indicator lamp in the
button informs you that the alarm was triggered
during your absence. When the ignition is
switched on, this flashing stops.
Failure of the remote control
To deactivate the monitoring functions:
► Unlock the vehicle using the key in the front
left-hand door lock.
►
Open the door; the alarm is triggered. ►
Switch on the ignition; this stops the alarm.
The indicator lamp in the button goes off.
Locking the vehicle without
activating the alarm
► Lock the vehicle using the key (built-in the
remote control) in the front left-hand door lock.
Automatic activation
(Depending on version)
The system is activated automatically 2 minutes
after the last door or the boot is closed.
►
T
o avoid triggering the alarm on entering the
vehicle, first press the unlocking button on the
remote control or unlock the vehicle using the
"Keyless Entry and Start" system.
Malfunction
When the ignition is switched on, the fixed
lighting of the red indicator lamp in the button
indicates a system malfunction.
Have it checked by a CITROËN dealer or a
qualified workshop.
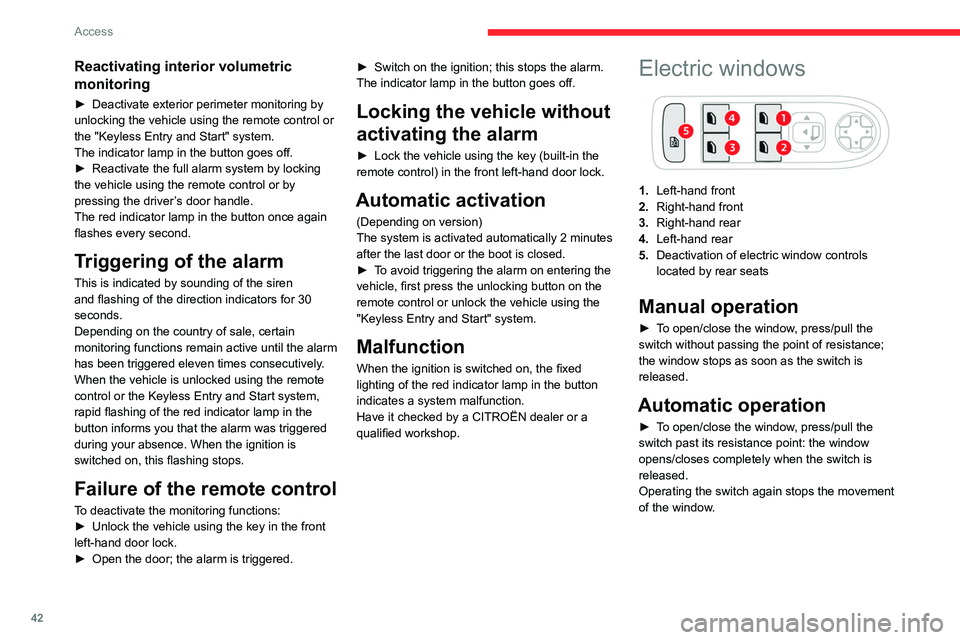
Electric windows
1. Left-hand front
2. Right-hand front
3. Right-hand rear
4. Left-hand rear
5. Deactivation of electric window controls
located by rear seats
Manual operation
► To open/close the window, press/pull the
switch without passing the point of resistance;
the window stops as soon as the switch is
released.
Automatic operation
► To open/close the window, press/pull the
switch past its resistance point: the window
opens/closes completely when the switch is
released.
Operating the switch again stops the movement
of the window.
Page 51 of 292

49
Ease of use and comfort
3
► Pull the lever to change to the anti-dazzle
"night" position.
►
Push the lever to change to the normal "day"
position.
Adjustment
►
Adjust the mirror to the normal "day" position.
Automatic "electrochrome" model
The electrochrome system uses a sensor that
detects the level of exterior brightness and that
coming from the rear of the vehicle, in order to
automatically and gradually switch between day
and night usage.
To ensure optimum visibility while manoeuvring, the mirror automatically
brightens when reverse gear is engaged.
The system is deactivated if the load in the
boot exceeds the height of the load space
cover or if the load space cover has items
placed on it.
Rear bench seat
Bench seat with fixed cushions and split folding
backrests (2/3-1/3) to adapt the boot load space.
The rear seat cushion remains fixed. To increase the boot loading volume, tilt the
bench seat backrest.
Rear head restraints
They have two positions:
– A high position , for when the seat is in use:
►
Pull the head restraint fully up.
–
A low position , for stowing, when the seat is
not in use: ►
Press the lug
A to release the head
restraint and push it down.
The rear head restraints can be removed.
Removing a head restraint
► Release the backrest using control 1 .
► T ilt the backrest slightly forwards.
►
Pull the head restraint fully up.
►
Press the lug
A to release the head restraint
and remove it completely.
Refitting a head restraint
► Insert the head restraint rods into the guides
in the corresponding backrest.
►
Push the head restraint fully down.
►
Press the lug
A to release the head restraint
and push it down.
Never drive with passengers seated at
the rear when the head restraints are
removed; the head restraints should be in
place and in the high position.
The head restraint for the centre seat
and those for the outer seats are not
interchangeable.
Folding the backrests
Manoeuvring the backrests should only
be done when the vehicle is stationary.
First steps:
Page 52 of 292
50
Ease of use and comfort
► Lower the head restraints.
► If necessary , move the front seats forward.
►
Check
that no person or object might interfere
with the folding of the backrests (e.g.
clothing,
luggage).
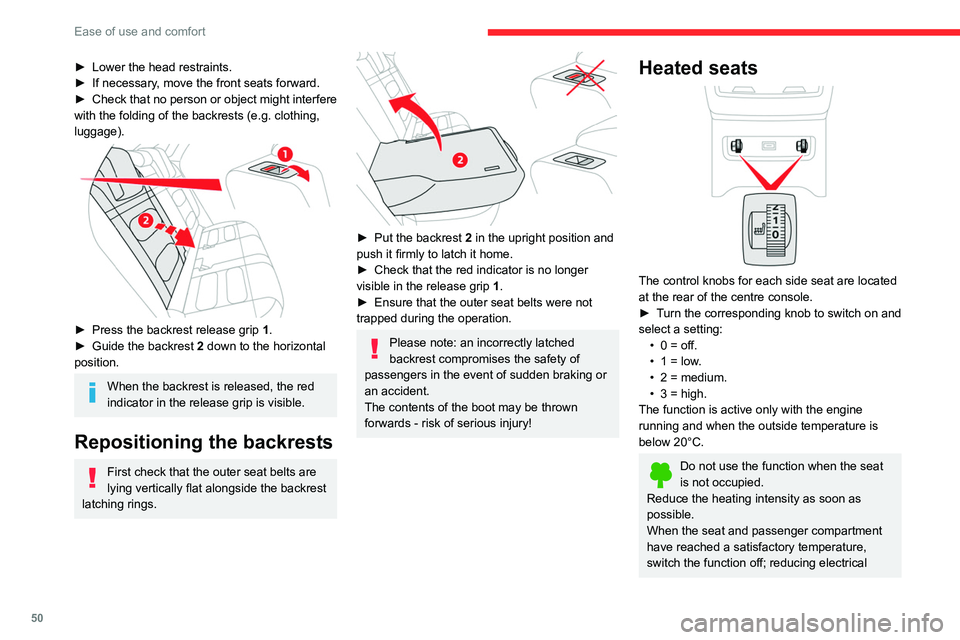
► Press the backrest release grip 1 .
► Guide the backrest 2 down to the horizontal
position.
When the backrest is released, the red
indicator in the release grip is visible.
Repositioning the backrests
First check that the outer seat belts are
lying vertically flat alongside the backrest
latching rings.
► Put the backrest 2 in the upright position and
push it firmly to latch it home.
►
Check that the red indicator is no longer
visible in the release grip 1
.
►
Ensure that the outer seat belts were not
trapped during the operation.
Please note: an incorrectly latched
backrest compromises the safety of
passengers in the event of sudden braking or
an accident.
The contents of the boot may be thrown
forwards - risk of serious injury!
Heated seats
The control knobs for each side seat are located
at the rear of the centre console.
►
T
urn the corresponding knob to switch on and
select a setting: •
0 = off.
•
1 = low
.
•
2 = medium.
•
3 = high.
The function is active only with the engine
running and when the outside temperature is
below 20°C.
Do not use the function when the seat
is not occupied.
Reduce the heating intensity as soon as
possible.
When the seat and passenger compartment
have reached a satisfactory temperature,
switch the function off; reducing electrical
Page 53 of 292

51
Ease of use and comfort
3consumption in turn decreases energy
consumption.
Prolonged use of heated seats is not
recommended for people with sensitive
skin.
There is a risk of burns for people whose
perception of heat is impaired (e.g.
illness,
taking medication).
To keep the heated pad intact and to prevent
a short circuit:
–
Do not place heavy or sharp objects on the
seat.
–
Do not kneel or stand on the seat.
–
Do not spill liquids onto the seat.
–
Never use the heating function if the seat
is damp.
Heating and Ventilation
Air intake
The air circulating in the passenger compartment
is filtered and originates either from the
exterior, via the grille located at the base of the
windscreen, or from the inside in air recirculation
mode.
Controls
Depending on version, the controls are
accessible in the touch screen or are
grouped together on the centre console panel.
Air distribution
1. Windscreen demisting/de-icing vents
2. Front side window demisting/de-icing vents
3. Adjustable and closable side air vents
4. Adjustable and closable central air vents
5. Air outlets to the front footwells
6. Air outlets to the rear footwells
7. Adjustable and closable air vents
Advice
Using the ventilation and air
conditioning system
►
T
o ensure that air is distributed evenly,
keep the external air intake grilles at the base
of the windscreen, the nozzles, the vents, the
air outlets and the air extractor in the boot
free from obstructions.
► Do not cover the sunshine sensor located
on the dashboard; this sensor is used to
regulate the automatic air conditioning
system.
►
Operate the air conditioning system for at
least 5 to 10 minutes once or twice a month to
keep it in good working order
.
►
If the system does not produce cold air
,
switch it off and contact a CITROËN dealer or
a qualified workshop.
When towing a large load on a steep gradient
in high temperatures, switching off the air
conditioning increases the available engine
power, enhancing the towing capacity.
Avoid driving for too long with the ventilation off or with prolonged operation
of interior air recirculation. Risk of misting and
deterioration of the air quality!
If the interior temperature is very high
after the vehicle has stood for a long
time in the sunshine, air the passenger
compartment for a few moments.
Put the air flow control at a setting high
enough to quickly change the air in the
passenger compartment.
Condensation created by the air
conditioning results in a discharge of
water underneath the vehicle. This is perfectly
normal.
Page 65 of 292
63
Ease of use and comfort
3– With the ignition off, approximately 10 minutes.
– In energy saving mode, approximately 30
seconds.
–
With the engine running, unlimited.
When the front courtesy lamp is in the
"Permanent lighting" position, the rear
courtesy lamp also comes on, unless it is in
the "Permanently off" position.
To switch off the rear courtesy lamp, put it in
the "Permanently off" position.
Reading lamps
► With the ignition on, operate the
corresponding switch.
Do not place anything against the
courtesy lamps.
Interior ambient lighting
The interior ambient lighting casts soft lighting in
the passenger compartment, both day and night.
With Touch screen BLUETOOTH audio
system or MyCitroën Play
Activation/deactivation and adjustment of the brightness are set via the Driving
touch screen menu.
With MyCitroën Drive
Activation/deactivation and adjustment of the brightness are set via the Vehicle
touch screen menu.
With MyCitroën Drive Plus
Activation/deactivation and adjustment of the brightness are set via the Settings >
Brightness touch screen application.
Boot fittings
C4
C4 X
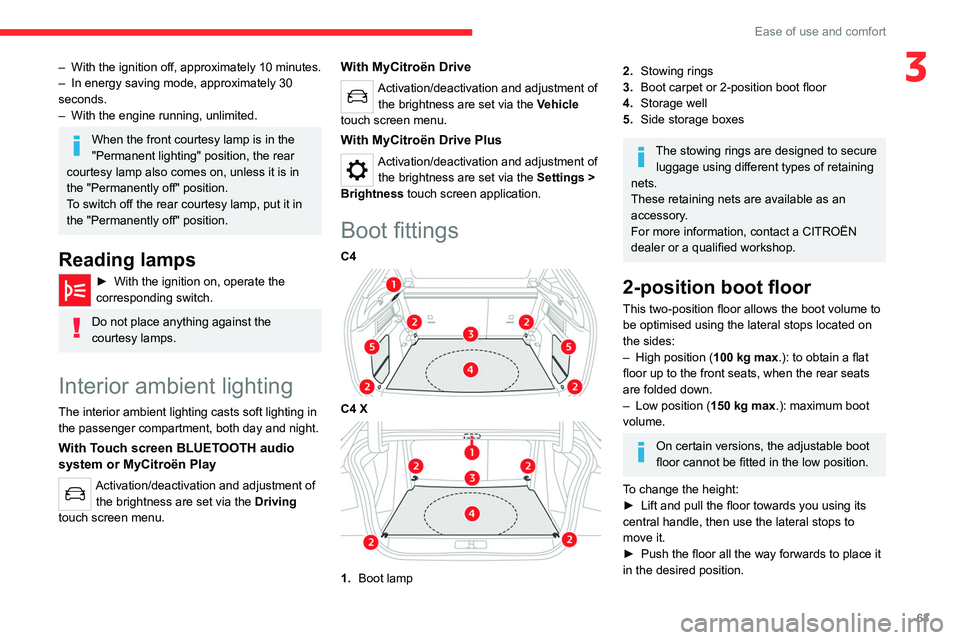
1. Boot lamp
2.Stowing rings
3. Boot carpet or 2-position boot floor
4. Storage well
5. Side storage boxes
The stowing rings are designed to secure
luggage using different types of retaining
nets.
These retaining nets are available as an
accessory.
For more information, contact a CITROËN
dealer or a qualified workshop.
2-position boot floor
This two-position floor allows the boot volume to
be optimised using the lateral stops located on
the sides:
–
High position ( 100
kg max.): to obtain a flat
floor up to the front seats, when the rear seats
are folded down.
–
Low position ( 150
kg max.): maximum boot
volume.
On certain versions, the adjustable boot
floor cannot be fitted in the low position.
To change the height:
►
Lift and pull the floor towards you using its
central handle, then use the lateral stops to
move it.
►
Push the floor all the way forwards to place it
in the desired position.
Page 66 of 292
64
Ease of use and comfort
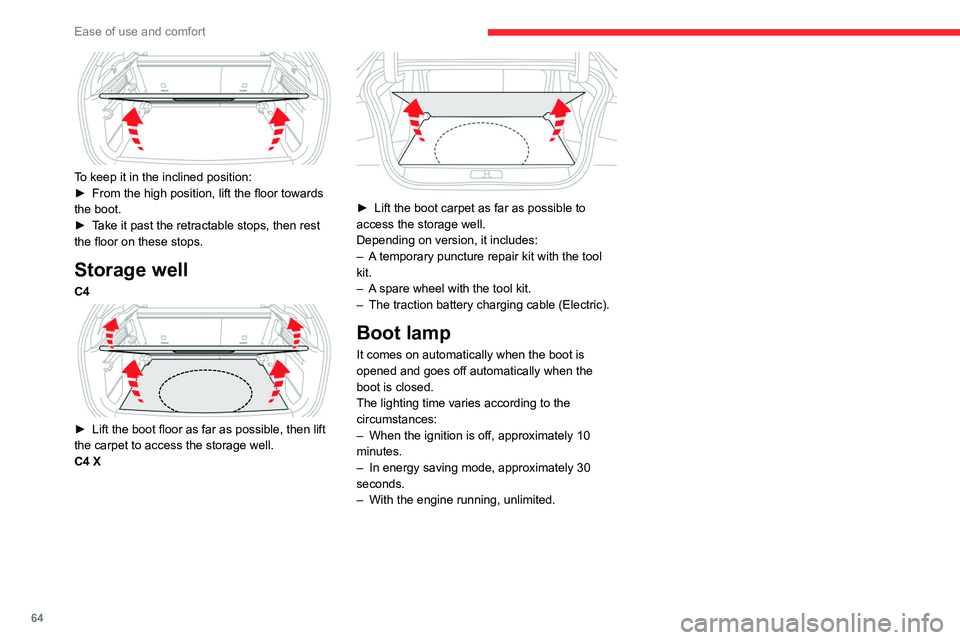
To keep it in the inclined position:
► From the high position, lift the floor towards
the boot.
►
T
ake it past the retractable stops, then rest
the floor on these stops.
Storage well
C4
► Lift the boot floor as far as possible, then lift
the carpet to access the storage well.
C4 X
► Lift the boot carpet as far as possible to
access the storage well.
Depending on version, it includes:
–
A
temporary puncture repair kit with the tool
kit.
–
A
spare wheel with the tool kit.
–
The traction battery charging cable (Electric).
Boot lamp
It comes on automatically when the boot is
opened and goes off automatically when the
boot is closed.
The lighting time varies according to the
circumstances:
–
When the ignition is off, approximately 10
minutes.
–
In energy saving mode, approximately 30
seconds.
–
With the engine running, unlimited.
Page 69 of 292

67
Lighting and visibility
4upwards or downwards, depending on the side
of the traffic (e.g. when parking on the right, push
the lighting control stalk down to light up on the
left).
This is confirmed by an audible signal and the
lighting of the corresponding direction indicator
lamp on the instrument panel.
►
T
o switch off the parking lamps, return the
lighting control stalk to the central position.
Automatic illumination of lamps
With the lighting control stalk in the “ AUTO”
position and if a low level of exterior brightness
is detected by the rain/sunshine sensor, the
sidelamps and dipped beam headlamps are
switched on automatically, without any action on
the part of the driver. They may also come on if
rain is detected, at the same time as automatic
operation of the windscreen wipers.
As soon as the brightness returns to a sufficient
level or after the windscreen wipers are switched
off, the lamps are switched off automatically.
Malfunction
In the event of a malfunction of the rain/
sunshine sensor, the vehicle’s lamps
come on and this warning lamp is displayed on
the instrument panel, accompanied by an
audible signal and/or the display of a message.
Have it checked by a CITROËN dealer or a
qualified workshop.
Do not cover the rain/sunshine sensor
located at the top centre of the
windscreen behind the interior rear view
mirror; the associated functions would no
longer be controlled.
In fog or snow, the rain/sunshine sensor
may detect sufficient light. For this
reason, the lighting will not come on
automatically.
The inner surface of the windscreen may become misted up and affect the proper
operation of the rain/sunshine sensor.
In humid and cold weather, demist the
windscreen regularly.
Headlamp beam height
adjustment
To avoid dazzling other road users, the height
of these headlamp beams must be adjusted
according to the load in the vehicle.
0 (Initial setting) Driver only or driver + front passenger
1 5 people
2 5 people + load in the boot
3 Driver only + load in the boot
4 5 6 Not used
Guide-me-home and
welcome lighting
Guide-me-home lighting
Automatic
With the ring of the lighting control stalk in the
"AUTO” position and when the light is poor, the
dipped beam headlamps come on automatically
when the ignition is switched off.
With Touch screen BLUETOOTH audio
system or MyCitroën Play
You can activate/deactivate this function
and adjust the guide-me-home lighting
duration in the Driving touch screen menu.
With MyCitroën Drive
You can activate/deactivate this function
and adjust the guide-me-home lighting
duration in the Vehicle touch screen menu.
Page 98 of 292

96
Driving
Switching off the engine
► Immobilise the vehicle.
► With the engine at idle, turn the key to
position 1
.
►
Remove the key from the ignition switch.
►
T
o lock the steering column, turn the steering
wheel until it locks.
To facilitate unlocking of the steering column, it is recommended that the
wheels be returned to the straight ahead
position before switching off the engine.
Never switch off the ignition before the
complete immobilisation of the vehicle.
With the engine off, the braking and steering
assistance systems are also cut off - risk of
loss of control of the vehicle!
Check that the parking brake is correctly
applied, particularly on sloping ground.
When leaving the vehicle, keep the key in
your possession and lock the vehicle.
Energy economy mode
After the engine has stopped (position 1. Stop),
for a maximum combined duration of 30 minutes,
you can still use functions such as the audio and
telematics system, courtesy lamps or dipped
beam headlamps.
For more information on Energy
economy mode, refer to the
corresponding section.
Key left in
When the driver's door is opened, a
message is displayed, accompanied by an
audible signal, if the key has been left in the
ignition switch in position 1.
If the key has been left in the ignition switch
in position 2, the ignition will be switched off
automatically after one hour.
To switch the ignition back on, turn the key to
position 1, then back to position 2.
Starting/switching off the
engine with Keyless Entry
and Start
The electronic key must be present in the
passenger compartment.
The electronic key is also detected in the
boot.
If the electronic key is not detected, a
message is displayed.
Move the electronic key so that the engine
can be started or switched off.
If there is still a problem, refer to the "Key
not detected - Back-up starting or Back-up
switch-off" section.
Starting
► With a manual gearbox, place the gear lever
in neutral and fully depress the clutch pedal.
►
With an
automatic gearbox, select mode P
or
N and press the brake pedal.
►
Press the "
START/STOP" button while
maintaining pressure on the pedal until the
engine starts.
Diesel engines
In negative temperatures and/or when the
engine is cold, starting takes place only after the
preheating warning lamp goes out.
If this warning lamp comes on after
pressing the " START/STOP" button:
►
Keep the pedal fully depressed and do not
press the "
START/STOP" button again until the
engine is running.
In all circumstances, if one of the starting
conditions is not met, a message is displayed.
In some circumstances, a message indicates
that it is necessary to turn the steering wheel
Page 124 of 292
122
Driving
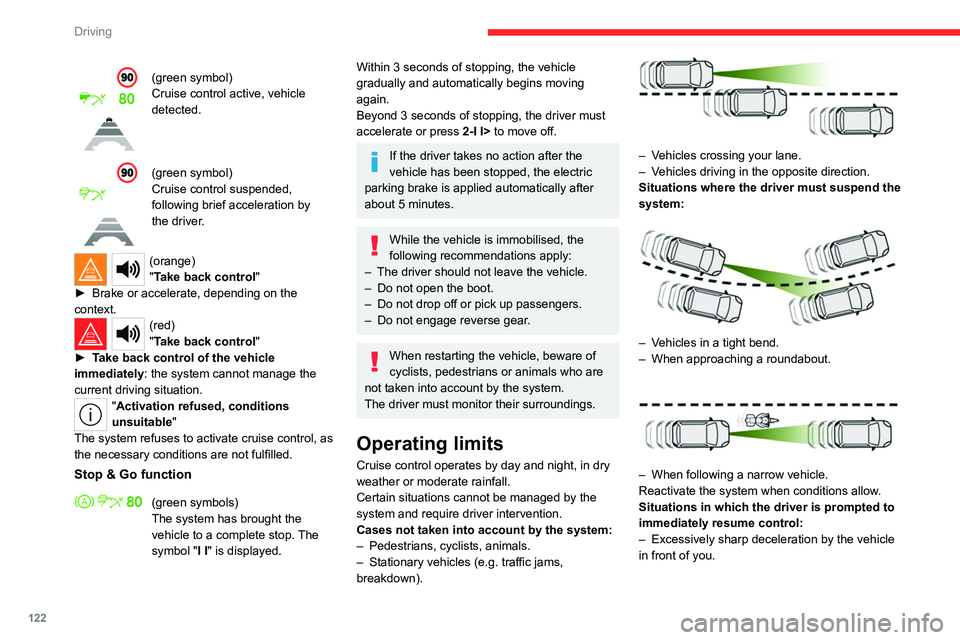
(green symbol)
Cruise control active, vehicle
detected.
(green symbol)
Cruise control suspended,
following brief acceleration by
the driver.
(orange)
"Take back control"
►
Brake or accelerate, depending on the
context.
(red)
"Take back control"
►
T
ake back control of the vehicle
immediately: the system cannot manage the
current driving situation.
"Activation refused, conditions
unsuitable "
The system refuses to activate cruise control, as
the necessary conditions are not fulfilled.
Stop & Go function
(green symbols)
The system has brought the
vehicle to a complete stop. The
symbol "I I" is displayed.
Within 3 seconds of stopping, the vehicle
gradually and automatically begins moving
again.
Beyond 3 seconds of stopping, the driver must
accelerate or press 2-I I> to move off.
If the driver takes no action after the
vehicle has been stopped, the electric
parking brake is applied automatically after
about 5 minutes.
While the vehicle is immobilised, the
following recommendations apply:
–
The driver should not leave the vehicle.
–
Do not open the boot.
–
Do not drop off or pick up passengers.
–
Do not engage reverse gear
.
When restarting the vehicle, beware of
cyclists, pedestrians or animals who are
not taken into account by the system.
The driver must monitor their surroundings.
Operating limits
Cruise control operates by day and night, in dry
weather or moderate rainfall.
Certain situations cannot be managed by the
system and require driver intervention.
Cases not taken into account by the system:
–
Pedestrians, cyclists, animals.
–
Stationary vehicles (e.g.
traffic jams,
breakdown).
– Vehicles crossing your lane.
– V ehicles driving in the opposite direction.
Situations where the driver must suspend the
system:
– Vehicles in a tight bend.
– When approaching a roundabout.
– When following a narrow vehicle.
Reactivate the system when conditions allow .
Situations in which the driver is prompted to
immediately resume control:
–
Excessively sharp deceleration by the vehicle
in front of you.
Page 130 of 292
128
Driving
Operating limits
The system may issue an alert when the vehicle is travelling on a long, straight
road with smooth road surface even if the
driver thinks they are holding the steering
wheel correctly.
The system may not operate or may produce
unsuitable corrections to the steering in the
following situations:
–
Poor visibility (insufficient road lighting,
snowfall, rain, fog).
–
Dazzle (headlamps of an oncoming vehicle,
low sun, reflections on a wet road surface,
leaving a tunnel, alternating light and shade).
–
Windscreen area in front of the camera
dirty
, misted up, frost-covered, snow-covered,
damaged or covered by a sticker.
–
Lane markings eroded, partially hidden (snow
,
mud) or multiple (roadworks, surface joints).
–
T
ravelling in a tight bend.
–
Winding roads.
–
Presence of a tarmac joint on the road.
Risk of undesirable operation
The system should be deactivated in the following situations:
–
Driving with a "space-saver" type spare
wheel.
–
When towing or with a bicycle carrier
attached to a towing device, particularly when
a trailer is not connected or the trailer is not
an approved type.
–
Adverse weather conditions.
–
Driving on slippery road surfaces (risk of
aquaplaning, snow
, ice).
–
In roadworks or toll booth areas.
–
Driving on racing circuits.
–
Driving on a rolling road.
Malfunction
In the event of a malfunction, the
Service warning lamp comes on
and this (orange) symbol appears on the
instrument panel, accompanied by the display of
a message and an audible signal.
Have it checked by a CITROËN dealer or a
qualified workshop.
Lane keeping assist
For more information, refer to the
General recommendations on the use
of driving and manoeuvring aids .
The system corrects the vehicle's trajectory by
alerting the driver as soon as it detects a risk of
involuntary lane departure or crossing of a verge
or hard shoulder (depending on version).
To do this, the system uses a camera, placed on
the upper part of the windscreen, identifying the
lane markings on the ground and the side of the
road (depending on version).
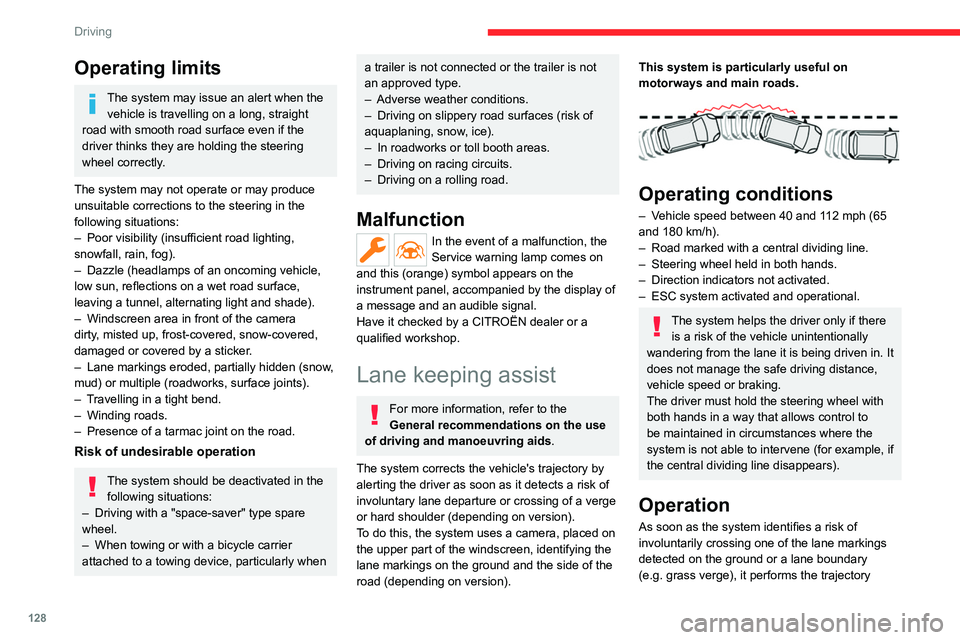
This system is particularly useful on
motorways and main roads.
Operating conditions
– Vehicle speed between 40 and 112 mph (65
and 180 km/h).
–
Road marked with a central dividing line.
–
Steering wheel held in both hands.
–
Direction indicators not activated.
–
ESC system activated and operational.
The system helps the driver only if there is a risk of the vehicle unintentionally
wandering from the lane it is being driven in. It
does not manage the safe driving distance,
vehicle speed or braking.
The driver must hold the steering wheel with
both hands in a way that allows control to
be maintained in circumstances where the
system is not able to intervene (for example, if
the central dividing line disappears).
Operation
As soon as the system identifies a risk of
involuntarily crossing one of the lane markings
detected on the ground or a lane boundary
(e.g.
grass verge), it performs the trajectory