replace CITROEN C4 2023 User Guide
[x] Cancel search | Manufacturer: CITROEN, Model Year: 2023, Model line: C4, Model: CITROEN C4 2023Pages: 292, PDF Size: 7.79 MB
Page 112 of 292
11 0
Driving
Manoeuvring aids
The driver must always check the
surroundings of the vehicle before and during
the whole manoeuvre, in particular using the
mirrors.
Radar(s)
The operation of the radar(s), along with
any associated functions, may be affected
by the accumulation of dirt (e.g.
mud, ice),
in poor weather conditions (e.g.
heavy rain,
snow), or if the bumpers are damaged.
If the front bumper is to be repainted, contact
a CITROËN dealer or a qualified workshop;
certain types of paint could interfere with the
operation of the radar(s).
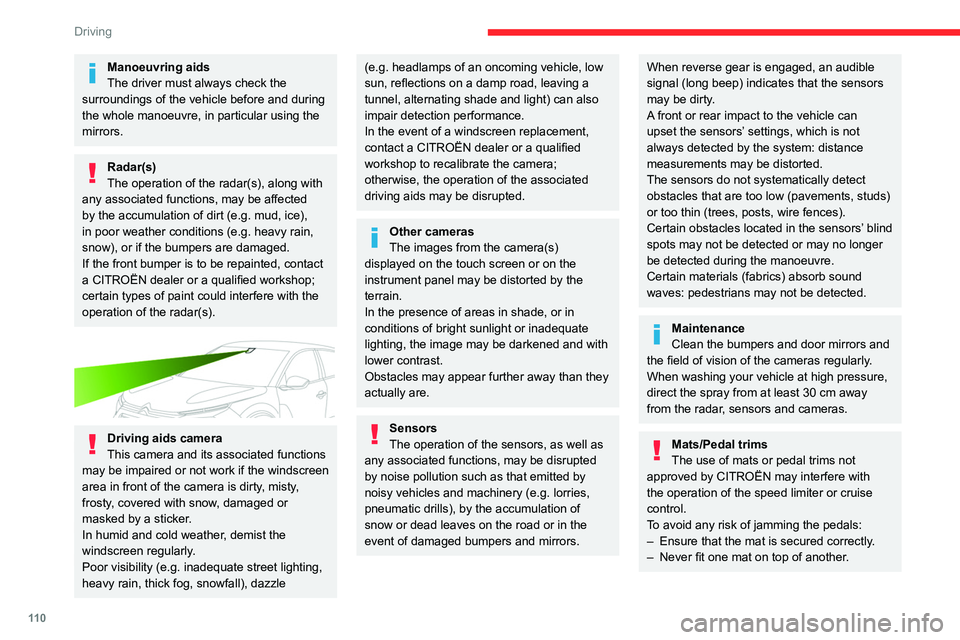
Driving aids camera
This camera and its associated functions
may be impaired or not work if the windscreen
area in front of the camera is dirty, misty,
frosty, covered with snow, damaged or
masked by a sticker.
In humid and cold weather, demist the
windscreen regularly.
Poor visibility (e.g.
inadequate street lighting,
heavy rain, thick fog, snowfall), dazzle
(e.g. headlamps of an oncoming vehicle, low
sun, reflections on a damp road, leaving a
tunnel, alternating shade and light) can also
impair detection performance.
In the event of a windscreen replacement,
contact a CITROËN dealer or a qualified
workshop to recalibrate the camera;
otherwise, the operation of the associated
driving aids may be disrupted.
Other cameras
The images from the camera(s)
displayed on the touch screen or on the
instrument panel may be distorted by the
terrain.
In the presence of areas in shade, or in
conditions of bright sunlight or inadequate
lighting, the image may be darkened and with
lower contrast.
Obstacles may appear further away than they
actually are.
Sensors
The operation of the sensors, as well as
any associated functions, may be disrupted
by noise pollution such as that emitted by
noisy vehicles and machinery (e.g. lorries,
pneumatic drills), by the accumulation of
snow or dead leaves on the road or in the
event of damaged bumpers and mirrors.
When reverse gear is engaged, an audible
signal (long beep) indicates that the sensors
may be dirty.
A front or rear impact to the vehicle can
upset the sensors’ settings, which is not
always detected by the system: distance
measurements may be distorted.
The sensors do not systematically detect
obstacles that are too low (pavements, studs)
or too thin (trees, posts, wire fences).
Certain obstacles located in the sensors’ blind
spots may not be detected or may no longer
be detected during the manoeuvre.
Certain materials (fabrics) absorb sound
waves: pedestrians may not be detected.
Maintenance
Clean the bumpers and door mirrors and
the field of vision of the cameras regularly.
When washing your vehicle at high pressure,
direct the spray from at least 30
cm away
from the radar, sensors and cameras.
Mats/Pedal trims
The use of mats or pedal trims not
approved by CITROËN may interfere with
the operation of the speed limiter or cruise
control.
To avoid any risk of jamming the pedals:
–
Ensure that the mat is secured correctly
.
–
Never fit one mat on top of another
.
Page 135 of 292
133
Driving
6
This system:
– warns the driver that their vehicle is at risk of
collision with the vehicle in front, a pedestrian or
,
depending on version, a cyclist.
–
reduces the vehicle's speed to avoid a
collision or limit its severity
.
The speed will be reduced by a maximum of 12 mph (20 km/h) (versions
with camera only) or by a maximum of 31
mph (50
km/h) (versions with camera and
radar).
The system also takes motorcyclists into account.
This system is comprised of three functions:
–
Collision
Risk Alert.
–
Intelligent emergency braking assistance
(iEBA).
–
Active Safety Brake (automatic emergency
braking).
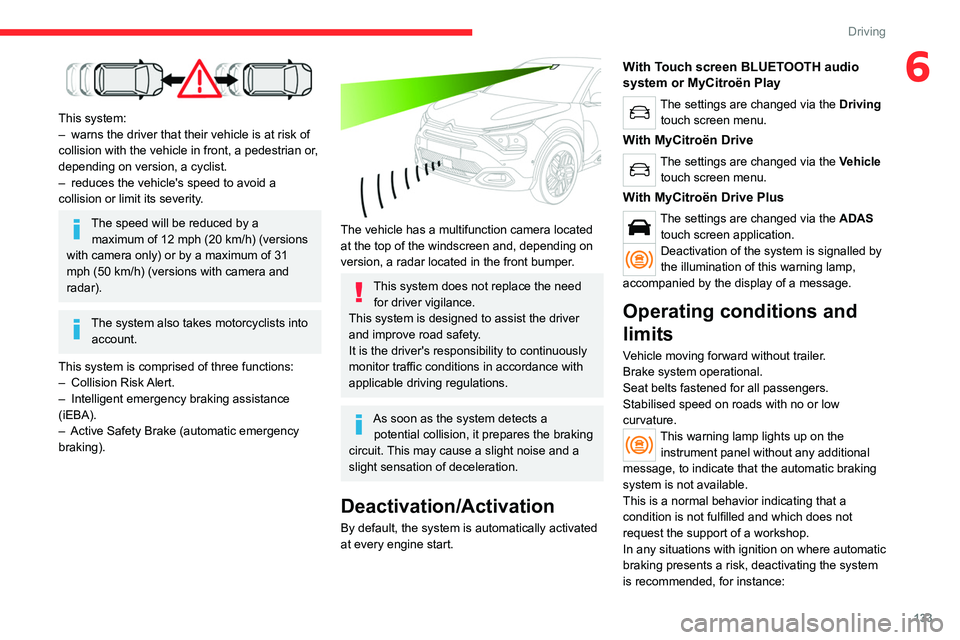
The vehicle has a multifunction camera located
at the top of the windscreen and, depending on
version, a radar located in the front bumper.
This system does not replace the need for driver vigilance.
This system is designed to assist the driver
and improve road safety.
It is the driver's responsibility to continuously
monitor traffic conditions in accordance with
applicable driving regulations.
As soon as the system detects a potential collision, it prepares the braking
circuit. This may cause a slight noise and a
slight sensation of deceleration.
Deactivation/Activation
By default, the system is automatically activated
at every engine start.
With Touch screen BLUETOOTH audio
system or MyCitroën Play
The settings are changed via the Driving
touch screen menu.
With MyCitroën Drive
The settings are changed via the Vehicle
touch screen menu.
With MyCitroën Drive Plus
The settings are changed via the ADAS
touch screen application.
Deactivation of the system is signalled by
the illumination of this warning lamp,
accompanied by the display of a message.
Operating conditions and
limits
Vehicle moving forward without trailer.
Brake system operational.
Seat belts fastened for all passengers.
Stabilised speed on roads with no or low
curvature.
This warning lamp lights up on the instrument panel without any additional
message, to indicate that the automatic braking
system is not available.
This is a normal behavior indicating that a
condition is not fulfilled and which does not
request the support of a workshop.
In any situations with ignition on where automatic
braking presents a risk, deactivating the system
is recommended, for instance:
Page 144 of 292
142
Driving
offering views from the rear of the vehicle (rear
vision) when reverse gear is engaged and views
from the front of the vehicle (front vision) when
the gearbox is in neutral or a gear is engaged.
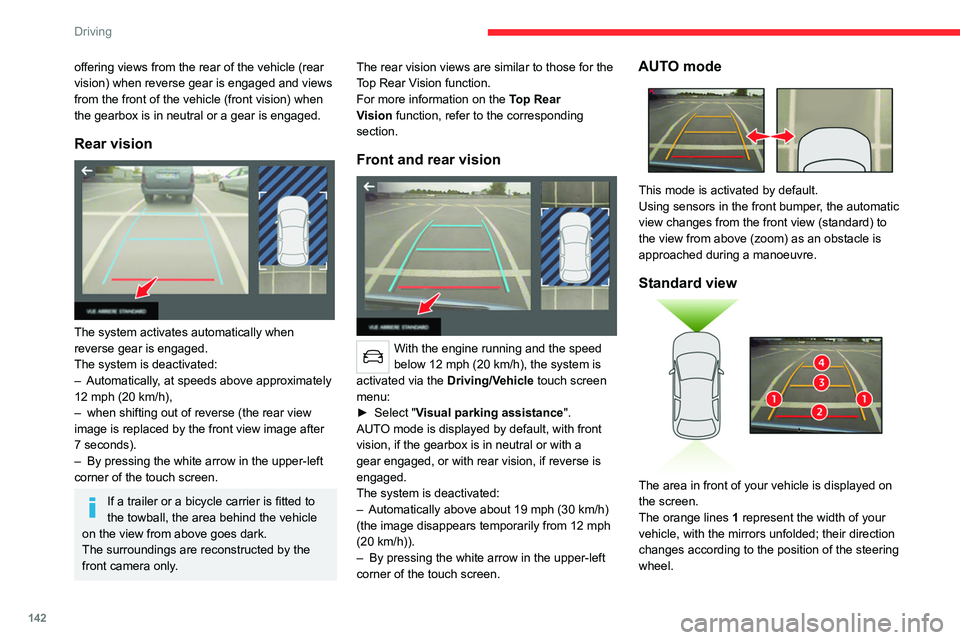
Rear vision
The system activates automatically when
reverse gear is engaged.
The system is deactivated:
–
Automatically
, at speeds above approximately
12 mph (20
km/h),
–
when shifting out of reverse (the rear view
image is replaced by the front view image after
7 seconds).
–
By pressing the white arrow in the upper-left
corner of the touch screen.
If a trailer or a bicycle carrier is fitted to
the towball, the area behind the vehicle
on the view from above goes dark.
The surroundings are reconstructed by the
front camera only. The rear vision views are similar to those for the
Top Rear Vision function.
For more information on the
Top Rear
Vision
function, refer to the corresponding
section.
Front and rear vision
With the engine running and the speed
below 12 mph (20 km/h), the system is
activated via the Driving/Vehicle touch screen
menu:
►
Select "
Visual parking assistance".
AUTO mode is displayed by default, with front
vision, if the gearbox is in neutral or with a
gear engaged, or with rear vision, if reverse is
engaged.
The system is deactivated:
–
Automatically above about 19 mph (30
km/h)
(the image disappears temporarily from 12 mph
(20
km/h)).
–
By pressing the white arrow in the upper-left
corner of the touch screen.
AUTO mode
This mode is activated by default.
Using sensors in the front bumper, the automatic
view changes from the front view (standard) to
the view from above (zoom) as an obstacle is
approached during a manoeuvre.
Standard view
The area in front of your vehicle is displayed on
the screen.
The orange lines 1 represent the width of your
vehicle, with the mirrors unfolded; their direction
changes according to the position of the steering
wheel.
Page 157 of 292
155
Practical information
7Traction battery
This battery stores the energy that powers
the electric motor and the thermal comfort
equipment in the passenger compartment. It is
discharged during use, and must therefore be
regularly recharged. There is no need to wait
for the traction battery to fall to its reserve level
before recharging.
The range of the battery may vary according
to the type of driving, the route, the use of
thermal comfort equipment and the ageing of its
components.
The lifespan of the traction battery depends on multiple factors, such as
climatic conditions, distance travelled and
how often it has been fast-charged.
To preserve the mileage of your vehicle and the durability of your traction battery,
CITROËN recommends that you:
–
Do not fully charge the battery of your
electric vehicle daily (charge the traction
battery below 80% as often as possible).
–
Do not completely discharge the battery
.
–
Do not store the vehicle for a long period
of non-use (more than 12
hours) when the
traction battery has a low or high charge level.
Prefer a charge level between 20 and 40%.
–
Limit the use of fast charging.
–
Do not expose the vehicle to temperatures
below -30°C and above +60°C for more than
24
hours.
– Avoid charging the vehicle at negative
temperatures (except if the vehicle ran more
than 20 minutes) or above +30°C.
–
Do not use the vehicle's traction battery as
a generator of energy
.
–
Do not use a generator to recharge your
vehicle's traction battery
.
In the event of damage to the traction
battery
It is strictly prohibited to work on the vehicle
yourself.
Do not touch liquids coming from the battery,
and in the event of skin contact with these
products, wash abundantly with water and
contact a doctor as soon as possible.
Contact a CITROËN dealer or a qualified
workshop to have the system checked.
Disposal of the traction battery
The traction battery is designed for the life of the
vehicle if the recommendations of CITROËN are
followed.
If it becomes necessary to replace the battery,
contact the CITROËN dealer for instructions on
its disposal. Improper disposal carries the risk of
severe burns, electric shock, and damage to the
environment.
In accordance with regulations, CITROËN
ensures a second life or recycling of this
component in collaboration with qualified
operators.
Charging connectors and
indicator lamps
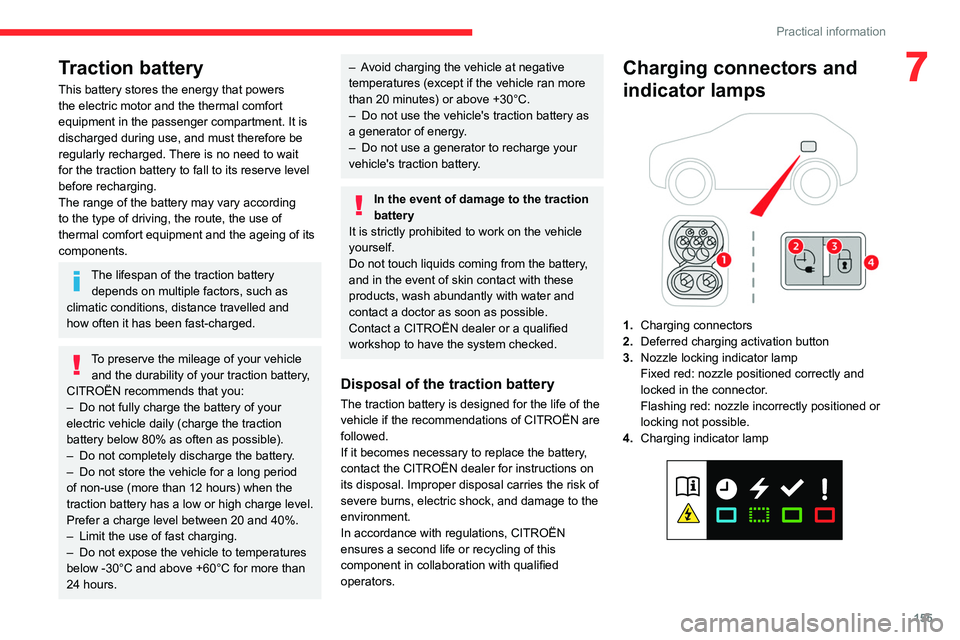
1. Charging connectors
2. Deferred charging activation button
3. Nozzle locking indicator lamp
Fixed red: nozzle positioned correctly and
locked in the connector.
Flashing red: nozzle incorrectly positioned or
locking not possible.
4. Charging indicator lamp
Page 159 of 292
157
Practical information
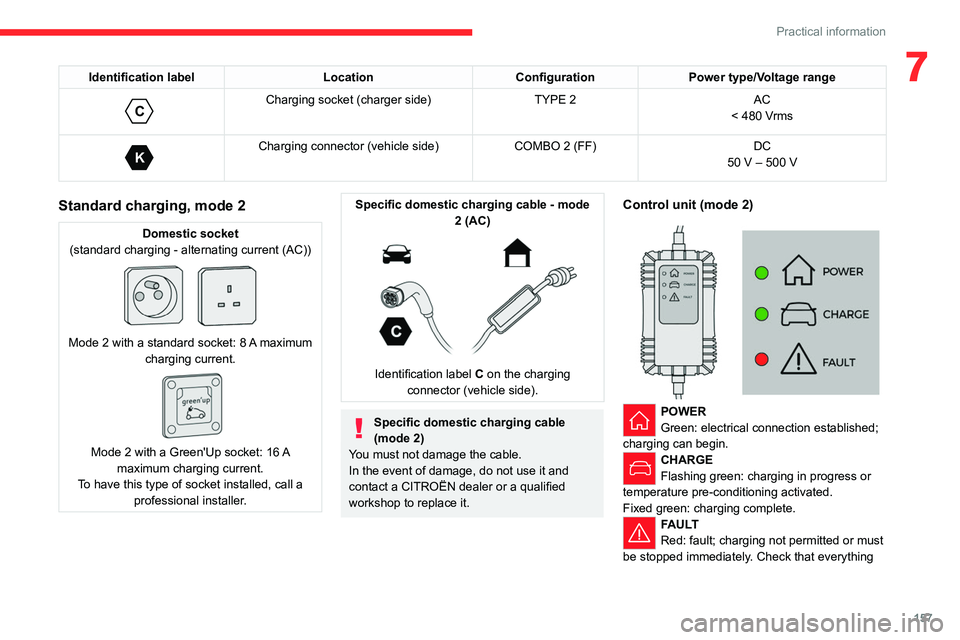
7Identification labelLocationConfigurationPower type/Voltage range
C
Charging socket (charger side) TYPE 2AC
< 480 Vrms
K
Charging connector (vehicle side) COMBO 2 (FF)DC
50 V – 500 V
Standard charging, mode 2
Domestic socket
(standard charging - alternating current (AC))
Mode 2 with a standard socket: 8 A maximum
charging current.
Mode 2 with a Green'Up socket: 16 A
maximum charging current.
To have this type of socket installed, call a professional installer.
Specific domestic charging cable - mode 2 (AC)
Identification label C on the charging
connector (vehicle side).
Specific domestic charging cable
(mode 2)
You must not damage the cable.
In the event of damage, do not use it and
contact a CITROËN dealer or a qualified
workshop to replace it.
Control unit (mode 2)
POWER
Green: electrical connection established;
charging can begin.
CHARGE
Flashing green: charging in progress or
temperature pre-conditioning activated.
Fixed green: charging complete.
FAULT
Red: fault; charging not permitted or must
be stopped immediately. Check that everything
Page 160 of 292

158
Practical information
is connected correctly and that the electrical
system is not faulty.
If the indicator lamp does not go off, contact a
CITROËN dealer or a qualified workshop.
Upon plugging the charging cable into a
domestic socket, all of the indicator lamps come
on briefly.
If no indicator lamps come on, check the
domestic socket's circuit-breaker:
–
If the circuit-breaker has tripped, contact a
professional to check that the electrical system
is compatible and/or carry out any necessary
repairs.
–
If the circuit-breaker has not tripped, stop
using the charging cable and contact a
CITROËN dealer or a qualified workshop.
Control unit label - Recommendations
Refer to the handbook before use.
1. Incorrect use of this charging cable may
result in fire, property damage and serious
injury or death by electrocution! 2.
Always use a correctly earthed power
socket, protected by a 30 mA residual
current device.
3. Always use an electrical socket protected
by a circuit-breaker appropriate for the
electrical circuit’s current rating.
4. The weight of the control unit must not be
borne by the electrical socket, plug and
cables.
5. Never use this charging cable if it is
defective or in any way damaged.
6. Never attempt to repair or open this
charging cable. It contains no repairable
parts - replace the charging cable if it is
damaged.
7. Never immerse this charging cable in water.
8. Never use this charging cable with an
extension cable, a multi-plug socket, a
conversion adaptor or on a damaged
electrical socket.
9. Do not unplug the plug from the wall as a
means of stopping charging.
10. Immediately stop charging, by locking and
then unlocking the vehicle using the remote
control key, if the charging cable or wall
socket feel burning hot to the touch. 11 .
This charging cable includes components
liable to cause electrical arcing or sparks.
Do not expose to flammable vapours.
12. Only use this charging cable with CITROËN
vehicles.
13. Never plug the cable into the wall socket (or
unplug it) with wet hands.
14. Do not force the connector if it is locked into
the vehicle.
Control unit label - State of indicator
lamps
State of the
indicator lamp
Off
On
Flashing
POWER CHARGE FAULT SymbolDescription
Not connected to the power supply or power is not
available from the infrastructure.
Page 166 of 292
164
Practical information
► If the vehicle is locked, unlock it.
The red indicator lamp in the flap goes out to
confirm that the charging nozzle is unlocked.
►
Within
30 seconds, remove the charging
nozzle.
The charging indicator lamp comes on in white.
With selective door unlocking activated,
press the unlocking button twice to
disconnect the charging nozzle.
When charging is complete, the green
charging indicator lamp in the flap goes
out after about 2 minutes.
Domestic charging, mode 2
The end of charging is confirmed when the green
CHARGE indicator lamp on the control unit and
the green charging indicator lamp in the flap
come on fixed.
►
Replace the protective cover on the charging
nozzle and close the charging flap.
►
Disconnect the control unit end of the
charging cable from the domestic socket.
Accelerated charging, mode 3
The end of charging is indicated by the charging
control unit and by the fixed lighting of the green
indicator lamp in the flap.
►
Hang up the nozzle on the charging unit and
close the charging flap.
Superfast charging, mode 4
The end of charging is indicated by the charger
and by the fixed lighting of the green indicator
lamp in the flap.
► You can also pause charging by
pressing this button in the flap (in mode 4
only).
►
Hang up the nozzle on the charger
.
►
Depending on version, replace the protective
cover on the lower section and close the
charging flap.
When the charging nozzle is
disconnected, a message on the
instrument panel indicates that charging is
complete, even if the charging nozzle was
disconnected before full charging was
completed.
Towing device
Load distribution
► Distribute the load in the trailer so that the
heaviest items are as close as possible to the
axle, and the nose weight approaches the
maximum permitted without exceeding it.
Air density decreases with altitude, thus reducing
engine performance.
The maximum towable load
must be reduced by 10% per 1,000
metres of
altitude.
Use genuine towing devices and wiring
harnesses approved by CITROËN. We
recommend having them fitted by a CITROËN
dealer or a qualified workshop.
If not fitted by a CITROËN dealer, they must
still be fitted in accordance with the vehicle
manufacturer's instructions.
Certain driving or manoeuvring aid functions
are automatically deactivated while an
approved towing system is in use.
Comply with the maximum authorised
towable weight, as indicated on your
vehicle's registration certificate, on the
manufacturer's label and in the Technical
data section of this guide.
If using accessories attached to the
towing device (e.g. bicycle carriers, tow
boxes):
–
Comply with the maximum authorised nose
weight.
–
Do not transport more than 4 conventional
bicycles or 2 electric bicycles.
When loading bicycles onto a bicycle carrier
on a towball, be sure to place the heaviest
bicycles as close as possible to the vehicle.
Observe the legislation in force in the
country where you are driving.
Electric motor
An electric vehicle cannot under any
circumstances be fitted with a towing device.
Page 168 of 292

166
Practical information
After use
When travelling without a trailer or
load carrier, remove the towball and fit the
protective plug into the carrier, to provide
clear visibility of the number plate and/or its
lighting.
Fitting the towball
► Below the rear bumper , remove the protective
plug 2 from the carrier 1.
►
Insert the end of the towball
5 into the carrier
1 and push it upwards; it will lock into position
automatically.
► The wheel 6 rotates a quarter turn anti-
clockwise; take care to keep your hands clear!
► Check that the mechanism has correctly
locked into place (position A
).
►
Close the lock 7
using the key.
►
Remove the key
. The key cannot be removed
while the lock is open.
►
Clip the cap onto the lock.
► Remove the protective cover from the
towball.
►
Attach the trailer to the towball.
►
Attach the cable on the trailer to the safety
eye
4 on the carrier.
►
Lower the connection socket 3
to put it in
position.
►
Insert the trailer plug and rotate it by a
quarter turn to connect it to the connection
socket
3 on the carrier.
Removing the towball
► Grasp the trailer's plug, perform a quarter
turn and pull to disconnect it from the connection
socket
3 on the carrier.
►
Lift the connection socket
3 to the right to
stow it away.
►
Detach the trailer's safety cable from the
safety eye
4 on the carrier.
►
Unhitch the trailer from the towball.
►
Replace the protective cover over the towball.
Page 169 of 292

167
Practical information
7► Remove the cap from the lock and press it
onto the head of the key .
► Insert the key into the lock 7.
► Open the lock using the key .
► Hold the towball 5 firmly in one hand; using
the other hand, pull and turn the wheel 6 fully in
a clockwise direction until it stops; do not release
the wheel.
►
Extract the towball from the base of its
carrier
1.
► Release the wheel; it automatically locks in
the unlocked position (position B
).
► Replace the protective plug 2 into the
carrier 1.
►
Stow the towball in its bag to protect it from
knocks and dirt.
Maintenance
Correct operation is only possible if the towball
and its carrier are kept clean.
Before cleaning the vehicle with a high-pressure
jet wash, the towball must be removed and the
protective plug fitted to the carrier.
Work on the towing device
Contact a CITROËN dealer or a qualified
workshop.
Roof bars
As a safety measure and to avoid damaging the roof, it is essential to use
transverse roof bars approved for your
vehicle.
Observe the instructions on fitting and use
contained in the guide supplied with the roof
bars.
Maximum load distributed over the
transverse roof bars, for a loading height
not exceeding 40 cm (except bicycle carrier):
80
kg.
As this value may change, please verify the
maximum load quoted in the guide supplied
with the roof bars.
If the height exceeds 40 cm, adapt the speed
of the vehicle to the profile of the road to
avoid damaging the roof bars and the fixings
on the vehicle.
Be sure to refer to national legislation in order
to comply with the regulations for transporting
objects that are longer than the vehicle.
Recommendations
Distribute the load uniformly, taking care
to avoid overloading one of the sides.
Arrange the heaviest part of the load as close
as possible to the roof.
Secure the load firmly.
Page 174 of 292
172
Practical information
Oil grade
Before topping up or changing the
engine oil, check that the oil is suitable
for your engine and complies with the
recommendations in the service schedule
supplied with the vehicle (or available from
your CITROËN dealer or qualified workshop).
Use of non-recommended oil may invalidate
your warranty in the event of engine failure.
Topping up the engine oil level
For the location of the engine oil filler cap, please
refer to the corresponding engine compartment
illustration.
►
Add oil in small quantities, avoiding any spills
on engine components (risk of fire).
►
W
ait a few minutes before checking the level
again using the dipstick.
►
T
op up the level if necessary.
►
After checking the level, carefully screw the
oil filler cap back on
and replace the dipstick in
its tube.
The oil level indication displayed on the instrument panel when the ignition is
switched on is not valid for 30 minutes
following an addition of oil.
Brake fluid
The level of this fluid should be close to
the "MAX" mark. If not, check the brake
pads for wear.
To know how often the brake fluid should be
replaced, refer to the manufacturer's servicing
schedule.
Clean the cap before removing it to refill.
Use only DOT4 brake fluid from a sealed
container.
Engine coolant
(Petrol or Diesel)
It is normal to top up this fluid between
two services.
The check and top-up must only be done with
the engine cold.
A level of coolant that is too low risks causing
major damage to the engine; the coolant level
must be close to the "MAX" mark without ever
going above it.
If the level is close to or below the " MIN" mark, it
is essential to top it up.
When the engine is hot, the temperature of the
coolant is regulated by the fan.
As the cooling system is pressurised, wait at
least one hour after switching off the engine
before carrying out any work.
In order to avoid the risk of scalding if you need
to top up in an emergency, wrap a cloth around
the cap and unscrew the cap by two turns to
allow the pressure to drop.
Once the pressure has dropped, remove the cap
and top up to the required level.
(Electric)
Do not top up the coolant.
If the level is close to or below
the "MIN" mark, it is essential to contact a
CITROËN dealer or a qualified workshop.
Screenwash fluid
Top up to the required level when necessary.
Fluid specification
The fluid must be topped up with a pre-mixed
product.
In winter (temperatures below zero), a fluid
containing an anti-freeze agent which is
appropriate for the temperature conditions
must be used in order to protect the system's
components (pump, tank, ducts, jets).
Filling with pure water is prohibited in all
circumstances (risk of freezing,
limescale, etc.).