ECU CITROEN C4 2023 Owners Manual
[x] Cancel search | Manufacturer: CITROEN, Model Year: 2023, Model line: C4, Model: CITROEN C4 2023Pages: 292, PDF Size: 7.79 MB
Page 17 of 292
15
Dashboard instruments
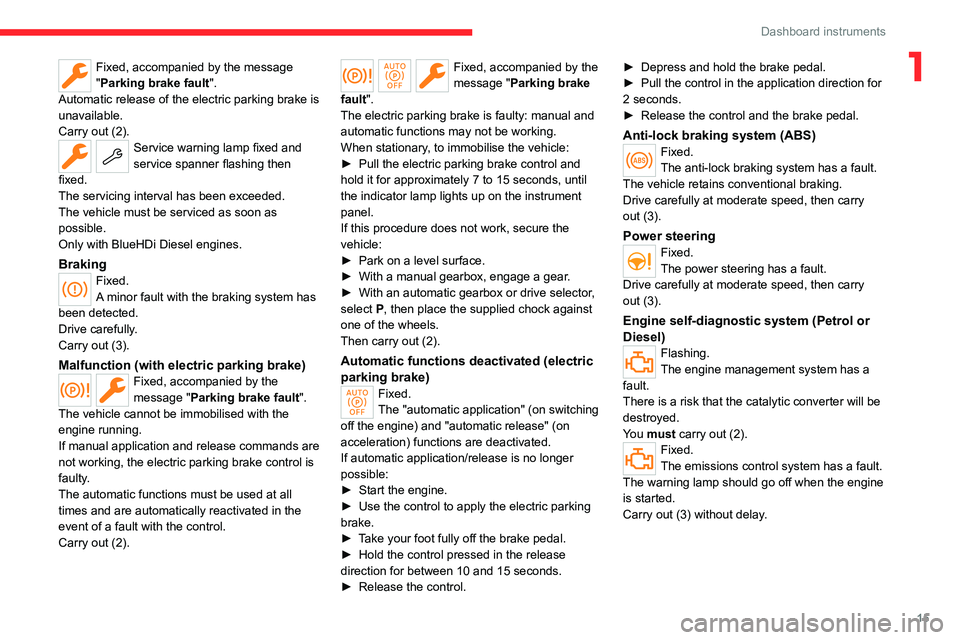
1Fixed, accompanied by the message
"Parking brake fault".
Automatic release of the electric parking brake is
unavailable.
Carry out (2).
Service warning lamp fixed and
service spanner flashing then
fixed.
The servicing interval has been exceeded.
The vehicle must be serviced as soon as
possible.
Only with BlueHDi Diesel engines.
BrakingFixed.
A minor fault with the braking system has
been detected.
Drive carefully.
Carry out (3).
Malfunction (with electric parking brake)Fixed, accompanied by the
message "Parking brake fault".
The vehicle cannot be immobilised with the
engine running.
If manual application and release commands are
not working, the electric parking brake control is
faulty.
The automatic functions must be used at all
times and are automatically reactivated in the
event of a fault with the control.
Carry out (2).
Fixed, accompanied by the
message "Parking brake
fault".
The electric parking brake is faulty: manual and
automatic functions may not be working.
When stationary, to immobilise the vehicle:
►
Pull the electric parking brake control and
hold it for approximately 7 to 15 seconds, until
the indicator lamp lights up on the instrument
panel.
If this procedure does not work, secure the
vehicle:
►
Park on a level surface.
►
With a manual gearbox, engage a gear
.
►
With an automatic gearbox or drive selector
,
select
P, then place the supplied chock against
one of the wheels.
Then carry out (2).
Automatic functions deactivated (electric
parking brake)
Fixed.
The "automatic application" (on switching
off the engine) and "automatic release" (on
acceleration) functions are deactivated.
If automatic application/release is no longer
possible:
►
Start the engine.
►
Use the control to apply the electric parking
brake.
►
T
ake your foot fully off the brake pedal.
►
Hold the control pressed in the release
direction for between 10 and 15
seconds.
►
Release the control. ►
Depress and hold the brake pedal.
►
Pull the control in the application direction for
2
seconds.
►
Release the control and the brake pedal.
Anti-lock braking system (ABS)Fixed.
The anti-lock braking system has a fault.
The vehicle retains conventional braking.
Drive carefully at moderate speed, then carry
out (3).
Power steeringFixed.
The power steering has a fault.
Drive carefully at moderate speed, then carry
out (3).
Engine self-diagnostic system (Petrol or
Diesel)
Flashing.
The engine management system has a
fault.
There is a risk that the catalytic converter will be
destroyed.
You must carry out (2).
Fixed.
The emissions control system has a fault.
The warning lamp should go off when the engine
is started.
Carry out (3) without delay.
Page 39 of 292
37
Access
2Central locking does not take place if any
of the doors are open.
When locking/deadlocking from the
outside
When the vehicle is locked or deadlocked
from the outside, the indicator lamp flashes
and the button is deactivated.
►
After normal locking, pull one of the
interior door controls to unlock the vehicle.
►
After deadlocking, you must use the
remote control or the
Keyless Entry and Start
system to unlock the vehicle.
Automatic (anti-intrusion security)
The doors and boot lock automatically while
driving (speed above 6 mph (10
km/h)).
To deactivate/reactivate this function (activated
by default):
►
Press the button until a confirmation
message appears.
Transporting long or voluminous
objects
Press the central locking control to drive
with the boot open and the doors locked.
Otherwise, every time the speed of the
vehicle exceeds 6 mph (10 km/h), the sound
of the locks rebounding will be heard and an
alert will be displayed.
Back-up procedures
Lost keys, remote control,
electronic key
Go to a CITROËN dealer with the vehicle's
registration certificate, your personal
identification documents and if possible, the label
bearing the key code.
The CITROËN dealer will be able to retrieve the
key code and the transponder code, enabling a
new key to be ordered.
Complete unlocking/locking
of the vehicle with the key
Use this procedure in the following situations:
– Remote control battery discharged.
–
Remote control malfunction.
–
V
ehicle battery discharged.
–
V
ehicle in an area subject to strong
electromagnetic interference.
In the first case, change the remote control
battery.
In the second case, reinitialise
the remote
control.
Refer to the corresponding sections.
► Insert the key in the door lock.
► T urn the key towards the front or the rear to
unlock or lock the vehicle.
If the vehicle is fitted with an alarm, it will
not be activated when locking with the
key.
If the alarm is activated, the siren sounds
when the door is opened; switch on the
ignition to stop it.
Central locking not
functioning
Use these procedures in the following cases:
– Central locking malfunction.
–
Battery disconnected or discharged.
In the event of a malfunction of the
central locking system, the battery must
be disconnected to ensure that the vehicle is
locked fully.
Front left-hand door
► Insert the key into the lock and turn it towards
the front or rear of the vehicle to lock and unlock
the door
.
Other doors
Unlocking
► Pull the interior door opening control.
Page 44 of 292
42
Access
Reactivating interior volumetric
monitoring
► Deactivate exterior perimeter monitoring by
unlocking the vehicle using the remote control or
the "Keyless Entry and Start" system.
The indicator lamp in the button goes off.
►
Reactivate the full alarm system by locking
the vehicle using the remote control or by
pressing the driver
’s door handle.
The red indicator lamp in the button once again
flashes every second.
Triggering of the alarm
This is indicated by sounding of the siren
and flashing of the direction indicators for 30
seconds.
Depending on the country of sale, certain
monitoring functions remain active until the alarm
has been triggered eleven times consecutively.
When the vehicle is unlocked using the remote
control or the Keyless Entry and Start system,
rapid flashing of the red indicator lamp in the
button informs you that the alarm was triggered
during your absence. When the ignition is
switched on, this flashing stops.
Failure of the remote control
To deactivate the monitoring functions:
► Unlock the vehicle using the key in the front
left-hand door lock.
►
Open the door; the alarm is triggered. ►
Switch on the ignition; this stops the alarm.
The indicator lamp in the button goes off.
Locking the vehicle without
activating the alarm
► Lock the vehicle using the key (built-in the
remote control) in the front left-hand door lock.
Automatic activation
(Depending on version)
The system is activated automatically 2 minutes
after the last door or the boot is closed.
►
T
o avoid triggering the alarm on entering the
vehicle, first press the unlocking button on the
remote control or unlock the vehicle using the
"Keyless Entry and Start" system.
Malfunction
When the ignition is switched on, the fixed
lighting of the red indicator lamp in the button
indicates a system malfunction.
Have it checked by a CITROËN dealer or a
qualified workshop.
Electric windows
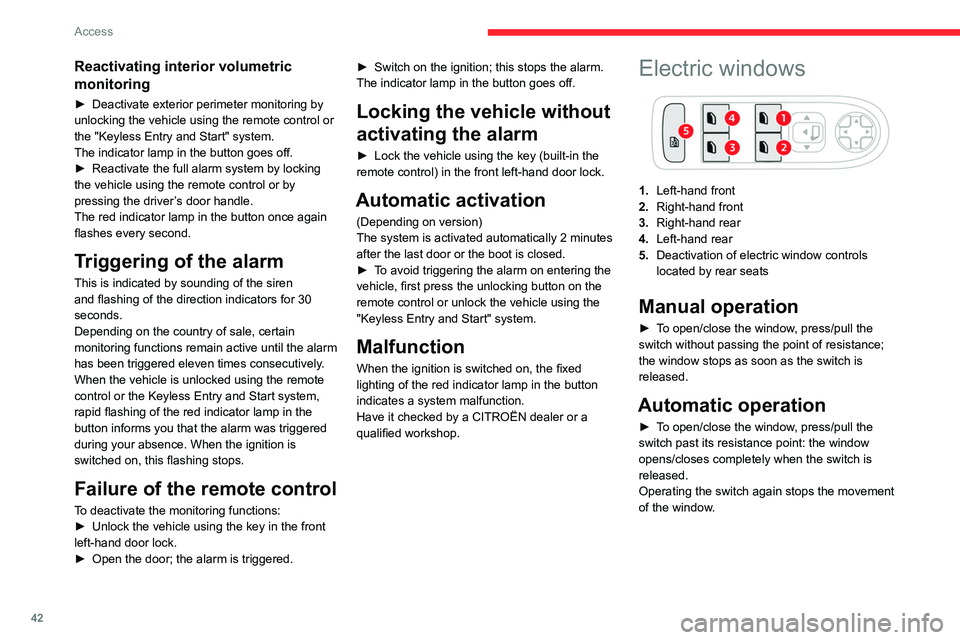
1. Left-hand front
2. Right-hand front
3. Right-hand rear
4. Left-hand rear
5. Deactivation of electric window controls
located by rear seats
Manual operation
► To open/close the window, press/pull the
switch without passing the point of resistance;
the window stops as soon as the switch is
released.
Automatic operation
► To open/close the window, press/pull the
switch past its resistance point: the window
opens/closes completely when the switch is
released.
Operating the switch again stops the movement
of the window.
Page 47 of 292
45
Ease of use and comfort
3Correct driving position
For safety reasons, adjustments must
only be made when the vehicle is
stationary.
Before taking to the road and to make the most
of the ergonomic layout of the instruments and
controls, carry out these adjustments in the
following order:
–
head restraint height.
–
seat backrest angle.
–
seat cushion height.
–
longitudinal seat position.
–
steering wheel height and reach.
–
rear view mirror and door mirrors.
Once these adjustments have been
made, check that the instrument panel
can be viewed correctly from your driving
position.
Front head restraints
Adjusting the height
Upwards:
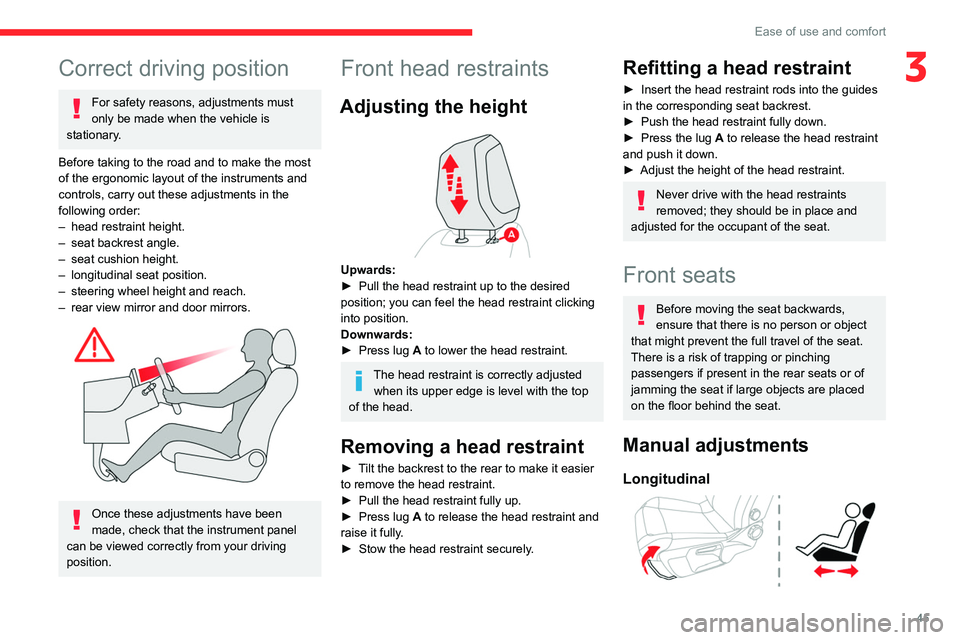
► Pull the head restraint up to the desired
position; you can feel the head restraint clicking
into position.
Downwards:
►
Press lug
A to lower the head restraint.
The head restraint is correctly adjusted when its upper edge is level with the top
of the head.
Removing a head restraint
► Tilt the backrest to the rear to make it easier
to remove the head restraint.
►
Pull the head restraint fully up.
►
Press lug
A to release the head restraint and
raise it fully.
►
Stow the head restraint securely
.
Refitting a head restraint
► Insert the head restraint rods into the guides
in the corresponding seat backrest.
►
Push the head restraint fully down.
►
Press the lug
A to release the head restraint
and push it down.
►
Adjust the height of the head restraint.
Never drive with the head restraints
removed; they should be in place and
adjusted for the occupant of the seat.
Front seats
Before moving the seat backwards,
ensure that there is no person or object
that might prevent the full travel of the seat.
There is a risk of trapping or pinching
passengers if present in the rear seats or of
jamming the seat if large objects are placed
on the floor behind the seat.
Manual adjustments
Longitudinal
Page 61 of 292

59
Ease of use and comfort
3For more information on Remotely operable
additional functions , refer to the corresponding
section.
The fan noise that occurs during temperature pre-conditioning is perfectly
normal.
Operating conditions
– The function is only activated when the
ignition is switched off and the
vehicle
locked.
–
When the vehicle is not connected, the
function is only activated if the battery charge
level is greater than 30%.
–
When the vehicle is not connected and a
recurring programme is active (e.g. from Monday
to Friday), if two temperature pre-conditioning
sequences are run without the vehicle being
used, the programme will be deactivated.
Interior fittings
1. Sun visor
2. Smart Pad Support Citroën
3. Dashboard drawer
4. Glove box
5. Wireless smartphone charger
USB sockets (type A/type C)
6. Storage compartment
12
V socket
7. Storage compartment with cup holders
8. Centre armrest with storage compartment
9. Door pockets
10. USB sockets
Heated rear seats
Make sure you do not leave any item in
the passenger compartment which could
act like a magnifying glass under the effect of
the sun's rays and cause a fire - risk of fire or
damage to interior surfaces!
Sun visor
► With the ignition on, raise the concealing
flap; depending on the version, the mirror is
illuminated automatically.
This sun visor is also equipped with a ticket
holder.
Glove box
► To open the glove box, lift the handle.
With the ignition on, the glove box is lit when
open.
Never drive with the glove box open
when a passenger is at the front. It may
cause injury during sharp deceleration!
Dashboard drawer
► To open the drawer, press the handle and
pull.
Never drive with the drawer open and a
passenger in the front seat - risk of injury
during sharp deceleration!
Page 64 of 292
62
Ease of use and comfort
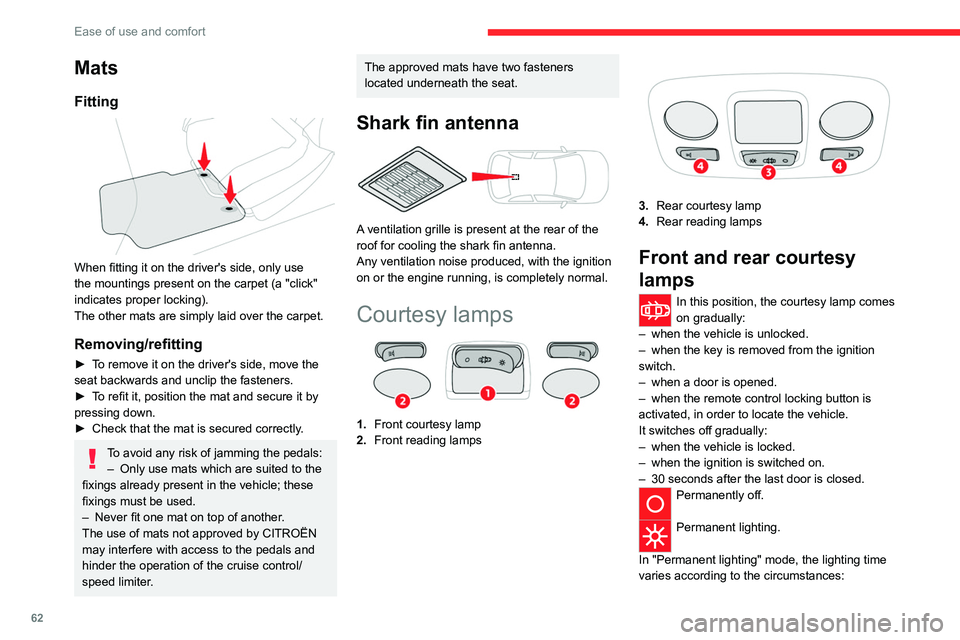
Mats
Fitting
When fitting it on the driver's side, only use
the mountings present on the carpet (a "click"
indicates proper locking).
The other mats are simply laid over the carpet.
Removing/refitting
► To remove it on the driver's side, move the
seat backwards and unclip the fasteners.
►
T
o refit it, position the mat and secure it by
pressing down.
►
Check that the mat is secured correctly
.
To avoid any risk of jamming the pedals:– Only use mats which are suited to the
fixings already present in the vehicle; these
fixings must be used.
–
Never fit one mat on top of another
.
The use of mats not approved by CITROËN
may interfere with access to the pedals and
hinder the operation of the cruise control/
speed limiter.
The approved mats have two fasteners
located underneath the seat.
Shark fin antenna
A ventilation grille is present at the rear of the
roof for cooling the shark fin antenna.
Any ventilation noise produced, with the ignition
on or the engine running, is completely normal.
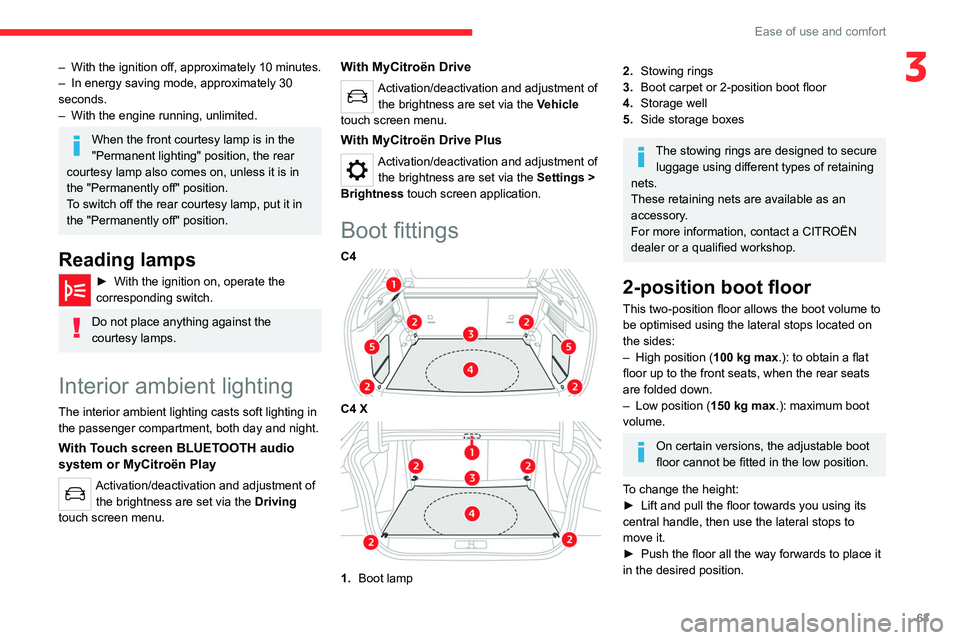
Courtesy lamps
1. Front courtesy lamp
2. Front reading lamps
3.Rear courtesy lamp
4. Rear reading lamps
Front and rear courtesy
lamps
In this position, the courtesy lamp comes
on gradually:
–
when the vehicle is unlocked.
–
when the key is removed from the ignition
switch.
–
when a door is opened.
–
when the remote control locking button is
activated, in order to locate the vehicle.
It switches off gradually:
–
when the vehicle is locked.
–
when the ignition is switched on.
–
30 seconds after the last door is closed.
Permanently off.
Permanent lighting.
In "Permanent lighting" mode, the lighting time
varies according to the circumstances:
Page 65 of 292
63
Ease of use and comfort
3– With the ignition off, approximately 10 minutes.
– In energy saving mode, approximately 30
seconds.
–
With the engine running, unlimited.
When the front courtesy lamp is in the
"Permanent lighting" position, the rear
courtesy lamp also comes on, unless it is in
the "Permanently off" position.
To switch off the rear courtesy lamp, put it in
the "Permanently off" position.
Reading lamps
► With the ignition on, operate the
corresponding switch.
Do not place anything against the
courtesy lamps.
Interior ambient lighting
The interior ambient lighting casts soft lighting in
the passenger compartment, both day and night.
With Touch screen BLUETOOTH audio
system or MyCitroën Play
Activation/deactivation and adjustment of the brightness are set via the Driving
touch screen menu.
With MyCitroën Drive
Activation/deactivation and adjustment of the brightness are set via the Vehicle
touch screen menu.
With MyCitroën Drive Plus
Activation/deactivation and adjustment of the brightness are set via the Settings >
Brightness touch screen application.
Boot fittings
C4
C4 X
1. Boot lamp
2.Stowing rings
3. Boot carpet or 2-position boot floor
4. Storage well
5. Side storage boxes
The stowing rings are designed to secure
luggage using different types of retaining
nets.
These retaining nets are available as an
accessory.
For more information, contact a CITROËN
dealer or a qualified workshop.
2-position boot floor
This two-position floor allows the boot volume to
be optimised using the lateral stops located on
the sides:
–
High position ( 100
kg max.): to obtain a flat
floor up to the front seats, when the rear seats
are folded down.
–
Low position ( 150
kg max.): maximum boot
volume.
On certain versions, the adjustable boot
floor cannot be fitted in the low position.
To change the height:
►
Lift and pull the floor towards you using its
central handle, then use the lateral stops to
move it.
►
Push the floor all the way forwards to place it
in the desired position.
Page 80 of 292
78
Safety
ABS prevents wheel locking in the event of
emergency braking.
Electronic brake force distribution (EBFD)
manages overall braking pressure on each
individual wheel.
►
When braking in an emergency
, depress
the pedal very firmly and maintain this
pressure.
Normal operation of the ABS may make
itself felt by slight vibrations of the brake
pedal.
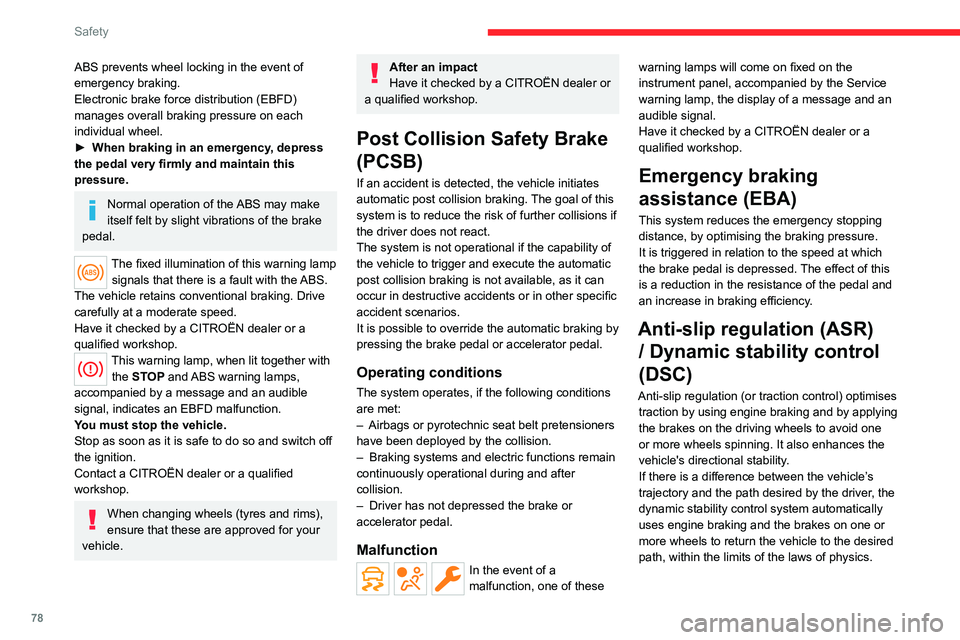
The fixed illumination of this warning lamp signals that there is a fault with the ABS.
The vehicle retains conventional braking. Drive
carefully at a moderate speed.
Have it checked by a CITROËN dealer or a
qualified workshop.
This warning lamp, when lit together with the STOP and ABS warning lamps,
accompanied by a message and an audible
signal, indicates an EBFD malfunction.
You must stop the vehicle.
Stop as soon as it is safe to do so and switch off
the ignition.
Contact a CITROËN dealer or a qualified
workshop.
When changing wheels (tyres and rims),
ensure that these are approved for your
vehicle.
After an impact
Have it checked by a CITROËN dealer or
a qualified workshop.
Post Collision Safety Brake
(PCSB)
If an accident is detected, the vehicle initiates
automatic post collision braking. The goal of this
system is to reduce the risk of further collisions if
the driver does not react.
The system is not operational if the capability of
the vehicle to trigger and execute the automatic
post collision braking is not available, as it can
occur in destructive accidents or in other specific
accident scenarios.
It is possible to override the automatic braking by
pressing the brake pedal or accelerator pedal.
Operating conditions
The system operates, if the following conditions
are met:
–
Airbags or pyrotechnic seat belt pretensioners
have been deployed by the collision.
–
Braking systems and electric functions remain
continuously operational during and after
collision.
–
Driver has not depressed the brake or
accelerator pedal.
Malfunction
In the event of a
malfunction, one of these warning lamps will come on fixed on the
instrument panel, accompanied by the Service
warning lamp, the display of a message and an
audible signal.
Have it checked by a CITROËN dealer or a
qualified workshop.
Emergency braking
assistance (EBA)
This system reduces the emergency stopping
distance, by optimising the braking pressure.
It is triggered in relation to the speed at which
the brake pedal is depressed. The effect of this
is a reduction in the resistance of the pedal and
an increase in braking efficiency.
Anti-slip regulation (ASR)
/ Dynamic stability control
(DSC)
Anti-slip regulation (or traction control) optimises
traction by using engine braking and by applying
the brakes on the driving wheels to avoid one
or more wheels spinning. It also enhances the
vehicle's directional stability.
If there is a difference between the vehicle’s
trajectory and the path desired by the driver, the
dynamic stability control system automatically
uses engine braking and the brakes on one or
more wheels to return the vehicle to the desired
path, within the limits of the laws of physics.
Page 83 of 292

81
Safety
5Rear seat belt not fastened alert
When the ignition is switched on, if one of
the rear passengers has not fastened their seat
belt, the corresponding warning lamp ( 3, 4 or 5)
comes on in red for 60 seconds.
Seat belt unfastened alert
After the ignition is switched on, if the
driver or a passenger unfastens their seat belt,
the corresponding warning lamp ( 1, 2, 3, 4 or
5) comes on in red. At a speed greater than
12 mph (20
km/h), the warning lamp flashes,
accompanied by an audible signal for around 2
minutes. After this time has elapsed, the warning
lamp remains on until the seat belt has been
fastened again.
With the ignition on, if the driver or a
passenger fastens their seat belt, the
corresponding warning lamp ( 1, 2, 3, 4 or 5)
comes on in green on the display.
With the ignition on, if one of the front or
rear passenger seats is detected as being
unoccupied, the corresponding warning lamp ( 2,
3, 4 or 5) comes on in grey.
When there are no longer any not fastened/
unfastened alerts, the green or grey warning
lamps remain on for around 30 seconds, then
go off.
Type 2
Front seat belt not fastened alert
When the ignition is switched on, if the
driver or front passenger has not fastened their
seat belt, the corresponding warning lamp ( 1 or
2) comes on in red. At a speed greater than 12
mph (20
km/h), the warning lamp flashes red,
accompanied by an audible signal for around 2
minutes. After this time has elapsed, the warning
lamp remains on fixed in red until the seat belt is
fastened.
Rear seat belt not fastened alert
When the ignition is switched on, if one of
the rear passengers has not fastened their seat
belt, the corresponding warning lamp ( 3, 4 or 5)
comes on in red for 60 seconds.
Seat belt unfastened alert
After the ignition is switched on, if the
driver or a passenger unfastens their seat belt,
the corresponding warning lamp ( 1, 2, 3, 4 or
5) comes on in red. At a speed greater than
12 mph (20
km/h), the warning lamp flashes,
accompanied by an audible signal for around 2
minutes. After this time has elapsed, the warning
lamp remains on until the seat belt has been
fastened again.
Advice
The driver must ensure that passengers use the seat belts correctly and that they
are all fastened before setting off.
Wherever seated in the vehicle, you must
always fasten the seat belt, even for short
journeys.
Do not invert the seat belt buckles, as they
will not fulfil their role properly.
To ensure the proper functioning of the belt
buckles, make sure that there are no foreign
bodies present (e.g.
a coin) before fastening.
Before and after use, ensure that the seat belt
is reeled in correctly.
After folding or moving a seat or rear bench
seat, ensure that the seat belt is positioned
and reeled in correctly.
Installation
The lower part of the strap must be
positioned as low as possible over the pelvis.
The upper part must be positioned in the
hollow of the shoulder.
At the front, adjusting the position of the
seat belt may require the seat height to be
adjusted.
In order to be effective, a seat belt must:
–
be tightened as close to the body as
possible.
–
be pulled in front of you with a smooth
movement, checking that it is not twisted.
–
must only be used to secure one person.
–
not show signs of tearing or fraying.
–
not be changed or modified, in order to
avoid affecting its performance.
Recommendations for children
Use a suitable child seat if the passenger
is less than 12 years old or shorter than 1.5
metres.
Page 84 of 292

82
Safety
Never use the same seat belt to secure more
than one child.
Never carry a child on your lap.
For more information on Child seats, refer to
the corresponding section.
Maintenance
In accordance with current safety
regulations, for all work on your vehicle's
seat belts, contact a qualified workshop with
the skills and equipment needed, which a
CITROËN
dealer is able to provide.
Have the seat belts checked regularly by a
CITROËN dealer or a qualified workshop,
particularly if the straps show signs of
damage.
Clean the seat belt straps with soapy water or
a textile cleaning product, sold by CITROËN
dealers.
Airbags
General information
System designed to help improve the safety
of the occupants sitting in the front seats and
the rear outer seats, in the event of a violent
collision. The airbags supplement the action
of the seat belts equipped with a force limiting
system.
Electronic detectors record and analyse the
front and side impacts sustained in the impact
detection zones:
–
In the event of violent impact, the airbags
deploy instantly and help better protect the
occupants of the vehicle; immediately after the
impact, the airbags deflate rapidly in order not
to hinder the visibility or the possible exit of the
occupants.
–
In the event of a slight impact, a rear impact
and under certain rollover conditions, the airbags
may not deploy; only the seat belt helps to
protect you in these situations.
The seriousness of the impact depends on the
nature of the obstacle and the speed of the
vehicle at the moment of collision.
The airbags do not operate when the
ignition is switched off.
This equipment will only deploy once. If a
second impact occurs (during the same or a
subsequent accident), the airbag will not be
deployed again.
Impact detection zones
A. Front impact zone
B. Side impact zone
When one or more airbags are deployed,
the detonation of the pyrotechnic charge
incorporated in the system makes a noise and
releases a small quantity of smoke.
This smoke is not harmful, but sensitive
individuals may experience irritation.
The detonation noise associated with the
deployment of one or more airbags may result
in a slight loss of hearing for a short time.