display Citroen C4 AIRCROSS RHD 2017 1.G Owner's Guide
[x] Cancel search | Manufacturer: CITROEN, Model Year: 2017, Model line: C4 AIRCROSS RHD, Model: Citroen C4 AIRCROSS RHD 2017 1.GPages: 368, PDF Size: 11.44 MB
Page 49 of 368
47
Permanent display
Once the data and time are set, you can
choose to have them always displayed in the
screen. To do this:
F
P
ress the MENU button.
F
P
ress " Setting ".
F
P
ress " Clock Screen ".
Display format
You can change the display format for the date
and time:
F
P
ress the MENU button.
F
P
ress " Setting ".
F
P
ress " System Setting ".
The date and time are displayed.
Simply touch the screen again to return to the
original display.
F
P
ress " Time Setting ".
F
P
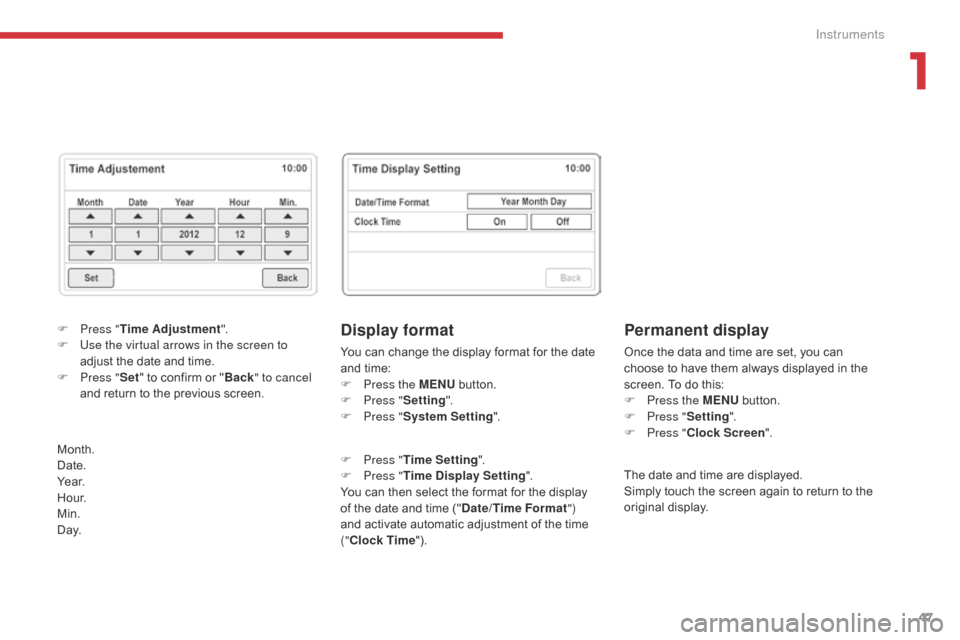
ress " Time Display Setting ".
You can then select the format for the display
of the date and time (" Date/Time Format")
and activate automatic adjustment of the time
("Clock Time ").
F
P
ress "
Time Adjustment ".
F
U
se the virtual arrows in the screen to
adjust the date and time.
F
P
ress " Set" to confirm or " Back" to cancel
and return to the previous screen.
Month.
Date.
Ye a r.
H o u r.
Min.
D ay.
1
Instruments
Page 50 of 368
48
Audio-Telematic system touch screen
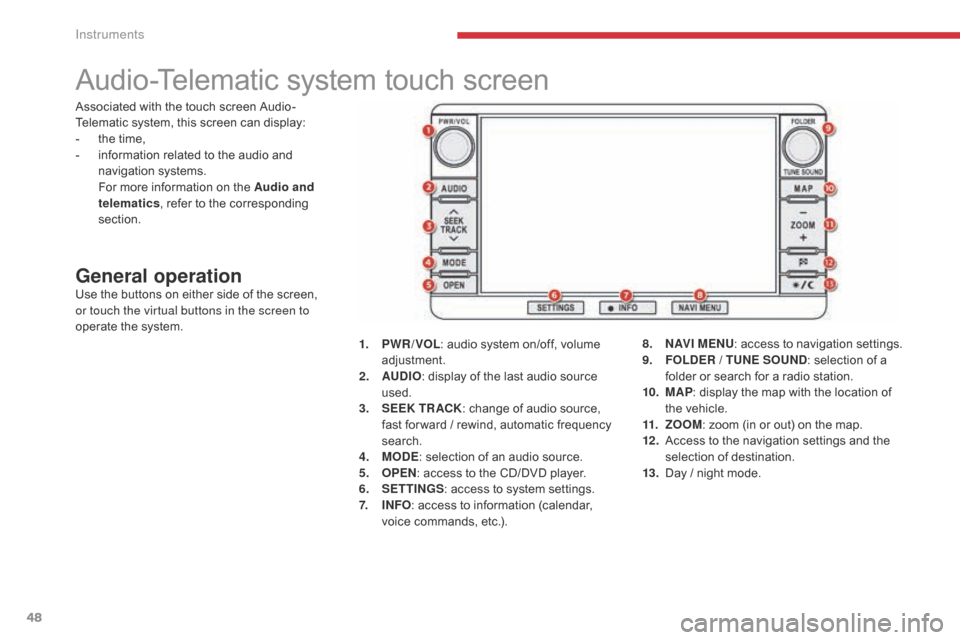
General operationUse the buttons on either side of the screen,
or touch the virtual buttons in the screen to
operate the system.1.
P
WR / VOL: audio system on/off, volume
adjustment.
2.
AU
DIO: display of the last audio source
used.
3.
S
EEK TR ACK: change of audio source,
fast for ward / rewind, automatic frequency
search.
4.
M
ODE: selection of an audio source.
5.
O
PEN: access to the CD/DVD player.
6.
S
ETTINGS: access to system settings.
7.
I
NFO: access to information (calendar,
voice commands, etc.). 8.
N
AV I M E NU: access to navigation settings.
9.
F
OLDER / TUNE SOUND: selection of a
folder or search for a radio station.
10.
M
AP: display the map with the location of
the vehicle.
11.
Z
OOM: zoom (in or out) on the map.
12 .
A
ccess to the navigation settings and the
selection of destination.
13.
D
ay / night mode.
Associated with the touch screen Audio-
Telematic system, this screen can display:
-
t
he time,
-
i
nformation related to the audio and
navigation systems.
F
or more information on the Audio and
telematics , refer to the corresponding
section.
Instruments
Page 51 of 368
49
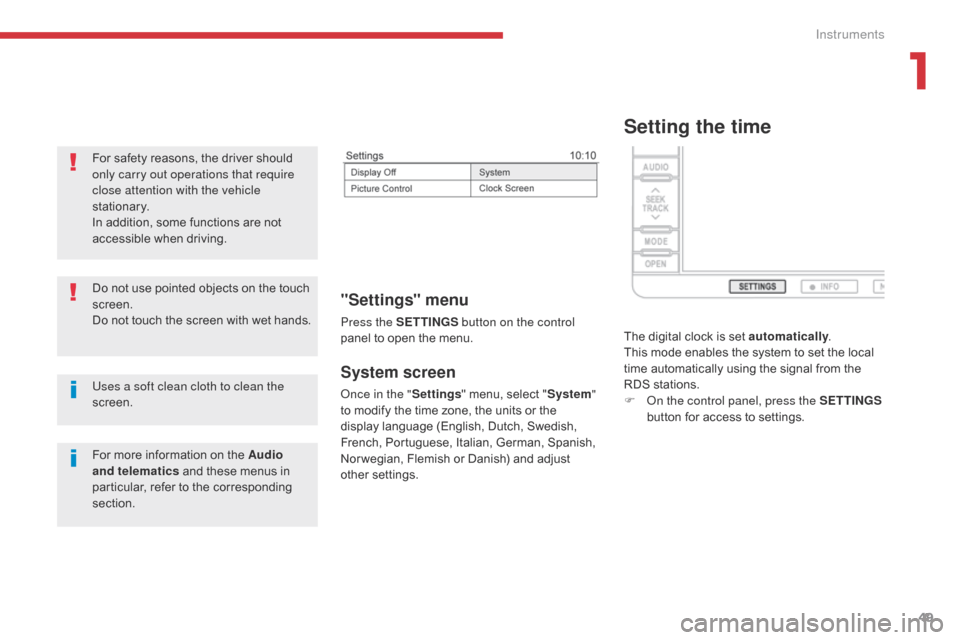
System screen
Once in the "Settings" menu, select " System"
to modify the time zone, the units or the
display language (English, Dutch, Swedish,
French, Portuguese, Italian, German, Spanish,
Nor wegian, Flemish or Danish) and adjust
other settings.
"Settings" menu
Press the S ETTINGS button on the control
panel to open the menu.
Uses a soft clean cloth to clean the
screen. Do not use pointed objects on the touch
screen.
Do not touch the screen with wet hands. For safety reasons, the driver should
only carry out operations that require
close attention with the vehicle
stationary.
In addition, some functions are not
accessible when driving.
For more information on the Audio
and telematics and these menus in
particular, refer to the corresponding
section.
Setting the time
The digital clock is set automatically .
This mode enables the system to set the local
time automatically using the signal from the
RDS stations.
F
O
n the control panel, press the SETTINGS
button for access to settings.
1
Instruments
Page 52 of 368
50
You must deactivate automatic
adjustment (RDS Auto Correct) to
change the time zone and summer time
settings.
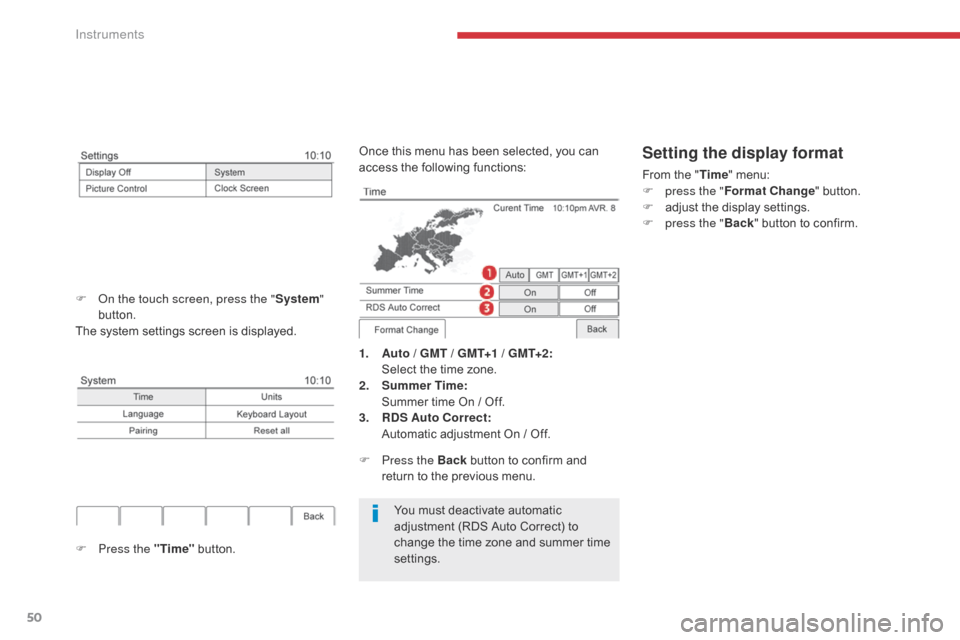
1. Auto / GMT / GMT+1 / GMT+2: Select the time zone.
2.
S
ummer Time :
S
ummer time On / Off.
3.
R
DS Auto Correct:
A
utomatic adjustment On / Off.
Once this menu has been selected, you can
access the following functions:
Setting the display format
From the "
Time" menu:
F p ress the " Format Change " button.
F
a
djust the display settings.
F
p
ress the " Back" button to confirm.
F
P
ress the Back button to confirm and
return to the previous menu.
F
O
n the touch screen, press the " System"
button.
The system settings screen is displayed.
F Press the "Time" button.
Instruments
Page 95 of 368
93
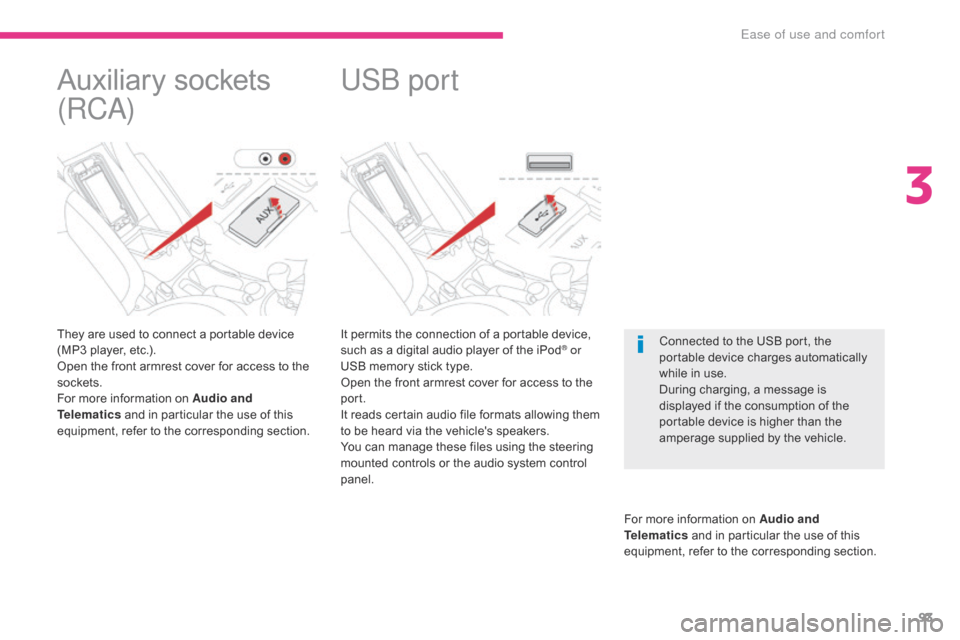
It permits the connection of a portable device,
such as a digital audio player of the iPod® or
USB memory stick type.
Open the front armrest cover for access to the
port.
It reads certain audio file formats allowing them
to be heard via the vehicle's speakers.
You can manage these files using the steering
mounted controls or the audio system control
panel.
For more information on Audio and
Telematics and in particular the use of this
equipment, refer to the corresponding section.
USB port
Connected to the USB port, the
portable device charges automatically
while in use.
During charging, a message is
displayed if the consumption of the
portable device is higher than the
amperage supplied by the vehicle.
Auxiliary sockets
(RCA)
They are used to connect a portable device
(MP3 player, etc.).
Open the front armrest cover for access to the
sockets.
For more information on Audio and
Telematics and in particular the use of this
equipment, refer to the corresponding section.
3
Ease of use and comfort
Page 102 of 368
100
For Diesel vehicles, when
the engine is cold, starting
does not take place until the
pre-heater warning lamp has
gone off.
If one of the starting conditions is not
met, a reminder message appears in
the instrument panel screen. In some
circumstances, it is necessary to
turn the steering wheel slightly while
pressing the "
START/STOP " button
to assist unlocking of the steering;
a message warns you when this is
needed.
The presence of the electronic key in
the defined zone is essential. For safety
reasons, do not leave this area when
the engine is running.
Switching off using the
electronic key
If the vehicle is not immobilised, the
engine will not switch off.
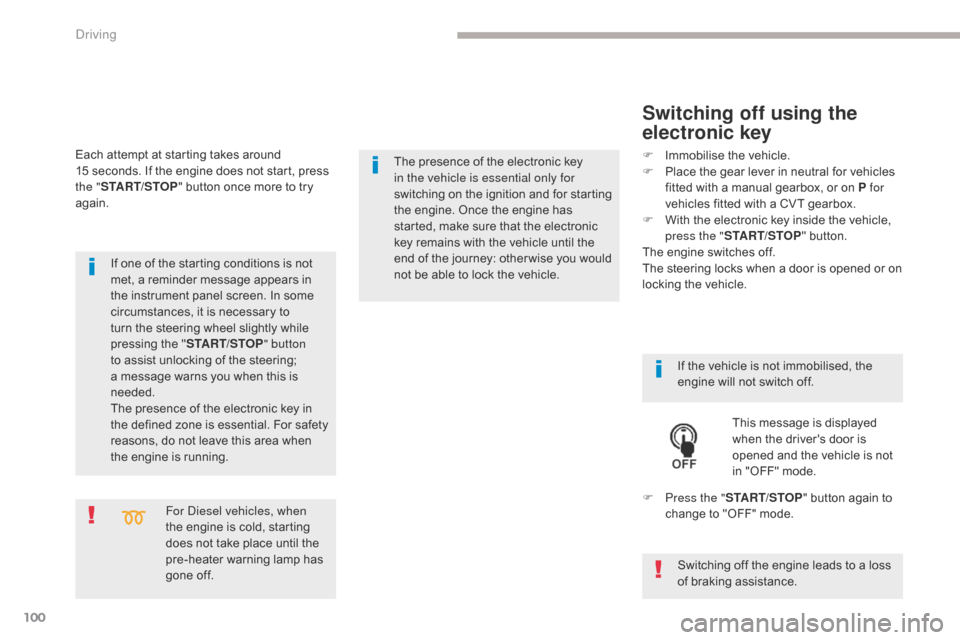
This message is displayed
when the driver's door is
opened and the vehicle is not
in "OFF" mode.
F
P
ress the " START/STOP " button again to
change to "OFF" mode.
F
I
mmobilise the vehicle.
F
P
lace the gear lever in neutral for vehicles
fitted with a manual gearbox, or on P for
vehicles fitted with a CVT gearbox.
F
W
ith the electronic key inside the vehicle,
press the " START/STOP " button.
The engine switches off.
The steering locks when a door is opened or on
locking the vehicle.
Each attempt at starting takes around
15
seconds. If the engine does not start, press
the " START/STOP " button once more to try
again.
The presence of the electronic key
in the vehicle is essential only for
switching on the ignition and for starting
the engine. Once the engine has
started, make sure that the electronic
key remains with the vehicle until the
end of the journey: other wise you would
not be able to lock the vehicle.
Switching off the engine leads to a loss
of braking assistance.
Driving
Page 103 of 368

101
Once the engine has started, you can
remove the electronic key from its
housing A and close the glove box.
Back-up starting with the
electronic key
The message is displayed
when you open the driver's
door and the electronic key
has not been removed from
its location A . Remember to take the electronic
key with you when you leave the vehicle.
F
P
ress the brake pedal on vehicles fitted
with a CVT gearbox or depress the clutch
pedal fully on vehicles with a manual
gearbox.
F
P
ress the "
START/STOP " button.
When the electronic key is in the defined zone
and your vehicle does not start after pressing
the " START/STOP " button:
F
O
pen the glove box.
F
I
nsert the electronic key in the location A .
Emergency stop with the
electronic key
During an emergency stop, the braking
servo assistance and steering power
assistance functions are no longer
provided. Take great care.
In the event of an emergency only
, the
engine can be stopped without any conditions.
To do this, press and hold the " S TA R T/
STOP " button for about 3 seconds or make
3
successive presses on the button.
The engine stops and the vehicle goes into
"ACC" mode.
4
Driving
Page 110 of 368
108
Manual gear changing
In the automated mode, you can take over
control temporarily at any time using the
steering mounted controls.
The use of these controls permits manual
selection of the gears in situations which
require a faster change down than that offered
in automated mode (arrival at a roundabout,
exit from a car park with a steep gradient,
over taking...).
The gearbox engages the gear requested if
the engine speed permits it. The gear engaged
appears.
To return to the automated mode, do one of the
following:
-
p
ress the back of the "+/OFF" steering
mounted control 3 for approximately
2
seconds,
-
m
ove the gear lever quickly towards
position +/- and then return it to position D ,
-
s
top the vehicle.
Stopping the vehicle Operating fault
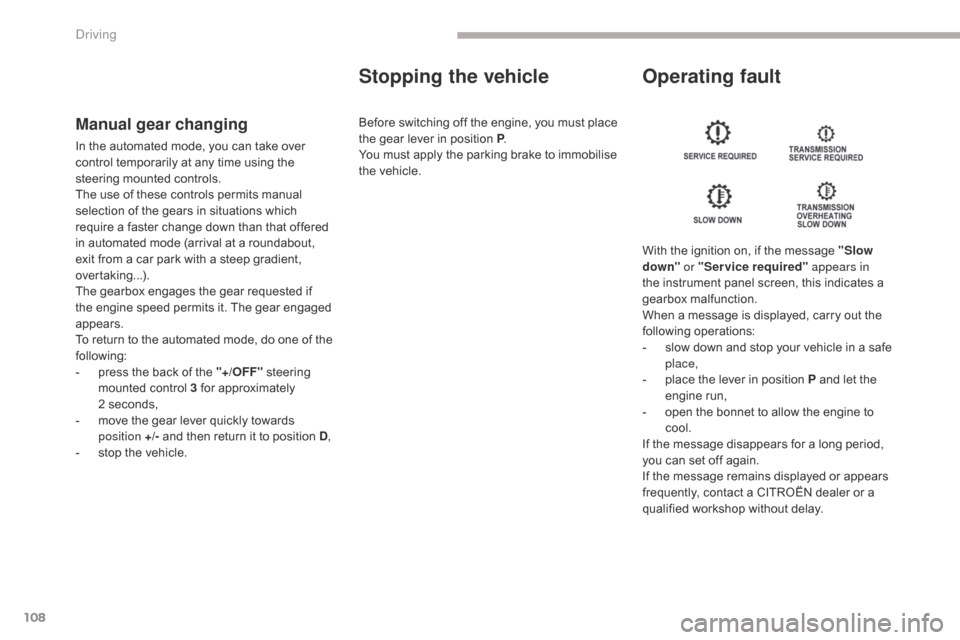
With the ignition on, if the message "Slow
down" or "Service required" appears in
the instrument panel screen, this indicates a
gearbox malfunction.
When a message is displayed, carry out the
following operations:
-
s
low down and stop your vehicle in a safe
place,
-
p
lace the lever in position P and let the
engine run,
-
o
pen the bonnet to allow the engine to
cool.
If the message disappears for a long period,
you can set off again.
If the message remains displayed or appears
frequently, contact a CITROËN dealer or a
qualified workshop without delay.
Before switching off the engine, you must place
the gear lever in position P
.
You must apply the parking brake to immobilise
the vehicle.
Driving
Page 117 of 368
115
Under-inflation alert
The alert is given by the fixed
illumination of this warning lamp and
the display of a message.
F
R
educe speed immediately, avoid sudden
steering movements or harsh brake
applications.
F
S
top as soon as it is safe to do so. The loss of pressure detected does not
always lead to visible deformation of the
tyre. Do not rely on just a visual check. The alert is maintained until the
reference pressure is reinitialised after
the inflation, repair or replacement of
the tyres concerned. In the event of
the repair or replacement of tyres, the
sensor identifiers must be registered in
the system by a CITROËN dealer or a
qualified workshop.
The spare wheel does not have
a sensor, so there is no need to
reinitialise the system for driving with
the spare wheel fitted.
F
I f you have a compressor (the one in the
temporary puncture repair kit, for example),
check the four tyre pressures when cold.
I
f it is not possible to check the tyre
pressures immediately, drive carefully at
reduced speed.
or
F
I
n the event of a puncture, use the
temporary puncture repair kit or the spare
wheel (depending on equipment).
Reinitialising the reference
pressure
Before reinitialising the system, ensure
that the pressures in the four tyres are
suitable for the conditions of use of the
vehicle and are as specified on the tyre
pressure label.
The under-inflation detection system
cannot warn of an incorrect pressure at
the time of reinitialisation.
The system must be reinitialised after any
adjustment of tyre pressures and after
changing one or more wheels.
4
Driving
Page 118 of 368
116
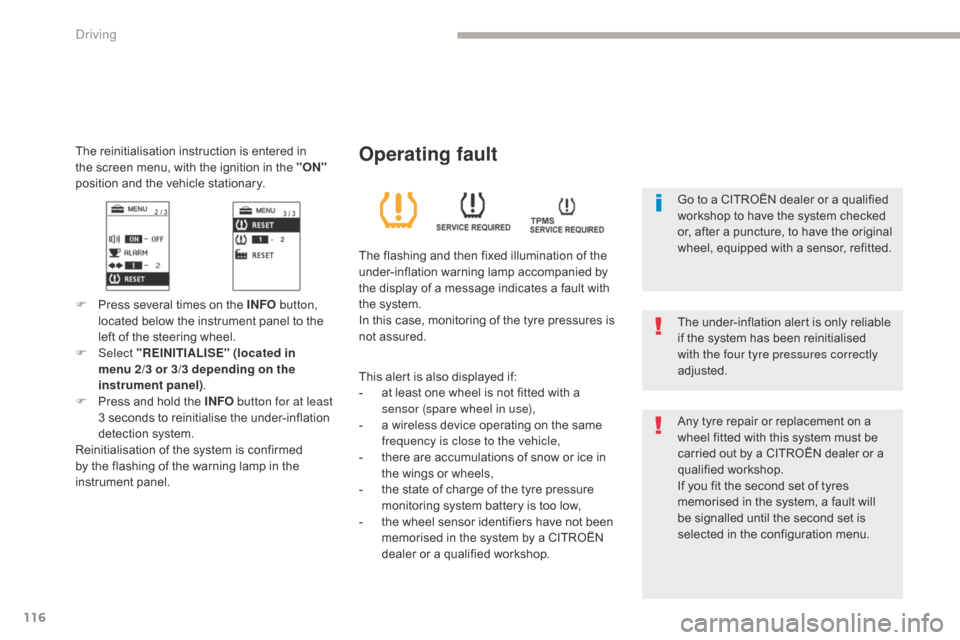
The reinitialisation instruction is entered in
the screen menu, with the ignition in the "ON"
position and the vehicle stationary.
F Press several times on the INFO button,
located below the instrument panel to the
left of the steering wheel.
F
Select "REINITIALISE" (located in
menu
2/3 or 3/3 depending on the
instrument panel) .
F
P
ress and hold the INFO button for at least
3 seconds to reinitialise the under-inflation
detection system.
Reinitialisation of the system is confirmed
by the flashing of the warning lamp in the
instrument panel. The under-inflation alert is only reliable
if the system has been reinitialised
with the four tyre pressures correctly
adjusted.
Operating fault
The flashing and then fixed illumination of the
under-inflation warning lamp accompanied by
the display of a message indicates a fault with
the system.
In this case, monitoring of the tyre pressures is
not assured.
This alert is also displayed if:
-
a
t least one wheel is not fitted with a
sensor (spare wheel in use),
-
a w
ireless device operating on the same
frequency is close to the vehicle,
-
t
here are accumulations of snow or ice in
the wings or wheels,
-
t
he state of charge of the tyre pressure
monitoring system battery is too low,
-
t
he wheel sensor identifiers have not been
memorised in the system by a CITROËN
dealer or a qualified workshop. Any tyre repair or replacement on a
wheel fitted with this system must be
carried out by a CITROËN dealer or a
qualified workshop.
If you fit the second set of tyres
memorised in the system, a fault will
be signalled until the second set is
selected in the configuration menu. Go to a CITROËN dealer or a qualified
workshop to have the system checked
or, after a puncture, to have the original
wheel, equipped with a sensor, refitted.
Driving