key Citroen C4 CACTUS 2016 1.G Owner's Guide
[x] Cancel search | Manufacturer: CITROEN, Model Year: 2016, Model line: C4 CACTUS, Model: Citroen C4 CACTUS 2016 1.GPages: 308, PDF Size: 7.96 MB
Page 157 of 308
155
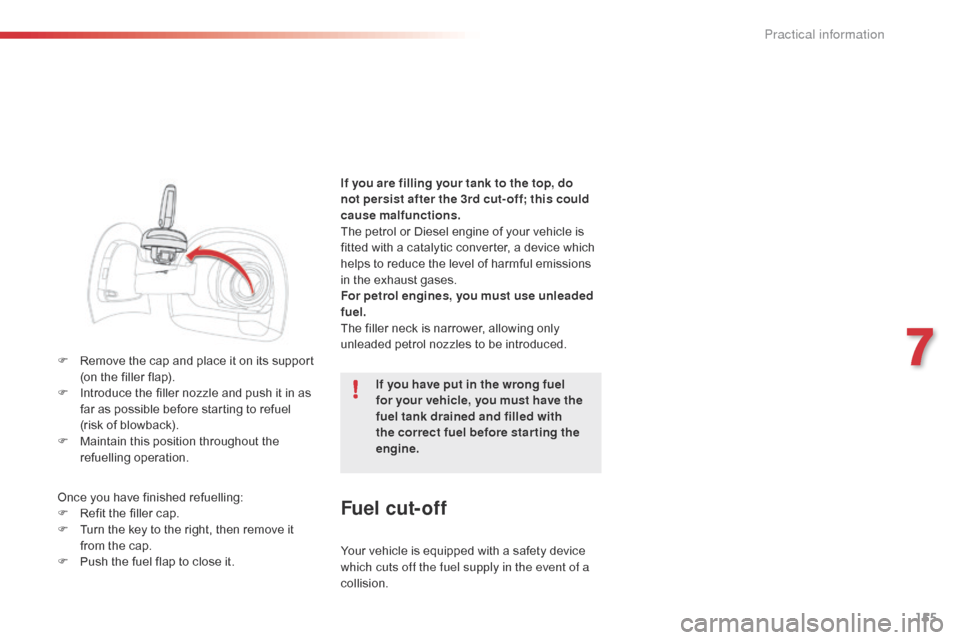
F Remove the cap and place it on its support (
on the filler flap).
F
I
ntroduce the filler nozzle and push it in as
f
ar as possible before starting to refuel
(risk
of blowback).
F
M
aintain this position throughout the
r
efuelling
ope
ration.
Once
you have finished refuelling:
F
R
efit the filler cap.
F
T
urn the key to the right, then remove it
f
rom the cap.
F
P
ush the fuel flap to close it.If you are filling your tank to the top, do
not persist after the 3rd cut- off; this could
cause malfunctions.
The
petrol or Diesel engine of your vehicle is
f
itted with a catalytic converter, a device which
h
elps to reduce the level of harmful emissions
i
n the exhaust gases.
For petrol engines, you must use unleaded
fuel.
The filler neck is narrower, allowing only
u
nleaded petrol nozzles to be introduced.
Your vehicle is equipped with a safety device
w
hich cuts off the fuel supply in the event of a
collision.
Fuel cut- of f
If you have put in the wrong fuel
for your vehicle, you must have the
fuel tank drained and filled with
the correct fuel before star ting the
engine.
7
Practical information
Page 183 of 308
181
Recommendations on storage
Never store bottles of AdBlue® in your
vehicle.
Procedure
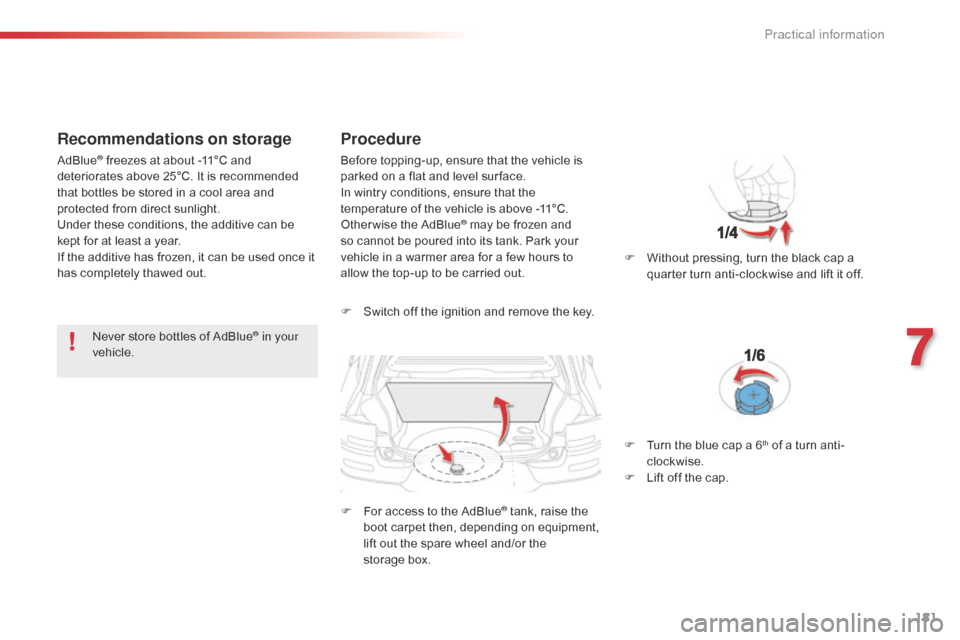
F Switch off the ignition and remove the key.
F
F
or access to the AdBlue
® tank, raise the b
oot
carpet
then,
depending on equipment,
l
ift
out
the
spare
wheel
and/or the
s
torage box. F
W
ithout pressing, turn the black cap a
q
uarter turn anti-clockwise and lift it off.
AdBlue
® freezes at about -11°C and d
eteriorates above 25°C. It is recommended
t
hat
bottles be stored in a cool area and
p
rotected from direct sunlight.
Under
these conditions, the additive can be
k
ept
for
at least a year.
If
the
additive has frozen, it can be used once it
h
as
completely thawed out. Before
topping-up, ensure that the vehicle is p
arked on a flat and level sur face.
In
wintry conditions, ensure that the
t
emperature of the vehicle is above -11°C.
O
therwise
t
he
A
dBlue
® may be frozen and s
o
cannot
be
poured
into its tank. Park your
v
ehicle
in
a
warmer
area for a few hours to
a
llow
the
top-up
to
be
carried out.
F
T
urn the blue cap a 6
th of a turn anti-
c
lockwise.
F
L
ift
off
the
cap.
7
Practical information
Page 184 of 308
182
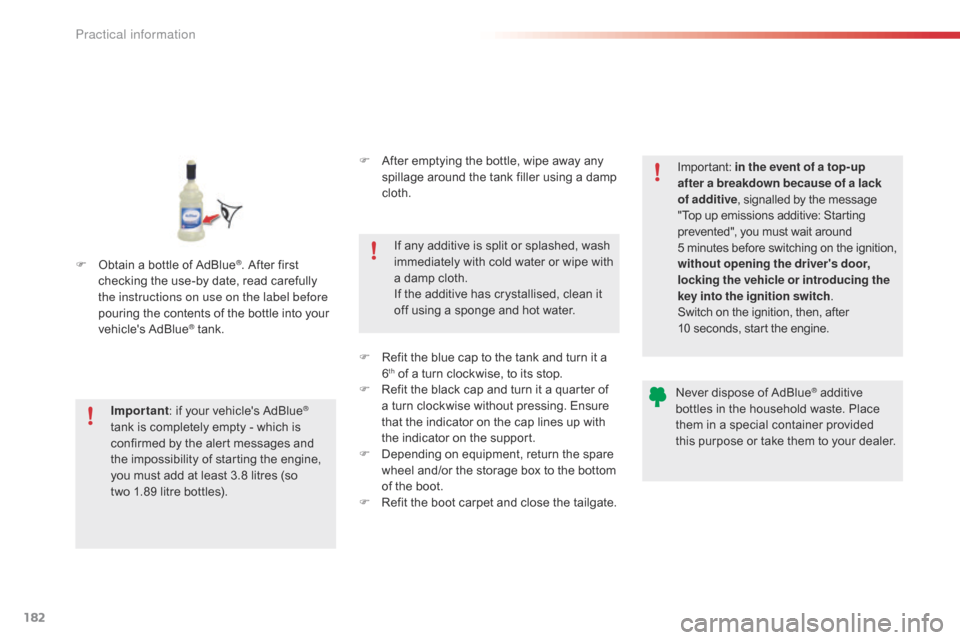
F Obtain a bottle of AdBlue®. After first c
hecking
the
use-by
date,
read carefully
t
he instructions on use on the label before
pouring
the
contents
of
the bottle into your
v
ehicle's
Ad
Blue
® tank.
I
mportant :
if
your vehicle's AdBlue
®
tank
is
completely
empty
-
which
is
c
onfirmed
by
the
alert
messages
and
t
he
impossibility
of
starting
the
engine,
y
ou
must
add
at
least
3.8
litres
(so
t
wo 1.89
litre
bottles). If
any additive is split or splashed, wash
i
mmediately
w
ith
c
old
w
ater
o
r
w
ipe
w
ith
a
damp cloth.
If the additive has crystallised, clean it
o
ff using a sponge and hot water.Important:
i
n the event of a top-up
after a breakdown because of a lack
of additive , signalled by the message
"
Top up emissions additive: Starting
p
revented", you must wait around
5
minutes
before
switching
on
the
ignition,
w
ithout opening the driver's door,
locking the vehicle or introducing the
key into the ignition switch .
Switch on the ignition, then, after
1
0 seconds, start the engine.
Never dispose of AdBlue
® additive b
ottles
in
the
household
waste. Place
t
hem
in
a
special
container provided
t
his
p
urpose
o
r
t
ake
t
hem
t
o
y
our
d
ealer.
F
A
fter
emptying
the
bottle,
wipe
away
any
s
pillage
around
the
tank
filler
using
a
damp
c
loth.
F
R
efit
the
blue
cap
to
the
tank
and
turn
it
a
6th of a turn clockwise, to its stop.
F
R
efit the black cap and turn it a quarter of
a
turn clockwise without pressing. Ensure
t
hat the indicator on the cap lines up with
t
he indicator on the support.
F
D
epending on equipment, return the spare
w
heel and/or the storage box to the bottom
o
f
the boot.
F
R
efit the boot carpet and close the tailgate.
Practical information
Page 218 of 308

216
Do not force the lever as locking will not be possible if the clamp is not
p
ositioned correctly; start the procedure
ag
ain.
Quick release terminal
Disconnecting the (+) terminal
F Raise the lever A fully to release the clamp B.
The
Stop & Start system may not be
o
perational during the trip following the
f
irst engine start.
In
this case, the system will only be
a
vailable again after a continuous
p
eriod of immobilisation of the vehicle,
a
period which depends on the ambient
t
emperature and the state of charge of
t
he battery (up to about 8 hours).
It
is
recommended
that
the
battery
be
d
isconnected
if
the
vehicle
is
not
to
be
used
f
or
a
very
long
period,
so
as
to
maintain
an
a
dequate
state
of
charge
for
starting
the
e
ngine.
Before
disconnecting
the
battery:
F
c
lose
all
openings
(doors,
boot,
windows,
r
oof),
F
s
witch
off
all
electrical
consumers
(audio
s
ystem,
wipers,
lighting...),
F
s
witch
off
the
ignition
and
then
wait
f
our minutes.
At
the
battery,
simply
detach
the
(+)
terminal.
Disconnecting the battery
Following reconnection of the battery, switch on t
he ignition and wait 1 minute before starting to
p
ermit initialisation of the electronic systems.
H
owever, if problems remain following this
o
peration, contact a CITROËN dealer or a
q
ualified
w
orkshop.
Referring
to the corresponding section, you
m
ust
y
ourself
r
einitialise
(
depending
o
n
ve
rsion):
-
t
he remote control key,
-
...
Following reconnection of the battery
Reconnecting the (+) terminal
F Position the open clamp B of the cable on
the positive post (+) of the battery.
F
P
ress down on the clamp to position it
c
orrectly on the battery post.
F
L
ock the clamp by lowering the lever A.
In the event of a breakdown
Page 237 of 308
235
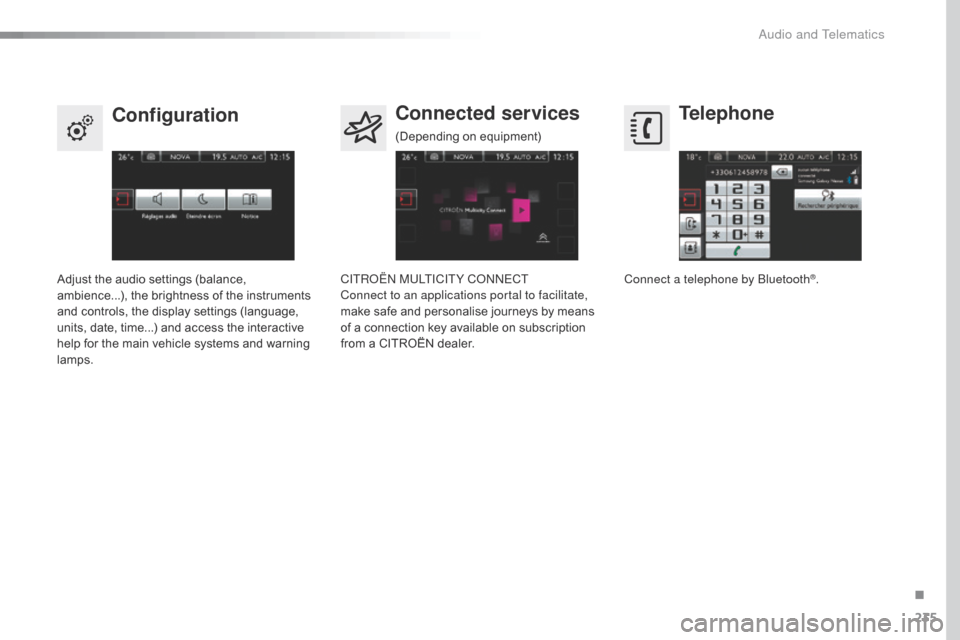
Telephone
Configuration Connected services
Connect a telephone by Bluetooth®.
Adjust
the
audio
settings
(balance,
a
mbience...),
the
brightness
of
the
instruments
a
nd
controls,
the
display
settings
(language,
u
nits,
date,
time...)
and
access
the
interactive
h
elp
for
the
main
vehicle
systems
and
warning
lam
ps. CITROËN MULTICITY CONNECT
Connect to an applications portal to facilitate,
make
safe
and
personalise
journeys
by
means
o
f
a
connection
key
available
on
subscription
f
rom
a
CITROËN
dealer.
(Depending
o
n
e
quipment)
.
Audio and Telematics
Page 245 of 308
243
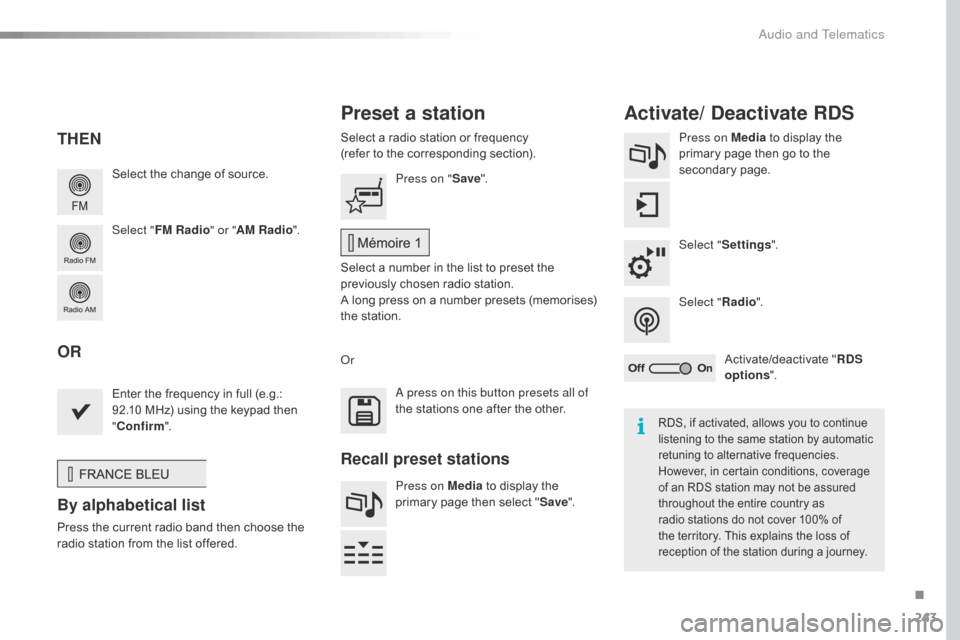
Select the change of source.
Sel ect " FM Radio " or "AM Radio ".Select
a radio station or frequency
(refer to the corresponding section).
Press on Media
to display the
p
rimary page then go to the s
econdary pag e.
Select " Settings ".
Select " Radio".
Activate/deactivate
" R
DS
options ".
Press on "
Save".
Select
a number in the list to preset the
p
reviously chosen radio station.
A
long press on a number presets (memorises)
t
he station.
Enter
the frequency in full (e.g.:
9
2.10 MHz) using the keypad then
"Co
nfirm ".
By alphabetical list
Press the current radio band then choose the r
adio station from the list offered. Or
Press on Media
to display the
p
rimary page then select "
Save ".
Preset a station Activate/ Deactivate RDS
THEN
OR
A press on this button presets all of
the
stations one after the other.
Recall preset stations
RDS, if activated, allows you to continue listening to the same station by automatic
r
etuning to alternative frequencies.
H
owever, in certain conditions, coverage
o
f an RDS station may not be assured
t
hroughout the entire country as
r
adio stations do not cover 100% of
t
he territory. This explains the loss of
r
eception of the station during a journey.
.
Audio and Telematics
Page 275 of 308
273
CITROËN Multicity Connect
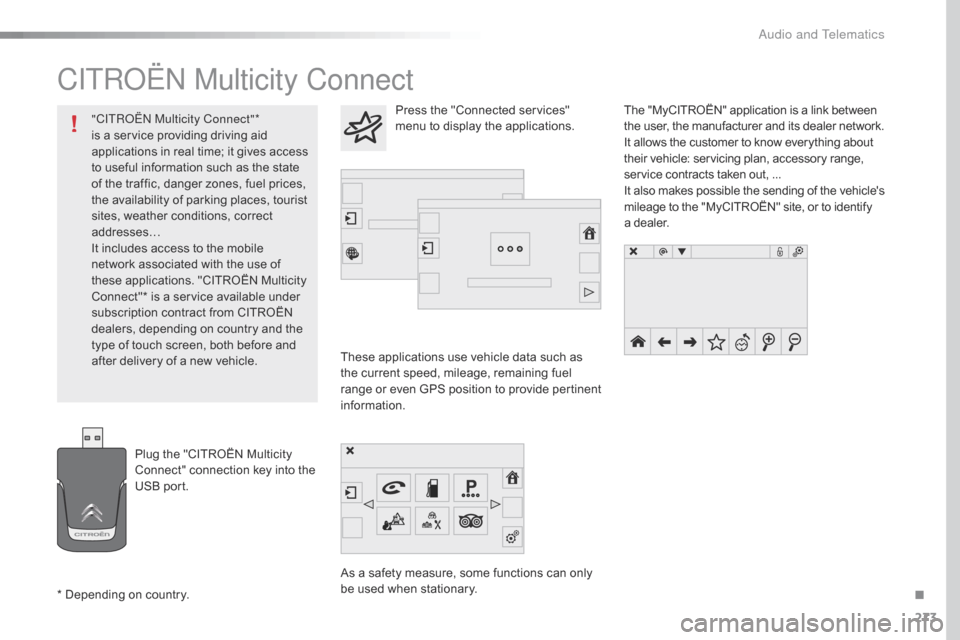
These applications use vehicle data such as the current speed, mileage, remaining fuel
r
ange
o
r
e
ven
G
PS
p
osition
t
o
p
rovide
p
ertinent
i
nformation.
As
a safety measure, some functions can only
b
e used when stationary. The
"MyCITROËN" application is a link between
t
he user, the manufacturer and its dealer network.
It allows the customer to know everything about
t
heir vehicle: servicing plan, accessory range,
s
ervice contracts taken out, ...
It
also
makes
possible
the
sending
of
the
vehicle's
m
ileage to the "MyCITROËN" site, or to identify
a
dealer.
Press the "Connected services"
m
enu to display the applications.
Plug
the
"CITROËN
Multicity
C
onnect"
connection
key
into
the
U
SB
port.
*
Depending
on
country.
"CITROËN Multicity Connect"*
is
a
service
providing
driving
aid
a
pplications
in
real
time;
it
gives
access
t
o
useful
information
such
as
the
state
o
f
the
traffic,
danger
zones,
fuel
prices,
t
he
availability
of
parking
places,
tourist
s
ites,
weather
conditions,
correct
a
ddresses…
It
includes
access
to
the
mobile
n
etwork
associated
with
the
use
of
t
hese
applications.
"CITROËN
Multicity
C
onnect"*
is
a
service
available
under
s
ubscription
contract
from
CITROËN
d
ealers,
depending
on
country
and
the
t
ype
of
touch
screen,
both
before
and
a
fter
delivery
of
a
new
vehicle.
.
Audio and Telematics
Page 293 of 308
291
Labels, identification .....................................2 25
Lamp, boot ............................... ...............69, 205
Lamps .............................................................. 80
Leather (care)
...............................
.................18 4
LEDs
- Light-emitting diodes
..................8
4, 205
Levels
and checks
..............................
...16 9 -173
Lighting,
c
ornering
...............................
...........86
Lighting
dimmer
..............................
................39
Lighting,
guide-me home
................................85
L
ighting,
i
nterior
.............................................. 68
Lo
ading
..............................
.............................10
Load
reduction mode
.................................... 16
1
Localised
A
ssistance/Emergency
C
all
.........2
26
Locating
your vehicle
...................................... 41
L
ocking from the inside
...................................45
L
ocking the doors
..............................
....... 45, 47
Low fuel level
..............................
..................15 4Oil
change
...............................
......................171
Oil
consumption
............................................17
1
Opening
the bonnet
......................................16
8
Opening
the boot
..............................
..............48
Opening
the doors
...............................
...........46
Paint
colour code
..........................................2
25
Panoramic
glass sunroof
................................69
P
arcel shelf, rear
....................................... 7
7, 78
Park
Assist
...............................
.....................146
Parking
brake
........................................ 1
25, 175
Parking
sensors, front
...................................14
4
Parking
sensors, rear....................................143
Plates,
id
entification...................................... 225
Player, Apple
® .............................. .................248
Player, USB
................................................... 24
6
Plip
..............................
.............................. 40, 41
Pre-heater,
D
iesel
...............................
............14
LN
O
P
Key with remote control ...................... 4 0, 41, 44
Kit, han ds-free ......................................2 78, 279
Kit,
temporary puncture repair
................ 7
7, 186 Navigation
...............................
......................
256
Number plate lamps
......................................
20
4
K
Jack ...............................................192,
194, 195
Jump starting .............................. ..................214
Maintenance
(
advice)
............................18
3,
18
4
Maintenance, routine
...................................... 10
M
ap reading lamps
.........................................68
M
arkings,
id
entification
.................................2
25
Mat
.......
............................................... 70, 71, 75
Memorising
a speed
.....................................14
2
Mirror, rear view
..............................................55
M
irrors, door....................................................54
Misfuel prevention
...............................
..........15 6
Mountings,
I
sofix
...............................
............114
J
M
Immobiliser, e lectronic .............................. 4 1, 44
Indicator, engine oil level ................................2
7
Indicator
lamps, operation
..............................13
I
ndicators,
d
irection
................................8
2, 200
Inflating
tyres
..............................
...................... 9
Inflating
tyres and accessories
(using
the kit)
..............................
................18 6
Instrument
panel
...............................
..............11
Interactive help
........................................3
3, 270
ISOFIX
...............
.................................... 114 -11 6
.
Alphabetical index