stop start CITROEN C4 CACTUS 2023 Owners Manual
[x] Cancel search | Manufacturer: CITROEN, Model Year: 2023, Model line: C4 CACTUS, Model: CITROEN C4 CACTUS 2023Pages: 196, PDF Size: 6.12 MB
Page 4 of 196
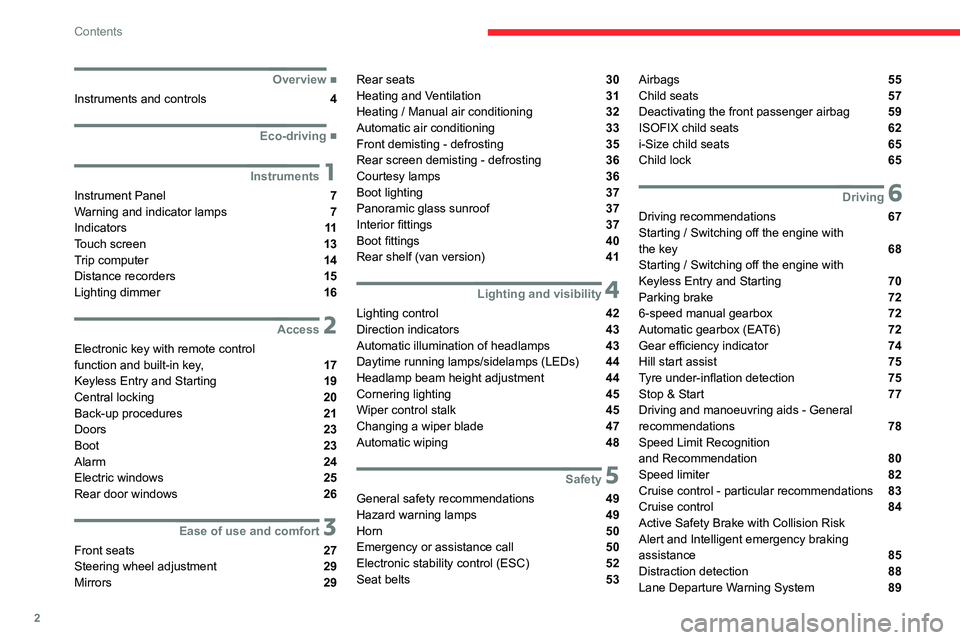
2
Contents
■
Overview
Instruments and controls 4
■
Eco-driving
1Instruments
Instrument Panel 7
Warning and indicator lamps 7
Indicators
11
Touch screen 13
Trip computer 14
Distance recorders 15
Lighting dimmer 16
2Access
Electronic key with remote control
function and built-in key, 17
Keyless Entry and Starting 19
Central locking 20
Back-up procedures 21
Doors 23
Boot 23
Alarm 24
Electric windows 25
Rear door windows 26
3Ease of use and comfort
Front seats 27
Steering wheel adjustment 29
Mirrors 29
Rear seats 30
Heating and Ventilation 31
Heating / Manual air conditioning 32
Automatic air conditioning 33
Front demisting - defrosting 35
Rear screen demisting - defrosting 36
Courtesy lamps 36
Boot lighting 37
Panoramic glass sunroof 37
Interior fittings
37
Boot fittings 40
Rear shelf (van version) 41
4Lighting and visibility
Lighting control 42
Direction indicators 43
Automatic illumination of headlamps 43
Daytime running lamps/sidelamps (LEDs) 44
Headlamp beam height adjustment 44
Cornering lighting 45
Wiper control stalk 45
Changing a wiper blade 47
Automatic wiping 48
5Safety
General safety recommendations 49
Hazard warning lamps 49
Horn 50
Emergency or assistance call 50
Electronic stability control (ESC) 52
Seat belts 53
Airbags 55
Child seats 57
Deactivating the front passenger airbag 59
ISOFIX child seats 62
i-Size child seats 65
Child lock 65
6Driving
Driving recommendations 67
Starting / Switching off the engine with
the key
68
Starting / Switching off the engine with
Keyless Entry and Starting
70
Parking brake 72
6-speed manual gearbox 72
Automatic gearbox (EAT6) 72
Gear efficiency indicator 74
Hill start assist 75
Tyre under-inflation detection 75
Stop & Start 77
Driving and manoeuvring aids - General
recommendations
78
Speed Limit Recognition
and Recommendation
80
Speed limiter 82
Cruise control - particular recommendations 83
Cruise control 84
Active Safety Brake with Collision Risk
Alert and Intelligent emergency braking
assistance
85
Distraction detection 88
Lane Departure Warning System 89
Page 7 of 196
5
Overview
2.Electric door mirrors adjustment
3. Electric child lock
4. Alarm activation indicator lamp
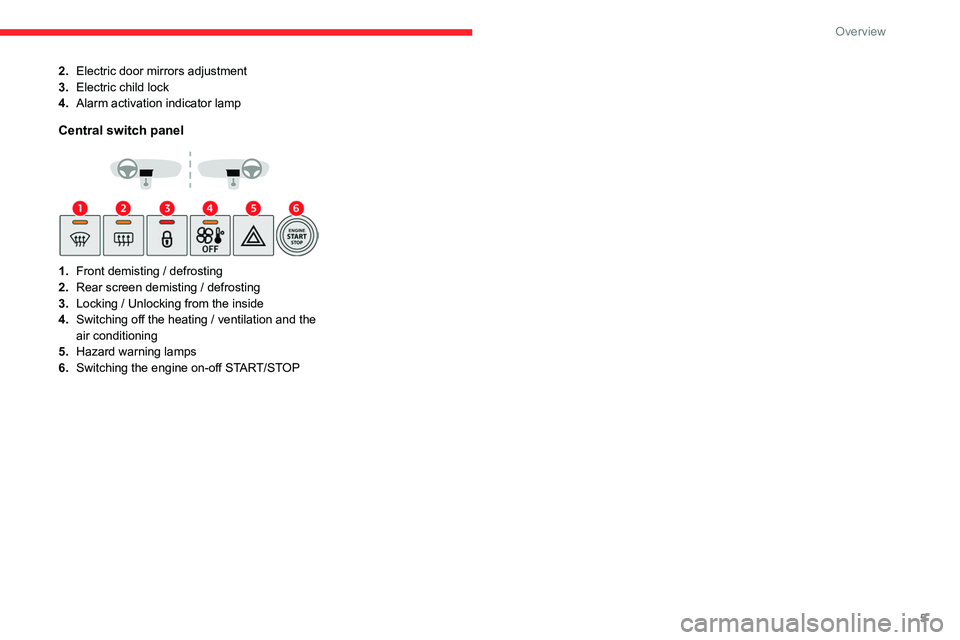
Central switch panel
1.Front demisting / defrosting
2. Rear screen demisting / defrosting
3. Locking / Unlocking from the inside
4. Switching off the heating / ventilation and the
air conditioning
5. Hazard warning lamps
6. Switching the engine on-off START/STOP
Page 9 of 196
7
Instruments
1Instrument panel
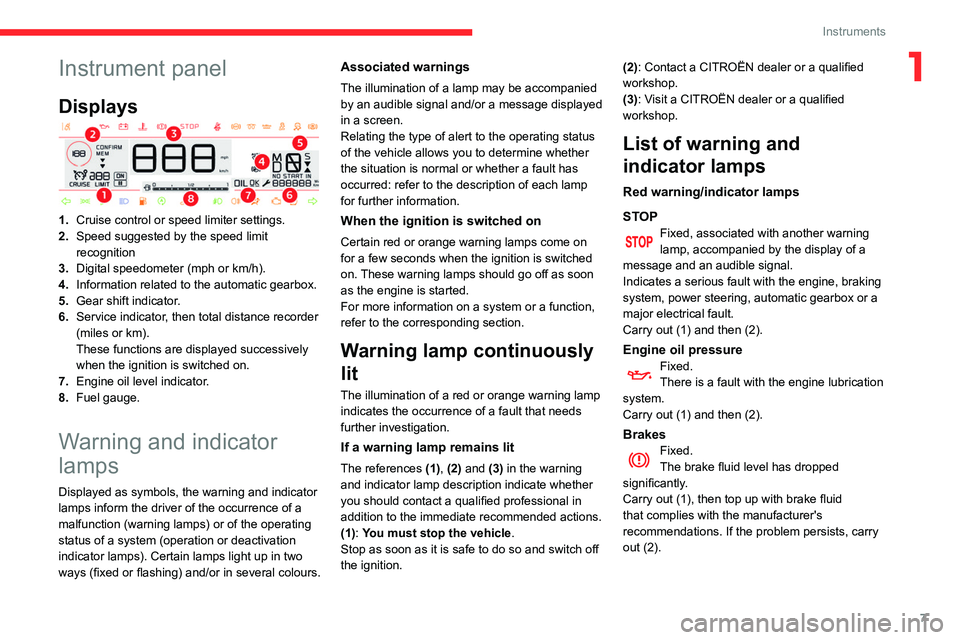
Displays
1.Cruise control or speed limiter settings.
2. Speed suggested by the speed limit
recognition
3. Digital speedometer (mph or km/h).
4. Information related to the automatic gearbox.
5. Gear shift indicator.
6. Service indicator, then total distance recorder
(miles or km).
These functions are displayed successively
when the ignition is switched on.
7. Engine oil level indicator.
8. Fuel gauge.
Warning and indicator
lamps
Displayed as symbols, the warning and indicator
lamps inform the driver of the occurrence of a
malfunction (warning lamps) or of the operating
status of a system (operation or deactivation
indicator lamps). Certain lamps light up in two
ways (fixed or flashing) and/or in several colours.
Associated warnings
The illumination of a lamp may be accompanied
by an audible signal and/or a message displayed
in a screen.
Relating the type of alert to the operating status
of the vehicle allows you to determine whether
the situation is normal or whether a fault has
occurred: refer to the description of each lamp
for further information.
When the ignition is switched on
Certain red or orange warning lamps come on
for a few seconds when the ignition is switched
on. These warning lamps should go off as soon
as the engine is started.
For more information on a system or a function,
refer to the corresponding section.
Warning lamp continuously
lit
The illumination of a red or orange warning lamp
indicates the occurrence of a fault that needs
further investigation.
If a warning lamp remains lit
The references (1), (2) and (3) in the warning
and indicator lamp description indicate whether
you should contact a qualified professional in
addition to the immediate recommended actions.
(1): You must stop the vehicle .
Stop as soon as it is safe to do so and switch off
the ignition. (2): Contact a CITROËN dealer or a qualified
workshop.
(3): Visit a CITROËN dealer or a qualified
workshop.
List of warning and
indicator lamps
Red warning/indicator lamps
STOP
Fixed, associated with another warning
lamp, accompanied by the display of a
message and an audible signal.
Indicates a serious fault with the engine, braking
system, power steering, automatic gearbox or a
major electrical fault.
Carry out (1) and then (2).
Engine oil pressureFixed.
There is a fault with the engine lubrication
system.
Carry out (1) and then (2).
BrakesFixed.
The brake fluid level has dropped
significantly.
Carry out (1), then top up with brake fluid
that complies with the manufacturer's
recommendations. If the problem persists, carry
out (2).
Page 12 of 196
10
Instruments
Indicators
Service indicator
The service indicator is displayed on the
instrument panel. Depending on the vehicle
version:
– the distance recorder display line indicates
the distance remaining before the next service
is due, or the distance travelled since it was due
preceded by the sign “-”.
– an alert message indicates the distance
remaining, as well as the period before the next
service is due or how long it is overdue.
Service spannerLights up temporarily when the ignition is
switched on.
Between 1,800 miles (3,000 km) and 600 miles
(1,000 km) remain before the next service is due.
Fixed, when the ignition is switched on.
The service is due in less than 600 miles
(1,000 km).
Have your vehicle serviced very soon.
Service spanner flashingFlashing then fixed, when the
ignition is switched on.
(With BlueHDi Diesel engines, combined with the
Service warning lamp.)
The servicing interval has been exceeded.
Have your vehicle serviced as soon as possible.
The distance indicated (in miles or kilometres) is calculated according to the
If the engine does not start, switch the ignition off
and then on, wait until the indicator lamp goes off
again, then start the engine.
Front passenger airbag (ON)Fixed.
The front passenger airbag is activated.
The control is in the "ON" position.
In this case, do NOT install a "rearward
facing" child seat on the front passenger seat
- Risk of serious injury!
Front passenger airbag(OFF)Fixed.
The front passenger airbag is deactivated.
The control is in the "OFF" position.
You can install a "rearward facing" child seat,
unless there is a fault with the airbags (airbag
warning lamp on).
AirbagsFixed.
One of the airbags or seat belt
pretensioners is faulty.
Carry out (3).
Low fuel levelFixed, accompanied by an audible signal
and a message.
Until sufficient fuel has been added, this
warning lamp reappears every time the ignition
is switched on, accompanied by an audible
warning and a message.
The audible warning and the message are
repeated with increasing frequency as the fuel level drops towards zero.
When it first comes on there remains
approximately 5 litres of fuel in the tank
(reserve).
Refuel without delay to avoid running out of fuel.
Never drive until completely empty, this could
damage the emissions and injection systems.
Lane departure alertFlashing, accompanied by an audible
signal.
A lane is being crossed, right side (or left side).
Turn the steering wheel in the opposite direction
to return to the correct trajectory.
Fixed.
The system has a fault.
Carry out (3).
Rear foglampFixed.
The rear foglamp is lit.
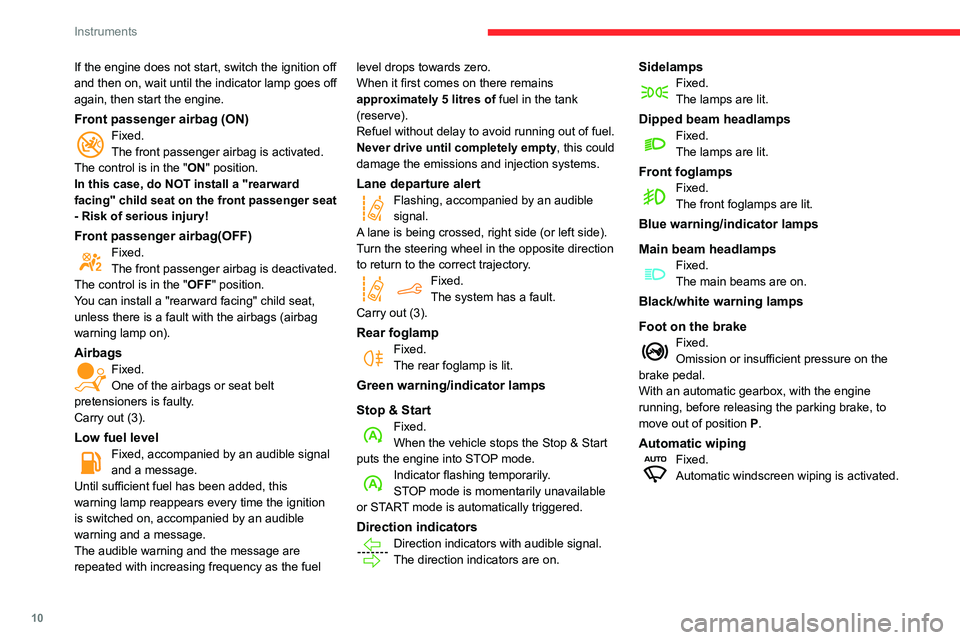
Green warning/indicator lamps
Stop & Start
Fixed.
When the vehicle stops the Stop & Start
puts the engine into STOP mode.
Indicator flashing temporarily.
STOP mode is momentarily unavailable
or START mode is automatically triggered.
Direction indicatorsDirection indicators with audible signal.
The direction indicators are on.
SidelampsFixed.
The lamps are lit.
Dipped beam headlampsFixed.
The lamps are lit.
Front foglampsFixed.
The front foglamps are lit.
Blue warning/indicator lamps
Main beam headlamps
Fixed.
The main beams are on.
Black/white warning lamps
Foot on the brake
Fixed.
Omission or insufficient pressure on the
brake pedal.
With an automatic gearbox, with the engine
running, before releasing the parking brake, to
move out of position P.
Automatic wipingFixed.
Automatic windscreen wiping is activated.
Page 16 of 196
14
Instruments
Display of information in the
touch screen
► In the “Applications ” menu, select the
"Vehicle application " tab, then "Trip
computer".
The trip computer information is displayed on
the page.
► Press one of the buttons to display the
desired tab.
For a temporary display in a specific
window, press the end of the wiper
control stalk for access to the information and
scroll through the different tabs.
– The current information tab with:
• the remaining range,
• current fuel consumption,
• time counter of the Stop & Start.
– The trip "1" tab with:
• the average speed,
• the average fuel consumption,
• the distance travelled, for the first trip.
– The trip "2" tab with:
• the average speed,
• the average fuel consumption,
• the distance travelled, for the second trip.
Trip reset
► When the desired trip is displayed, press the
Reset button or the end of the wiper control stalk
until zeros appear.
Trips “1“ and “2“ are independent.
Recommendations
This screen is of the capacitive type.
Use is possible in all temperatures.
Do not use pointed objects on the touch screen.
Do not touch the touch screen with wet hands.
Use a soft clean cloth to clean the touch screen.
Touch screen
Use the buttons on each side of the touch screen
to access the menus, then use the buttons that
appear on the touch screen.
Certain functions may be displayed over 1 or 2
pages.
To deactivate / activate a function, press OFF/
ON.
To modify a setting (lighting duration, etc.) or
access additional information, press the symbol
for the function.
After a few moments with no action on the secondary page, the primary page is
displayed automatically.
Use this button to confirm.
Use this button to return to the previous
page.
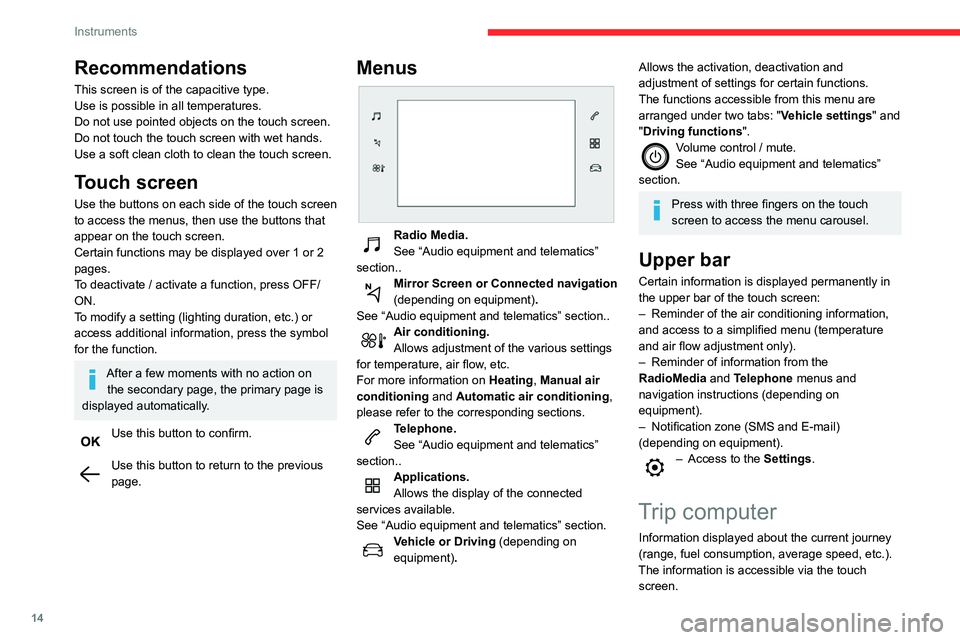
Menus
Radio Media.
See “Audio equipment and telematics”
section..
Mirror Screen or Connected navigation
(depending on equipment) .
See “Audio equipment and telematics” section..
Air conditioning.
Allows adjustment of the various settings
for temperature, air flow, etc.
For more information on Heating, Manual air
conditioning and Automatic air conditioning ,
please refer to the corresponding sections.
Telephone.
See “Audio equipment and telematics”
section..
Applications.
Allows the display of the connected
services available.
See “Audio equipment and telematics” section.
Vehicle or Driving (depending on
equipment) .
Allows the activation, deactivation and
adjustment of settings for certain functions.
The functions accessible from this menu are
arranged under two tabs: " Vehicle settings" and
"Driving functions ".
Volume control / mute.
See “Audio equipment and telematics”
section.
Press with three fingers on the touch
screen to access the menu carousel.
Upper bar
Certain information is displayed permanently in
the upper bar of the touch screen:
–
Reminder of the air conditioning information,
and access to a simplified menu (temperature
and air flow adjustment only).
–
Reminder of information from the
RadioMedia
and Telephone menus and
navigation instructions (depending on
equipment).
–
Notification zone (SMS and E-mail)
(depending on equipment).
– Access to the Settings.
Trip computer
Information displayed about the current journey
(range, fuel consumption, average speed, etc.).
The information is accessible via the touch screen.
Page 17 of 196
15
Instruments
1Display of information in the
touch screen
► In the “Applications ” menu, select the
"Vehicle application " tab, then "Trip
computer".
The trip computer information is displayed on
the page.
►
Press one of the buttons to display the
desired tab.
For a temporary display in a specific
window, press the end of the wiper
control stalk for access to the information and
scroll through the different tabs.
–
The current information tab with:
•
the remaining range,
•
current fuel consumption,
•
time counter of the Stop & Start.
–
The trip "
1" tab with:
•
the average speed,
•
the average fuel consumption,
•
the distance travelled, for the first trip.
–
The trip "
2" tab with:
•
the average speed,
•
the average fuel consumption,
•
the distance travelled, for the second trip.
Trip reset
► When the desired trip is displayed, press the
Reset button or the end of the wiper control stalk
until zeros appear
.
Trips “1“ and “2“ are independent.
For example, trip “1“ can be used for daily
figures, and trip “2“ for monthly figures.
A few definitions…
Range
(miles or km)The distance which can still be travelled with the fuel remaining in the tank (related
to the average fuel consumption over the last
few miles (kilometres) travelled).
This value may fluctuate if a change of driving style or terrain results in a
significant change in the current fuel
consumption.
Dashes are displayed when the range falls below
20 miles (30km).
After filling with at least 5 litres of fuel, the range
is recalculated and is displayed if it exceeds 60
miles (100 km).
If dashes instead of figures continue to
be displayed when driving, contact a
CITROËN dealer or a qualified workshop.
Current fuel consumption
(mpg or km/l or l/100 km)Calculated over the last few seconds.
This function is only displayed from 19 mph (30 km/h).
Average fuel consumption
(mpg or km/l or l/100 km)Calculated since the last trip computer
reset.
Average speed
(mph or km/h)Calculated since the last trip computer
reset.
Distance travelled
(miles or km)Calculated since the last trip computer
reset.
Time counter in Stop & Start
(minutes / seconds or hours / minutes)
A time counter calculates the time spent in STOP
mode during a journey.
It resets to zero every time the ignition is
switched on.
Distance recorders
The total and trip distances are displayed for
thirty seconds when the ignition is switched off,
when the driver's door is opened and when the
vehicle is locked or unlocked.
When travelling abroad, you may have to
change the units of distance: the display
Page 23 of 196
21
Access
2When locking/deadlocking from the
outside
When the vehicle is locked or deadlocked
from the outside, the indicator lamp flashes
and the button is inoperative.
►
After normal locking, pull one of the
interior door controls to unlock the vehicle.
►
After deadlocking, it is necessary to use
the remote control, Keyless Entry and Starting
or the integral key to unlock the vehicle.
Automatic (anti-intrusion security)
The doors and boot lock automatically when
driving (speed above 6 mph (10
km/h)).
To deactivate/reactivate this function (activated
by default):
►
Press the button until an audible signal is
heard and a message appears in the screen.
Transporting long or bulky objects
Press the central locking control to drive
with the boot open and the doors locked.
Otherwise, every time the speed of the
vehicle exceeds 6 mph (10
km/h), the locks
will rebound and an alert will appear.
Pressing the central locking button unlocks
the vehicle.
Above 6 mph (10
km/h), this unlocking is
temporary.
Back-up procedures
Lost keys, remote control,
electronic key
Visit a CITROËN dealer with the vehicle's
registration certificate, your personal
identification documents and if possible, the label
bearing the key code.
The CITROËN dealer will be able to retrieve the
key code and the transponder code required to
order a new key
Total unlocking/locking of
the vehicle with the key
Use these procedures in the following cases:
– remote control cell battery flat,
–
remote control fault,
–
vehicle in an area subject to strong
electromagnetic interference.
In the first case, you can also replace the remote
control cell battery
.
In the second case, you can also reinitialise the
remote control.
Refer to the corresponding sections.
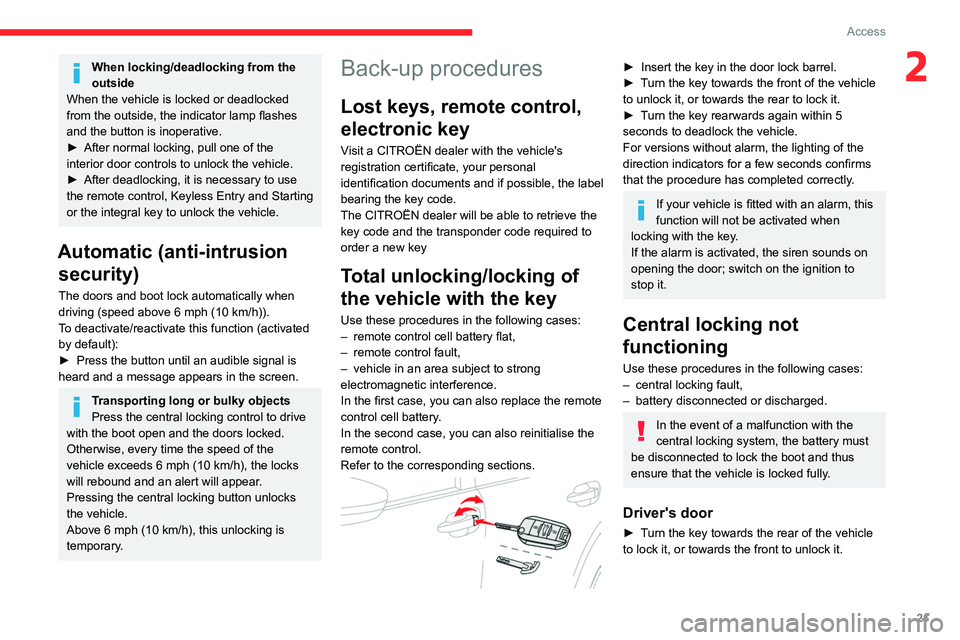
► Insert the key in the door lock barrel.
► T urn the key towards the front of the vehicle
to unlock it, or towards the rear to lock it.
►
T
urn the key rearwards again within 5
seconds to deadlock the vehicle.
For versions without alarm, the lighting of the
direction indicators for a few seconds confirms
that the procedure has completed correctly.
If your vehicle is fitted with an alarm, this
function will not be activated when
locking with the key.
If the alarm is activated, the siren sounds on
opening the door; switch on the ignition to
stop it.
Central locking not
functioning
Use these procedures in the following cases:
– central locking fault,
–
battery disconnected or discharged.
In the event of a malfunction with the
central locking system, the battery must
be disconnected to lock the boot and thus
ensure that the vehicle is locked fully.
Driver's door
► Turn the key towards the rear of the vehicle
to lock it, or towards the front to unlock it.
Page 24 of 196
22
Access
► Immediately press the closed padlock button
for a few seconds.
► Switch off the ignition and remove the key
from the switch.
The remote control is now fully operational
again.
With Keyless Entry and Starting
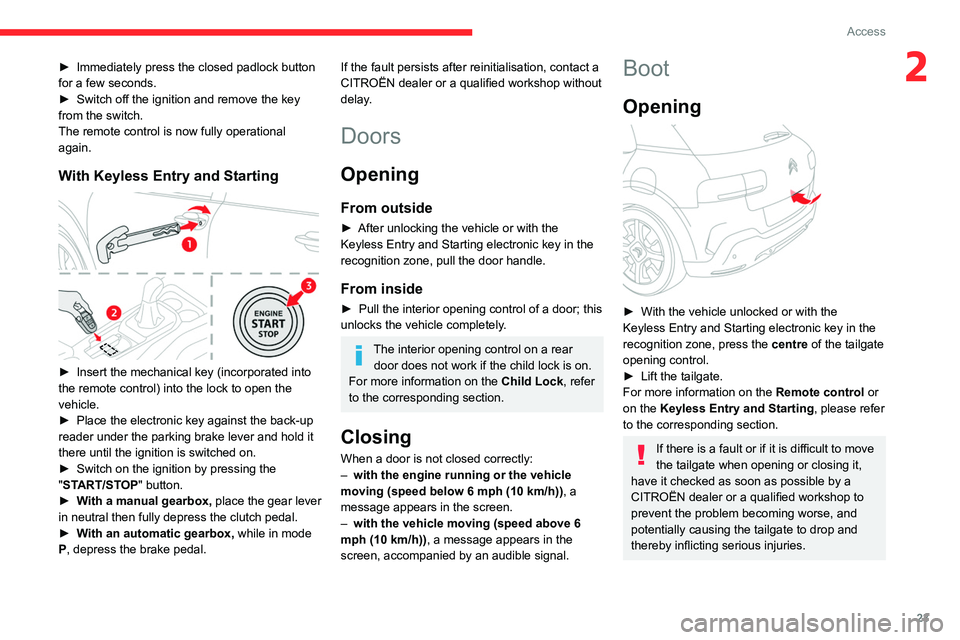
► Insert the mechanical key (incorporated into
the remote control) into the lock to open the
vehicle.
► Place the electronic key against the back-up
reader under the parking brake lever and hold it
there until the ignition is switched on.
► Switch on the ignition by pressing the
"START/STOP" button.
► With a manual gearbox, place the gear lever
in neutral then fully depress the clutch pedal.
► With an automatic gearbox, while in mode
P, depress the brake pedal.
Passenger doors
Unlocking
► Pull the interior door opening handle.
Application
►
Open the door
.
►
On the rear doors, check that the child lock
is not activated. Refer to the corresponding
section.
► Remove the black cap on the edge of the
door , using the key.
►
Without forcing, insert the key into the
aperture; then, without turning it, move the latch
sideways towards the inside of the door
.
►
Remove the key and refit the black cap.
►
Close the doors and check from the outside
that the vehicle is locked.
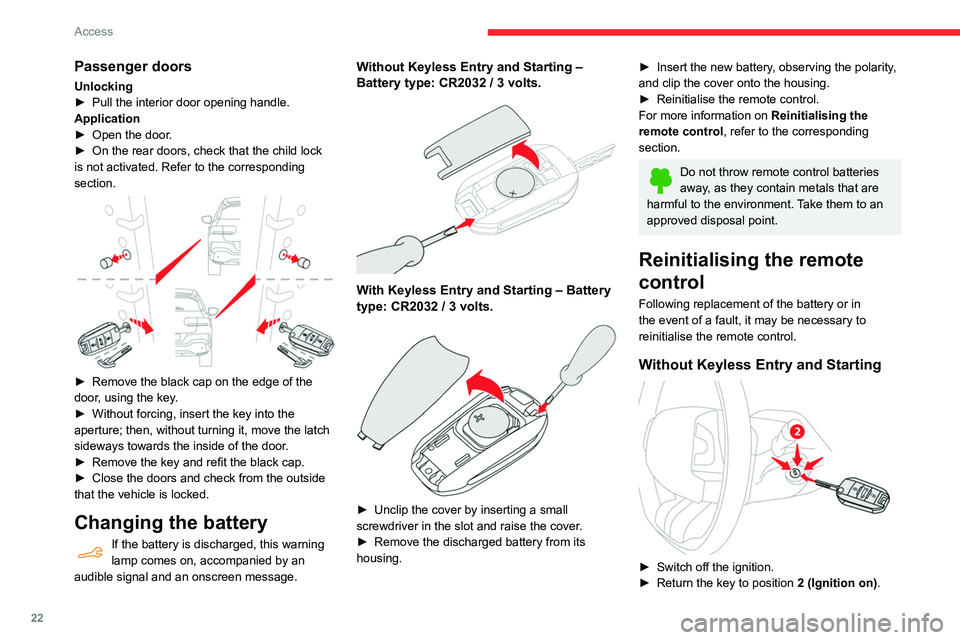
Changing the battery
If the battery is discharged, this warning
lamp comes on, accompanied by an
audible signal and an onscreen message.
Without Keyless Entry and Starting ‒
Battery type: CR2032 / 3 volts.
With Keyless Entry and Starting ‒ Battery
type: CR2032 / 3 volts.
► Unclip the cover by inserting a small
screwdriver in the slot and raise the cover .
►
Remove the discharged battery from its
housing.
► Insert the new battery , observing the polarity,
and clip the cover onto the housing.
►
Reinitialise the remote control.
For more information on Reinitialising the
remote control
, refer to the corresponding
section.
Do not throw remote control batteries
away, as they contain metals that are
harmful to the environment. Take them to an
approved disposal point.
Reinitialising the remote
control
Following replacement of the battery or in
the event of a fault, it may be necessary to
reinitialise the remote control.
Without Keyless Entry and Starting
► Switch off the ignition.
► Return the key to position 2 (Ignition on).
Page 25 of 196
23
Access
2► Immediately press the closed padlock button
for a few seconds.
►
Switch off the ignition and remove the key
from the switch.
The remote control is now fully operational
again.
With Keyless Entry and Starting
► Insert the mechanical key (incorporated into
the remote control) into the lock to open the
vehicle.
►
Place the electronic key against the back-up
reader under the parking brake lever and hold it
there until the ignition is switched on.
►
Switch on the ignition by pressing the
"
START/STOP" button.
►
W
ith a manual gearbox, place the gear lever
in neutral then fully depress the clutch pedal.
►
W
ith an automatic gearbox, while in mode
P, depress the brake pedal.
If the fault persists after reinitialisation, contact a
CITROËN dealer or a qualified workshop without
delay.
Doors
Opening
From outside
► After unlocking the vehicle or with the
Keyless Entry and Starting electronic key in the
recognition zone, pull the door handle.
From inside
► Pull the interior opening control of a door; this
unlocks the vehicle completely .
The interior opening control on a rear door does not work if the child lock is on.
For more information on the Child Lock, refer
to the corresponding section.
Closing
When a door is not closed correctly:
– with the engine running or the vehicle
moving (speed below 6 mph (10 km/h)) , a
message appears in the screen.
–
with the vehicle moving (speed above 6
mph (10 km/h))
, a message appears in the
screen, accompanied by an audible signal.
Boot
Opening
► With the vehicle unlocked or with the
Keyless Entry and Starting electronic key in the
recognition zone, press the centre
of the tailgate
opening control.
►
Lift the tailgate.
For more information on the Remote control
or
on the Keyless Entry and Starting, please refer
to the corresponding section.
If there is a fault or if it is difficult to move
the tailgate when opening or closing it,
have it checked as soon as possible by a
CITROËN dealer or a qualified workshop to
prevent the problem becoming worse, and
potentially causing the tailgate to drop and
thereby inflicting serious injuries.
Page 27 of 196
25
Access
2If an opening (door or boot) is not
properly closed, the vehicle is not locked,
but the exterior perimeter monitoring will be
activated after 45
seconds.
Deactivation
► Press the remote control unlocking
button.
or
►
Unlock the vehicle with the Keyless Entry and
Starting system.
The monitoring system is deactivated: the
indicator lamp in the button goes off and the
direction indicators flash for about 2 seconds.
If the vehicle automatically locks itself
again (as happens if a door or the boot is
not opened within 30 seconds of unlocking),
the monitoring system is automatically
reactivated.
Triggering of the alarm
This is indicated by sounding of the siren
and flashing of the direction indicators for 30
seconds.
Depending on the country of sale, certain
monitoring functions remain active until the alarm
has been triggered eleven times consecutively.
When the vehicle is unlocked using the remote
control or the Keyless Entry and Starting system,
rapid flashing of the red indicator lamp in the
button informs you that the alarm was triggered during your absence. When the ignition is
switched on, this flashing stops.
Failure of the remote control
To deactivate the monitoring functions:
►
Unlock the vehicle using the key in the
driver's door lock.
►
Open the door; the alarm is triggered.
►
Switch on the ignition; this stops the alarm.
The indicator lamp in the button goes off.
Locking the vehicle without
activating the alarm
► Lock or deadlock the vehicle using the key
(integral to the remote control) in the driver's
door lock.
Malfunction
When the ignition is switched on, fixed
illumination of the red indicator lamp in the
button indicates a malfunction of the system.
Have it checked by a CITROËN dealer or a
qualified workshop.
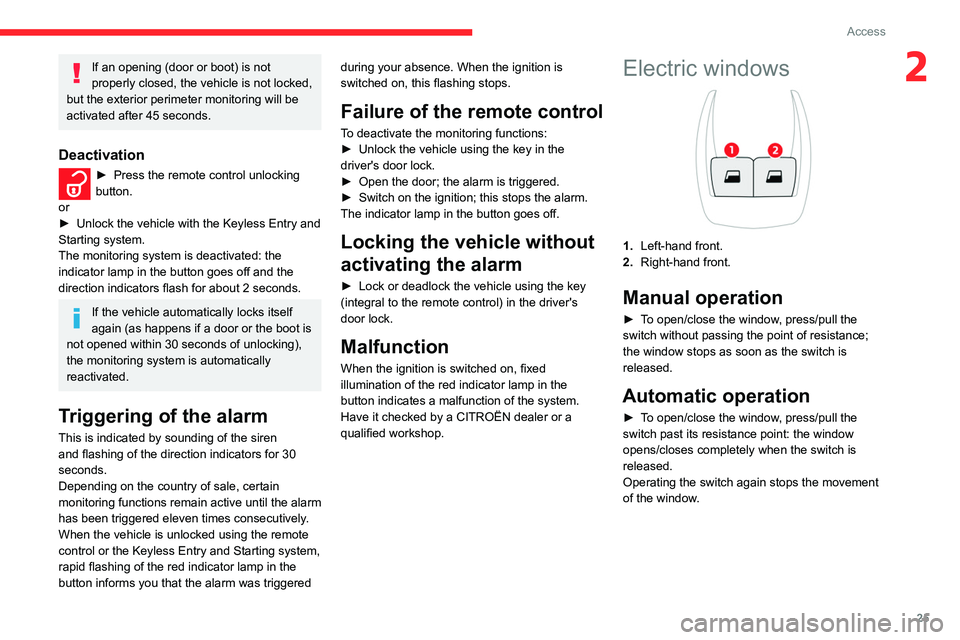
Electric windows
1. Left-hand front.
2. Right-hand front.
Manual operation
► To open/close the window, press/pull the
switch without passing the point of resistance;
the window stops as soon as the switch is
released.
Automatic operation
► To open/close the window, press/pull the
switch past its resistance point: the window
opens/closes completely when the switch is
released.
Operating the switch again stops the movement
of the window.