boot Citroen C4 CACTUS RHD 2015 1.G User Guide
[x] Cancel search | Manufacturer: CITROEN, Model Year: 2015, Model line: C4 CACTUS RHD, Model: Citroen C4 CACTUS RHD 2015 1.GPages: 326, PDF Size: 8.56 MB
Page 60 of 326

58
In order for these systems to be fully effective, follow the operation and maintenance guidelines belo w:
F
T
o obtain an even air distribution, take care not to obstruct the exterior air intake grilles
l
ocated at the base of the windscreen, the nozzles, the vents and the air outlets, as well
a
s the air extractor located in the boot.
F
D
o not cover the sunshine sensor, located on the dashboard; this is used for regulation
o
f the air conditioning system.
F
O
perate the air conditioning system for at least 5 to 10 minutes, once or twice a month
t
o keep it in per fect working order.
F
E
nsure that the passenger compartment filter is in good condition and have the filter
e
lements replaced regularly.
W
e recommend the use of a combined passenger compartment filter. Thanks to its
s
pecial active additive, it contributes to the purification of the air breathed by the
o
ccupants and the cleanliness of the passenger compartment (reduction of allergic
s
ymptoms, bad odours and greasy deposits).
F
T
o ensure correct operation of the air conditioning system, you are also advised to have
i
t checked regularly as recommended in the maintenance and warranty guide.
F
I
f the system does not produce cold air, switch it off and contact a CITROËN dealer or a
q
ualified
w
orkshop.
Recommendations for ventilation and air conditioning
If after an extended stop in sunshine, the i nterior t emperature i s v ery h igh, f irst
v
entilate the passenger compartment for
a
few moments.
Put
the air flow control at a setting high
e
nough to quickly change the air in the
p
assenger
c
ompartment.
The
air conditioning system does not
c
ontain chlorine and does not present
a
ny danger to the ozone layer.
The
condensation created by the air
c
onditioning results in a discharge
o
f water under the vehicle which is
p
er fectly normal.
When
towing
the
maximum
load
on
a
steep
gradient
in
high
temperatures,
switching
off
the
a
ir
conditioning
increases
the
available
engine
power
and
so
improves
the
towing
ability.
Stop & Start
The heating and air conditioning s ystems only work when the engine
i
s running. To maintain a comfortable
t
emperature in the passenger
c
ompartment, you can temporarily
d
eactivate the Stop & Start system (see
t
he corresponding section).
Comfort
Page 77 of 326
75
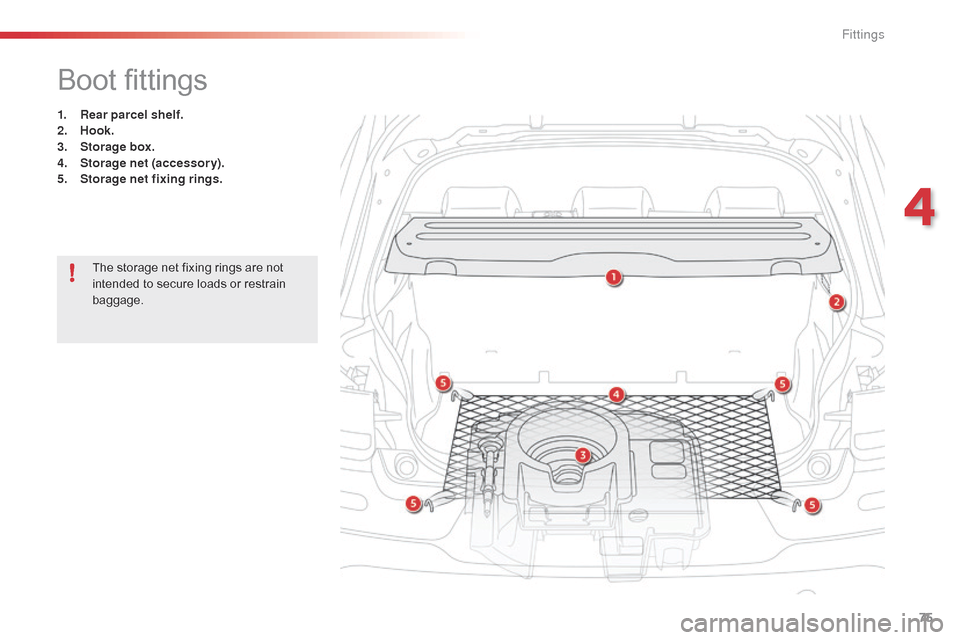
Boot fittings
1. Rear parcel shelf.
2. Hook.
3.
S
torage box.
4.
S
torage net (accessory).
5.
S
torage net fixing rings.
The
storage net fixing rings are not
i
ntended to secure loads or restrain
b
aggage.
4
Fittings
Page 78 of 326
76
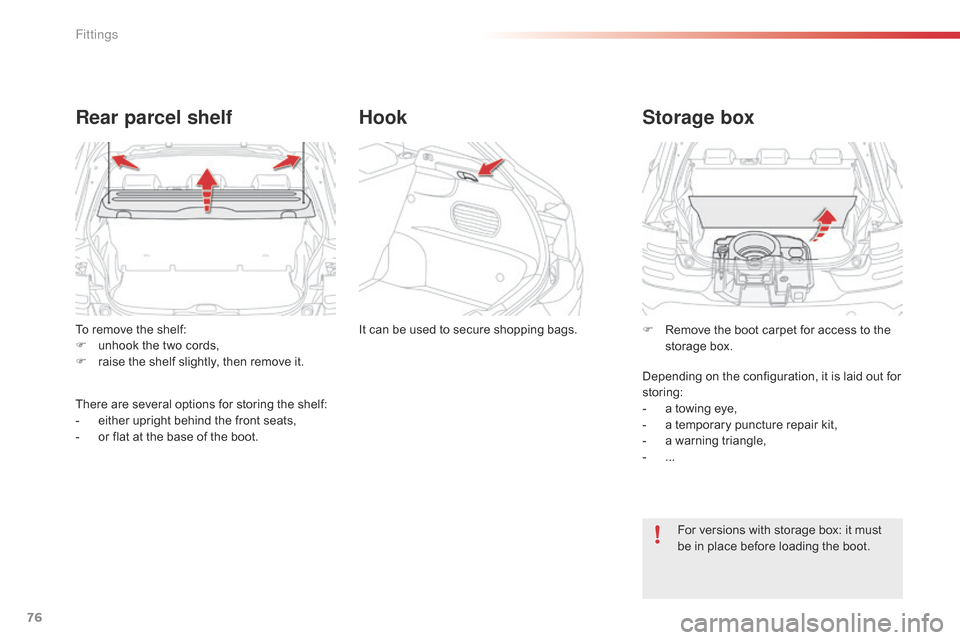
To remove the shelf:
F u nhook the two cords,
F
r
aise the shelf slightly, then remove it.
Rear parcel shelf
There are several options for storing the shelf:
- e ither upright behind the front seats,
-
o
r flat at the base of the boot.It
can be used to secure shopping bags.
Hook
Storage box
For versions with storage box: it must b
e in place before loading the boot.
F
R
emove the boot carpet for access to the
s
torage box.
Depending on the configuration, it is laid out for
s
toring:
-
a
towing eye,
-
a
temporary puncture repair kit,
-
a
warning triangle,
-
...
Fittings
Page 79 of 326
77
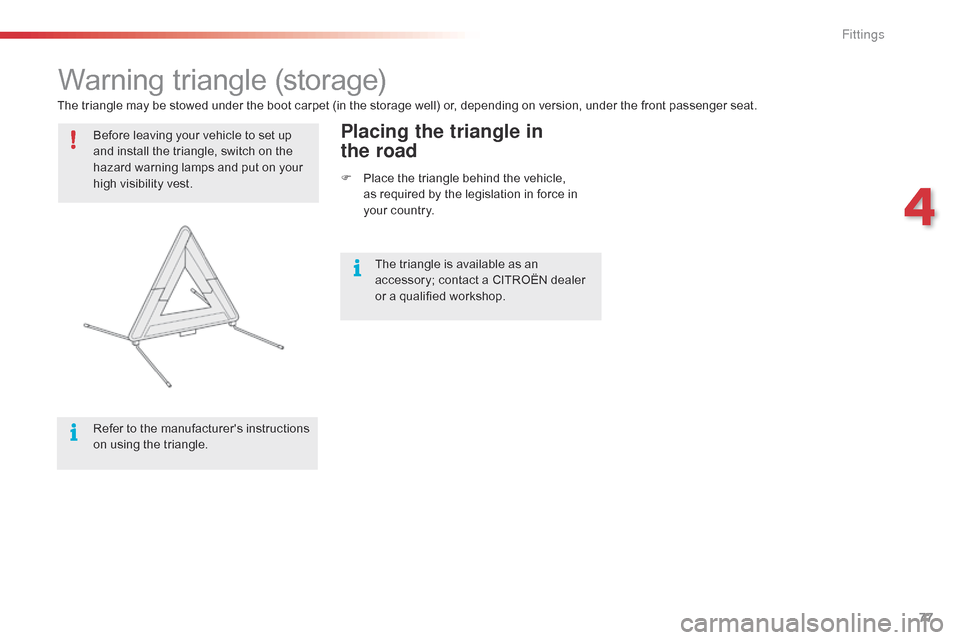
Warning triangle (storage)
Before leaving your vehicle to set up a
nd install the triangle, switch on the
h
azard warning lamps and put on your
h
igh visibility vest.
Refer
to the manufacturer's instructions
o
n using the triangle.Placing the triangle in
the road
F Place the triangle behind the vehicle, a
s required by the legislation in force in
y
our country.
The
triangle
may
be
stowed
under
the
boot
carpet
(in the storage well) or, depending on version, under the front passenger seat.
The triangle is available as an
a
ccessory; contact a CITROËN dealer
o
r a qualified workshop.
4
Fittings
Page 117 of 326
115
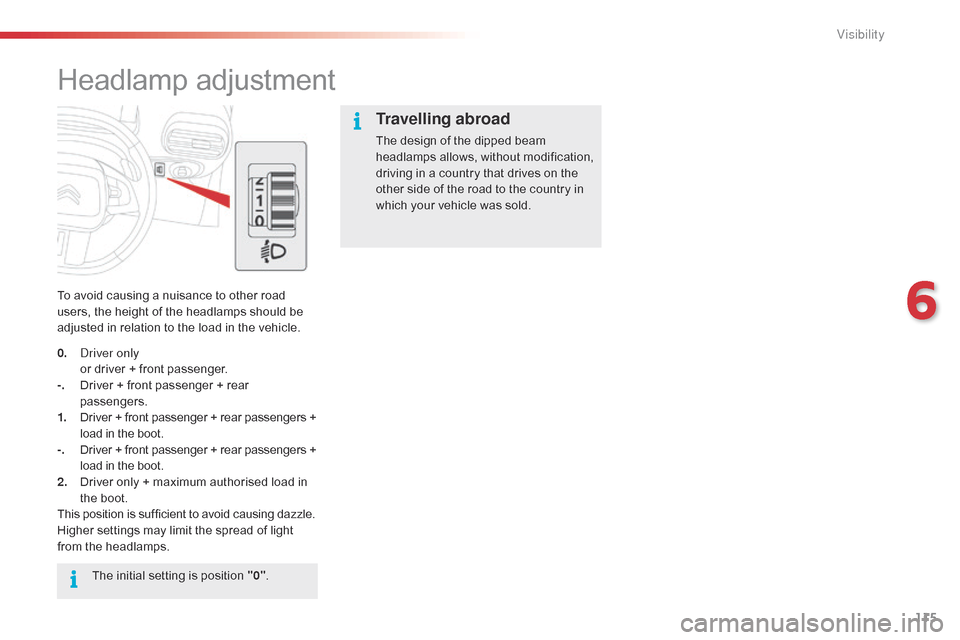
Headlamp adjustment
To avoid causing a nuisance to other road u
sers, the height of the headlamps should be
a
djusted in relation to the load in the vehicle.
The
initial setting is position "0".
Travelling abroad
The design of the dipped beam h
eadlamps allows, without modification,
d
riving in a country that drives on the
o
ther side of the road to the country in
w
hich your vehicle was sold.
0.
d
r
iver only
o
r
driver
+
front
passenger.
-.
D
river
+
front
passenger
+
rear
p
assengers.
1.
D
river
+
front
passenger
+
rear
passengers
+
l
oad
in
the
boot.
-.
D
river
+
front
passenger
+
rear
passengers
+
l
oad
in
the
boot.
2.
D
river
only
+
maximum
authorised
load
in
t
he
boot.
This
position
is
sufficient
to
avoid
causing
dazzle.
Higher
settings
may
limit
the
spread
of
light
f
rom
the
headlamps.
6
Visibility
Page 120 of 326
118
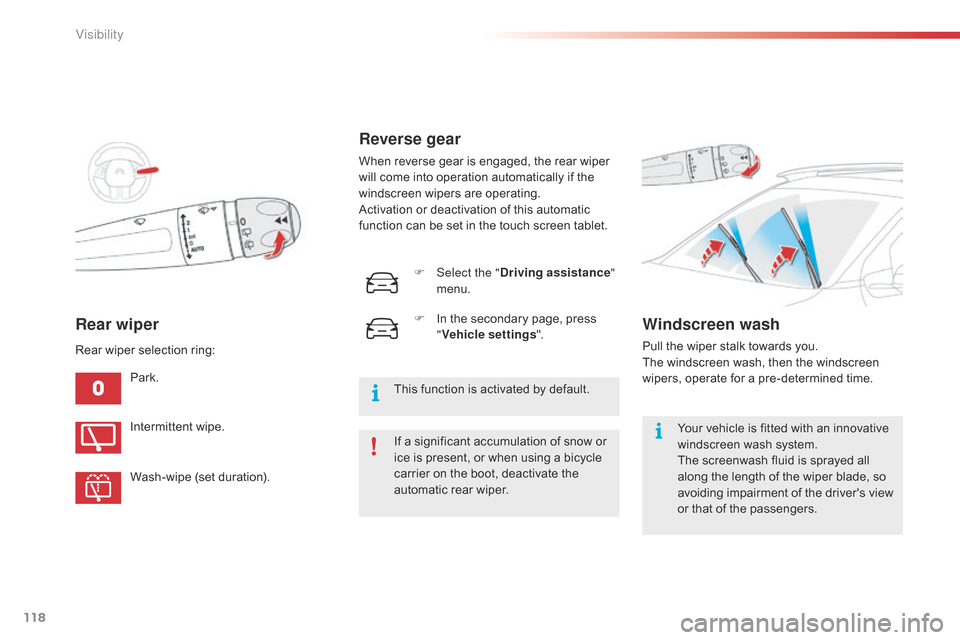
Rear wiper
Park.If a significant accumulation of snow or
i
ce is present, or when using a bicycle
c
arrier on the boot, deactivate the
a
utomatic rear wiper.
Intermittent
wipe.
Wash-wipe
(set duration).
Rear
wiper selection ring:
Reverse gear
When reverse gear is engaged, the rear wiper w
ill come into operation automatically if the
w
indscreen wipers are operating.
Activation
or deactivation of this automatic
f
unction can be set in the touch screen tablet.
Windscreen wash
Pull the wiper stalk towards you. The windscreen wash, then the windscreen
w
ipers, operate for a pre-determined time.
Your
vehicle is fitted with an innovative
w
indscreen wash system.
The
screenwash fluid is sprayed all
a
long the length of the wiper blade, so
a
voiding impairment of the driver's view
o
r that of the passengers.
F
Sel
ect the "
Driving assistance "
menu.
F
I
n
the
secondary
page,
press
"
V
ehicle settings
".
This
function
is
activated
by
default.
Visibility
Page 125 of 326
123
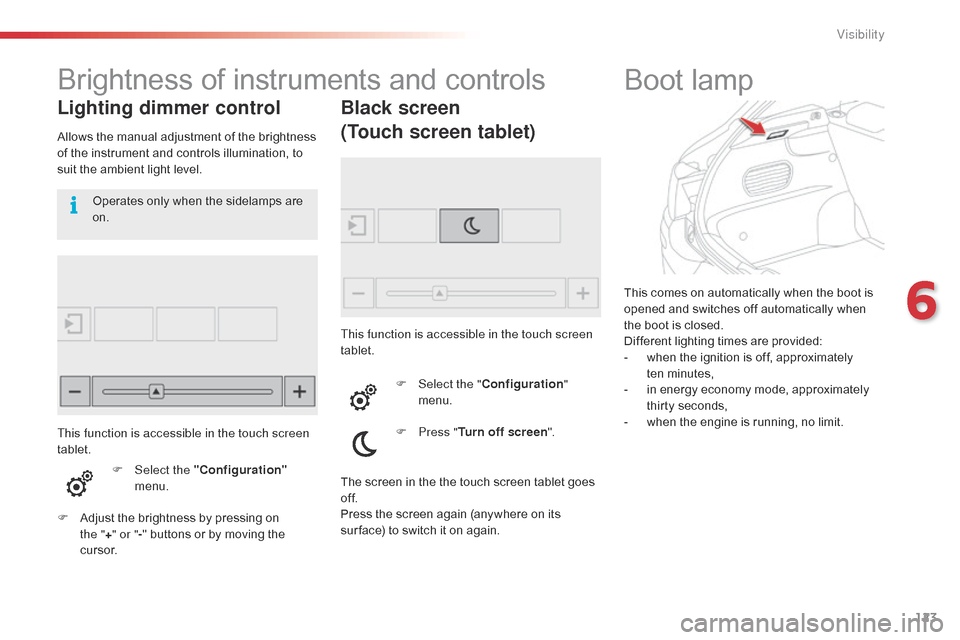
This comes on automatically when the boot is opened and switches off automatically when
t
he boot is closed.
Different
lighting times are provided:
-
w
hen the ignition is off, approximately
t
en minutes,
-
i
n energy economy mode, approximately
t
hirty seconds,
-
w
hen the engine is running, no limit.
Boot lamp
Brightness
of
instruments
and
controls
Lighting dimmer control
Allows the manual adjustment of the brightness o
f the instrument and controls illumination, to
s
uit the ambient light level.
F
Sel
ect the "Configuration"
menu.
F
A
djust the brightness by pressing on
t
he "+ " or " -"
buttons or by moving the
c
u r s o r.Operates
only when the sidelamps are
o
n.
Black screen
(Touch screen tablet)
This function is accessible in the touch screen
tablet. F
Sel
ect the "Configuration "
menu.
F
P
ress "Turn off screen ".
This function is accessible in the touch screen
tablet.
The
screen in the the touch screen tablet goes
o
f f.
Press
the screen again (anywhere on its
s
ur face) to switch it on again.
6
Visibility
Page 163 of 326
161
AdBlue® additive and SCR system
f
or
BlueHDi Diesel engines
To assure respect for the environment and c
onformity with the new Euro 6 emissions
s
tandard, without adversely affecting the
p
er formance or fuel consumption of Diesel
e
ngines, CITROËN has taken the decision to
e
quip its vehicles with an effective system that
a
ssociates SCR (Selective Catalytic Reduction)
w
ith a particle filter (FAP) for the treatment of
e
xhaust gases.
Presentation of the SCR system
Using an additive called AdBlue® containing urea, a
catalytic
converter
turns
up
to
85% of nitrous o
xides
(NOx)
into
nitrogen
and
water, which are
h
armless
to
health
and
the
environment. Once
the AdBlue
® tank is empty, a s
ystem
required
by regulations
p
revents
starting
of the engine.
If the SCR is faulty, the level of
emissions
from
your vehicle will no
l
onger
meet
the
Euro 6 standard: you
v
ehicle
becomes
polluting.
In
the
event
of
a
confirmed fault
w
ith
the
SCR
system, you must go
t
o
a
CITROËN
dealer or a qualified
w
orkshop
as
soon as possible: after
a
running
distance of 650 miles
(
1 100
km),
a
system will be triggered
a
utomatically
to
prevent engine starting.
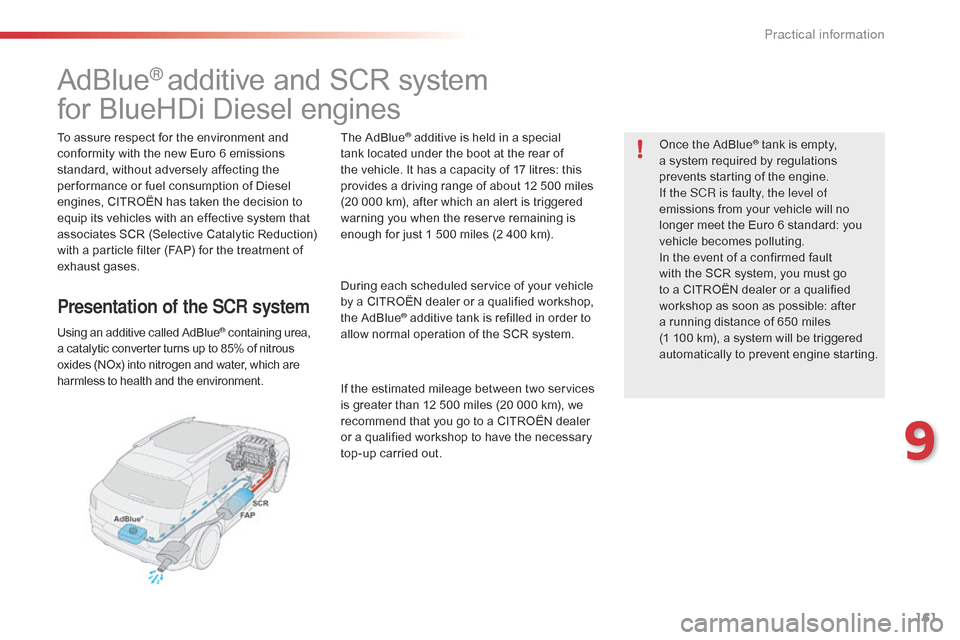
The
AdBlue® additive is held in a special t
ank
located
under the boot at the rear of
t
he
vehicle.
It has a capacity of 17 litres: this
p
rovides
a
driving range of about 12 500 miles
(
20
000
km),
after which an alert is triggered
w
arning
you
when the reserve remaining is
e
nough
for
just 1 500 miles (2 400 km).
During
each
scheduled service of your vehicle
b
y
a
CITROËN dealer or a qualified workshop,
t
he
AdBlue
® additive tank is refilled in order to a
llow
normal operation of the SCR system.
If
the
estimated mileage between two services
i
s
greater
than 12 500 miles (20 000 km), we
r
ecommend
that you go to a CITROËN dealer
o
r
a
qualified workshop to have the necessary
t
op-up
carried out.
9
Practical information
Page 170 of 326
168
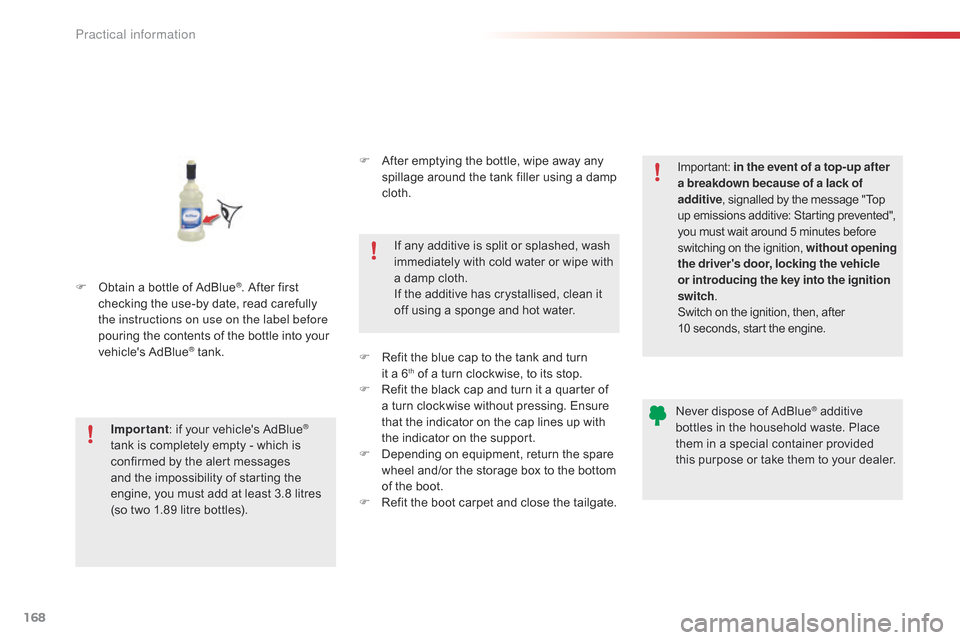
F Obtain a bottle of AdBlue®. After first c
hecking
the
use-by
date,
read carefully
t
he instructions on use on the label before
pouring
the
contents
of
the bottle into your
v
ehicle's
Ad
Blue
® tank.
I
mportant :
if
your vehicle's AdBlue
®
tank
is
completely
empty
-
which
is
c
onfirmed
by
the
alert
messages
a
nd
the
impossibility
of
starting
the
e
ngine,
you
must
add
at
least
3.8
litres
(
so two 1.89
litre
bottles). If
any additive is split or splashed, wash
i
mmediately
w
ith
c
old
w
ater
o
r
w
ipe
w
ith
a
damp cloth.
If the additive has crystallised, clean it
o
ff using a sponge and hot water.Important:
i
n the event of a top-up after
a breakdown because of a lack of
additive , signalled by the message "Top
u
p emissions additive: Starting prevented",
y
ou must wait around 5 minutes before
s
witching
o
n
t
he
i
gnition,
w
ithout opening
the driver's door, locking the vehicle
or introducing the key into the ignition
switch .
Switch on the ignition, then, after
1
0 seconds, start the engine.
Never dispose of AdBlue
® additive b
ottles
in
the
household
waste. Place
t
hem
in
a
special
container provided
t
his
p
urpose
o
r
t
ake
t
hem
t
o
y
our
d
ealer.
F
A
fter
emptying
the
bottle,
wipe
away
any
s
pillage
around
the
tank
filler
using
a
damp
c
loth.
F
R
efit
the
blue
cap
to
the
tank
and
turn
it
a
6
th of a turn clockwise, to its stop.
F
R
efit
the black cap and turn it a quarter of
a
turn
clockwise without pressing. Ensure
t
hat
the indicator on the cap lines up with
t
he
indicator on the support.
F
D
epending on equipment, return the spare
w
heel
and/or the storage box to the bottom
o
f
the
boot.
F
R
efit
the boot carpet and close the tailgate.
Practical information
Page 178 of 326
176
Changing a wheel
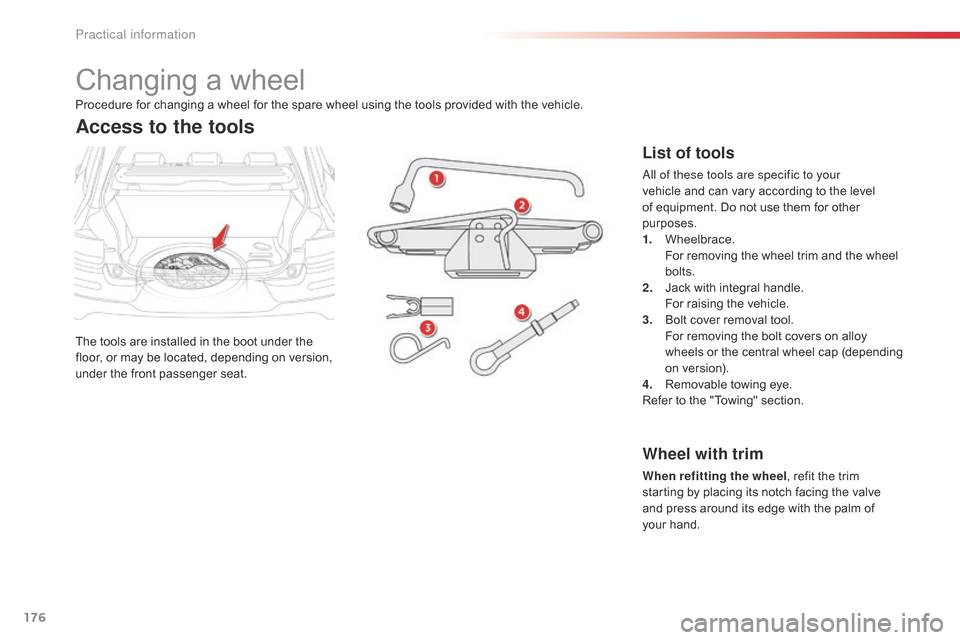
The tools are installed in the boot under the floor, or may be located, depending on version,
u
nder
t
he
f
ront
p
assenger
sea
t.
Access to the tools
List of tools
all of these tools are specific to your
vehicle and can vary according to the level
o
f equipment. Do not use them for other
p
urposes.
1.
W
heelbrace.
F
or removing the wheel trim and the wheel
bol
ts.
2.
J
ack with integral handle.
F
or raising the vehicle.
3.
B
olt cover removal tool.
F
or removing the bolt covers on alloy
w
heels
o
r
t
he
c
entral
w
heel
c
ap
(
depending
o
n version).
4.
R
emovable towing eye.
Refer
to the "Towing" section.
Procedure
for
changing
a
wheel
for
the
spare
wheel
using
the
tools
provided
with
the
vehicle.
Wheel with trim
When refitting the wheel
, refit the trim s
tarting by placing its notch facing the valve
a
nd press around its edge with the palm of
y
our hand.
Practical information