Citroen C4 CACTUS RHD 2015 1.G Manual PDF
Manufacturer: CITROEN, Model Year: 2015, Model line: C4 CACTUS RHD, Model: Citroen C4 CACTUS RHD 2015 1.GPages: 326, PDF Size: 8.56 MB
Page 71 of 326
69
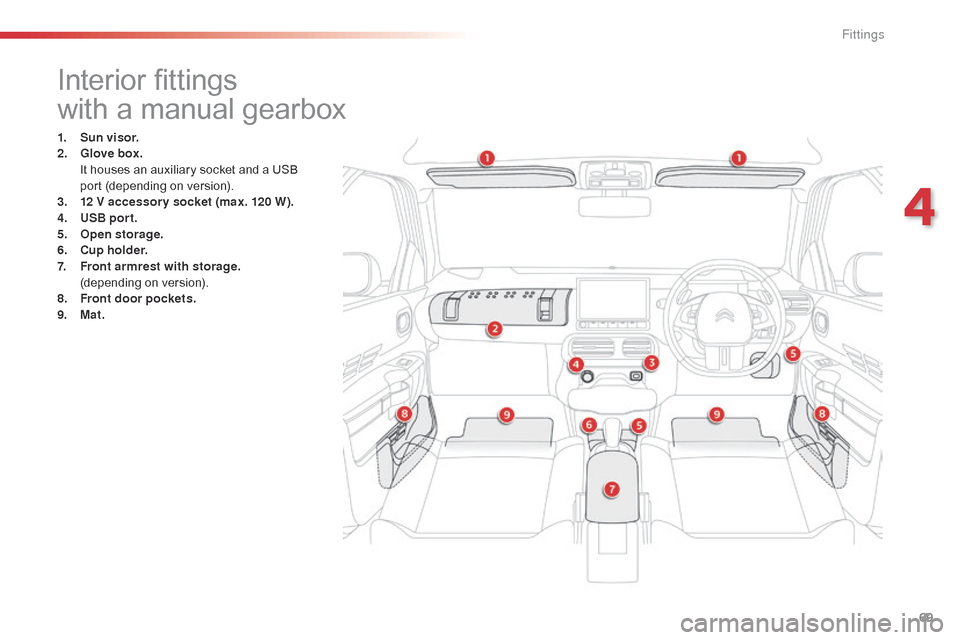
Interior fittings
with a manual gearbox
1. Sun visor .
2. G love box .
I
t houses an auxiliary socket and a USB
p
ort (depending on version).
3.
1
2 V accessor y socket (max. 120 W).
4.
U
SB por t.
5.
O
pen storage.
6.
C
up holder.
7.
F
ront armrest with storage.
(
depending
o
n
v
ersion).
8.
F
ront door pockets .
9.
M
at.
4
Fittings
Page 72 of 326
70
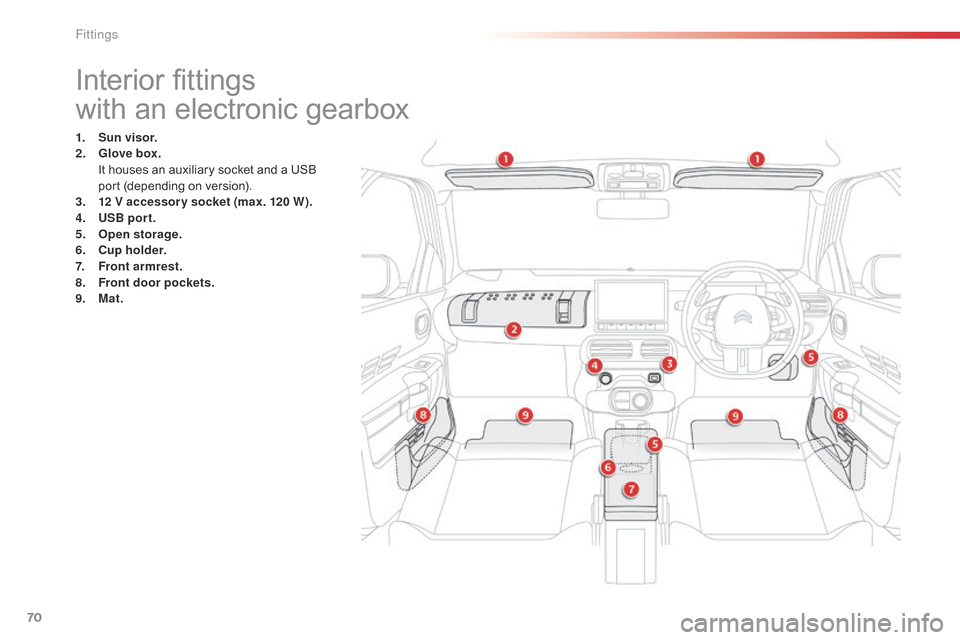
Interior fittings
with an electronic gearbox
1. Sun visor.
2. G
love box.
I
t houses an auxiliary socket and a USB
p
ort (depending on version).
3.
1
2 V accessor y socket (max. 120 W).
4.
U
SB por t.
5.
O
pen storage.
6.
C
up holder.
7.
F
ront armrest.
8.
F
ront door pockets.
9.
M
at.
Fittings
Page 73 of 326
71
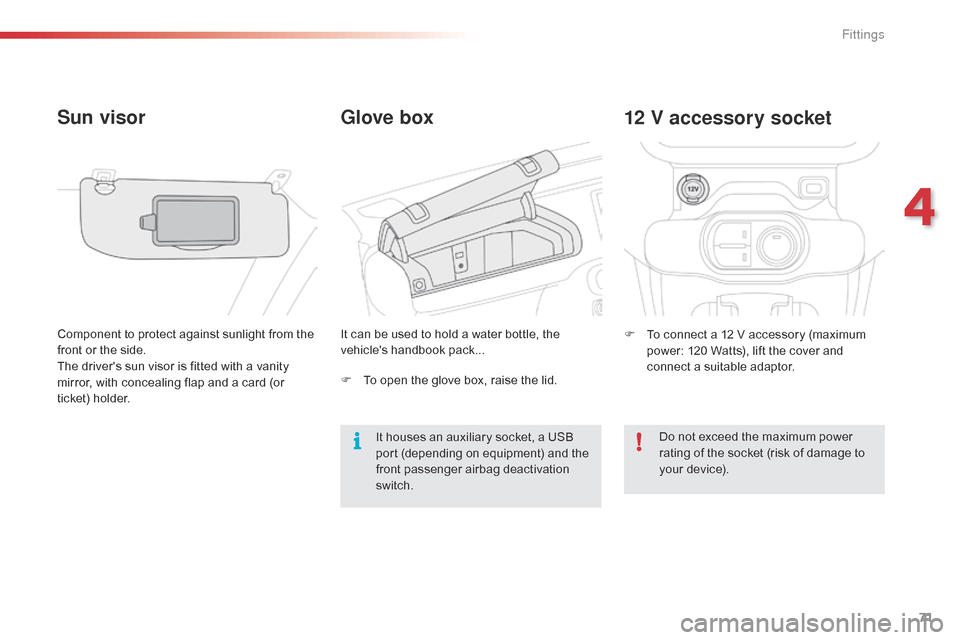
Glove box
Sun visor
Component to protect against sunlight from the f
ront or the side.
The
driver's sun visor is fitted with a vanity
m
irror, with concealing flap and a card (or
t
icket) holder. It
can be used to hold a water bottle, the v
ehicle's handbook pack...F
T o connect a 12 V accessory (maximum
p
ower: 120 Watts), lift the cover and
c
onnect a suitable adaptor.
12 V accessory socket
F To open the glove box, raise the lid.
Do not exceed the maximum power
r
ating of the socket (risk of damage to
y
our device).
It
houses an auxiliary socket, a USB
p
ort (depending on equipment) and the
f
ront passenger airbag deactivation
s
witch.
4
Fittings
Page 74 of 326
72
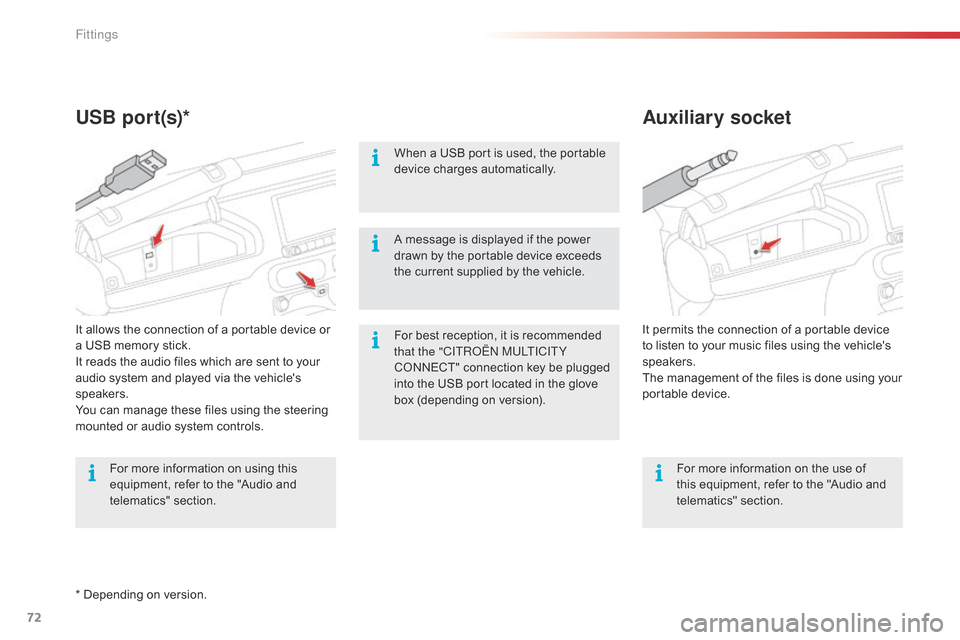
Auxiliary socket
USB por t(s)*
For best reception, it is recommended t
hat the "CITRoËn M ULTICITY
CONNECT"
connection key be plugged
i
nto the USB port located in the glove
b
ox (depending on version).
When
a USB port is used, the portable
d
evice charges automatically.
For more information on the use of
t
his equipment, refer to the "Audio and
t
elematics"
se
ction.
For
more
information
on
using
this
e
quipment,
refer
to
the
"Audio
and
t
elematics"
se
ction. It
permits the connection of a portable device t
o listen to your music files using the vehicle's
s
peakers.
The
management of the files is done using your
p
ortable
d
evice.
It
allows
the
connection
of
a
portable
device
or
a
USB
memory
stick.
It
reads
the
audio
files
which
are
sent
to
your
a
udio
system
and
played
via
the
vehicle's
s
peakers.
You
can
manage
these
files
using
the
steering
m
ounted
or
audio
system
controls. A
message is displayed if the power
d
rawn by the portable device exceeds
t
he current supplied by the vehicle.
*
Depending
on
version.
Fittings
Page 75 of 326
73
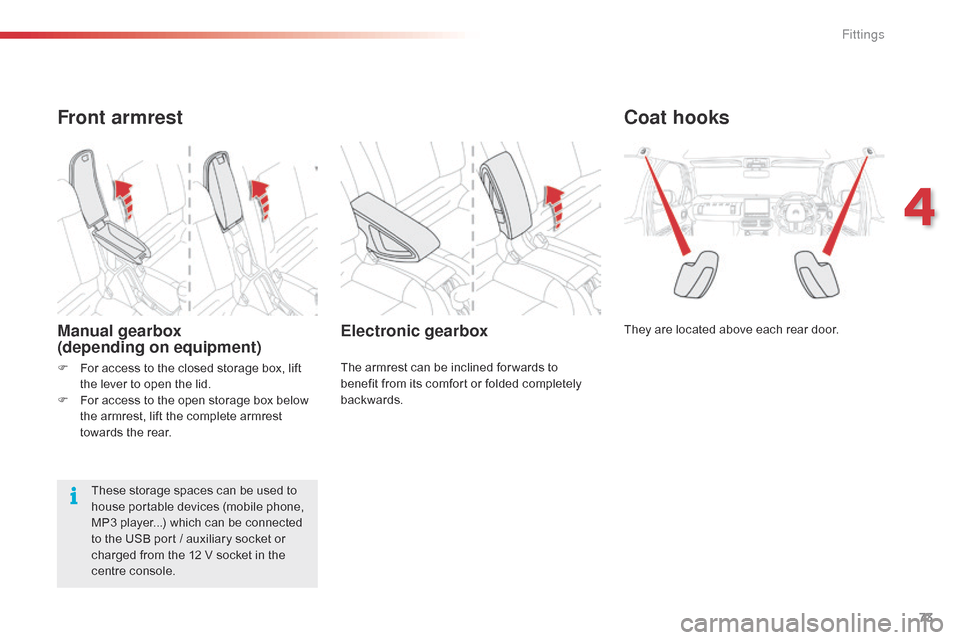
Coat hooks
They are located above each rear door.Electronic gearbox
The armrest can be inclined for wards to benefit from its comfort or folded completely
ba
ckwards.
Front armrest
Manual gearbox
(depending on equipment)
These storage spaces can be used to house portable devices (mobile phone,
M
P3 player...) which can be connected
t
o the USB port / auxiliary socket or
c
harged from the 12 V socket in the
c
entre console.
F
F
or access to the closed storage box, lift
t
he lever to open the lid.
F
F
or access to the open storage box below
t
he armrest, lift the complete armrest
t
owards the rear.
4
Fittings
Page 76 of 326
74
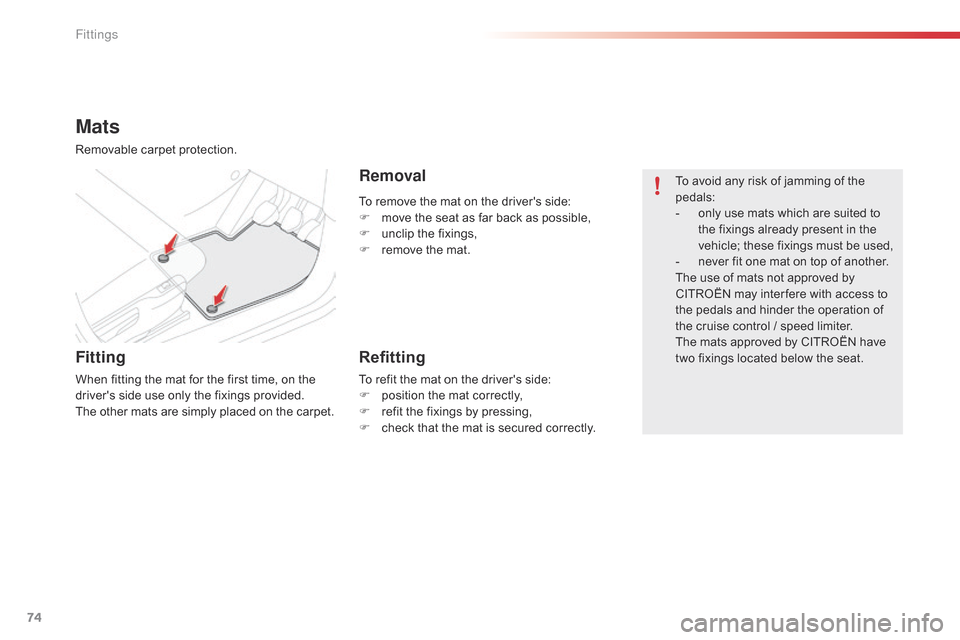
To remove the mat on the driver's side:
F m ove the seat as far back as possible,
F
u
nclip the fixings,
F
r
emove the mat.
Mats
Removable carpet protection.
Fitting
When fitting the mat for the first time, on the driver's side use only the fixings provided.
The
other mats are simply placed on the carpet.
RemovalTo avoid any risk of jamming of the pedals:
-
o
nly use mats which are suited to
t
he fixings already present in the
v
ehicle; these fixings must be used,
-
n
ever fit one mat on top of another.
The
use of mats not approved by
C
ITROËN may inter fere with access to
t
he pedals and hinder the operation of
t
he cruise control / speed limiter.
The
mats approved by CITROËN have
t
wo fixings located below the seat.
Refitting
To refit the mat on the driver's side:
F p osition the mat correctly,
F
r
efit the fixings by pressing,
F
c
heck that the mat is secured correctly.
Fittings
Page 77 of 326
75
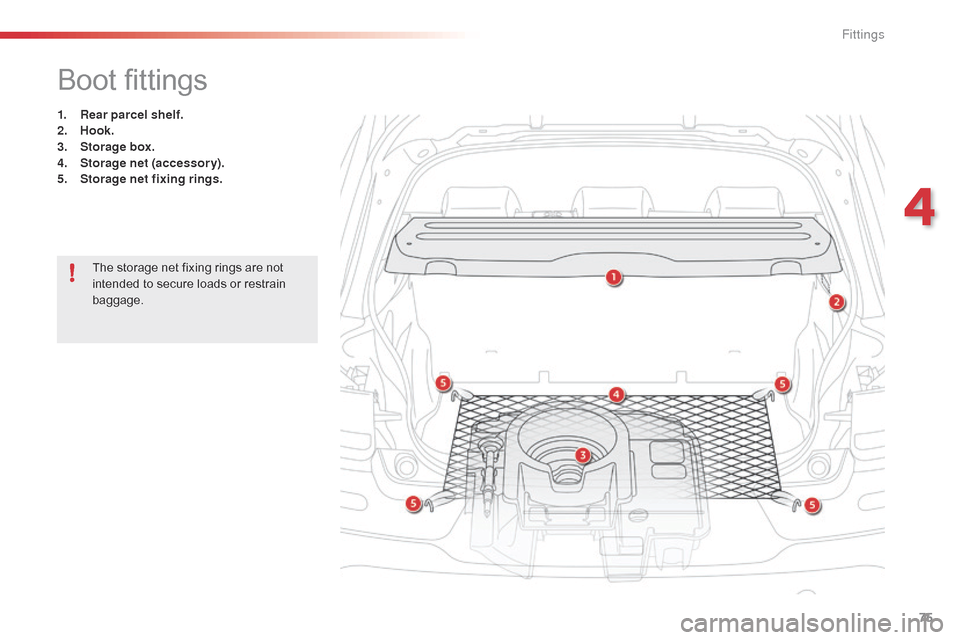
Boot fittings
1. Rear parcel shelf.
2. Hook.
3.
S
torage box.
4.
S
torage net (accessory).
5.
S
torage net fixing rings.
The
storage net fixing rings are not
i
ntended to secure loads or restrain
b
aggage.
4
Fittings
Page 78 of 326
76
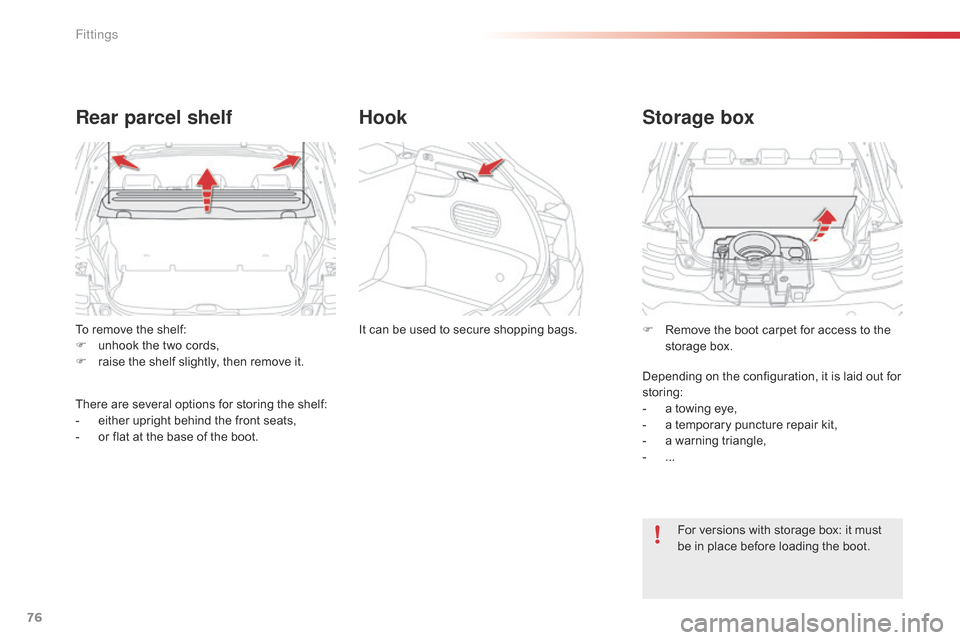
To remove the shelf:
F u nhook the two cords,
F
r
aise the shelf slightly, then remove it.
Rear parcel shelf
There are several options for storing the shelf:
- e ither upright behind the front seats,
-
o
r flat at the base of the boot.It
can be used to secure shopping bags.
Hook
Storage box
For versions with storage box: it must b
e in place before loading the boot.
F
R
emove the boot carpet for access to the
s
torage box.
Depending on the configuration, it is laid out for
s
toring:
-
a
towing eye,
-
a
temporary puncture repair kit,
-
a
warning triangle,
-
...
Fittings
Page 79 of 326
77
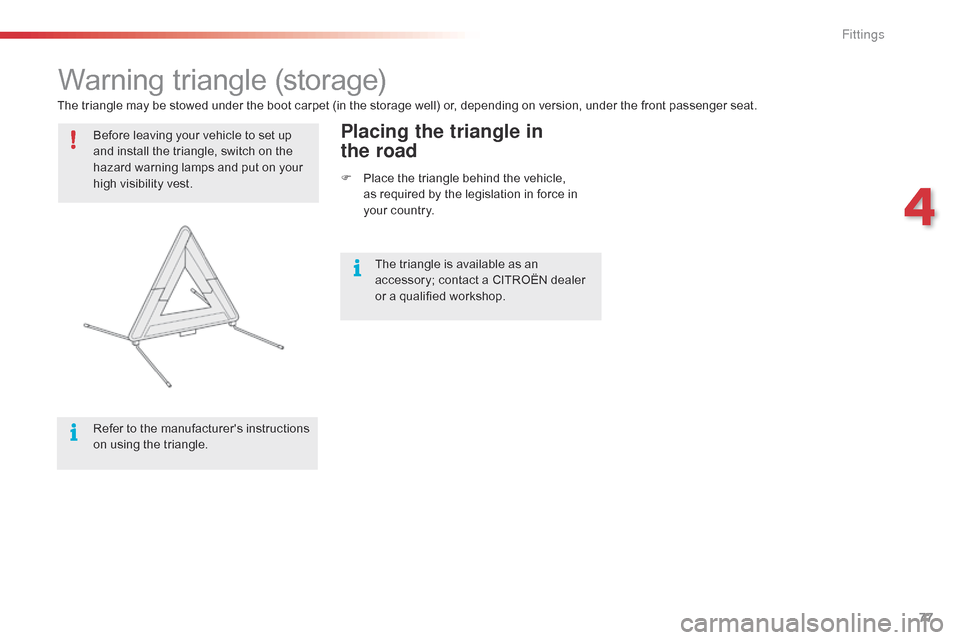
Warning triangle (storage)
Before leaving your vehicle to set up a
nd install the triangle, switch on the
h
azard warning lamps and put on your
h
igh visibility vest.
Refer
to the manufacturer's instructions
o
n using the triangle.Placing the triangle in
the road
F Place the triangle behind the vehicle, a
s required by the legislation in force in
y
our country.
The
triangle
may
be
stowed
under
the
boot
carpet
(in the storage well) or, depending on version, under the front passenger seat.
The triangle is available as an
a
ccessory; contact a CITROËN dealer
o
r a qualified workshop.
4
Fittings
Page 80 of 326
78
A few driving recommendations
Observe the driving regulations at all times and remain vigilant whatever the traffic conditions.
Pay
close attention to the traffic and keep your
h
ands on the wheel so that you are ready to
r
eact at any time to any eventuality.
On
a long journey, a break every two hours is
s
trongly
re
commended.
In
difficult weather, drive smoothly, anticipate
t
he need to brake and increase the distance
f
rom other vehicles.
Driving on flooded roads
We strongly advise against driving on flooded roads, as this could cause serious damage
t
o the engine or gearbox, as well as to the
e
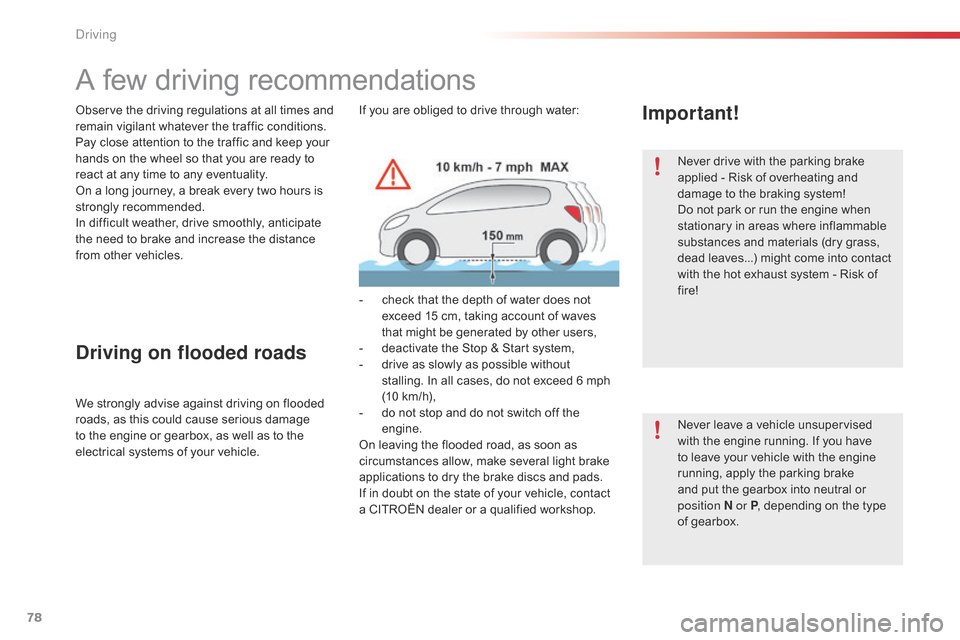
lectrical systems of your vehicle.If
you are obliged to drive through water:
-
c
heck that the depth of water does not
e
xceed 15 cm, taking account of waves
t
hat might be generated by other users,
-
d
eactivate the Stop & Start system,
-
d
rive as slowly as possible without
s
talling. In all cases, do not exceed 6 mph (
10 km/h),
- d o not stop and do not switch off the
e
ngine.
On
leaving the flooded road, as soon as
c
ircumstances allow, make several light brake
a
pplications to dry the brake discs and pads.
If
in doubt on the state of your vehicle, contact
a
CITROËN dealer or a qualified workshop.
Important!
Never drive with the parking brake applied - Risk of overheating and
d
amage to the braking system!
Do
not park or run the engine when
s
tationary in areas where inflammable
s
ubstances and materials (dry grass,
d
ead leaves...) might come into contact
w
ith the hot exhaust system - Risk of
f
ire!
Never
leave a vehicle unsupervised
w
ith the engine running. If you have
t
o leave your vehicle with the engine
r
unning, apply the parking brake
a
nd put the gearbox into neutral or
p
osition
N or P,
depending on the type
o
f gearbox.
Driving