automatic Citroen C4 PICASSO 2008 1.G Owner's Guide
[x] Cancel search | Manufacturer: CITROEN, Model Year: 2008, Model line: C4 PICASSO, Model: Citroen C4 PICASSO 2008 1.GPages: 266, PDF Size: 7.14 MB
Page 79 of 266
4
3
A
2 1II
79
All lamps off
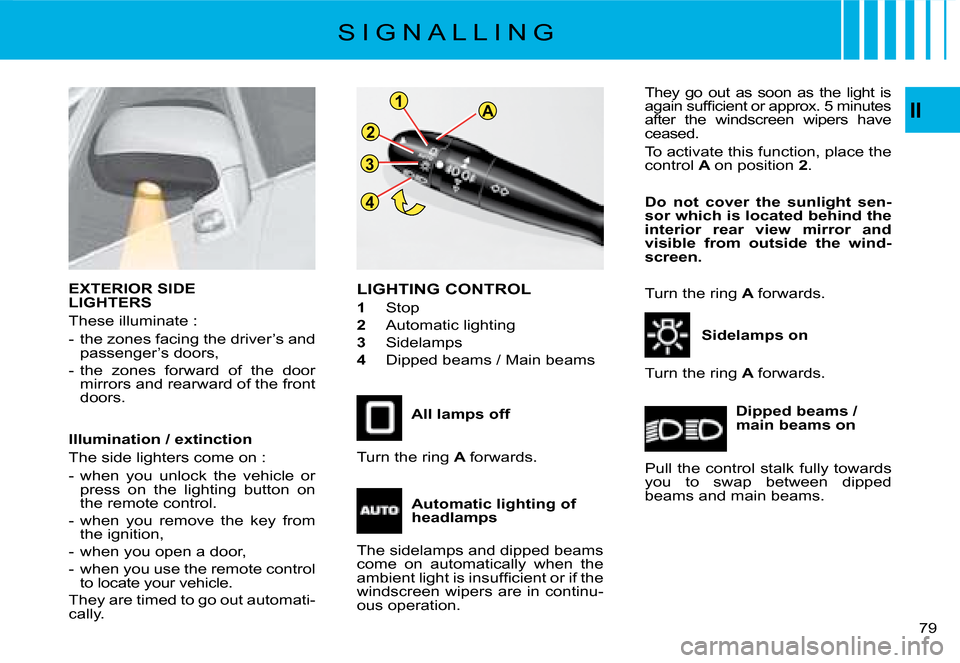
LIGHTING CONTROL
1 Stop
2 Automatic lighting
3 Sidelamps
4 Dipped beams / Main beams
Sidelamps on
Dipped beams / main beams on
Turn the ring A forwards.
Turn the ring A forwards.
Automatic lighting of headlamps
The sidelamps and dipped beams come on automatically when the �a�m�b�i�e�n�t� �l�i�g�h�t� �i�s� �i�n�s�u�f�fi� �c�i�e�n�t� �o�r� �i�f� �t�h�e� windscreen wipers are in continu-ous operation.
Pull the control stalk fully towards you to swap between dipped beams and main beams.
EXTERIOR SIDE LIGHTERS
These illuminate :
- the zones facing the driver’s and passenger’s doors,
- the zones forward of the door mirrors and rearward of the front doors.
�I�l�l�u�m�i�n�a�t�i�o�n� �/� �e�x�t�i�n�c�t�i�o�n
The side lighters come on :
- when you unlock the vehicle or press on the lighting button on the remote control.
- when you remove the key from the ignition,
- when you open a door,
- when you use the remote control to locate your vehicle.
They are timed to go out automati-cally.
They go out as soon as the light is �a�g�a�i�n� �s�u�f�fi� �c�i�e�n�t� �o�r� �a�p�p�r�o�x�.� �5� �m�i�n�u�t�e�s� after the windscreen wipers have ceased.
To activate this function, place the control A on position 2.
Do not cover the sunlight sen-sor which is located behind the interior rear view mirror and visible from outside the wind-screen.
Turn the ring A forwards.
S I G N A L L I N G
Page 80 of 266
A
80
II
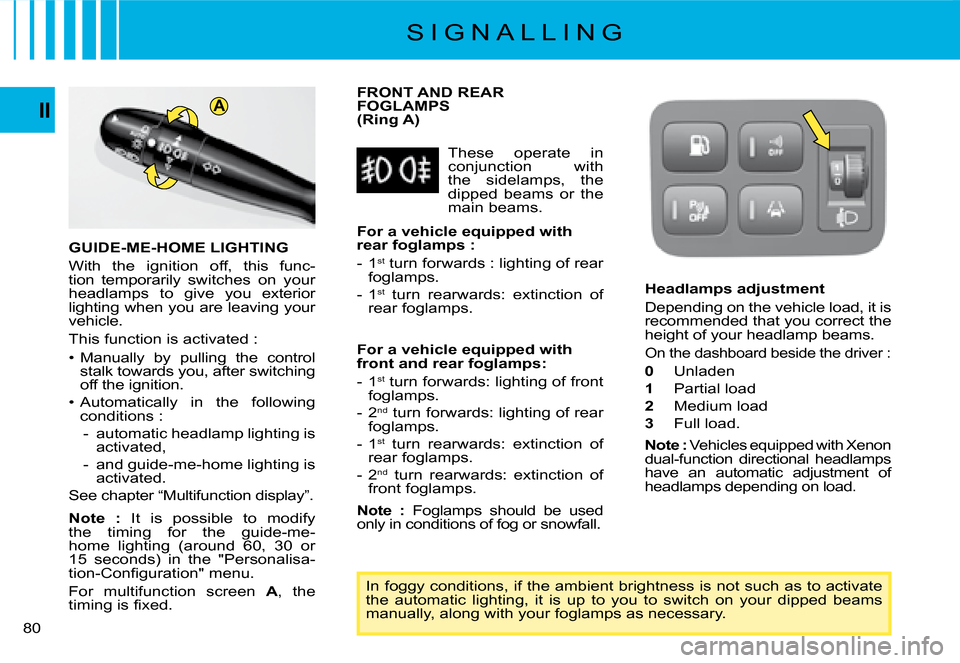
FRONT AND REAR FOGLAMPS (Ring A)
In foggy conditions, if the ambient brightness is not such as to activate the automatic lighting, it is up to you to switch on your dipped beams manually, along with your foglamps as necessary.
These operate in conjunction with the sidelamps, the dipped beams or the main beams.
Headlamps adjustment
Depending on the vehicle load, it is recommended that you correct the height of your headlamp beams.
On the dashboard beside the driver :
0 Unladen
1 Partial load
2 Medium load
3 Full load.
Note : Vehicles equipped with Xenon dual-function directional headlamps have an automatic adjustment of headlamps depending on load.
For a vehicle equipped with rear foglamps :
- 1st turn forwards : lighting of rear foglamps.
- 1st turn rearwards: extinction of rear foglamps.
For a vehicle equipped with front and rear foglamps:
- 1st turn forwards: lighting of front foglamps.
- 2nd turn forwards: lighting of rear foglamps.
- 1st turn rearwards: extinction of rear foglamps.
- 2nd turn rearwards: extinction of front foglamps.
Note : Foglamps should be used only in conditions of fog or snowfall.
GUIDE-ME-HOME LIGHTING
With the ignition off, this func-tion temporarily switches on your headlamps to give you exterior lighting when you are leaving your vehicle.
This function is activated :
Page 81 of 266
A
80
II
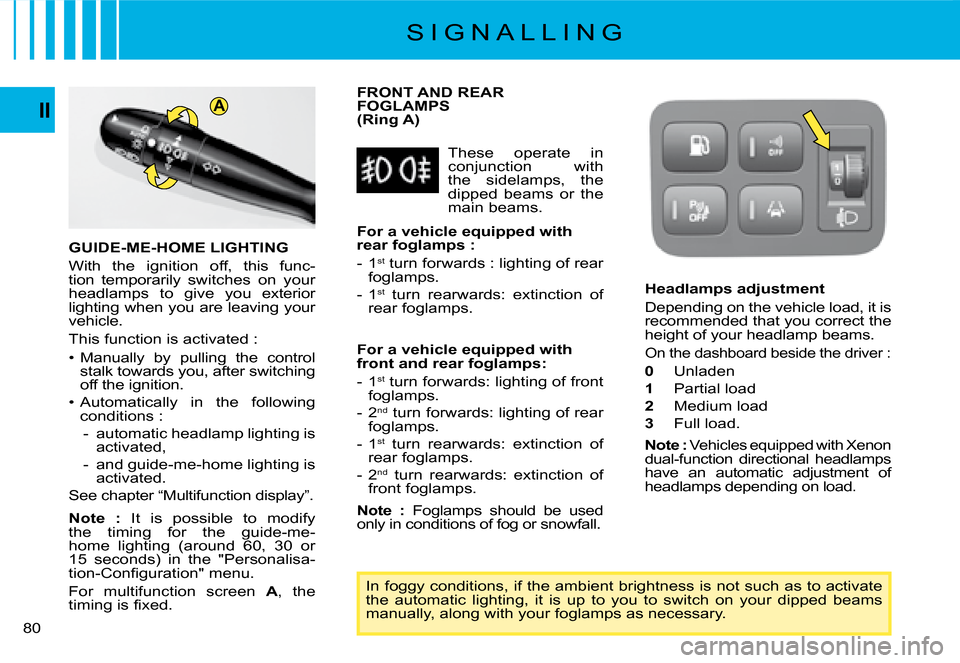
FRONT AND REAR FOGLAMPS (Ring A)
In foggy conditions, if the ambient brightness is not such as to activate the automatic lighting, it is up to you to switch on your dipped beams manually, along with your foglamps as necessary.
These operate in conjunction with the sidelamps, the dipped beams or the main beams.
Headlamps adjustment
Depending on the vehicle load, it is recommended that you correct the height of your headlamp beams.
On the dashboard beside the driver :
0 Unladen
1 Partial load
2 Medium load
3 Full load.
Note : Vehicles equipped with Xenon dual-function directional headlamps have an automatic adjustment of headlamps depending on load.
For a vehicle equipped with rear foglamps :
- 1st turn forwards : lighting of rear foglamps.
- 1st turn rearwards: extinction of rear foglamps.
For a vehicle equipped with front and rear foglamps:
- 1st turn forwards: lighting of front foglamps.
- 2nd turn forwards: lighting of rear foglamps.
- 1st turn rearwards: extinction of rear foglamps.
- 2nd turn rearwards: extinction of front foglamps.
Note : Foglamps should be used only in conditions of fog or snowfall.
GUIDE-ME-HOME LIGHTING
With the ignition off, this func-tion temporarily switches on your headlamps to give you exterior lighting when you are leaving your vehicle.
This function is activated :
Page 82 of 266
3
2
1
0
4
II
81
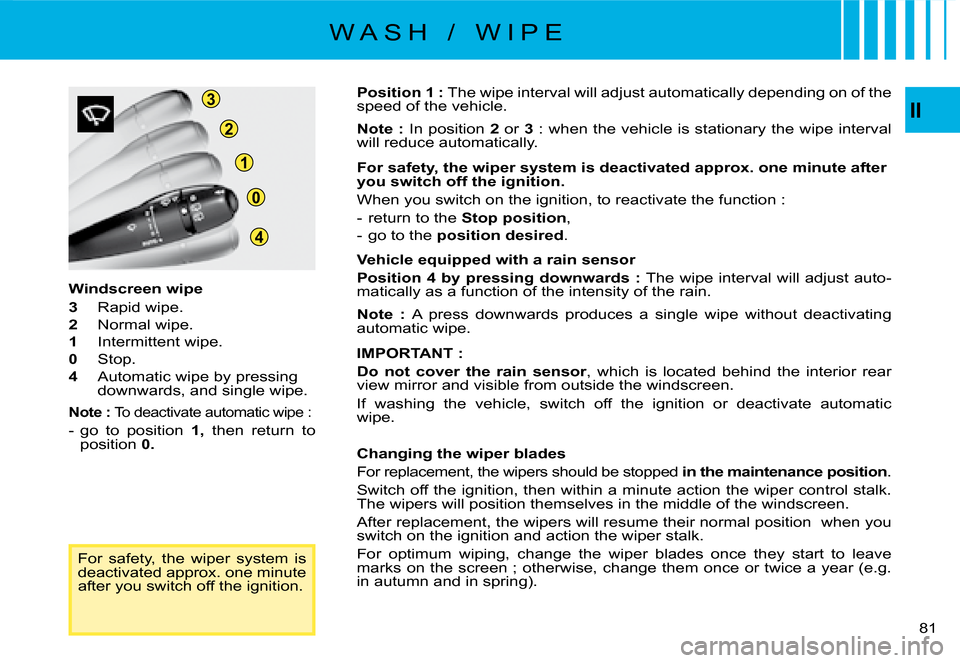
Windscreen wipe
3 Rapid wipe.
2 Normal wipe.
1 Intermittent wipe.
0 Stop.
4 Automatic wipe by pressing downwards, and single wipe.
Note : To deactivate automatic wipe :
- go to position 1, then return to position 0.
Position 1 : The wipe interval will adjust automatically depending on of the speed of the vehicle.
Note : In position 2 or 3 : when the vehicle is stationary the wipe interval will reduce automatically.
�F�o�r� �s�a�f�e�t�y�,� �t�h�e� �w�i�p�e�r� �s�y�s�t�e�m� �i�s� �d�e�a�c�t�i�v�a�t�e�d� �a�p�p�r�o�x�.� �o�n�e� �m �i�n�u�t�e� �a�f�t�e�r� you switch off the ignition.
When you switch on the ignition, to reactivate the function :
- return to the Stopposition,
- go to the position desired.
Vehicle equipped with a rain sensor
Position 4 by pressing downwards : The wipe interval will adjust auto-matically as a function of the intensity of the rain.
Note : A press downwards produces a single wipe without deactivating automatic wipe.
IMPORTANT :
Do not cover the rain sensor, which is located behind the interior rear view mirror and visible from outside the windscreen.
If washing the vehicle, switch off the ignition or deactiva te automatic wipe.
Changing the wiper blades
For replacement, the wipers should be stopped in themaintenance position.
Switch off the ignition, then within a minute action the wiper control stalk. The wipers will position themselves in the middle of the wi ndscreen.
After replacement, the wipers will resume their normal position when you switch on the ignition and action the wiper stalk.
For optimum wiping, change the wiper blades once they start t o leave marks on the screen ; otherwise, change them once or twice a year (e .g. in autumn and in spring).
For safety, the wiper system is deactivated approx. one minute after you switch off the ignition.
W A S H / W I P E
Page 83 of 266
A
B
82
II
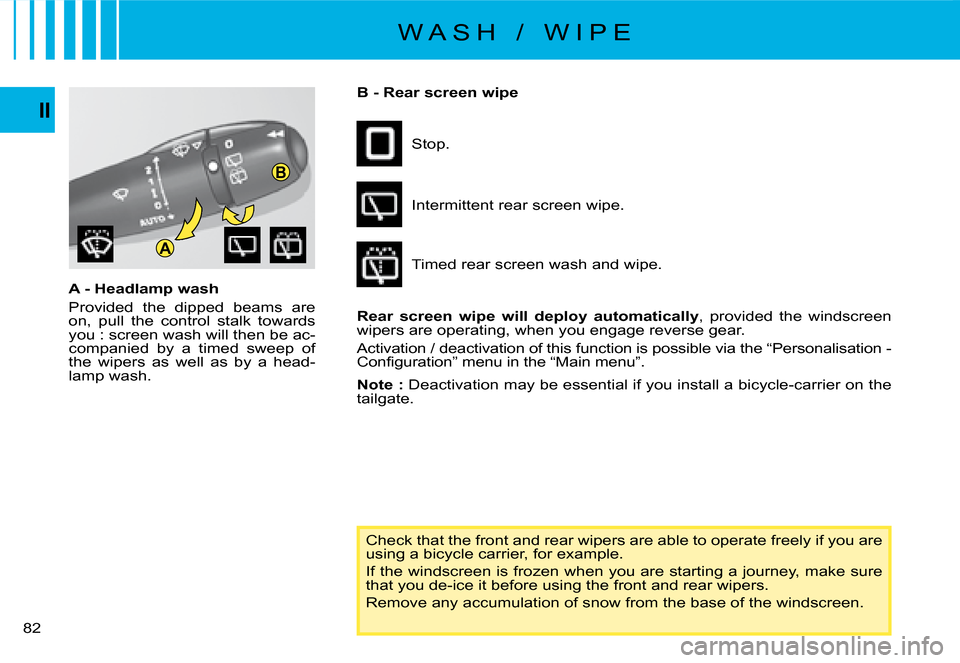
A - Headlamp wash
Provided the dipped beams are on, pull the control stalk towards you : screen wash will then be ac-companied by a timed sweep of the wipers as well as by a head-lamp wash.
Check that the front and rear wipers are able to operate freely if you are using a bicycle carrier, for example.
If the windscreen is frozen when you are starting a journey, ma ke sure that you de-ice it before using the front and rear wipers.
Remove any accumulation of snow from the base of the windscreen.
B - Rear screen wipe
Rear screen wipewill deployautomatically, provided the windscreen wipers are operating, when you engage reverse gear.
Activation / deactivation of this function is possible via the “Personalisation - �C�o�n�fi� �g�u�r�a�t�i�o�n�”� �m�e�n�u� �i�n� �t�h�e� �“�M�a�i�n� �m�e�n�u�”�.�
Note : Deactivation may be essential if you install a bicycle-carrier on t he tailgate.
Stop.
Intermittent rear screen wipe.
Timed rear screen wash and wipe.
W A S H / W I P E
Page 84 of 266
12II
83
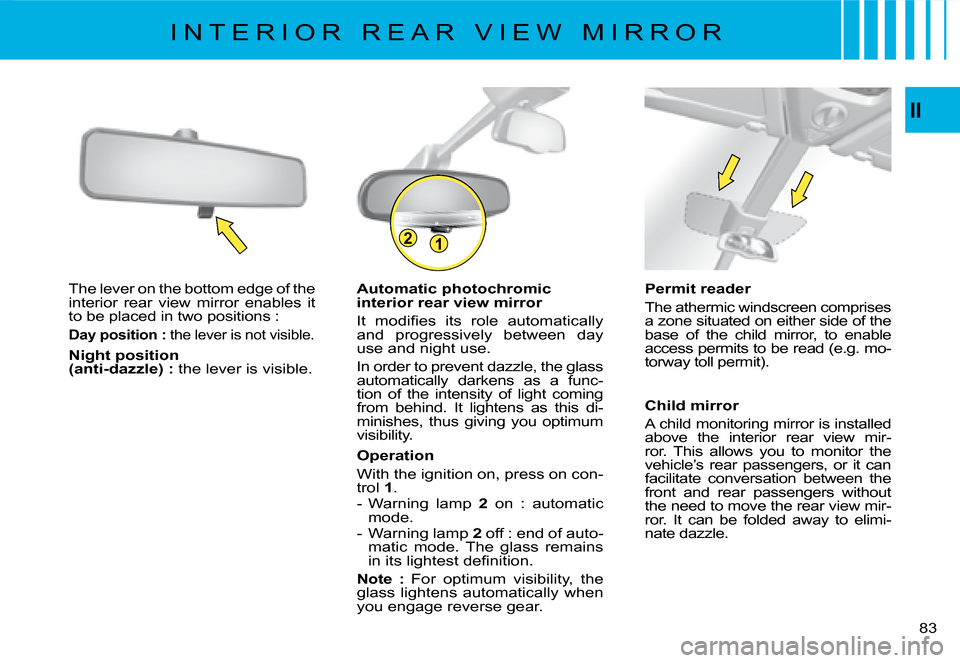
Automatic photochromic interior rear view mirror
�I�t� �m�o�d�i�fi� �e�s� �i�t�s� �r�o�l�e� �a�u�t�o�m�a�t�i�c�a�l�l�y� and progressively between day use and night use.
In order to prevent dazzle, the glass automatically darkens as a func-tion of the intensity of light coming from behind. It lightens as this di-minishes, thus giving you optimum visibility.
Operation
With the ignition on, press on con-trol 1. - Warning lamp 2 on : automatic mode. - Warning lamp 2 off : end of auto-matic mode. The glass remains �i�n� �i�t�s� �l�i�g�h�t�e�s�t� �d�e�fi� �n�i�t�i�o�n�.�
Note : For optimum visibility, the glass lightens automatically when you engage reverse gear.
The lever on the bottom edge of the interior rear view mirror enables it to be placed in two positions :
Day position : the lever is not visible.
Night position (anti-dazzle) : the lever is visible.
Permit reader
The athermic windscreen comprises a zone situated on either side of the base of the child mirror, to enable access permits to be read (e.g. mo-torway toll permit).
Child mirror
A child monitoring mirror is installed above the interior rear view mir-ror. This allows you to monitor the vehicle’s rear passengers, or it can facilitate conversation between the front and rear passengers without the need to move the rear view mir-ror. It can be folded away to elimi-nate dazzle.
I N T E R I O R R E A R V I E W M I R R O R
Page 85 of 266
1
2
84
II
REAR VIEW MIRRORS
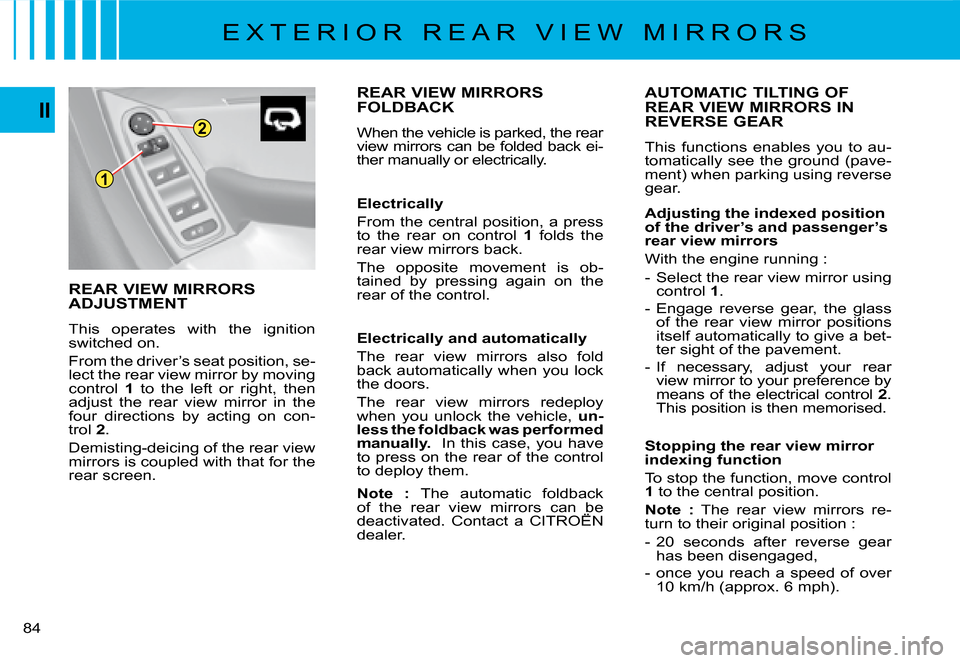
ADJUSTMENT
This operates with the ignition switched on.
From the driver’s seat position, se-lect the rear view mirror by moving control 1 to the left or right, then adjust the rear view mirror in the four directions by acting on con-trol 2.
Demisting-deicing of the rear view mirrors is coupled with that for the rear screen.
REAR VIEW MIRRORS
FOLDBACK
When the vehicle is parked, the rear view mirrors can be folded back ei-ther manually or electrically.
Electrically
From the central position, a press to the rear on control 1 folds the rear view mirrors back.
The opposite movement is ob-tained by pressing again on the rear of the control.
Electrically and automatically
The rear view mirrors also fold back automatically when you lock the doors.
The rear view mirrors redeploy when you unlock the vehicle, un-less the foldback was performed manually. In this case, you have to press on the rear of the control to deploy them.
Note : The automatic foldback of the rear view mirrors can be deactivated. Contact a CITROËN dealer.
AUTOMATIC TILTING OF
REAR VIEW MIRRORS IN
REVERSE GEAR
This functions enables you to au-tomatically see the ground (pave-ment) when parking using reverse gear.
�A�d�j�u�s�t�i�n�g� �t�h�e� �i�n�d�e�x�e�d� �p�o�s�i�t�i�o�n� of the driver’s and passenger’s rear view mirrors
With the engine running :
- Select the rear view mirror using control 1.
- Engage reverse gear, the glass of the rear view mirror positions itself automatically to give a bet-ter sight of the pavement.
- If necessary, adjust your rear view mirror to your preference by means of the electrical control 2. This position is then memorised.
Stopping the rear view mirror �i�n�d�e�x�i�n�g� �f�u�n�c�t�i�o�n� �
To stop the function, move control 1 to the central position.
Note : The rear view mirrors re-turn to their original position :
- 20 seconds after reverse gear has been disengaged,
- once you reach a speed of over 10 km/h (approx. 6 mph).
E X T E R I O R R E A R V I E W M I R R O R S
Page 86 of 266
A
II
85
For safety, these ma-noeuvres should not be performed while the vehi-cle is in motion.
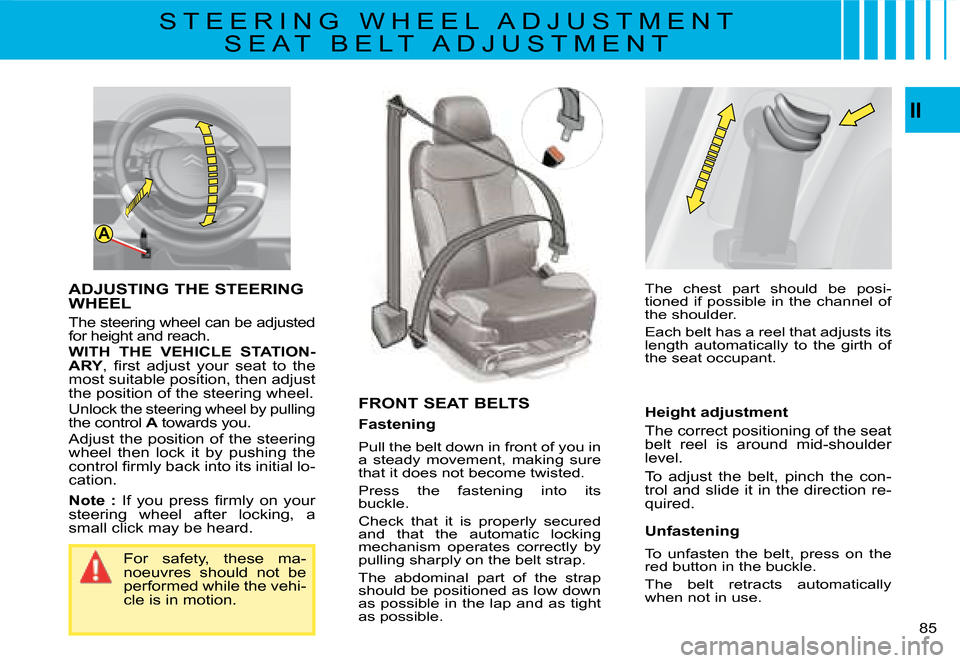
FRONT SEAT BELTS
Fastening
Pull the belt down in front of you in a steady movement, making sure that it does not become twisted.
Press the fastening into its buckle.
Check that it is properly secured and that the automatic locking mechanism operates correctly by pulling sharply on the belt strap.
The abdominal part of the strap should be positioned as low down as possible in the lap and as tight as possible.
ADJUSTING THE STEERING
WHEEL
The steering wheel can be adjusted for height and reach. WITH THE VEHICLE STATION-ARY�,� �fi� �r�s�t� �a�d�j�u�s�t� �y�o�u�r� �s�e�a�t� �t�o� �t�h�e� most suitable position, then adjust the position of the steering wheel. Unlock the steering wheel by pulling the control A towards you. AAdjust the position of the steering wheel then lock it by pushing the �c�o�n�t�r�o�l� �fi� �r�m�l�y� �b�a�c�k� �i�n�t�o� �i�t�s� �i�n�i�t�i�a�l� �l�o�-cation.
Note :� �I�f� �y�o�u� �p�r�e�s�s� �fi� �r�m�l�y� �o�n� �y�o�u�r� steering wheel after locking, a small click may be heard.
S T E E R I N G W H E E L A D J U S T M E N T
S E A T B E L T A D J U S T M E N T
The chest part should be posi-tioned if possible in the channel of the shoulder.
Each belt has a reel that adjusts its length automatically to the girth of the seat occupant.
Height adjustment
The correct positioning of the seat belt reel is around mid-shoulder level.
To adjust the belt, pinch the con-trol and slide it in the direction re-quired.
Unfastening
To unfasten the belt, press on the red button in the buckle.
The belt retracts automatically when not in use.
Page 94 of 266
II
93
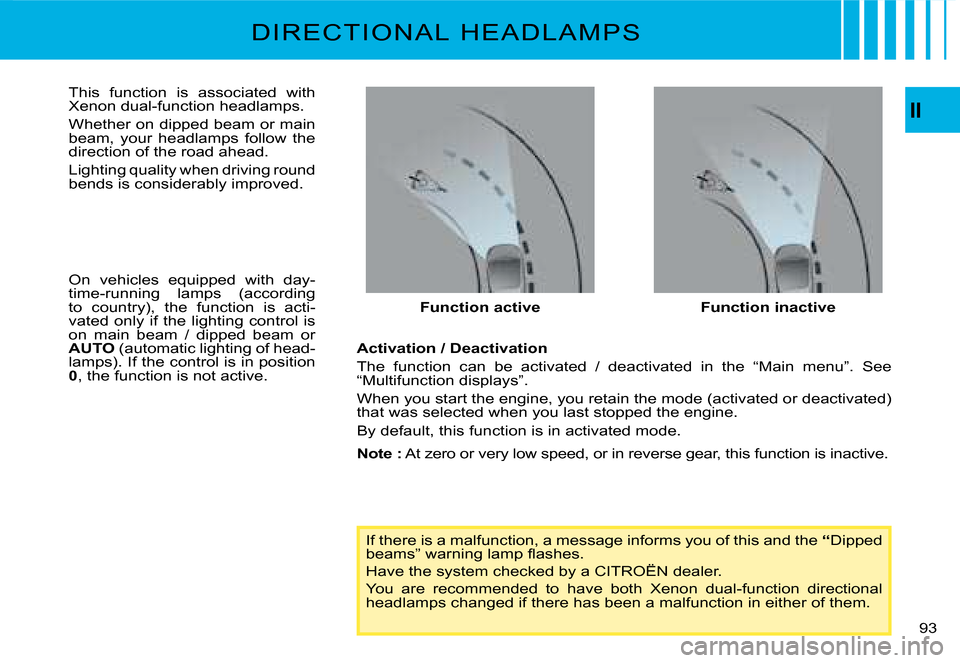
Function active
If there is a malfunction, a message informs you of this and the “Dipped �b�e�a�m�s�”� �w�a�r�n�i�n�g� �l�a�m�p� �fl� �a�s�h�e�s�.
Have the system checked by a CITROËN dealer.
You are recommended to have both Xenon dual-function direction al headlamps changed if there has been a malfunction in either of them.
Function inactive
This function is associated with Xenon dual-function headlamps.
Whether on dipped beam or main beam, your headlamps follow the direction of the road ahead.
Lighting quality when driving round bends is considerably improved.
On vehicles equipped with day-time-running lamps (according to country), the function is acti-vated only if the lighting control is on main beam / dipped beam or AUTO (automatic lighting of head-lamps). If the control is in position 0, the function is not active.
Activation / Deactivation
The function can be activated / deactivated in the “Main men u”. See “Multifunction displays”.
When you start the engine, you retain the mode (activated or deactivated) that was selected when you last stopped the engine.
By default, this function is in activated mode.
Note : At zero or very low speed, or in reverse gear, this function is inactive.
D I R E C T I O N A L H E A D L A M P S
Page 98 of 266
A
III
97
If you decide to drive with the doors locked, be aware that this �w�i�l�l� �m�a�k�e� �a�c�c�e�s�s� �m�o�r�e� �d�i�f�fi� �c�u�l�t� �f�o�r� �t�h�e� �e�m�e�r�g�e�n�c�y� �s�e�r�v�i�c�e�s� �i�n� �t�h�e� event of an accident.
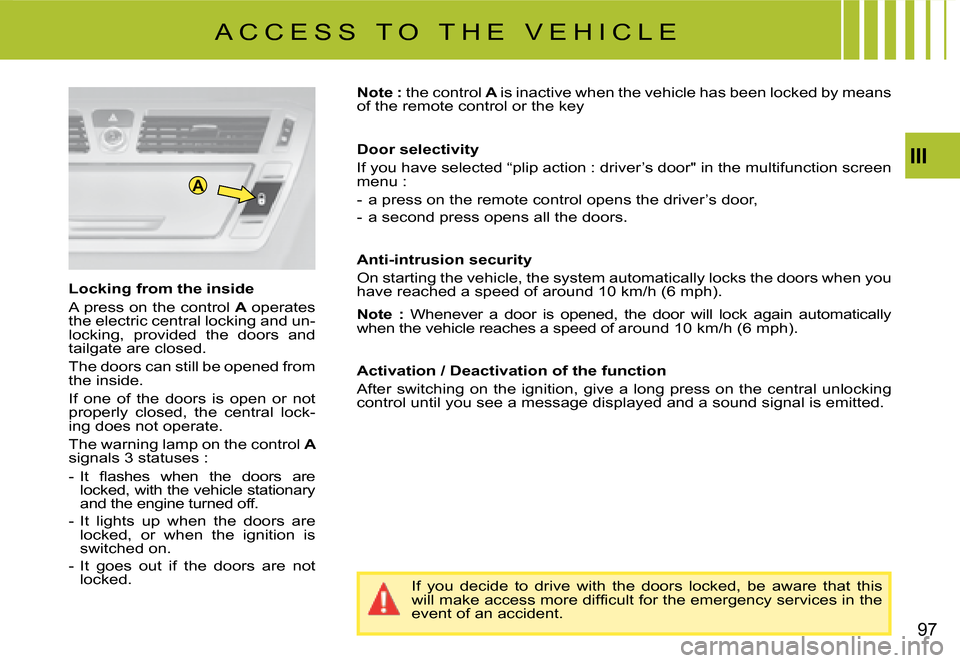
Note : the control A is inactive when the vehicle has been locked by means of the remote control or the key
Door selectivity
If you have selected “plip action : driver’s door" in the multifunction screen menu :
- a press on the remote control opens the driver’s door,
- a second press opens all the doors.
Anti-intrusion security
On starting the vehicle, the system automatically locks the doors w hen you have reached a speed of around 10 km/h (6 mph).
Note : Whenever a door is opened, the door will lock again automatically when the vehicle reaches a speed of around 10 km/h (6 mp h).
Activation / Deactivation of the function
After switching on the ignition, give a long press on the ce ntral unlocking control until you see a message displayed and a sound signal is emitted.
Locking from the inside
A press on the control A operates the electric central locking and un-locking, provided the doors and tailgate are closed.
The doors can still be opened from the inside.
If one of the doors is open or not properly closed, the central lock-ing does not operate.
The warning lamp on the control A signals 3 statuses :
�-� �I�t� �fl� �a�s�h�e�s� �w�h�e�n� �t�h�e� �d�o�o�r�s� �a�r�e� locked, with the vehicle stationary and the engine turned off.
- It lights up when the doors are locked, or when the ignition is switched on.
- It goes out if the doors are not locked.
A C C E S S T O T H E V E H I C L E