automatic Citroen C4 PICASSO 2008 1.G Repair Manual
[x] Cancel search | Manufacturer: CITROEN, Model Year: 2008, Model line: C4 PICASSO, Model: Citroen C4 PICASSO 2008 1.GPages: 266, PDF Size: 7.14 MB
Page 161 of 266
IV
Using the RDS (radio data system) function on FM
The majority of FM radio stations use the RDS system. The radio in your vehicle has this system,.
The RDS system enables these stations to transmit non-audible data in addition to the broadcasting of their programmes. The data provides access to various functions described in this chapter, such as: display of the station name, inter-�m�i�t�t�e�n�t� �t�r�a�f�fi� �c� �i�n�f�o�r�m�a�t�i�o�n� �fl� �a�s�h�e�s� �o�r� automatic scanning of stations. This enables you to continue listening to your chosen radio station, regard-less of the different frequencies it uses in the regions through which you are travelling.
Scanning of RDS stations
Your radio keeps the best pos-sible reception by continuously looking for any other frequencies on which the selected radio sta-tion is broadcast, automatically choosing the frequency offering the best reception (providing the station broadcasts on more than one transmitter or frequency).
Activation/deactivation of the RDS functions
The RDS functions can be accessed via the following two menus :
- Main menu (press button O).
- Audio menu (press button L).
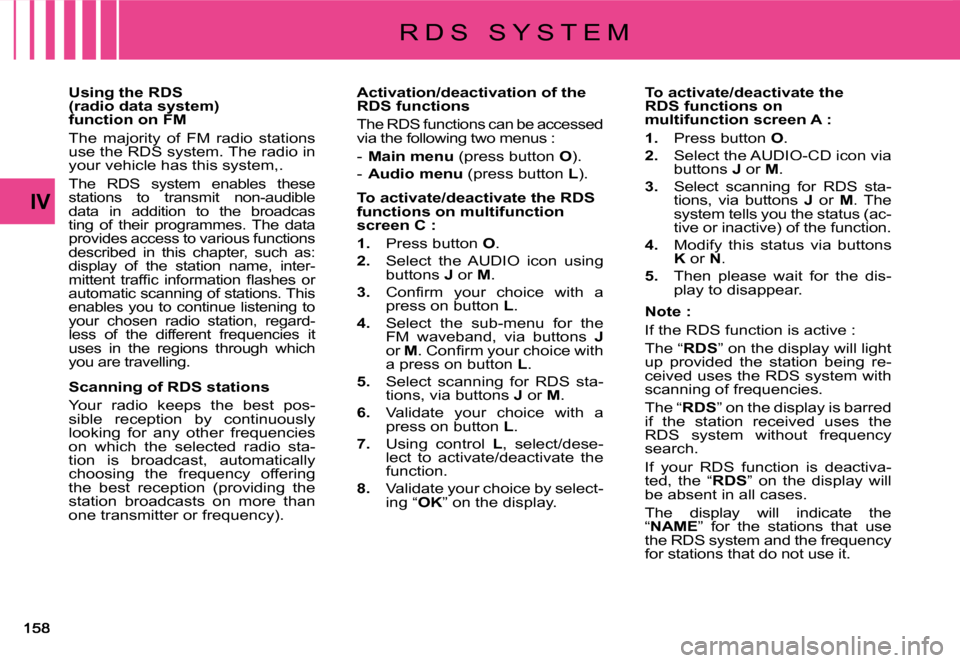
To activate/deactivate the RDS functions on multifunction screen C :
1. Press button O.
2. Select the AUDIO icon using buttons J or M.
3.� �C�o�n�fi� �r�m� �y�o�u�r� �c�h�o�i�c�e� �w�i�t�h� �a� press on button L.
4. Select the sub-menu for the FM waveband, via buttons Jor M�.� �C�o�n�fi� �r�m� �y�o�u�r� �c�h�o�i�c�e� �w�i�t�h� a press on button L.
5. Select scanning for RDS sta-tions, via buttons J or M.
6. Validate your choice with a press on button L.
7. Using control L, select/dese-lect to activate/deactivate the function.
8. Validate your choice by select-ing “OK” on the display.
To activate/deactivate the RDS functions on multifunction screen A :
1. Press button O.
2. Select the AUDIO-CD icon via buttons J or M.
3. Select scanning for RDS sta-tions, via buttons J or M. The system tells you the status (ac-tive or inactive) of the function.
4. Modify this status via buttons K or N.
5. Then please wait for the dis-play to disappear.
Note :
If the RDS function is active :
The “RDS” on the display will light up provided the station being re-ceived uses the RDS system with scanning of frequencies.
The “RDS” on the display is barred if the station received uses the RDS system without frequency search.
If your RDS function is deactiva-ted, the “RDS” on the display will be absent in all cases.
The display will indicate the “NAME” for the stations that use the RDS system and the frequency for stations that do not use it.
R D S S Y S T E M
Page 162 of 266
159
Regional search mode
Some stations, when they are or-ganised in networks, broadcast regional programmes at certain times of day, and national pro-grammes at other times.
It is possible to search :
- Either for a regional station only.
- Or across the whole network in �o�r�d�e�r� �t�o� �fi� �n�d� �a� �d�i�f�f�e�r�e�n�t� �p�r�o�g�r�a�m�m�e.
To activate/deactivate this func-tion, proceed as for Scanning of RDS stations.
Note :
When this mode is activated, the system will remain tuned to one �s�p�e�c�i�fi� �c� �r�e�g�i�o�n�a�l� �s�t�a�t�i�o�n�.
�T�A� �t�r�a�f�fi� �c� �i�n�f�o�r�m�a�t�i�o�n� �(�t�r�a�f�fi� �c� �a�n�n�o�u�n�c�e�m�e�n�t�s�)
Some stations allow broadcasting, only in FM, of these messages thanks to the “TA” function.
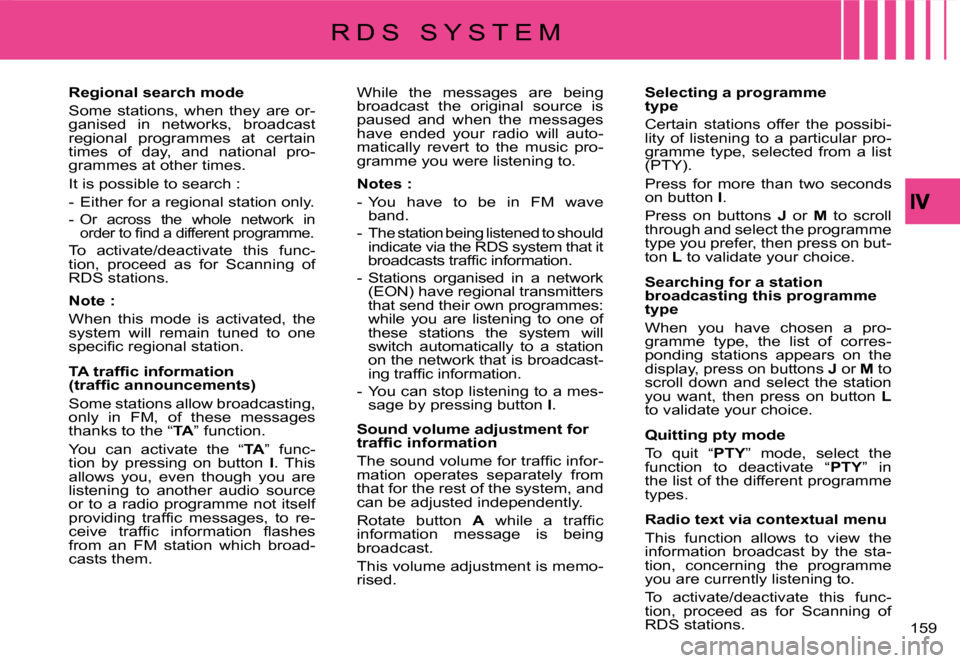
You can activate the “TA” func-tion by pressing on button I. This allows you, even though you are listening to another audio source or to a radio programme not itself �p�r�o�v�i�d�i�n�g� �t�r�a�f�fi� �c� �m�e�s�s�a�g�e�s�,� �t�o� �r�e�-�c�e�i�v�e� �t�r�a�f�fi� �c� �i�n�f�o�r�m�a�t�i�o�n� �fl� �a�s�h�e�s� from an FM station which broad-casts them.
While the messages are being broadcast the original source is paused and when the messages have ended your radio will auto-matically revert to the music pro-gramme you were listening to.
Notes :
- You have to be in FM wave band.
- The station being listened to should indicate via the RDS system that it �b�r�o�a�d�c�a�s�t�s� �t�r�a�f�fi� �c� �i�n�f�o�r�m�a�t�i�o�n.
- Stations organised in a network (EON) have regional transmitters that send their own programmes: while you are listening to one of these stations the system will switch automatically to a station on the network that is broadcast-�i�n�g� �t�r�a�f�fi� �c� �i�n�f�o�r�m�a�t�i�o�n�.
- You can stop listening to a mes-sage by pressing button I.
Sound volume adjustment for �t�r�a�f�fi� �c� �i�n�f�o�r�m�a�t�i�o�n
�T�h�e� �s�o�u�n�d� �v�o�l�u�m�e� �f�o�r� �t�r�a�f�fi� �c� �i�n�f�o�r�-mation operates separately from that for the rest of the system, and can be adjusted independently.
Rotate button A� �w�h�i�l�e� �a� �t�r�a�f�fi� �c� information message is being broadcast.
This volume adjustment is memo-rised.
Selecting a programme type
Certain stations offer the possibi-lity of listening to a particular pro-gramme type, selected from a list (PTY).
Press for more than two seconds on button I.
Press on buttons J or M to scroll through and select the programme type you prefer, then press on but-ton L to validate your choice.
Searching for a station broadcasting this programme type
When you have chosen a pro-gramme type, the list of corres-ponding stations appears on the display, press on buttons J or M to scroll down and select the station you want, then press on button Lto validate your choice.
Quitting pty mode
To quit “PTY” mode, select the function to deactivate “PTY” in the list of the different programme types.
Radio text via contextual menu
This function allows to view the information broadcast by the sta-tion, concerning the programme you are currently listening to.
To activate/deactivate this func-tion, proceed as for Scanning of RDS stations.
R D S S Y S T E M
Page 163 of 266
IV
Selecting CD source
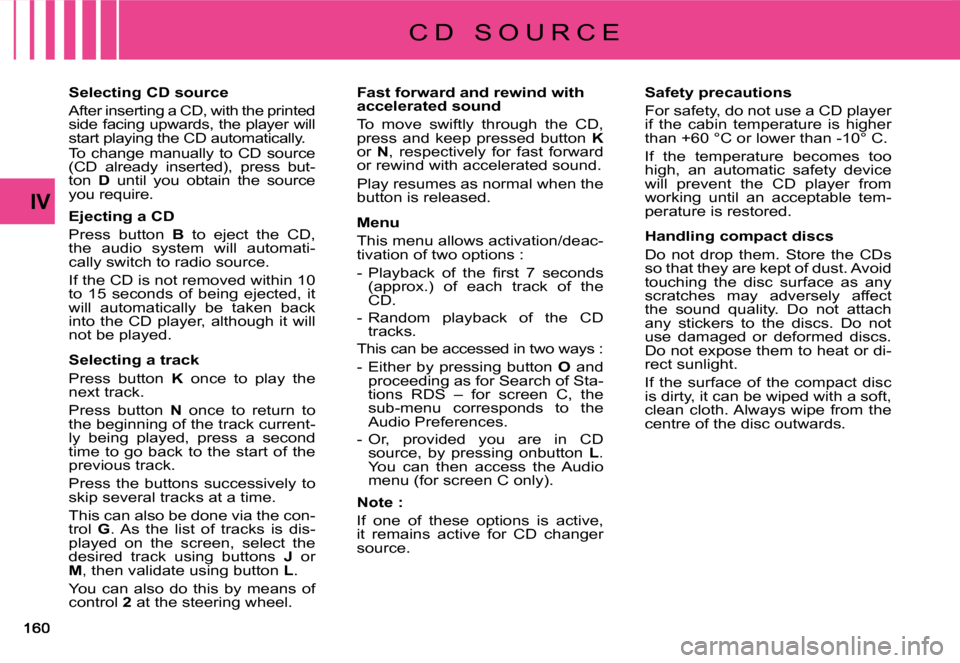
After inserting a CD, with the printed side facing upwards, the player will start playing the CD automatically.To change manually to CD source (CD already inserted), press but-ton D until you obtain the source you require.
Ejecting a CD
Press button B to eject the CD, the audio system will automati-cally switch to radio source.
If the CD is not removed within 10 to 15 seconds of being ejected, it will automatically be taken back into the CD player, although it will not be played.
Selecting a track
Press button K once to play the next track.
Press button N once to return to the beginning of the track current-ly being played, press a second time to go back to the start of the previous track.
Press the buttons successively to skip several tracks at a time.
This can also be done via the con-trol G. As the list of tracks is dis-played on the screen, select the desired track using buttons J or M, then validate using button L.
You can also do this by means of control 2 at the steering wheel.
Fast forward and rewind with accelerated sound
To move swiftly through the CD, press and keep pressed button Kor N, respectively for fast forward or rewind with accelerated sound.
Play resumes as normal when the button is released.
Menu
This menu allows activation/deac-tivation of two options :
�-� �P�l�a�y�b�a�c�k� �o�f� �t�h�e� �fi� �r�s�t� �7� �s�e�c�o�n�d�s� (approx.) of each track of the CD.
- Random playback of the CD tracks.
This can be accessed in two ways :
- Either by pressing button O and proceeding as for Search of Sta-tions RDS – for screen C, the sub-menu corresponds to the Audio Preferences.
- Or, provided you are in CD source, by pressing onbutton L. You can then access the Audio menu (for screen C only).
Note :
If one of these options is active, it remains active for CD changer source.
Safety precautions
For safety, do not use a CD player if the cabin temperature is higher than +60 °C or lower than -10° C.
If the temperature becomes too high, an automatic safety device will prevent the CD player from working until an acceptable tem-perature is restored.
Handling compact discs
Do not drop them. Store the CDs so that they are kept of dust. Avoid touching the disc surface as any scratches may adversely affect the sound quality. Do not attach any stickers to the discs. Do not use damaged or deformed discs. Do not expose them to heat or di-rect sunlight.
If the surface of the compact disc is dirty, it can be wiped with a soft, clean cloth. Always wipe from the centre of the disc outwards.
C D S O U R C E
Page 166 of 266
163
- The telephone detects the Blue-tooth system on your vehicle. “CITROËNtooth systemh syst” displays on your telephone.
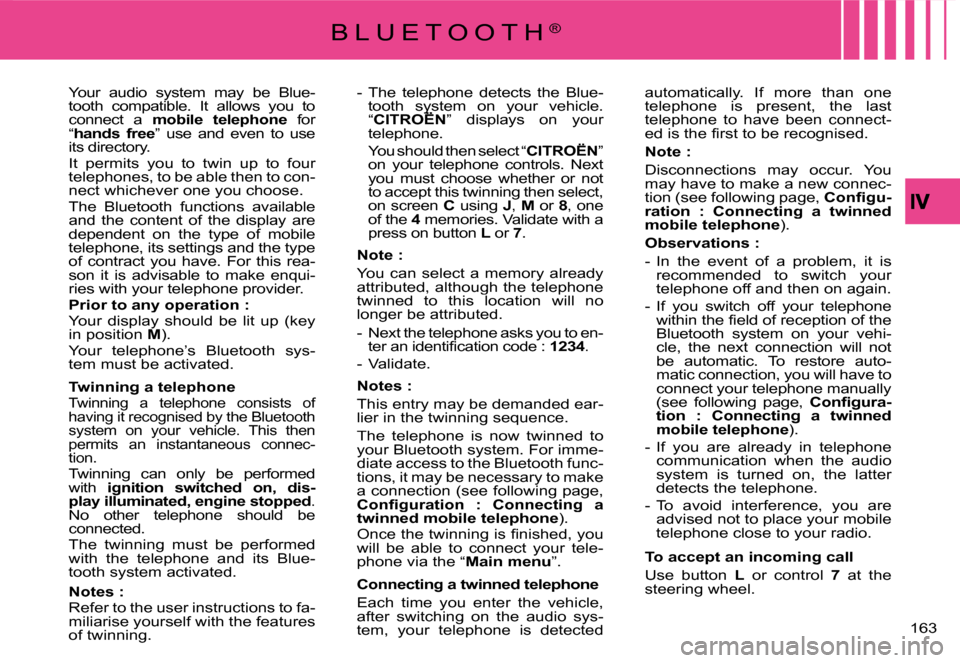
You should then select “CITROËN” on your telephone controls. Next you must choose whether or not to accept this twinning then select, on screen C using J, M or 8, one of the 4 memories. Validate with a press on button L or 7.
Note :
You can select a memory already attributed, although the telephone twinned to this location will no longer be attributed.
- Next the telephone asks you to en-�t�e�r� �a�n� �i�d�e�n�t�i�fi� �c�a�t�i�o�n� �c�o�d�e� �:� 1234.
- Validate.
Notes:
This entry may be demanded ear-lier in the twinning sequence.
The telephone is now twinned to your Bluetooth system. For imme-diate access to the Bluetooth func-tions, it may be necessary to make a connection (see following page, �C�o�n�fi� �g�u�r�a�t�i�o�n� �:� �C�o�n�n�e�c�t�i�n�g� �a� twinned mobile telephone).�O�n�c�e� �t�h�e� �t�w�i�n�n�i�n�g� �i�s� �fi� �n�i�s�h�e�d�,� �y�o�u� will be able to connect your tele-phone via the “Main menu”.
Connecting a twinned telephone
Each time you enter the vehicle, after switching on the audio sys-tem, your telephone is detected
automatically. If more than one telephone is present, the last telephone to have been connect-�e�d� �i�s� �t�h�e� �fi� �r�s�t� �t�o� �b�e� �r�e�c�o�g�n�i�s�e�d�.
Note :
Disconnections may occur. You may have to make a new connec-tion (see following page, �C�o�n�fi� �g�u�-ration : Connecting a twinned mobile telephone).
Observations :
- In the event of a problem, it is recommended to switch your telephone off and then on again.
- If you switch off your telephone �w�i�t�h�i�n� �t�h�e� �fi� �e�l�d� �o�f� �r�e�c�e�p�t�i�o�n� �o�f� �t�h�e� Bluetooth system on your vehi-cle, the next connection will not be automatic. To restore auto-matic connection, you will have to connect your telephone manually (see following page, �C�o�n�fi� �g�u�r�a�-tion : Connecting a twinned mobile telephone).
- If you are already in telephone communication when the audio system is turned on, the latter detects the telephone.
- To avoid interference, you are advised not to place your mobile telephone close to your radio.
To accept an incoming call
Use button L or control 7 at the steering wheel.
Your audio system may be Blue-tooth compatible. It allows you to connect a mobile telephone for “hands free” use and even to use its directory.It permits you to twin up to four telephones, to be able then to con-nect whichever one you choose.The Bluetooth functions available and the content of the display are dependent on the type of mobile telephone, its settings and the type of contract you have. For this rea-son it is advisable to make enqui-ries with your telephone provider.Prior to any operation :Your display should be lit up (key in position M).Your telephone’s Bluetooth sys-tem must be activated.
Twinning a telephoneTwinning a telephone consists of having it recognised by the Bluetooth system on your vehicle. This then permits an instantaneous connec-tion.Twinning can only be performed with ignition switched on, dis-play illuminated, engine stopped. No other telephone should be connected.The twinning must be performed with the telephone and its Blue-tooth system activated.
Notes : Refer to the user instructions to fa-miliarise yourself with the features of twinning.
B L U E T O O T H®
Page 167 of 266
IV
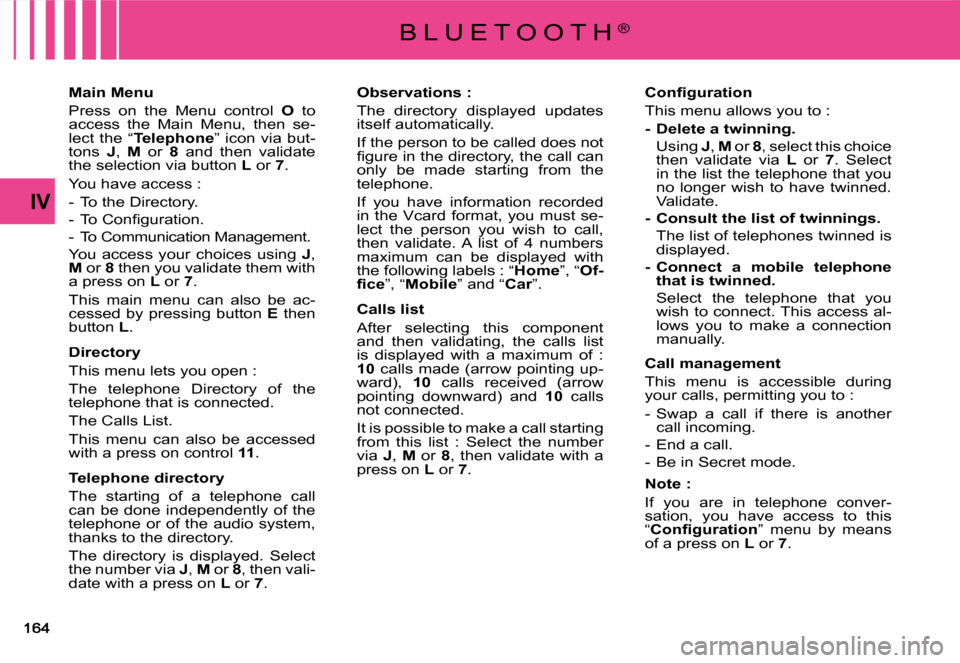
Main Menu
Press on the Menu control O to access the Main Menu, then se-lect the “Telephone” icon via but-tons J, M or 8 and then validate the selection via button L or 7.
You have access :
- To the Directory.
�-� �T�o� �C�o�n�fi� �g�u�r�a�t�i�o�n�.
- To Communication Management.
You access your choices using J, M or 8 then you validate them with a press on L or 7.
This main menu can also be ac-cessed by pressing button E then button L.
Directory
This menu lets you open :
The telephone Directory of the telephone that is connected.
The Calls List.
This menu can also be accessed with a press on control 11.
Telephone directory
The starting of a telephone call can be done independently of the telephone or of the audio system, thanks to the directory.
The directory is displayed. Select the number via J, M or 8, then vali-date with a press on L or 7.
Observations :
The directory displayed updates itself automatically.
If the person to be called does not �fi� �g�u�r�e� �i�n� �t�h�e� �d�i�r�e�c�t�o�r�y�,� �t�h�e� �c�a�l�l� �c�a�n� only be made starting from the telephone.
If you have information recorded in the Vcard format, you must se-lect the person you wish to call, then validate. A list of 4 numbers maximum can be displayed with the following labels : “Home”, “Of-�fi� �c�e”, “Mobile” and “Car”.
Calls list
After selecting this component and then validating, the calls list is displayed with a maximum of : 10 calls made (arrow pointing up-ward), 10 calls received (arrow pointing downward) and 10 calls not connected.
It is possible to make a call starting from this list : Select the number via J, M or 8, then validate with a press on L or 7.
�C�o�n�fi� �g�u�r�a�t�i�o�n
This menu allows you to :
- Delete a twinning.
Using J, M or 8, select this choice then validate via L or 7. Select in the list the telephone that you no longer wish to have twinned. Validate.
- Consult the list of twinnings.
The list of telephones twinned is displayed.
- Connect a mobile telephone that is twinned.
Select the telephone that you wish to connect. This access al-lows you to make a connection manually.
Call management
This menu is accessible during your calls, permitting you to :
- Swap a call if there is another call incoming.
- End a call.
- Be in Secret mode.
Note :
If you are in telephone conver-sation, you have access to this “�C�o�n�fi� �g�u�r�a�t�i�o�n” menu by means of a press on L or 7.
B L U E T O O T H®
Page 196 of 266
A
1
VI
193
C H A N G I N G A W H E E L
REMOVING A WHEEL
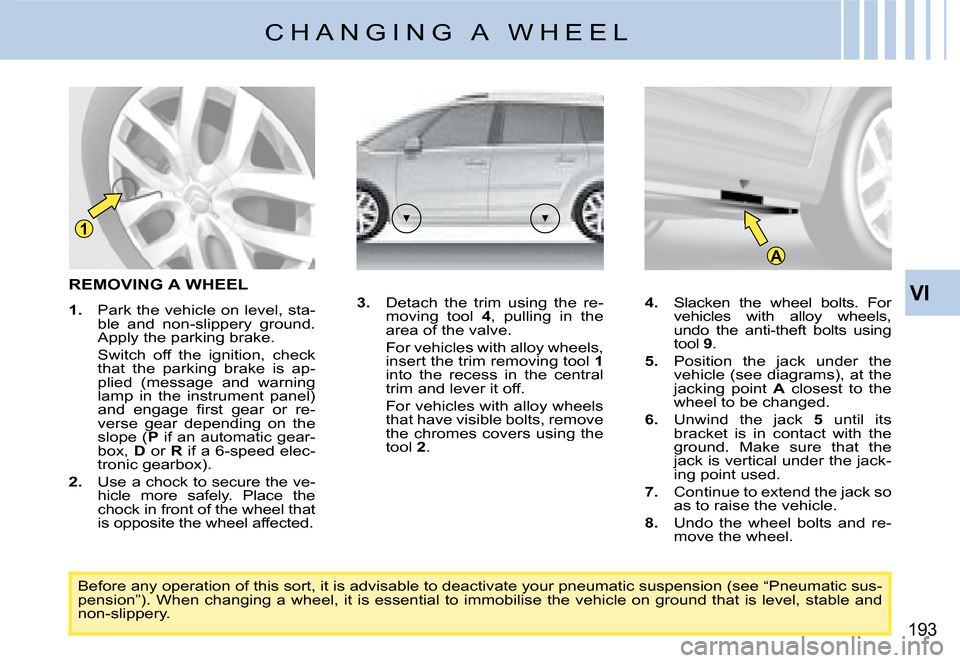
1. Park the vehicle on level, sta-ble and non-slippery ground. Apply the parking brake.
Switch off the ignition, check that the parking brake is ap-plied (message and warning lamp in the instrument panel) �a�n�d� �e�n�g�a�g�e� �fi� �r�s�t� �g�e�a�r� �o�r� �r�e�-verse gear depending on the slope (P if an automatic gear-box, D or R if a 6-speed elec-tronic gearbox).
2. Use a chock to secure the ve-hicle more safely. Place the chock in front of the wheel that is opposite the wheel affected.
3. Detach the trim using the re-moving tool 4, pulling in the area of the valve.
For vehicles with alloy wheels, insert the trim removing tool 1into the recess in the central trim and lever it off.
For vehicles with alloy wheels that have visible bolts, remove the chromes covers using the tool 2.
Before any operation of this sort, it is advisable to deactivate your pneumatic suspension (see “Pneumatic sus-pension”). When changing a wheel, it is essential to immobil ise the vehicle on ground that is level, stable and non-slippery.
4. Slacken the wheel bolts. For vehicles with alloy wheels, undo the anti-theft bolts using tool 9.
5. Position the jack under the vehicle (see diagrams), at the jacking point A closest to the wheel to be changed.
6. Unwind the jack 5 until its bracket is in contact with the ground. Make sure that the jack is vertical under the jack-ing point used.
7. Continue to extend the jack so as to raise the vehicle.
8. Undo the wheel bolts and re-move the wheel.
Page 199 of 266
196
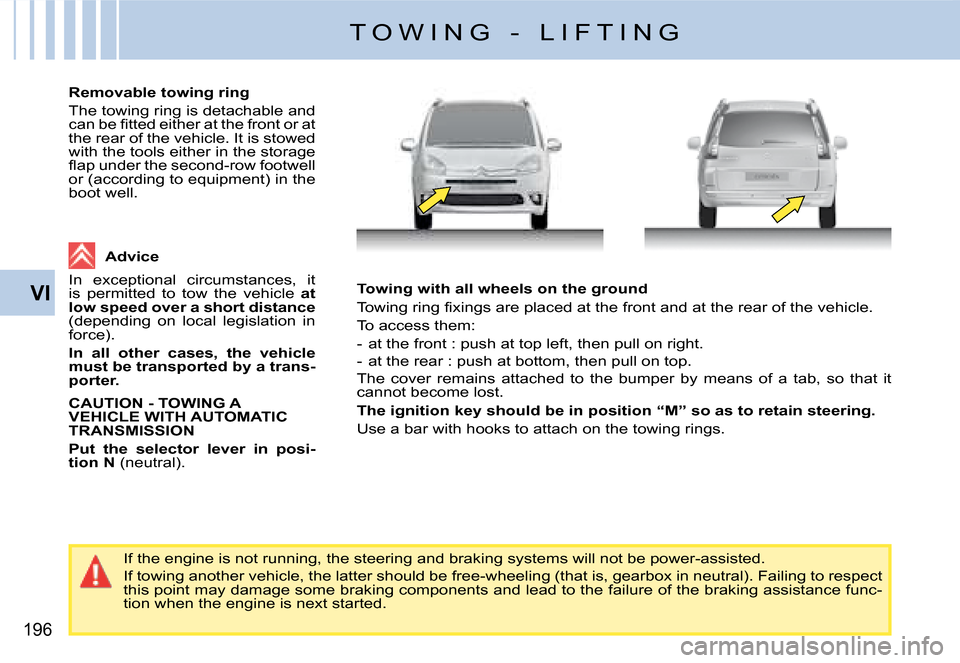
VITowing with all wheels on the ground
�T�o�w�i�n�g� �r�i�n�g� �fi� �x�i�n�g�s� �a�r�e� �p�l�a�c�e�d� �a�t� �t�h�e� �f�r�o�n�t� �a�n�d� �a�t� �t�h�e� �r�e�a�r� �o�f� �t�h�e� �v�e�h�i�c�l�e�.
To access them:
- at the front : push at top left, then pull on right.
- at the rear : push at bottom, then pull on top.
The cover remains attached to the bumper by means of a tab, so t hat it cannot become lost.
The ignition key should be in position “M” so as to retain steering.
Use a bar with hooks to attach on the towing rings.
If the engine is not running, the steering and braking systems will not be power-assisted.
If towing another vehicle, the latter should be free-wheeling (that is, gearbox in neutral). Failing to respect this point may damage some braking components and lead to the failure of the braking assistance func-tion when the engine is next started.
Removable towing ring
The towing ring is detachable and �c�a�n� �b�e� �fi� �t�t�e�d� �e�i�t�h�e�r� �a�t� �t�h�e� �f�r�o�n�t� �o�r� �a�t� the rear of the vehicle. It is stowed with the tools either in the storage �fl� �a�p� �u�n�d�e�r� �t�h�e� �s�e�c�o�n�d�-�r�o�w� �f�o�o�t�w�e�l�l� or (according to equipment) in the boot well.
T O W I N G - L I F T I N G
Advice
In exceptional circumstances, it is permitted to tow the vehicle at low speed over a short distance(depending on local legislation in force).
In all other cases, the vehicle must be transported by a trans-porter.
CAUTION - TOWING A VEHICLE WITH AUTOMATIC TRANSMISSION
Put the selector lever in posi-tion N (neutral).
Page 216 of 266
55
34
2728
26
25
29
31
32
33
30
35
36
D E S C R I P T I O N O F T H E C O N T R O L S
O N T H E S T E E R I N G W H E E L
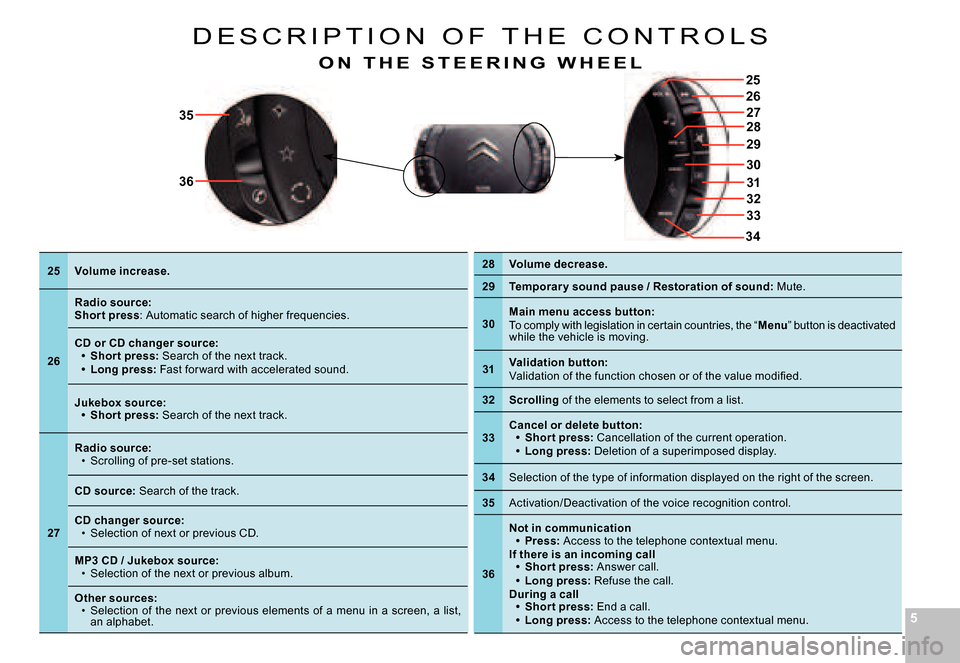
25Volume increase.
26
Radio source:Shor t press: Automatic search of higher frequencies.
CD or CD changer source:Shor t press: Search of the next track.Long press: Fast for ward with accelerated sound.
Page 223 of 266
121212
I
B1B2B3B4
C1C2C3C4C5
A1
A2
A3
A4
B1
B2
B3
B4
C1
C2
C3
C4
C5
D
A
B
C
ABCD
A1A2A3A4
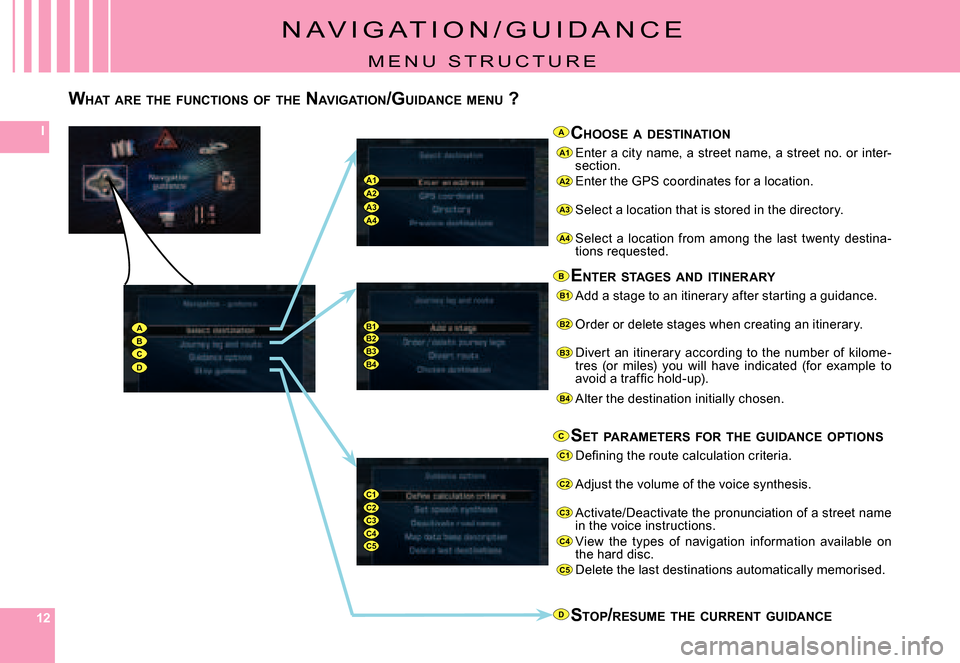
N A V I G A T I O N / G U I D A N C E
M E N U S T R U C T U R E
WHAT ARE THE FUNCTIONS OF THE NAVIGATION /GUIDANCE MENU ?
CHOOSE A DESTINATION
Enter a city name, a street name, a street no. or inter -section.Enter the GPS coordinates for a location.
Select a location that is stored in the directory.
Select a location from among the last twenty destina-tions requested.
ENTER STAGES AND ITINERARY
Add a stage to an itinerary after starting a guidance .
Order or delete stages when creating an itinerary.
Divert an itinerary according to the number of kilome -tres (or miles) you will have indicated (for example to �a�v�o�i�d� �a� �t�r�a�f�fi� �c� �h�o�l�d�-�u�p�)�.
Alter the destination initially chosen.
SET PARAMETERS FOR THE GUIDANCE OPTIONS
�D�e�fi� �n�i�n�g� �t�h�e� �r�o�u�t�e� �c�a�l�c�u�l�a�t�i�o�n� �c�r�i�t�e�r�i�a�.
Adjust the volume of the voice synthesis.
Activate/Deactivate the pronunciation of a street n ame in the voice instructions.View the types of navigation information available o n the hard disc.Delete the last destinations automatically memorised.
STOP /RESUME THE CURRENT GUIDANCE
Page 234 of 266
232323
IIi
C
B1B2
B3
D1D2D3
B1
B2
B3
C2
D1
D2
D3
C1
C2
C1AB
D
A
B
C
D
A
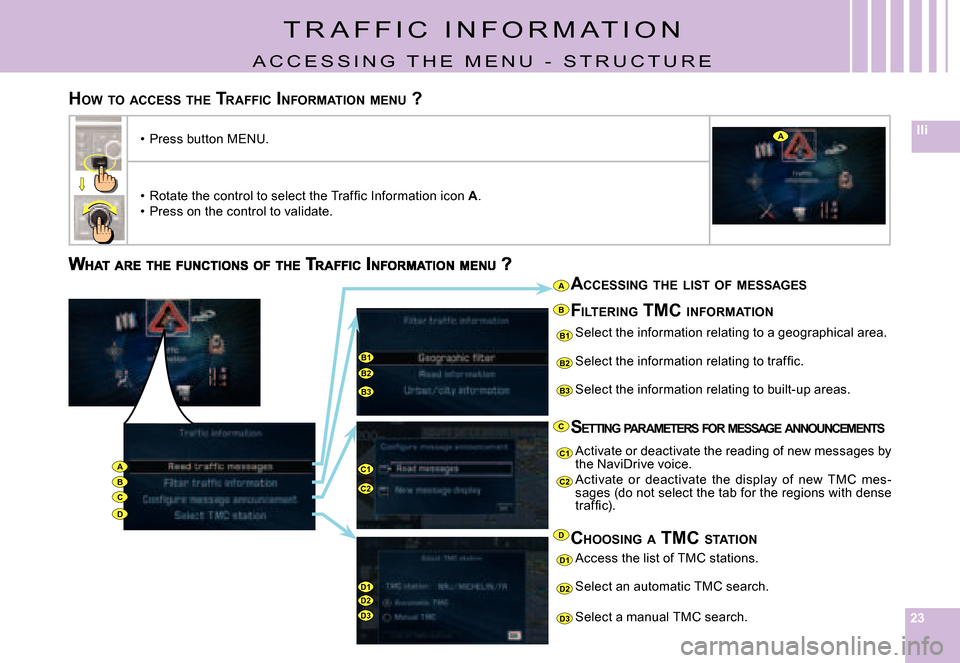
ACCESSING THE LIST OF MESSAGES
Select the information relating to a geographical a rea.
�S�e�l�e�c�t� �t�h�e� �i�n�f�o�r�m�a�t�i�o�n� �r�e�l�a�t�i�n�g� �t�o� �t�r�a�f�fi� �c�.
Select the information relating to built-up areas.
SETTING PARAMETERS FOR MESSAGE ANNOUNCEMENTS
Activate or deactivate the reading of new messages by the NaviDrive voice.Activate or deactivate the display of new TMC mes-sages (do not select the tab for the regions with dens e �t�r�a�f�fi� �c�)�.
CHOOSING A TMC STATION
Select an automatic TMC search.
Select a manual TMC search.
Access the list of TMC stations.
FILTERING TMC INFORMATION
T R A F F I C I N F O R M A T I O N
A C C E S S I N G T H E M E N U - S T R U C T U R E
HOW TO ACCESS THE TRAFFIC INFORMATION MENU ?
Press button MENU.