buttons Citroen C4 PICASSO 2015 2.G Owner's Manual
[x] Cancel search | Manufacturer: CITROEN, Model Year: 2015, Model line: C4 PICASSO, Model: Citroen C4 PICASSO 2015 2.GPages: 420, PDF Size: 10.72 MB
Page 4 of 420
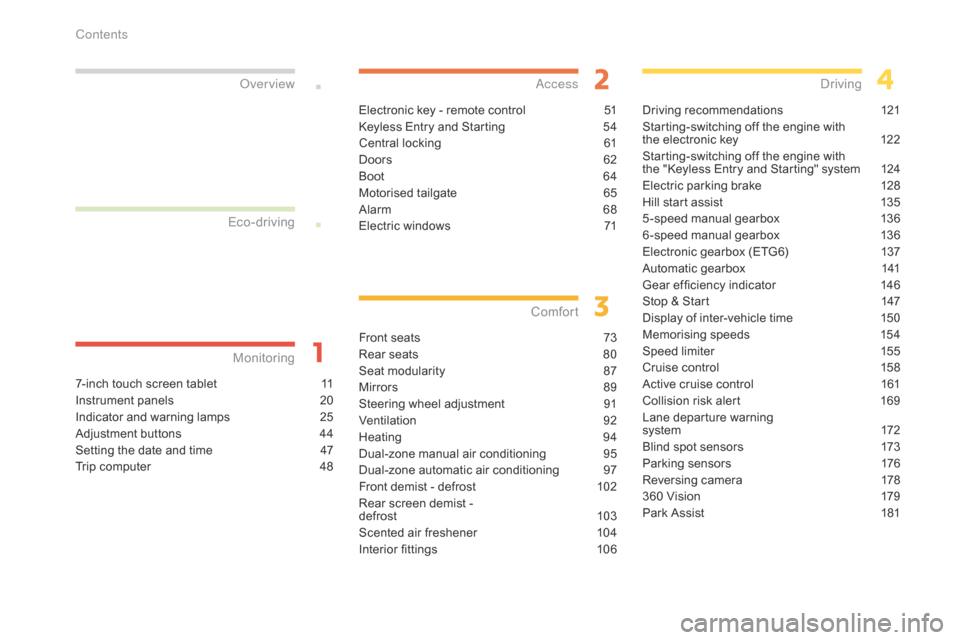
7-inch touch screen tablet 11
Instrument panels
2
0
Indicator
and warning lamps
2
5
Adjustment
buttons
4
4
Setting
the date and time
4
7
Trip
computer
4
8
Monitoring
ove
r view
Electronic key - remote control 5
1
Keyless Entry and Starting
5
4
Central
locking
6
1
Doors
6
2
Boot
6
4
Motorised
tailgate
6
5
Alarm
6
8
Electric
windows
7
1
access
Front seats 73
Rear seats
8
0
Seat
modularity
87
M
irrors
8
9
Steering
wheel adjustment
9
1
Ventilation
9
2
Heating
9
4
Dual-zone
m
anual
a
ir
c
onditioning
9
5
Dual-zone
automatic air conditioning
9
7
Front
demist - defrost
1
02
Rear
screen demist -
d
efrost
10
3
Scented
air freshener
1
04
Interior
fittings
1
06
Comfort
Driving recommendations 1 21
Starting-switching off the engine with
t
he electronic key
1
22
Starting-switching
off the engine with
t
he "Keyless Entry and Starting" system
1
24
Electric
parking brake
1
28
Hill
start assist
1
35
5 -speed
manual gearbox
1
36
6 -speed
manual gearbox
1
36
Electronic
gearbox (ETG6)
1
37
Automatic
gearbox
1
41
Gear
ef ficiency indicator
1
46
Stop
& Start
1
47
Display
of inter-vehicle time
1
50
Memorising
speeds
1
54
Speed
limiter
1
55
Cruise
control
1
58
Active
cruise control
1
61
Collision
risk alert
1
69
Lane
departure warning
system
1
72
Blind
spot sensors
1
73
Parking
sensors
1
76
Reversing
camera
1
78
360
Vision
1
79
Park
Assist
1
81
Driving
Eco-driving
Contents
Page 13 of 420
11
7-inch touch screen tablet
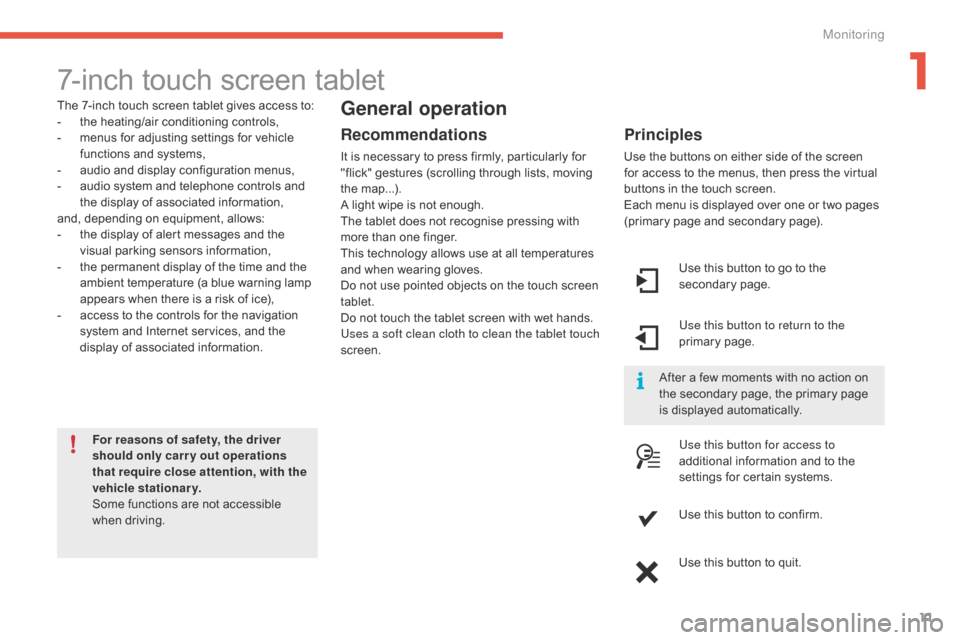
The 7-inch touch screen tablet gives access to:
- t he heating/air conditioning controls,
-
m
enus for adjusting settings for vehicle
f
unctions and systems,
-
a
udio and display configuration menus,
-
a
udio system and telephone controls and
t
he display of associated information,
and,
depending on equipment, allows:
-
t
he display of alert messages and the
v
isual
par
king
s
ensors
in
formation,
-
t
he permanent display of the time and the
a
mbient temperature (a blue warning lamp
a
ppears when there is a risk of ice),
-
a
ccess to the controls for the navigation
s
ystem and Internet services, and the
d
isplay of associated information.
For reasons of safety, the driver
should only carr y out operations
that require close attention, with the
vehicle stationary.
Some
functions are not accessible
w
hen
d
riving.General operation
Recommendations
It is necessary to press firmly, particularly for "flick" gestures (scrolling through lists, moving
t
he
m
ap...).
A
light wipe is not enough.
The
tablet does not recognise pressing with
m
ore than one finger.
This
technology allows use at all temperatures
a
nd when wearing gloves.
Do
not use pointed objects on the touch screen
t
ablet.
Do
not touch the tablet screen with wet hands.
Uses a soft clean cloth to clean the tablet touch
screen. Use
this button to go to the
s
econdary
pag
e.
Use this button to return to the
primary
pag
e.
Use this button for access to
additional
information and to the
s
ettings for certain systems.
Use
this button to confirm.
Use
this button to quit.
Principles
Use the buttons on either side of the screen for access to the menus, then press the virtual
b
uttons in the touch screen.
Each
menu is displayed over one or two pages
(
primary page and secondary page).
After
a few moments with no action on
t
he secondary page, the primary page
i
s displayed automatically.
1
Monitoring
Page 22 of 420
20
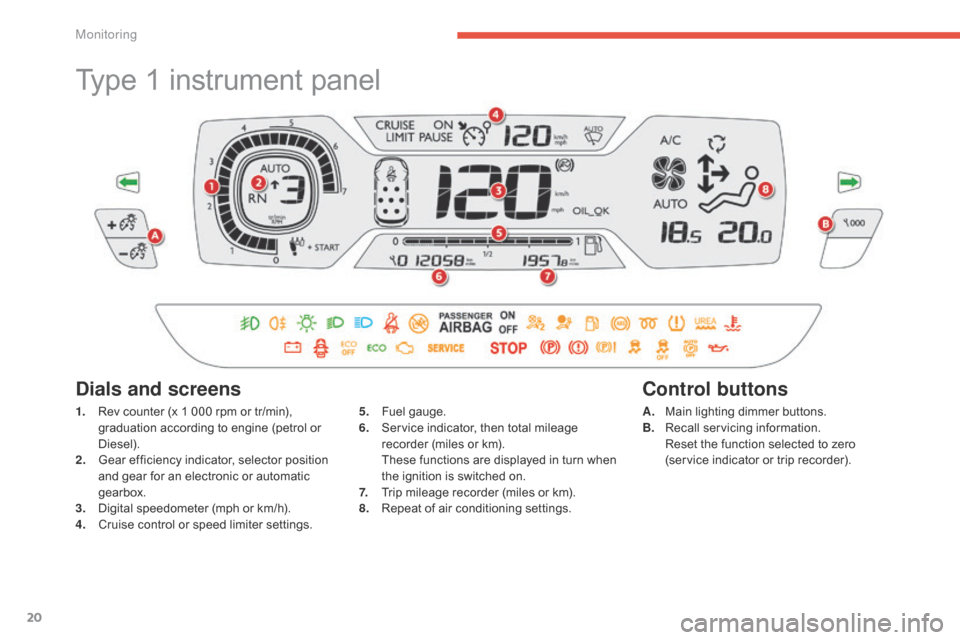
Type 1 instrument panel
1. Rev counter (x 1 000 rpm or tr/min), g
raduation according to engine (petrol or
D
iesel).
2.
G
ear efficiency indicator, selector position
a
nd gear for an electronic or automatic
g
earbox.
3.
D
igital speedometer (mph or km/h).
4.
C
ruise control or speed limiter settings.
Dials and screens
5. Fuel gauge.
6. S ervice indicator, then total mileage
r
ecorder (miles or km).
T
hese functions are displayed in turn when
t
he ignition is switched on.
7.
T
rip mileage recorder (miles or km).
8.
R
epeat of air conditioning settings.A. M
ain lighting dimmer buttons.
B. R ecall servicing information.
R
eset the function selected to zero
(service
indicator or trip recorder).
Control buttons
Monitoring
Page 47 of 420
45
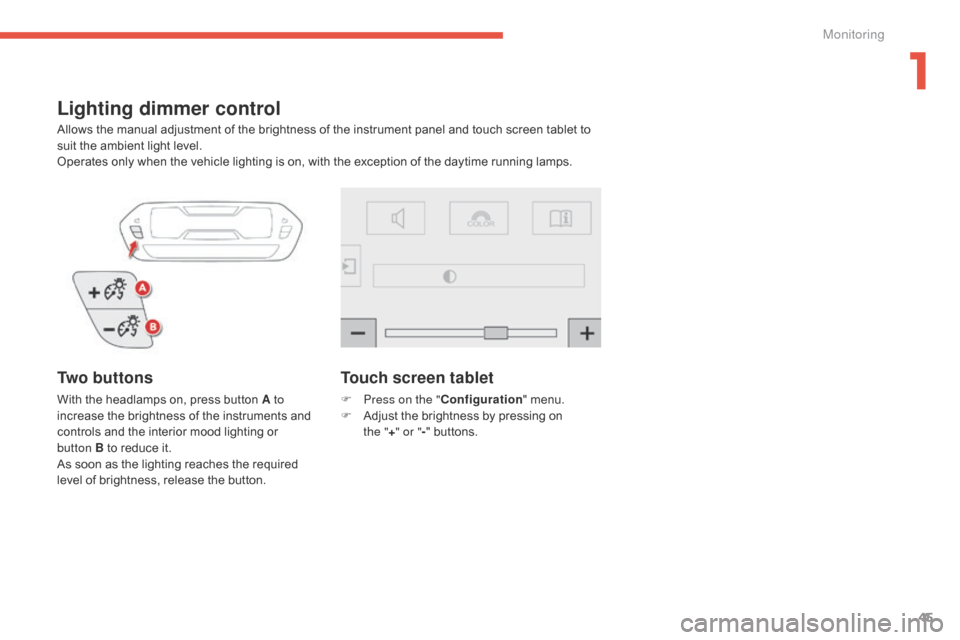
Lighting dimmer control
Allows the manual adjustment of the brightness of the instrument panel and touch screen tablet to suit the ambient light level.
Operates
only when the vehicle lighting is on, with the exception of the daytime running lamps.
Tw o b u t t o n s
With the headlamps on, press button A to
i ncrease the brightness of the instruments and
c
ontrols and the interior mood lighting or
button B
to reduce it.
As
soon as the lighting reaches the required
l
evel of brightness, release the button.
Touch screen tablet
F Press on the "Configuration" menu.
F A djust the brightness by pressing on
t
he "+ " or " -"
buttons.
1
Monitoring
Page 50 of 420
48
Trip computer
T ype 1 instrument panel
System that gives you information on the journey in progress (range, fuel consumption…).
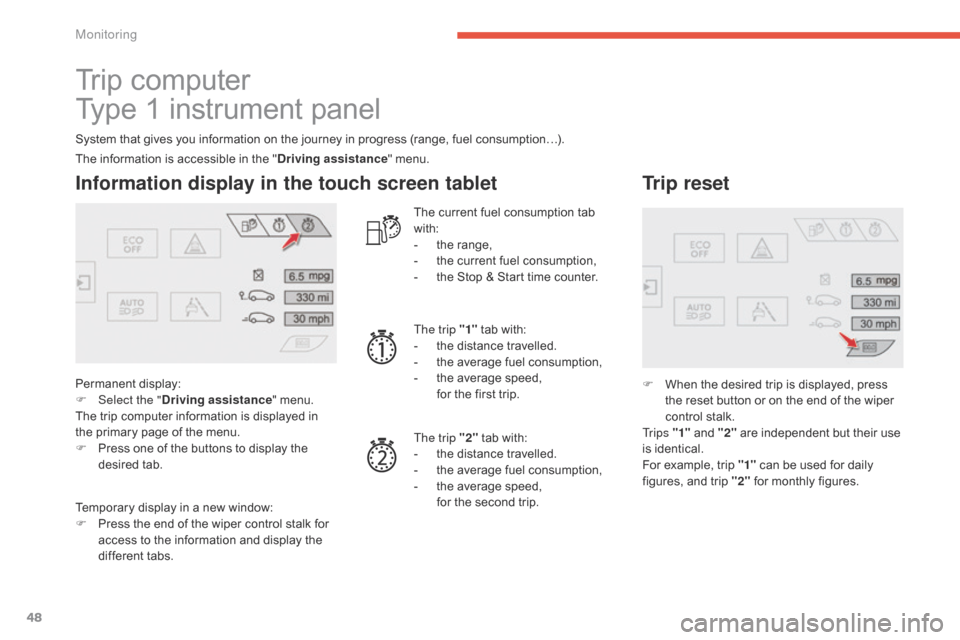
Information display in the touch screen tablet
Permanent display:
F Sel ect the " Driving assistance "
menu.
The
trip computer information is displayed in
t
he primary page of the menu.
F
P
ress one of the buttons to display the
de
sired
t
ab. The
current fuel consumption tab
w
ith:
-
t
he range,
-
t
he current fuel consumption,
-
t
he Stop & Start time counter.
The trip "1"
tab with:
-
t
he distance travelled.
-
t
he average fuel consumption,
- t he average speed,
f or the first trip.
The trip "2"
tab with:
-
t
he distance travelled.
-
t
he average fuel consumption,
-
t
he average speed,
f
or the second trip.
Trip reset
F When the desired trip is displayed, press t
he reset button or on the end of the wiper
c
ontrol stalk.
Tr i p s "1"
and "2"
are independent but their use
i
s identical.
For
example, trip "1"
can be used for daily
f
igures, and trip "2"
for monthly figures.
The
information
is
accessible
in
the
"
Driving assistance "
menu.
Temporary
display
in
a
new
window:
F
P
ress
the
end
of
the
wiper
control
stalk
for
a
ccess
to
the
information
and
display
the
d
ifferent
tabs.
Monitoring
Page 59 of 420
57
As a safety measure (children on board), never leave the vehicle without
t
aking the key for the Keyless Entry and
S
tarting
system,
even
for
a
short
period.
Be
aware of the risk of theft when the
k
ey for the Keyless Entry and Starting
s
ystem is in one of the defined zones
w
ith the vehicle unlocked.
If
one
of
the
doors
or
the
boot
is
still
o
pen
or
if
the
electronic
key
for
the
K
eyless
Entry
and
Starting
system
has
b
een
left
inside
the
vehicle,
the
central
l
ocking
does
not
take
place.
However,
the
alarm
(if
present)
will
be
f
ully
activated
after
about
45
seconds. In
order to preserve the battery in the
e
lectronic key and the vehicle's battery,
t
he "Hands-free" functions are put into
l
ong-term standby after 21 days without
u
se. To restore these functions, press
o
ne of the remote control buttons or
s
tart the engine with the electronic key
i
n the reader (see the "Starting with
t
he Keyless Entry and Starting system"
s
ection).
If
the
vehicle
is
unlocked
by
mistake
a
nd
with
no
action
on
the
doors
or
boot,
t
he
vehicle
will
lock
again
automatically
a
fter
about
thirty
seconds.
If
the
alarm
had
been
activated
p
reviously,
it
will
not
be
reactivated
au
tomatically.
The
automatic
folding
and
unfolding
o
f
the
door
mirrors
can
be
deactivated
b
y
a
CITROËN
dealer
or
a
qualified
w
orkshop. Accumulations
(water, dust, grime,
s
alt...) on the inner sur face if the door
h
andle may affect detection.
If
cleaning the inner sur face of the door
h
andle using a cloth does not restore
d
etection, contact a CITROËN dealer or
a
qualified workshop.
A
sudden splash of water (stream of
w
ater, high pressure jet washer, …)
m
ay be identified by the system as the
d
esire to open the vehicle.
2
Ac
Page 62 of 420
60
Lost electronic key
Visit a CITROËN dealer with the vehicle's registration certificate, your personal identification documents and if possible the key code label.
T he CITROËN dealer will be able to retrieve the key code and the transponder code required to order a new key.
Electronic key
The electronic key is a sensitive system; do not operate it while it is in your pocket as there is a possibility that it may unlock the vehicle, without you being aware of it.
Do
not repeatedly press the buttons of your electronic key out of range and out of sight of your vehicle. You run the risk of stopping it from
w
orking and the remote control would have to be reinitialised.
The
electronic key cannot operate as a remote control when it is in the reader or even when the ignition is switched on.
Locking the vehicle
Driving with the doors locked may make access to the passenger compartment by the emergency services more difficult in an emergency.
A s a safety precaution (with children on board), take the electronic key with you when you leave the vehicle, even for a short time.
Electrical interference
The electronic key may not operate if close to certain electronic devices: telephone, laptop computer, strong magnetic fields, ...
Anti-theft protection
Do not make any modifications to the electronic engine immobiliser system; this could cause malfunctions.
When purchasing a second-hand vehicle
Have all of the keys in your possession paired by a CITROËN dealer, to ensure that only your keys allow your vehicle to be unlocked and started.
Access
Page 68 of 420
66
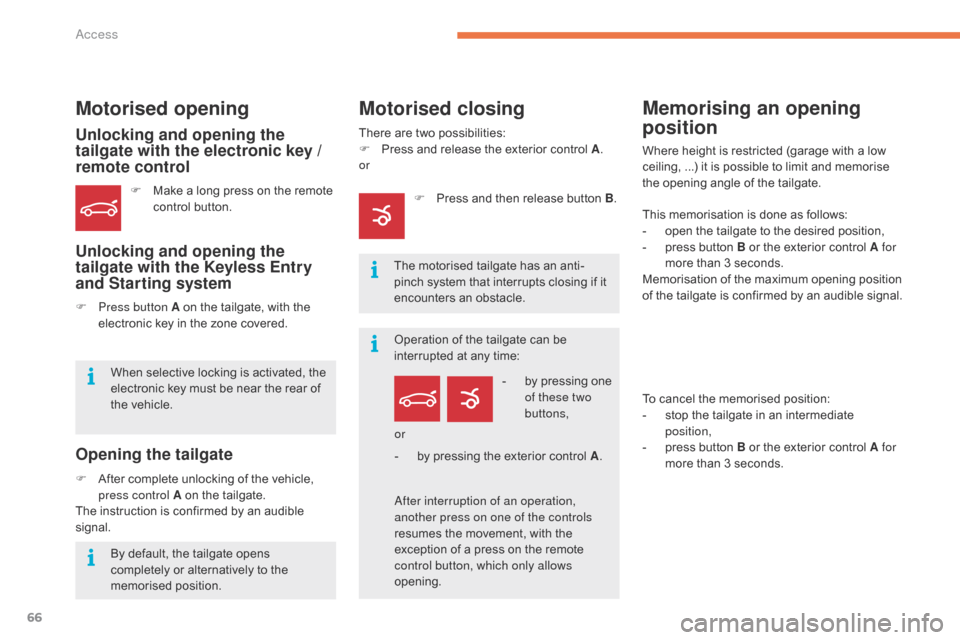
Motorised opening
Unlocking and opening the
tailgate with the electronic key /
remote control
Unlocking and opening the
tailgate with the Keyless Entry
and Starting system
Opening the tailgate
F Make a long press on the remote c
ontrol button.
F
P
ress button A on the tailgate, with the
e
lectronic key in the zone covered.
When
selective locking is activated, the
e
lectronic key must be near the rear of
t
he
vehicle.
By
default, the tailgate opens
c
ompletely or alternatively to the
m
emorised
p
osition.
F
A
fter
complete unlocking of the vehicle,
p
ress control A on the tailgate.
The
instruction is confirmed by an audible
s
ignal.
Motorised closing
There are two possibilities:
F P ress and release the exterior control A.
or
-
b
y pressing one
o
f these two
buttons,
The
motorised tailgate has an anti-
pinch
system that interrupts closing if it
e
ncounters an obstacle.
Operation
of the tailgate can be
i
nterrupted at any time:
af
ter interruption of an operation,
another press on one of the controls
resumes
the movement, with the
e
xception of a press on the remote
c
ontrol button, which only allows
opening. or
-
b
y pressing the exterior control A.
Memorising an opening
position
Where height is restricted (garage with a low c
eiling, ...) it is possible to limit and memorise
t
he opening angle of the tailgate.
This
memorisation is done as follows:
-
o
pen the tailgate to the desired position,
-
p
ress button B or the exterior control A for
more
than 3 seconds.
Memorisation
of the maximum opening position
o
f the tailgate is confirmed by an audible signal.
To
cancel the memorised position:
-
s
top the tailgate in an intermediate
p
osition,
-
p
ress button B or the exterior control A for
more
than 3 seconds.
F
P
ress
and
then
release
button
B .
Access
Page 71 of 420

69
OFF
Locking the vehicle
with exterior perimeter
monitoring only
Deactivate the interior volumetric monitoring to avoid unwanted triggering of the alarm in
c
ertain cases such as:
-
l
eaving a window partially open,
-
w
ashing your vehicle,
-
c
hanging a wheel.
Deactivating the volumetric
monitoring
F Switch of the ignition and within t
en seconds press this button
u
ntil its indicator lamp is on fixed.
F
G
et
out of the vehicle.
F
I
mmediately lock the vehicle using the
r
emote control or the "Keyless Entry and
S
tarting" system.
Only
the
exterior perimeter protection system is
a
ctive:
the indicator lamp in the button flashes
o
nce
per
second.
To
be
effective, this deactivation must be done
e
very
time the ignition is switched off.
In
the
case
of
automatic
locking
of
the
v
ehicle
(which
occurs
after
a
period
of
3
0
seconds
if
a
door
or
the
boot
is
not
o
pened),
the
monitoring
system
is
not
r
eactivated
automatically.
To
reactivate
i
t,
it
is
necessary
to
unlock
the
vehicle
a
nd
lock
it
again,
using
the
remote
c
ontrol
or
the
"Keyless
Entry
and
S
tarting"
system.
Deactivation
F Press
one of the unlocking buttons on the r
emote control:
short press
long
press
or
F
U
nlock the vehicle using the "Keyless Entry
a
nd Starting" system.
The
monitoring system is deactivated: the
i
ndicator lamp in the button is off and the
d
irection indicators flash for about 2 seconds.
2
Access
Page 78 of 420

76
System which registers the electrical settings of the driver's seat. It enables you to store and
r
ecall two positions using the buttons on the
s
ide of the driver's seat.
Storing driving positions
Storing a position
Using buttons M / 1 / 2
F Switch on the ignition.
F A djust your seat and the door mirrors.
F
P
ress button M , then press button 1 or 2
within
four seconds.
An
audible signal indicates that
t
he position has
b
een stored.
Storing
a new position cancels the previous
p
osition.
Recalling a stored position
Ignition on or engine running
F Press button 1 or 2 to recall the corresponding p osition.
A
n audible signal confirms that adjustment
i
s complete.
You
can interrupt the current movement by
p
ressing button M, 1 or 2
or by using one of the
s
eat controls.
A
stored position cannot be recalled while
d
riving.
Recalling
stored positions is deactivated
4
5 seconds after switching off the ignition.
Comfort