ESP Citroen C4 PICASSO 2016 2.G Repair Manual
[x] Cancel search | Manufacturer: CITROEN, Model Year: 2016, Model line: C4 PICASSO, Model: Citroen C4 PICASSO 2016 2.GPages: 527, PDF Size: 13.72 MB
Page 239 of 527
237
C4-Picasso-II_en_Chap06_securite_ed01-2016
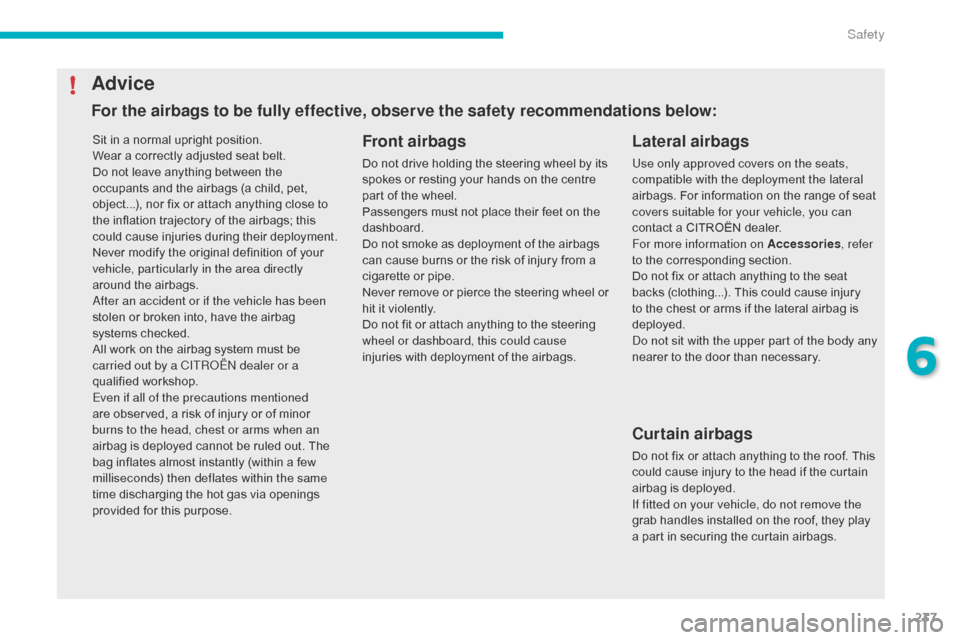
Sit┬Āin┬Āa┬Ānormal┬Āupright┬Āposition.
W ear ┬Ā a ┬Ā correctly ┬Ā adjusted ┬Ā seat ┬Ā belt.
Do
┬Ā not ┬Ā leave ┬Ā anything ┬Ā between ┬Ā the ┬Ā
o
ccupants ┬Ā and ┬Ā the ┬Ā airbags ┬Ā (a ┬Ā child, ┬Ā pet, ┬Ā
o
bject...), ┬Ā nor ┬Ā fix ┬Ā or ┬Ā attach ┬Ā anything ┬Ā close ┬Ā to ┬Ā
t
he ┬Ā inflation ┬Ā trajectory ┬Ā of ┬Ā the ┬Ā airbags; ┬Ā this ┬Ā
c
ould ┬Ā cause ┬Ā injuries ┬Ā during ┬Ā their ┬Ā deployment.
Never
┬Ā modify ┬Ā the ┬Ā original ┬Ā definition ┬Ā of ┬Ā your ┬Ā
v
ehicle, particularly in the area directly
around
┬Ā the ┬Ā airbags.
After an accident or if the vehicle has been
stolen
┬Ā or ┬Ā broken ┬Ā into, ┬Ā have ┬Ā the ┬Ā airbag ┬Ā
s
ystems ┬Ā checked.
All
┬Ā work ┬Ā on ┬Ā the ┬Ā airbag ┬Ā system ┬Ā must ┬Ā be ┬Ā
c
arried out by a CITRO├ŗN dealer or a
qualified
┬Āw
orkshop.
Even if all of the precautions mentioned
are
┬Ā observed, ┬Ā a ┬Ā risk ┬Ā of ┬Ā injury ┬Ā or ┬Ā of ┬Ā minor ┬Ā
b
urns to the head, chest or arms when an
airbag
┬Ā is ┬Ā deployed ┬Ā cannot ┬Ā be ┬Ā ruled ┬Ā out. ┬Ā The ┬Ā
b
ag ┬Ā inflates ┬Ā almost ┬Ā instantly ┬Ā (within ┬Ā a ┬Ā few ┬Ā
m
illiseconds) then deflates within the same
time
┬Ā discharging ┬Ā the ┬Ā hot ┬Ā gas ┬Ā via ┬Ā openings ┬Ā
p
rovided ┬Ā for ┬Ā this ┬Ā purpose.Front airbags
Do┬Ānot┬Ādrive┬Āholding┬Āthe┬Āsteering┬Āwheel┬Āby┬Āits┬Āspokes ┬Ā or ┬Ā resting ┬Ā your ┬Ā hands ┬Ā on ┬Ā the ┬Ā centre ┬Ā
p
art ┬Ā of ┬Ā the ┬Ā wheel.
Passengers
┬Ā must ┬Ā not ┬Ā place ┬Ā their ┬Ā feet ┬Ā on ┬Ā the ┬Ā
das
hboard.
Do
┬Ā not ┬Ā smoke ┬Ā as ┬Ā deployment ┬Ā of ┬Ā the ┬Ā airbags ┬Ā
c
an ┬Ā cause ┬Ā burns ┬Ā or ┬Ā the ┬Ā risk ┬Ā of ┬Ā injury ┬Ā from ┬Ā a ┬Ā
c
igarette ┬Ā or ┬Ā pipe.
Never
┬Ā
remove
┬Ā
or
┬Ā
pierce
┬Ā
the
┬Ā
steering
┬Ā
wheel
┬Ā
or
┬Āh
it ┬Ā it ┬Ā violently.
Do
┬Ā not ┬Ā fit ┬Ā or ┬Ā attach ┬Ā anything ┬Ā to ┬Ā the ┬Ā steering ┬Ā
w
heel or dashboard, this could cause
injuries
┬Ā with ┬Ā deployment ┬Ā of ┬Ā the ┬Ā airbags.
Advice
Lateral airbags
Use only approved covers on the seats,
compatible with the deployment the lateral
airbags.┬Ā For ┬Ā information ┬Ā on ┬Ā the ┬Ā range ┬Ā of ┬Ā seat ┬Ā
c
overs suitable for your vehicle, you can
contact
┬Ā a ┬Ā CITRO├ŗN┬Ādealer.
For more information on Accessories , refer
to
┬Ā the ┬Ā corresponding ┬Ā section.
Do
┬Ā not ┬Ā fix ┬Ā or ┬Ā attach ┬Ā anything ┬Ā to ┬Ā the ┬Ā seat ┬Ā
b
acks ┬Ā (clothing...). ┬Ā This ┬Ā could ┬Ā cause ┬Ā injury ┬Ā
t
o ┬Ā the ┬Ā chest ┬Ā or ┬Ā arms ┬Ā if ┬Ā the ┬Ā lateral ┬Ā airbag ┬Ā is ┬Ā
d
eployed.
Do not sit with the upper part of the body any
nearer
┬Ā to ┬Ā the ┬Ā door ┬Ā than ┬Ā necessary.
Curtain airbags
Do┬Ānot┬Āfix┬Āor┬Āattach┬Āanything┬Āto┬Āthe┬Āroof.┬ĀThis┬Ācould ┬Ā cause ┬Ā injury ┬Ā to ┬Ā the ┬Ā head ┬Ā if ┬Ā the ┬Ā curtain ┬Ā
a
irbag ┬Ā is ┬Ā deployed.
If fitted on your vehicle, do not remove the
grab
┬Ā handles ┬Ā installed ┬Ā on ┬Ā the ┬Ā roof, ┬Ā they ┬Ā play ┬Ā
a
┬Ā part ┬Ā in ┬Ā securing ┬Ā the ┬Ā curtain ┬Ā airbags.
For the airbags to be fully effective, observe the safety recommendations below:
6
Safety
Page 243 of 527
241
AR
BG
ąØąśąÜą×ąōąÉ┬ĀąØąĢ┬ĀąĖąĮčüčéą░ą╗ąĖčĆą░ą╣č鹥┬Āą┤ąĄčéčüą║ąŠ┬Āčüč鹊ą╗č湥┬ĀąĮą░┬ĀčüąĄą┤ą░ą╗ą║ą░┬Āčü┬ĀąÉąÜąóąśąÆąśąĀąÉąØąÉ┬Āą┐čĆąĄą┤ąĮą░┬ĀąÆą¬ąŚąöąŻą©ąØąÉ┬ĀąÆą¬ąŚąōąøąÉąÆąØąśą” ąÉ.┬ĀąóąŠą▓ą░┬Āą╝ąŠąČąĄ┬Āą┤ą░┬Āą┐čĆąĖčćąĖąĮąĖ┬ĀąĪ ą£ą¬ąĀąó ┬Ā ąĖą╗ąĖ ┬Ā ąĪąĢąĀąśą×ąŚąØą× ┬Ā ąØąÉąĀąÉąØą»ąÆąÉąØąĢ ┬Ā ąĮą░ ┬Ā ą┤ąĄč鹥č鹊.
CSNIKDY┬Āneumis┼źujte┬Ād─øtsk├®┬Āz├Īdr┼Šn├®┬Āza┼Ö├Łzen├Ł┬Āorientovan├®┬Āsm─ørem┬Ādozadu┬Āna┬Āsedadlo┬Āchr├Īn─øn├®┬ĀAKTIVOVAN├ØM┬Ā─Źeln├Łm┬ĀAIRBAGEM.┬ĀHroz├Ł┬Ānebezpe─Ź├Ł ┬Ā SMRTI ┬Ā D├ŹT─ÜTE ┬Ā nebo ┬Ā V├ü ┼ĮN├ēHO ┬Ā ZR AN─ÜN├Ź.
DABrug┬ĀALDRIG┬Ā┬Āen┬Ābagudvendt┬Ābarnestol┬Āp├ź┬Āet┬Ās├”de,┬Āder┬Āer┬Ābeskyttet┬Āaf┬Āen┬ĀAKTIV┬ĀAIRBAG.┬ĀBARNET┬Ārisikerer┬Āat┬Āblive┬ĀALVORLIGT┬ĀKV├åSTET ┬Ā eller ┬Ā DR ├åBT.
DEMontieren┬ĀSie┬Āauf┬Āeinem┬ĀSitz┬Āmit┬ĀAKTIVIERTEM┬ĀFront-Airbag┬ĀNIEMALS┬Āeinen┬ĀKindersitz┬Āoder┬Āeine┬ĀBabyschale┬Āentgegen┬Āder┬ĀFahr trichtung,┬Ādas ┬Ā Kind ┬Ā k├Čnnte ┬Ā schwere ┬Ā oder ┬Ā sogar ┬Ā t├Čdliche ┬Ā Verletzungen ┬Ā erleiden.
EL╬£╬Ę┬ĀŽćŽü╬ĘŽā╬╣╬╝╬┐ŽĆ╬┐╬╣╬Ą╬»Žä╬Ą┬Ā╬Ā╬¤╬ż╬Ģ┬ĀŽĆ╬▒╬╣╬┤╬╣╬║Žī┬Ā╬║╬¼╬Ė╬╣Žā╬╝╬▒┬Ā╬╝╬Ą┬ĀŽä╬Ę╬Į┬ĀŽĆ╬╗╬¼Žä╬Ę┬ĀŽä╬┐Žģ┬ĀŽĆŽü╬┐Žé┬ĀŽä╬┐┬Ā╬Ą╬╝ŽĆŽüŽīŽé┬Ā╬╝╬ŁŽü╬┐Žé┬ĀŽä╬┐Žģ┬Ā╬▒ŽģŽä╬┐╬║╬╣╬Į╬«Žä╬┐Žģ,┬ĀŽā╬Ą┬Ā╬╝╬╣╬▒┬Ā╬Ė╬ŁŽā╬Ę┬ĀŽĆ╬┐Žģ┬ĀŽĆŽü╬┐ŽāŽä╬▒Žä╬ĄŽŹ╬ĄŽä╬▒╬╣┬Ā╬▒ŽĆŽī┬Ā╬£╬Ģ╬ż╬®╬Ā╬Ö╬Ü╬¤ ┬Ā ╬▒╬ĄŽüŽīŽā╬▒╬║╬┐ ┬Ā ŽĆ╬┐Žģ ┬Ā ╬Ą╬»╬Į╬▒╬╣ ┬Ā ╬Ģ╬Ø╬Ģ╬Ī╬ō╬¤╬Ż. ┬Ā ╬æŽģŽäŽī ┬Ā ╬╝ŽĆ╬┐Žü╬Ą╬» ┬Ā ╬Į╬▒ ┬Ā ╬ŁŽć╬Ą╬╣ ┬Ā Žā╬▒╬Į ┬Ā ŽāŽģ╬Į╬ŁŽĆ╬Ą╬╣╬▒ ┬Ā Žä╬┐ ┬Ā ╬ś╬æ╬Ø╬æ╬ż╬¤ ┬Ā ╬« ┬Ā Žä╬┐ ┬Ā ╬Ż╬¤╬Æ╬æ╬Ī╬¤ ┬Ā ╬ż╬Ī╬æ╬ź╬£╬æ╬ż╬Ö╬Ż╬£╬¤ ┬Ā Žä╬┐Žģ ┬Ā ╬Ā╬æ╬Ö╬ö╬Ö╬¤╬ź.
ENNEVER┬Āuse┬Āa┬Ārear ward┬Āfacing┬Āchild┬Ārestraint┬Āon┬Āa┬Āseat┬Āprotected┬Āby┬Āan┬ĀACTIVE┬ĀAIRBAG┬Āin┬Āfront┬Āof┬Āit,┬ĀDEATH┬Āor┬ĀSERIOUS┬ĀINJURY┬Āto┬Āthe┬ĀCHILD ┬Ā can ┬Ā occur.
ESNO┬ĀINSTALAR┬ĀNUNCA┬Āun┬Āsistema┬Āde┬Āretenci├│n┬Āpara┬Āni├▒os┬Āde┬Āespaldas┬Āal┬Āsentido┬Āde┬Āla┬Āmarcha┬Āen┬Āun┬Āasiento┬Āprotegido┬Āmediante┬Āun┬ĀAIRBAG ┬Ā frontal ┬Ā ACTIVADO, ┬Ā ya ┬Ā que ┬Ā podr├Ła ┬Ā causar ┬Ā lesiones ┬Ā GR AVES ┬Ā o ┬Ā incluso ┬Ā la ┬Ā MUERTE ┬Ā del ┬Ā ni├▒o.
ET├ärge┬ĀMITTE┬ĀKUNAGI┬Āpaigaldage┬Ā"seljaga┬Ās├Ąidusuunas"┬Ālapseistet┬Ājuhi┬Āk├Ąr valistmele,┬Āmille┬ĀESITURVAPADI┬Āon┬ĀAKTIVEERITUD.┬ĀTur vapadja┬Āavanemine ┬Ā v├Ąib ┬Ā last ┬Ā T├ĢSISELT ┬Ā v├Ąi ┬Ā ELUOHTLIKULT ┬Ā vigastada.
FI├äL├ä┬ĀKOSK A AN┬Āaseta┬Ālapsen┬Ātur vaistuinta┬Āselk├ż┬Āajosuuntaan┬Āistuimelle,┬Ājonka┬Āedess├ż┬Āsuojana┬Āon┬Āk├żytt├Č├Čn┬Āaktivoitu┬ĀTURVAT Y YNY.┬ĀSen┬Ālaukeaminen ┬Ā voi ┬Ā aiheuttaa ┬Ā LAPSEN ┬Ā KUOLEMAN ┬Ā tai ┬Ā VAK AVAN ┬Ā LOUKK A ANTUMISEN.
FRNE┬ĀJAMAIS┬Āinstaller┬Āde┬Āsyst├©me┬Āde┬Āretenue┬Āpour┬Āenfants┬Āfaisant┬Āface┬Āvers┬ĀlŌĆÖarri├©re┬Āsur┬Āun┬Āsi├©ge┬Āprot├®g├®┬Āpar┬Āun┬ĀCOUSSIN┬ĀGONFLABLE┬Āfrontal ┬Ā ACTIV├ē.
Cela
┬Ā peut ┬Ā provoquer ┬Ā la ┬Ā MORT ┬Ā de ┬Ā lŌĆÖENFANT ┬Ā ou ┬Ā le ┬Ā BLESSER ┬Ā GR AVEMENT.
HRNIK ADA┬Āne┬Āpostavljati┬Ādje─Źju┬Āsjedalicu┬Āle─æima┬Āu┬Āsmjeru┬Āvo┼Šnje┬Āna┬Āsjedalo┬Āza┼Īti─ćeno┬ĀUKLJU─īENIM┬Āprednjim┬ĀZR A─īNIM┬ĀJASTUKOM.┬ĀTo┬Ābi┬Āmoglo ┬Ā uzrokovati ┬Ā SMRT ┬Ā ili ┬Ā TE┼ĀKU ┬Ā OZLJEDU ┬Ā djeteta.
HUSOHA┬Āne┬Āhaszn├Īljon┬Āmenetir├Īnynak┬Āh├Īttal┬Ābeszerelt┬Āgyermek├╝l├®st┬ĀAKTIV├üLT┬Ā(BEK APCSOLT)┬ĀFRONTL├ēGZS├üKK AL┬Āv├®dett┬Ā├╝l├®sen.┬ĀEz┬Āa┬Āgyermek ┬Ā HAL├üL├üT ┬Ā vagy ┬Ā S├ÜLYOS ┬Ā S├ēR├£L├ēS├ēT ┬Ā okozhatja.
ITNON┬Āinstallare┬ĀMAI┬Āseggiolini┬Āper┬Ābambini┬Āposizionati┬Āin┬Āsenso┬Ācontrario┬Āa┬Āquello┬Ādi┬Āmarcia┬Āsu┬Āun┬Āsedile┬Āprotetto┬Āda┬Āun┬ĀAIRBAG┬Āfrontale┬ĀATTIVATO. ┬Ā Ci├▓ ┬Ā potrebbe ┬Ā provocare ┬Ā la ┬Ā MORTE ┬Ā o ┬Ā FERITE ┬Ā GR AVI ┬Ā al ┬Ā bambino.
LTNIEK ADA┬Āne─»renkite┬Āvaiko┬Āprilaikymo┬Āpriemon─Śs┬Āsu┬Āatgal┬Āatgr─Ö┼Štu┬Āvaiku┬Āant┬Ās─Śdyn─Śs,┬Ākuri┬Āsaugoma┬ĀVEIKIAN─īIOS┬Āpriekin─Śs┬ĀORO┬ĀPAGALV─¢S. ┬Ā I┼Īsiskleidus ┬Ā oro ┬Ā pagalvei ┬Ā vaikas ┬Ā gali ┬Ā b┼½ti ┬Ā MIRTINAI ┬Ā arba ┬Ā SUNKIAI ┬Ā TR AUMUOTAS.
LVNEK AD┬ĀNEuzst─üdiet┬Āuz┬Āaizmuguri┬Āv─ōrstu┬Āb─ōrnu┬Ās─ōdekl─½ti┬Āpriek┼Ī─ōj─ü┬Āpasa┼Šiera┬Ās─ōdviet─ü,┬Ākur─ü┬Āir┬ĀAKTIVIZ─ÆTS┬Āpriek┼Ī─ōjais┬ĀDRO┼Ā─¬BAS┬ĀGAISA┬ĀSP I LV E N S .
Tas
┬Ā var ┬Ā izrais─½t ┬Ā B─ÆRNA ┬Ā N─ĆVI ┬Ā vai ┬Ā rad─½t ┬Ā NOPIETNUS ┬Ā IEVAINOJUMUS.
C4-Picasso-II_en_Chap06_securite_ed01-2016
6
Safety
Page 254 of 527
252
C4-Picasso-II_en_Chap06_securite_ed01-2016
I UF: seat suitable for the installation of an
ISOFIX U niversal seat, F or ward
┬Ā facing ┬Ā
s
ecured ┬Ā using ┬Ā the ┬Ā upper ┬Ā strap ┬Ā to ┬Ā the ┬Ā top ┬Ā
t
ether ┬Ā on ┬Ā ISOFIX ┬Ā seats.
IL- SU:
s
eat suitable for the installation of an
I sofix
┬Ā Semi- Universal
┬Āsea
t
┬Āei
ther:
-
┬Ā
r
ear ward ┬Ā facing ┬Ā fitted ┬Ā with ┬Ā an ┬Ā upper ┬Ā strap ┬Ā
o
r ┬Ā a ┬Ā support ┬Ā leg,
-
┬Ā
f
or ward ┬Ā facing ┬Ā fitted ┬Ā with ┬Ā a ┬Ā support ┬Ā leg,
-
a s
leeper cot fitted with an upper strap or a
support
┬Ā leg.
Remove and stow the head restraint
before
┬Ā installing ┬Ā a ┬Ā child ┬Ā seat ┬Ā on ┬Ā a ┬Ā
p
assenger ┬Ā seat. ┬Ā Refit ┬Ā the ┬Ā head ┬Ā restraint ┬Ā
o
nce ┬Ā the ┬Ā child ┬Ā seat ┬Ā has ┬Ā been ┬Ā removed.
For more information on ISOFIX mountings
and
┬Ā in ┬Ā particular ┬Ā on ┬Ā securing ┬Ā the ┬Ā upper ┬Ā strap, ┬Ā
r
efer ┬Ā to ┬Ā the ┬Ā corresponding ┬Ā section.
X:
s
eat not suitable for the installation of a
child
┬Ā seat ┬Ā or ┬Ā sleeper ┬Ā cot ┬Ā for ┬Ā the ┬Ā weight ┬Ā group ┬Ā
i
ndicated.
(1) :
┬Ā┬Ā
T
he ┬Ā outer ┬Ā seat ┬Ā in ┬Ā row ┬Ā 2 ┬Ā must ┬Ā be ┬Ā adjusted ┬Ā
t
o ┬Ā 3 ┬Ā notches ┬Ā back ┬Ā from ┬Ā the ┬Ā fully ┬Ā for ward ┬Ā
p
osition.
Safety
Page 256 of 527
254
C4-Picasso-II_en_Chap06_securite_ed01-2016
I UF: seat suitable for the installation of an
ISOFIX U niversal seat, F or ward
┬Ā facing ┬Ā
s
ecured ┬Ā using ┬Ā the ┬Ā upper ┬Ā strap ┬Ā to ┬Ā the ┬Ā top ┬Ā
t
ether ┬Ā on ┬Ā ISOFIX ┬Ā seats.
IL- SU:
s
eat suitable for the installation of an
I sofix
┬Ā Semi- Universal
┬Āsea
t
┬Āei
ther:
-
┬Ā
r
ear ward ┬Ā facing ┬Ā fitted ┬Ā with ┬Ā an ┬Ā upper ┬Ā strap ┬Ā
o
r ┬Ā a ┬Ā support ┬Ā leg,
-
┬Ā
f
or ward ┬Ā facing ┬Ā fitted ┬Ā with ┬Ā a ┬Ā support ┬Ā leg,
-
a s
leeper cot fitted with an upper strap or a
support
┬Ā leg.
Remove and stow the head restraint
before
┬Ā installing ┬Ā a ┬Ā child ┬Ā seat ┬Ā on ┬Ā a ┬Ā
p
assenger ┬Ā seat. ┬Ā Refit ┬Ā the ┬Ā head ┬Ā restraint ┬Ā
o
nce ┬Ā the ┬Ā child ┬Ā seat ┬Ā has ┬Ā been ┬Ā removed.
For more information on ISOFIX mountings
and
┬Ā in ┬Ā particular ┬Ā on ┬Ā securing ┬Ā the ┬Ā upper ┬Ā strap, ┬Ā
r
efer ┬Ā to ┬Ā the ┬Ā corresponding ┬Ā section.
X:
s
eat not suitable for the installation of a
child
┬Ā seat ┬Ā or ┬Ā sleeper ┬Ā cot ┬Ā for ┬Ā the ┬Ā weight ┬Ā group ┬Ā
i
ndicated.
Safety
Page 263 of 527
261
C4-Picasso-II_en_Chap07_info-pratiques_ed01-2016
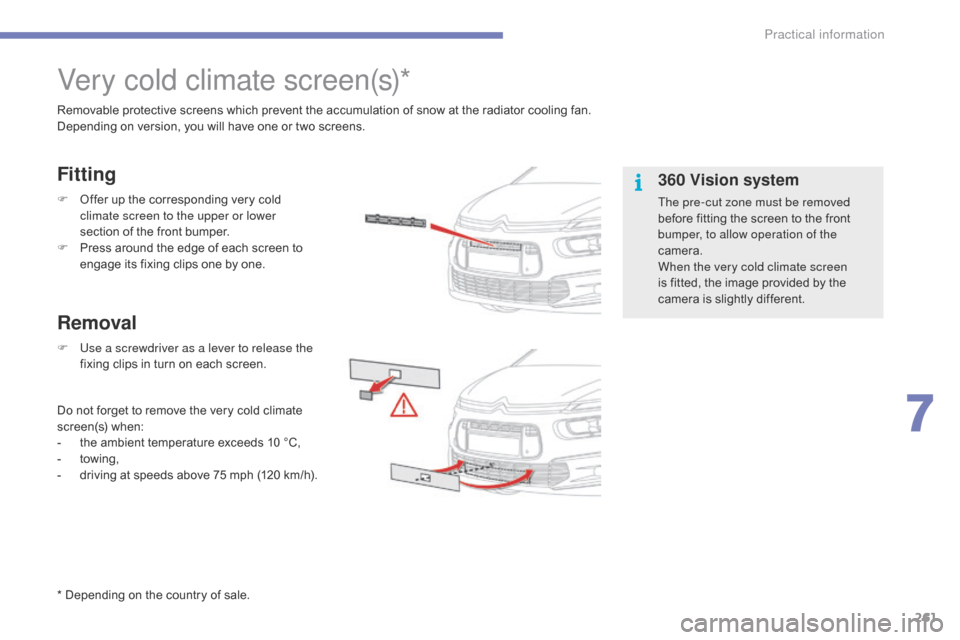
Very cold climate screen(s)*
Removable┬Āprotective┬Āscreens┬Āwhich┬Āprevent┬Āthe┬Āaccumulation┬Āof┬Āsnow┬Āat┬Āthe┬Āradiator┬Ācooling┬Āfan.
D epending ┬Ā on ┬Ā version, ┬Ā you ┬Ā will ┬Ā have ┬Ā one ┬Ā or ┬Ā two ┬Ā screens.
F
┬Ā
O
ffer ┬Ā up ┬Ā the ┬Ā corresponding ┬Ā very ┬Ā cold ┬Ā
c
limate screen to the upper or lower
section
┬Ā of ┬Ā the ┬Ā front ┬Ā bumper.
F
┬Ā
P
ress ┬Ā around ┬Ā the ┬Ā edge ┬Ā of ┬Ā each ┬Ā screen ┬Ā to ┬Ā
e
ngage ┬Ā its ┬Ā fixing ┬Ā clips ┬Ā one ┬Ā by ┬Ā one.
F
U
se a screwdriver as a lever to release the
fixing
┬Ā clips ┬Ā in ┬Ā turn ┬Ā on ┬Ā each ┬Ā screen.
Do
┬Ā not ┬Ā forget ┬Ā to ┬Ā remove ┬Ā the ┬Ā very ┬Ā cold ┬Ā climate ┬Ā
s
creen(s)
┬Āw
hen:
-
┬Ā
t
he ┬Ā ambient ┬Ā temperature ┬Ā exceeds ┬Ā 10 ┬Ā ┬░C,
-
┬Ātow
ing,
-
┬Ā
d
riving ┬Ā
a
t ┬Ā
s
peeds ┬Ā
a
bove ┬Ā
7
5 ┬Ā
m
ph ┬Ā
(
120┬Ākm/h).
Removal Fitting
360 Vision system
The pre-cut zone must be removed
before┬Ā fitting ┬Ā the ┬Ā screen ┬Ā to ┬Ā the ┬Ā front ┬Ā
b
umper, to allow operation of the
camera.
When the very cold climate screen
is
┬Ā fitted, ┬Ā the ┬Ā image ┬Ā provided ┬Ā by ┬Ā the ┬Ā
c
amera ┬Ā is ┬Ā slightly ┬Ā different.
*┬ĀDepending
┬Ā
on
┬Ā
the
┬Ā
country
┬Ā
of
┬Ā
sale.
7
Practical information
Page 265 of 527

263
C4-Picasso-II_en_Chap07_info-pratiques_ed01-2016
F Unclip and remove the protective cover, by turning ┬Ā it ┬Ā to ┬Ā the ┬Ā right.
Removing
F┬ĀPress┬Ā the ┬Ā trigger ┬Ā B and remove the towball
by ┬Ā pulling ┬Ā it ┬Ā towards ┬Ā you.
F
O
n the towball, press and hold control A .
F
┬Ā
R
elease
┬Ā
the
┬Ā
locking
┬Ā
mechanism
┬Ā
by
┬Ā
p
ressing
┬Ā
the
┬Ā
trigger
┬Ā
B . If
┬Ā the ┬Ā towball ┬Ā is ┬Ā not ┬Ā locked ┬Ā in ┬Ā place, ┬Ā the ┬Ā
t
railer ┬Ā could ┬Ā separate. ┬Ā There ┬Ā is ┬Ā a ┬Ā risk ┬Ā of ┬Ā
a
n ┬Ā accident.
Always ┬Ā lock ┬Ā the ┬Ā towball ┬Ā in ┬Ā the ┬Ā way ┬Ā
de
scribed.
Observe ┬Ā the ┬Ā legislation ┬Ā in ┬Ā force ┬Ā in ┬Ā the ┬Ā
c
ountry ┬Ā in ┬Ā which ┬Ā you ┬Ā are ┬Ā driving.
Remove ┬Ā the ┬Ā towball ┬Ā when ┬Ā it ┬Ā is ┬Ā not ┬Ā being ┬Āu
sed.
Before
┬Ā setting ┬Ā off, ┬Ā check ┬Ā that ┬Ā the ┬Ā trailer ┬Ā
l
ighting ┬Ā and ┬Ā signalling ┬Ā works ┬Ā correctly.
Maximum
┬Ā authorised ┬Ā nose ┬Ā weight: ┬Ā
7
0┬Ākg.
For
┬Ā more ┬Ā information ┬Ā on ┬Ā your ┬Ā vehicle's ┬Ā
W
eights,
┬Ā refer ┬Ā to ┬Ā the ┬Ā corresponding ┬Ā
s
ection.
Carrying
┬Ā system ┬Ā (box ┬Ā or ┬Ā bicycle ┬Ā carrier).
You
┬Ā must ┬Ā not ┬Ā exceed ┬Ā the ┬Ā maximum ┬Ā
n
ose ┬Ā weight ┬Ā on ┬Ā the ┬Ā towbar: ┬Ā if ┬Ā this ┬Ā weight ┬Ā
i
s ┬Ā exceeded, ┬Ā the ┬Ā device ┬Ā could ┬Ā detach ┬Ā
f
rom the vehicle and cause a serious
accident.
F
C
lip the protective cover in place on the
carrier
┬Ā located ┬Ā below ┬Ā the ┬Ā bumper.
7
Practical information
Page 266 of 527
264
C4-Picasso-II_en_Chap07_info-pratiques_ed01-2016
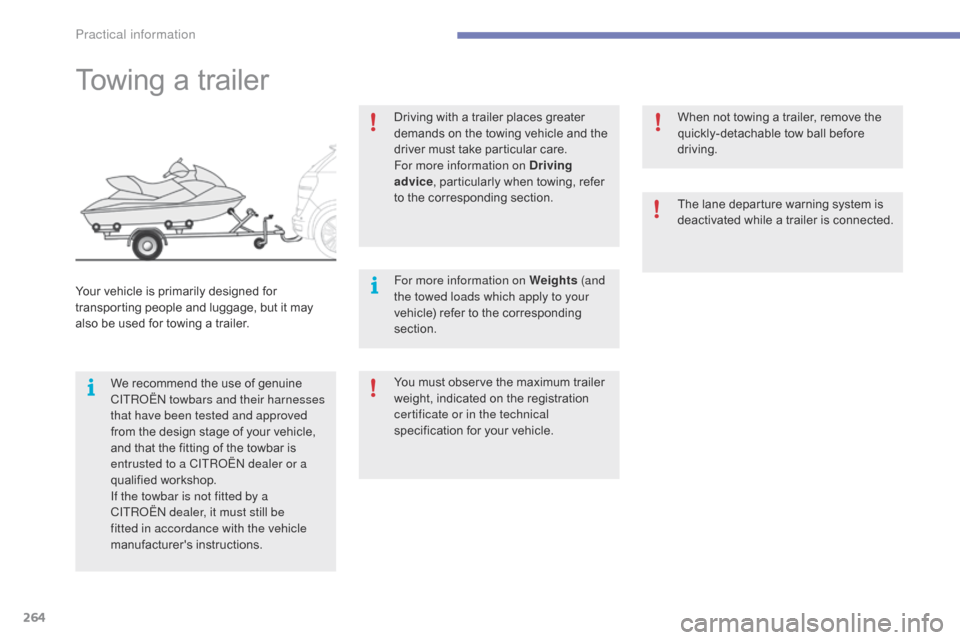
Towing┬Āa┬Ātrailer
We┬Ārecommend┬Āthe┬Āuse┬Āof┬Āgenuine┬ĀCITRO├ŗN towbars and their harnesses
that have been tested and approved
from
┬Ā the ┬Ā design ┬Ā stage ┬Ā of ┬Ā your ┬Ā vehicle, ┬Ā
a
nd ┬Ā that ┬Ā the ┬Ā fitting ┬Ā of ┬Ā the ┬Ā towbar ┬Ā is ┬Ā
e
ntrusted to a CITRO├ŗN dealer or a
qualified
┬Āw
orkshop.
If the towbar is not fitted by a
CITRO├ŗN dealer, it must still be
fitted in accordance with the vehicle
manufacturer's
┬Āi
nstructions.
Your
┬Ā
vehicle ┬Ā is ┬Ā primarily ┬Ā designed ┬Ā for ┬Ā
t
ransporting ┬Ā people ┬Ā and ┬Ā luggage, ┬Ā but ┬Ā it ┬Ā may ┬Ā
a
lso
┬Ā
be ┬Ā used ┬Ā for ┬Ā towing ┬Ā a ┬Ā trailer. Driving ┬Ā with ┬Ā a ┬Ā trailer ┬Ā places ┬Ā greater ┬Ā
d
emands ┬Ā on ┬Ā the ┬Ā towing ┬Ā vehicle ┬Ā and ┬Ā the ┬Ā
d
river ┬Ā must ┬Ā take ┬Ā particular ┬Ā care.
For more information on Driving
advice , ┬Ā particularly ┬Ā when ┬Ā towing, ┬Ā refer ┬Ā
t
o ┬Ā the ┬Ā corresponding ┬Ā section.
For more information on Weights (and
the towed loads which apply to your
vehicle) ┬Ā refer ┬Ā to ┬Ā the ┬Ā corresponding ┬Ā
s
ection.
You ┬Ā must ┬Ā observe ┬Ā the ┬Ā maximum ┬Ā trailer ┬Āw
eight, ┬Ā indicated ┬Ā on ┬Ā the ┬Ā registration ┬Ā
c
ertificate or in the technical
specification
┬Ā for ┬Ā your ┬Ā vehicle.When
┬Ā not ┬Ā towing ┬Ā a ┬Ā trailer, ┬Ā remove ┬Ā the ┬Ā
q
uickly-detachable ┬Ā tow ┬Ā ball ┬Ā before ┬Ā
d
riving.
The ┬Ā lane ┬Ā departure ┬Ā warning ┬Ā system ┬Ā is ┬Ā
d
eactivated ┬Ā while ┬Ā a ┬Ā trailer ┬Ā is ┬Ā connected.
Practical information
Page 267 of 527
265
C4-Picasso-II_en_Chap07_info-pratiques_ed01-2016
Exiting economy mode
These functions are reactivated automatically
next┬Ā time ┬Ā the ┬Ā vehicle ┬Ā is ┬Ā driven.
In order to restore the use of these functions
immediately,
┬Ā start ┬Ā the ┬Ā engine ┬Ā and ┬Ā let ┬Ā it ┬Ā run:
-
f
or less than ten minutes, to use the
equipment
┬Ā for ┬Ā approximately ┬Ā five ┬Ā minutes,
-
f
or more than ten minutes, to use the
equipment
┬Ā for ┬Ā up ┬Ā to ┬Ā approximately ┬Ā
t
hirty┬Āminutes.
Let
┬Ā the ┬Ā engine ┬Ā run ┬Ā for ┬Ā the ┬Ā duration ┬Ā specified ┬Ā to ┬Ā
e
nsure ┬Ā that ┬Ā the ┬Ā battery ┬Ā charge ┬Ā is ┬Ā sufficient.
Do not repeatedly and continuously restart the
engine
┬Ā in ┬Ā order ┬Ā to ┬Ā charge ┬Ā the ┬Ā battery.
A
┬Ā flat ┬Ā battery ┬Ā prevents ┬Ā the ┬Ā engine ┬Ā from ┬Ā starting.
For more information on the 12 V batter y , refer
to
┬Ā the ┬Ā corresponding ┬Ā section.
Load reduction mode
System┬Āwhich┬Āmanages┬Āthe┬Āuse┬Āof┬Ācertain┬Āfunctions ┬Ā according ┬Ā to ┬Ā the ┬Ā level ┬Ā of ┬Ā charge ┬Ā
r
emaining ┬Ā in ┬Ā the ┬Ā battery.
When
┬Ā the ┬Ā vehicle ┬Ā is ┬Ā being ┬Ā driven, ┬Ā the ┬Ā load ┬Ā
r
eduction function temporarily deactivates
certain
┬Ā functions, ┬Ā such ┬Ā as ┬Ā the ┬Ā air ┬Ā conditioning, ┬Ā
t
he ┬Ā heated ┬Ā rear ┬Ā screen...
The deactivated functions are reactivated
automatically
┬Ā as ┬Ā soon ┬Ā as ┬Ā conditions ┬Ā permit.
Energy┬Āeconomy┬Āmode
Switching to economy
mode
A┬Āmessage┬Āappears┬Āin┬Āthe┬Āinstrument┬Āpanel┬Ās
creen ┬Ā indicating ┬Ā that ┬Ā the ┬Ā vehicle ┬Ā has ┬Ā switched ┬Ā
t
o economy mode and the active functions are
put
┬Ā on ┬Ā standby.
If
┬Ā a ┬Ā telephone ┬Ā call ┬Ā is ┬Ā being ┬Ā made ┬Ā at ┬Ā this ┬Ā time, ┬Ā it ┬Ā
w
ill be maintained for around 10 minutes with
the Bluetooth hands-free system of your audio
system. System ┬Ā which ┬Ā manages ┬Ā the ┬Ā duration ┬Ā of ┬Ā use ┬Ā of ┬Ā certain ┬Ā functions ┬Ā to ┬Ā conserve ┬Ā a ┬Ā sufficient ┬Ā level ┬Ā of ┬Ā
c
harge ┬Ā in ┬Ā the ┬Ā battery.
After ┬Ā the ┬Ā engine ┬Ā has ┬Ā stopped, ┬Ā you ┬Ā can ┬Ā still ┬Ā use ┬Ā functions ┬Ā such ┬Ā as ┬Ā the ┬Ā audio ┬Ā and ┬Ā telematics ┬Ā
s
ystem,┬Āwindscreen ┬Ā wipers, ┬Ā dipped ┬Ā beam ┬Ā headlamps,┬Ācourtesy ┬Ā lamps, ┬Ā etc. ┬Ā for ┬Ā a ┬Ā maximum ┬Ā
c
ombined ┬Ā duration ┬Ā of ┬Ā about ┬Ā forty ┬Ā minutes.
7
Practical information
Page 270 of 527
268
C4-Picasso-II_en_Chap07_info-pratiques_ed01-2016
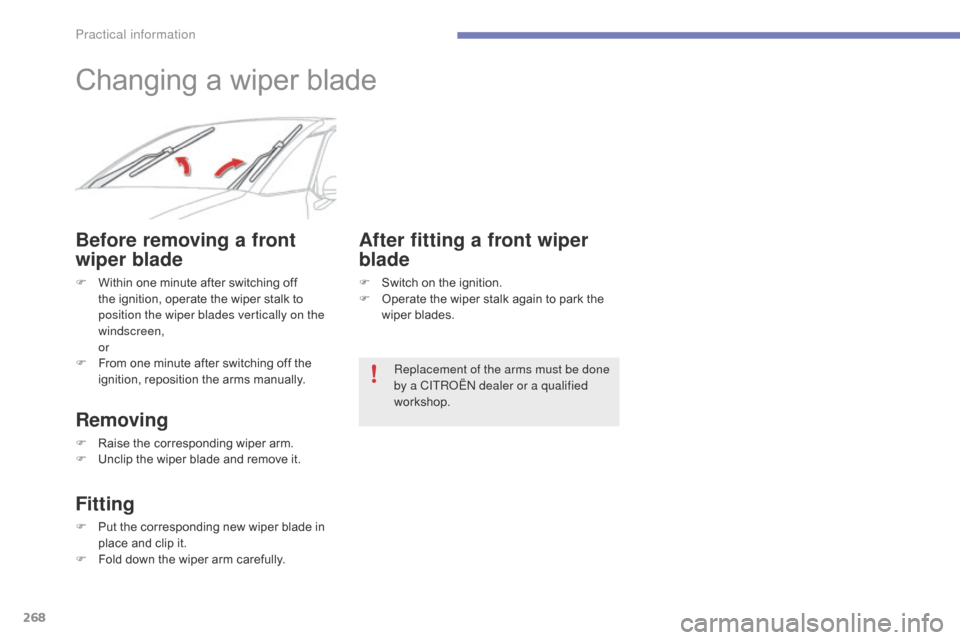
Changing┬Āa┬Āwiper┬Āblade
Before removing a front
wiper blade
F┬ĀWithin┬Ā one ┬Ā minute ┬Ā after ┬Ā switching ┬Ā off ┬Āt
he ┬Ā ignition, ┬Ā operate ┬Ā the ┬Ā wiper ┬Ā stalk ┬Ā to ┬Ā
p
osition the wiper blades vertically on the
windscreen,
or
F
┬Ā
F
rom ┬Ā one ┬Ā minute ┬Ā after ┬Ā switching ┬Ā off ┬Ā the ┬Ā
i
gnition, ┬Ā reposition ┬Ā the ┬Ā arms ┬Ā manually.
Removing
F┬ĀRaise┬Ā the ┬Ā corresponding ┬Ā wiper ┬Ā arm.
F ┬ĀU nclip ┬Ā the ┬Ā wiper ┬Ā blade ┬Ā and ┬Ā remove ┬Ā it.
Fitting
F┬ĀPut┬Ā the ┬Ā corresponding ┬Ā new ┬Ā wiper ┬Ā blade ┬Ā in ┬Āp
lace ┬Ā and ┬Ā clip ┬Ā it.
F
┬Ā
F
old ┬Ā down ┬Ā the ┬Ā wiper ┬Ā arm ┬Ā carefully.
After fitting a front wiper
blade
F┬ĀSwitch┬Ā on ┬Ā the ┬Ā ignition.
F ┬ĀO perate ┬Ā the ┬Ā wiper ┬Ā stalk ┬Ā again ┬Ā to ┬Ā park ┬Ā the ┬Ā
w
iper ┬Ā blades.
Replacement of the arms must be done
by a CITRO├ŗN dealer or a qualified
workshop.
Practical information
Page 276 of 527
274
C4-Picasso-II_en_Chap07_info-pratiques_ed01-2016
Checking┬Ālevels
Take┬Ācare┬Āwhen┬Āworking┬Āunder┬Āthe┬Ābonnet,┬Āas┬Ācertain┬Āareas┬Āof┬Āthe┬Āengine┬Āmay┬Ābe┬Āextremely┬Āhot┬Ā(risk┬Āof┬Āburns)┬Āand┬Āthe┬Ācooling┬Āfan┬Ācould┬Āstart┬Āat┬Āany ┬Ā time ┬Ā (even ┬Ā with ┬Ā the ┬Ā ignition ┬Ā off).
Engine oil level
The┬Ācheck┬Āis┬Ācarried┬Āout┬Āeither┬Āwhen┬Āthe ┬Ā ignition ┬Ā is ┬Ā switched ┬Ā on ┬Ā using ┬Ā the ┬Ā
o
il level indicator in the instrument
panel for vehicles so equipped, or
using
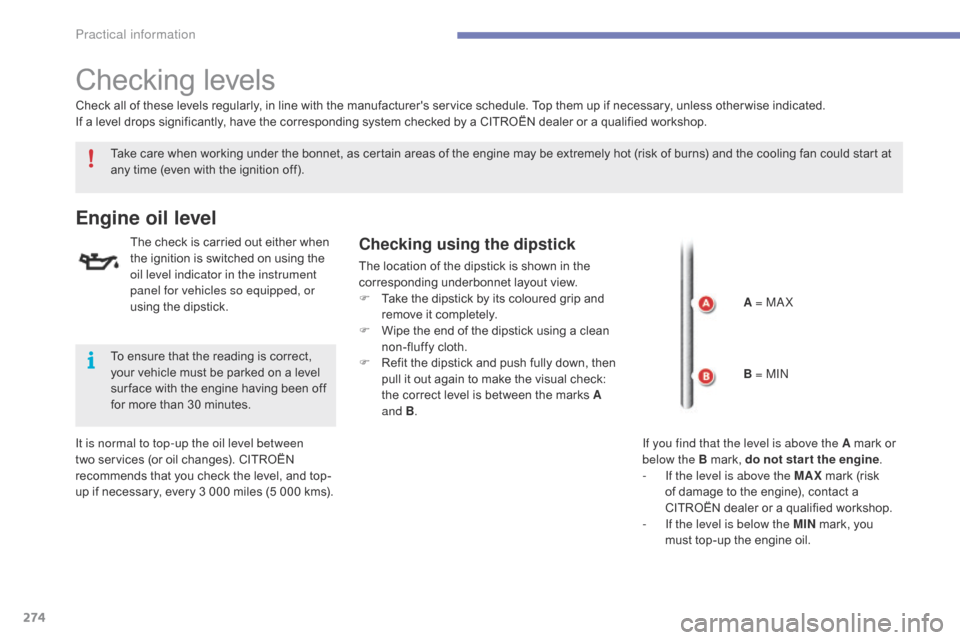
┬Ā the ┬Ā dipstick.Checking using the dipstick
The┬Ālocation┬Āof┬Āthe┬Ādipstick┬Āis┬Āshown┬Āin┬Āthe┬Ācorresponding ┬Ā underbonnet ┬Ā layout ┬Ā view.
F
┬Ā
T
ake ┬Ā the ┬Ā dipstick ┬Ā by ┬Ā its ┬Ā coloured ┬Ā grip ┬Ā and ┬Ā
r
emove ┬Ā it ┬Ā completely.
F
┬Ā
W
ipe ┬Ā the ┬Ā end ┬Ā of ┬Ā the ┬Ā dipstick ┬Ā using ┬Ā a ┬Ā clean ┬Ā
n
on-fluffy ┬Ā cloth.
F
┬Ā
R
efit ┬Ā the ┬Ā dipstick ┬Ā and ┬Ā push ┬Ā fully ┬Ā down, ┬Ā then ┬Ā
p
ull ┬Ā it ┬Ā out ┬Ā again ┬Ā to ┬Ā make ┬Ā the ┬Ā visual ┬Ā check: ┬Ā
t
he ┬Ā correct ┬Ā level ┬Ā is ┬Ā between ┬Ā the ┬Ā marks ┬Ā A
and B .
It is normal to top-up the oil level between
two
┬Ā
services
┬Ā
(or
┬Ā
oil
┬Ā
changes).
┬Ā
CITRO├ŗN
┬Ā
r
ecommends
┬Ā
that
┬Ā
you
┬Ā
check
┬Ā
the
┬Ā
level,
┬Ā
and
┬Ā
top-
up
┬Ā
if
┬Ā
necessary,
┬Ā
every
┬Ā
3
┬Ā
000
┬Ā
miles
┬Ā
(5
┬Ā
000
┬Ā
kms).
Check
┬Ā
all
┬Ā
of
┬Ā
these
┬Ā
levels
┬Ā
regularly,
┬Ā
in
┬Ā
line
┬Ā
with
┬Ā
the
┬Ā
manufacturer's ┬Ā service ┬Ā schedule. ┬Ā Top ┬Ā them ┬Ā up ┬Ā if ┬Ā necessary, ┬Ā unless ┬Ā other wise ┬Ā indicated.
If
┬Ā
a
┬Ā
level
┬Ā
drops
┬Ā
significantly,
┬Ā
have
┬Ā
the
┬Ā
corresponding ┬Ā system ┬Ā checked ┬Ā by ┬Ā a ┬Ā CITRO├ŗN ┬Ā dealer ┬Ā or ┬Ā a ┬Ā qualified ┬Ā workshop.
To
┬Ā
ensure
┬Ā
that
┬Ā
the
┬Ā
reading
┬Ā
is
┬Ā
correct,
┬Ā
y
our
┬Ā
vehicle
┬Ā
must
┬Ā
be
┬Ā
parked
┬Ā
on
┬Ā
a
┬Ā
level
┬Ā
s
ur face
┬Ā
with
┬Ā
the
┬Ā
engine
┬Ā
having
┬Ā
been
┬Ā
off
┬Ā
f
or
┬Ā
more
┬Ā
than
┬Ā
30
┬Ā
minutes. A = MA X
B = MIN
If you find that the level is above the A
┬Ā mark ┬Ā or ┬Ā
belo
w the B ┬Ā mark, ┬Ā do not star t the engine.
-
I
f the level is above the MAX
┬Ā
mark ┬Ā (risk ┬Ā
o
f ┬Ā damage ┬Ā to ┬Ā the ┬Ā engine), ┬Ā contact ┬Ā a ┬Ā
C
ITRO├ŗN ┬Ā dealer ┬Ā or ┬Ā a ┬Ā qualified ┬Ā workshop.
-
I
f the level is below the MIN
┬Ā
mark, ┬Ā you ┬Ā
m
ust ┬Ā top-up ┬Ā the ┬Ā engine ┬Ā oil.
Practical information