buttons Citroen C4 RHD 2015 2.G Owner's Manual
[x] Cancel search | Manufacturer: CITROEN, Model Year: 2015, Model line: C4 RHD, Model: Citroen C4 RHD 2015 2.GPages: 328, PDF Size: 12.72 MB
Page 8 of 328
6 6
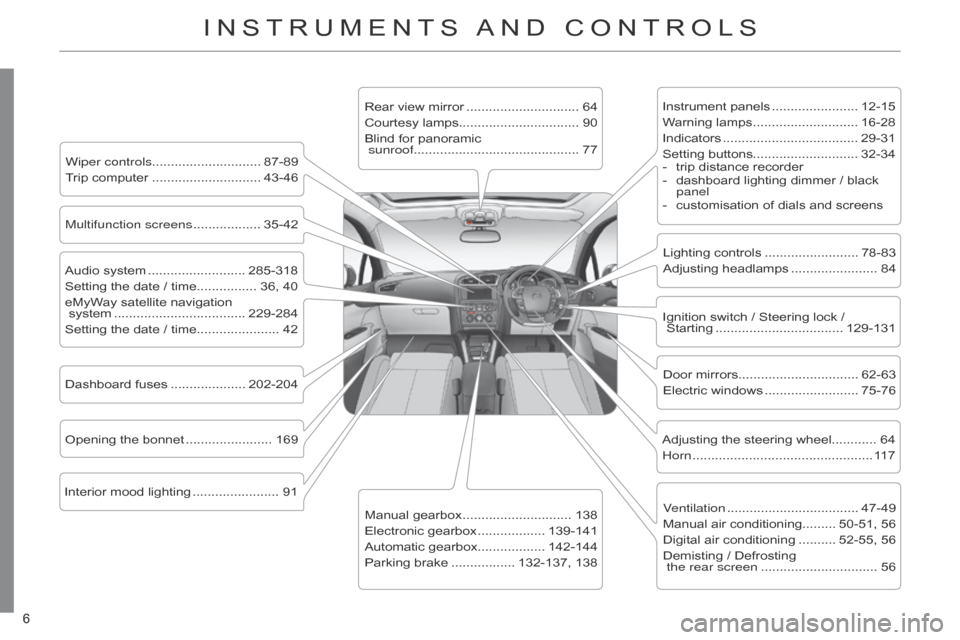
INSTRUMENTS AND CONTROLS
Instrument panels ....................... 12-15
W arning lamps ............................ 16-28
Indicators
.................................... 29-31
Setting
buttons............................ 32-34
-
trip
distance recorder
-
dashboard
lighting dimmer / black
panel
-
customisation
of dials and screens
Lighting
controls
......................... 78-83
Adjusting
headlamps
....................... 84
Door
mirrors
................................ 62-63
Electric
windows
......................... 75-76
Dashboard
fuses
.................... 202-204
Opening
the
bonnet
....................... 169 Adjusting
the steering wheel............ 64
Horn
................................................ 11
7
Audio
system
.......................... 285-318
Setting
the
date
/
time................ 36,
40
eMyWay
satellite
navigation
system
................................... 229-284
Setting
the
date
/
time...................... 42 Manual
gearbox
............................. 138
Electronic
gearbox
.................. 139-141
Automatic
gearbox.................. 142-144
Parking
brake
................. 132-137,
138
Wiper controls............................. 87-89
Trip
computer
............................. 43-46 Rear
view
mirror
.............................. 64
Courtesy
lamps................................ 90
Blind
for
panoramic
sunroof ............................................ 77
Interior
mood
lighting
....................... 91 Ignition
switch / Steering lock /
Starting
.................................. 129-131
Multifunction screens
.................. 35-42
V
entilation
................................... 47-49
Manual
air conditioning......... 50-51, 56
Digital
air conditioning
.......... 52-55,
56
Demisting
/ Defrosting
the rear screen
............................... 56
Page 14 of 328

12
TWO-TONE INSTRUMENT PANEL WITHOUT AUDIO SYSTEM
Dials and screens
1. Rev counter (x 1 000 rpm or tr/min).
2.
Gear
efficiency
indicator
or
gear
se
-
lector
lever
position
and
gear
for
an
electronic
or automatic gearbox.
3.
Cruise
control
or
speed
limiter
setting.
4.
Digital
speedometer (mph or km/h).
5.
Engine
oil level indicator. 6.
Service indicator
(miles
or km) then,
total
mileage recorder.
These
two
functions
are
displayed
successively
on
switching
on
the
ignition.
Lighting
dimmer
setting
(when
making an
adjustment).
7.
T
rip
mileage
recorder
(miles
or
km).
8.
Fuel
gauge
and
associated
low
fuel
level
warning
lamp
(
a or b
accord
-
ing
to version).
9.
T
ime.
Control buttons
A. Lighting dimmer (available in night mode).
B.
Reminder
of servicing information
Reset
service
indicator
or
trip
mile
-
age
recorder.
A
and B.
Setting
the
time
and
select
-
ing
units.
1
MONITORING
Page 15 of 328

13
TWO-TONE INSTRUMENT PANEL WITH AUDIO SYSTEM
Dials and screens
A. Lighting dimmer (available in night mode).
B.
Reminder
of the servicing information.
Reset
the
service
indicator
or
the
trip
mileage recorder.
7.
Service
indicator
(miles
or
km)
then,
total
mileage
recorder.
These
two
functions
are
displayed
successively on switching on the igni -
tion.
Lighting dimmer setting (when mak -
ing an adjustment).
8.
T
rip
mileage
recorder
(miles
or
km).
9.
Fuel
gauge
and
associated
low
fuel
level
warning
lamp
(
a or b
accord
-
ing
to version).
10.
Range
(miles
or
km)
for
the
remain
-
ing
fuel
(
a)
or
the
AdBlueadditive
and
the SCR system (b).
Control buttons
1. Rev counter (x 1 000 rpm or tr/min).
2.
Gear
efficiency
indicator
or
gear
se
-
lector
lever
position
and
gear
for
an
electronic
or automatic gearbox.
3.
Analogue
speedometer
(mph
or
km/h).
4.
Cruise
control
or
speed
limiter
setting.
5.
Digital
speedometer (mph or km/h).
6.
Engine
oil level indicator.
1
MONITORING
Page 16 of 328

14
CUSTOMISABLE COLOUR INSTRUMENT PANEL WITH AUDIO SYSTEM OR NAVIGATION SYSTEM
1. Rev counter (x 1 000 rpm or tr/min).
2.
Gear
efficiency
indicator
or
gear
se
-
lector
lever
position
and
gear
for
an
electronic
or automatic gearbox.
3.
Analogue
speedometer
(mph
or
km/h).
4.
Cruise
control
or
speed
limiter
set
-
ting.
5.
Digital
speedometer (mph or km/h).
6.
Engine
oil level indicator. A.
Dial COLOUR: customisation of the background
colour of the dials.
B.
Screen
COLOUR:
customisation
of
the
background
colour
of
the
screens.
C.
Lighting
dimmer
(available
in
night
mode).
D.
Reminder
of
the
servicing
informa
-
tion.
Reset
the
service
indicator
or
the
trip
mileage recorder.
Dials and screens
7. Service indicator
(miles
or km) then,
total
mileage recorder.
These
two
functions
are
displayed
successively on switching on the igni -
tion.
Lighting dimmer setting (when mak -
ing an adjustment).
8.
T
rip
mileage
recorder
(miles
or
km).
9.
Fuel
gauge
and
associated
low
fuel
level
warning lamp.
10.
Range
(miles
or
km)
for
the
remain
-
ing
fuel
(
a)
or
the
AdBlueadditive
and
the SCR system (b).
Control buttons
1
MONITORING
Page 34 of 328
32
Distance recorders
The total and trip distances are dis -
played for thirty seconds when the ig -
nition
is
switched
of
f,
when
the
driver's
door
is
opened
and
when
the
vehicle
is
locked
or unlocked.
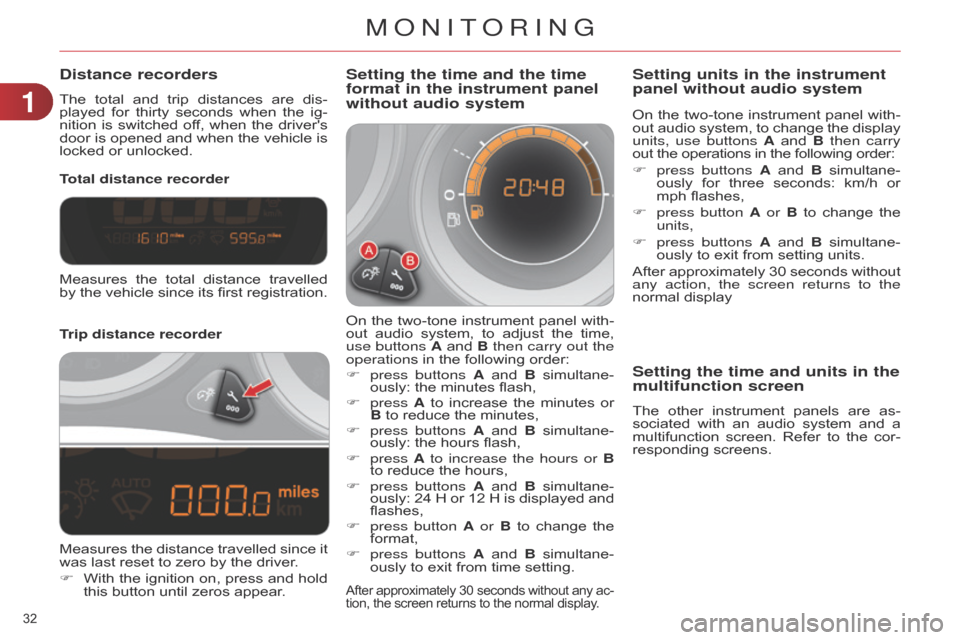
Trip distance recorder Total distance recorder
Setting the time and the time
format in the instrument panel
without audio system
On the two-tone instrument panel with -
out audio system, to adjust the time,
use buttons
A
and
B
then carry out the
operations
in the following order:
F
press buttons
A
and
B
simultane
-
ously:
the minutes flash,
F
press A
to
increase
the
minutes
or
B
to reduce the minutes,
F
press buttons
A
and
B
simultane
-
ously:
the hours flash,
F
press A to increase the hours or B
to
reduce the hours,
F
press buttons
A
and
B
simultane
-
ously:
24
H
or
12
H
is
displayed
and
flashes,
F
press button
A or B
to
change
the
format,
F
press buttons
A
and
B
simultane
-
ously
to exit from time setting.
After approximately 30 seconds without any ac -
tion, the screen returns to the normal display.
Measures the total distance travelled by
the vehicle since its first registration.
Measures
the
distance
travelled
since
it
was
last reset to zero by the driver.
F
With
the
ignition
on,
press
and
hold
this
button until zeros appear. On
the
two-tone
instrument
panel
with
-
out
audio
system,
to
change
the
display
units, use buttons
A
and
B
then carry
out the operations in the following order:
F
press buttons
A
and
B
simultane
-
ously
for
three
seconds:
km/h
or
mph
flashes,
F
press button
A or B
to
change
the
units,
F
press buttons
A
and
B
simultane
-
ously to exit from setting units.
After approximately 30 seconds without any action, the screen returns to the
normal
display
Setting units in the instrument
panel without audio system
Setting the time and units in the
multifunction screen
The other instrument panels are as -
sociated with an audio system and a
multifunction
screen.
Refer
to
the
cor
-
responding
screens.
1
MONITORING
Page 37 of 328
22
35
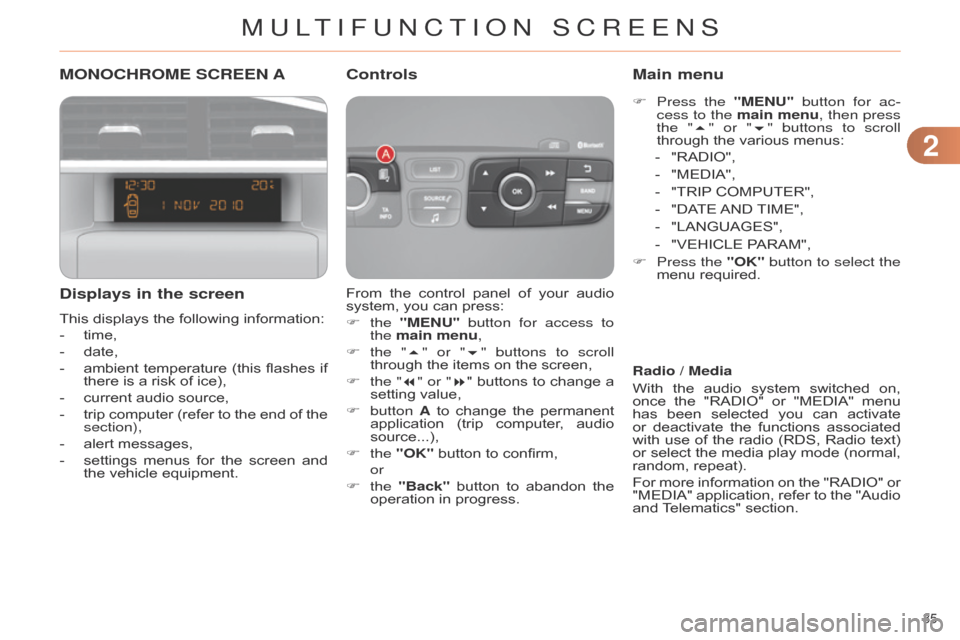
MONOCHROME SCREEN A
Displays in the screen
This displays the following information:
-
time,
-
date,
-
ambient
temperature
(this
flashes
if
there
is a risk of ice),
-
current
audio source,
-
trip
computer
(refer
to
the
end
of
the
section),
-
alert
messages,
-
settings
menus
for
the
screen
and
the
vehicle equipment. From
the
control
panel
of
your
audio
system,
you can press:
F the "MENU" button for access to
the main menu,
F
the "
5" or "6" buttons to scroll
through
the items on the screen,
F
the
"7" or "8"
buttons
to
change
a
setting
value,
F
button A
to
change
the
permanent
application
(trip
computer
,
audio
source...),
F
the "OK"
button to confirm,
or
F
the "Back"
button
to
abandon
the
operation
in progress.
Controls
F Press the "MENU" button for ac-
cess to the main menu, then press
the "5" or "6" buttons to scroll
through
the various menus:
-
"RADIO",
-
"MEDIA",
-
"TRIP
COMPUTER",
-
"DA
TE
AND
TIME",
-
"LANGUAGES",
-
"VEHICLE
PARAM",
F
Press
the "OK" button to select the
menu
required.
Main menu
Radio / Media
With
the
audio
system
switched
on,
once
the
"RADIO"
or
"MEDIA"
menu
has
been
selected
you
can
activate
or
deactivate
the
functions
associated
with
use
of
the
radio
(RDS,
Radio
text)
or
select
the
media
play
mode
(normal,
random,
repeat).
For
more
information
on
the
"RADIO"
or
"MEDIA"
application,
refer
to
the
"Audio
and
T
elematics" section.
MULTIFUNCTION SCREENS
Page 38 of 328
22
36
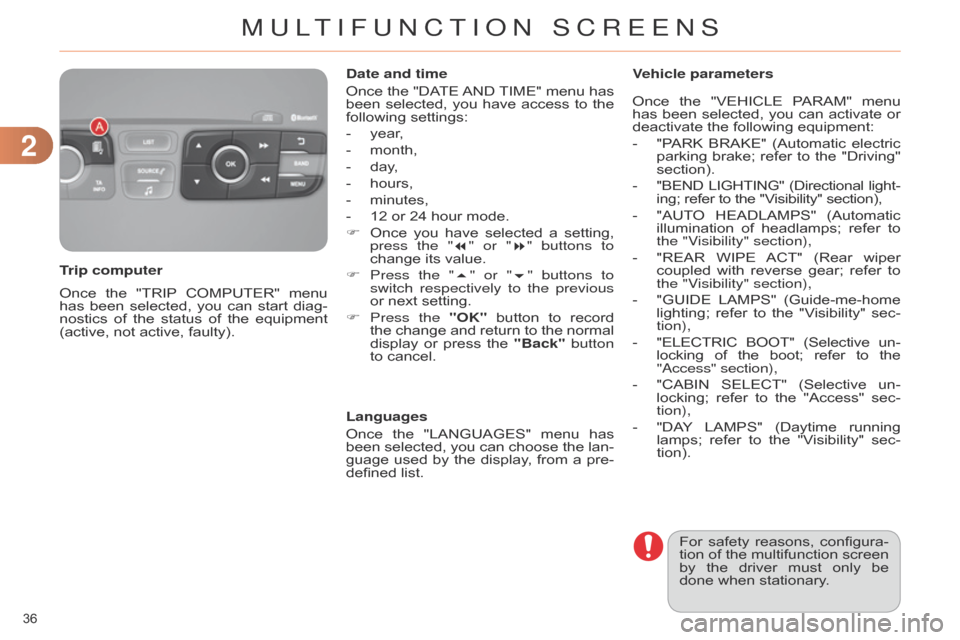
Once the "TRIP COMPUTER" menu has
been selected, you can start diag -
nostics
of
the
status
of
the
equipment
(active,
not active, faulty).
Trip computer Date and time
Once
the
"DA
TE
AND
TIME"
menu
has
been
selected,
you
have
access
to
the
following
settings:
-
year
,
-
month,
-
day
,
-
hours,
-
minutes,
-
12
or 24 hour mode.
F
Once
you
have
selected
a
setting,
press the "
7" or "8" buttons to
change its value.
F
Press the "
5" or "6" buttons to
switch respectively to the previous
or next setting.
F
Press
the "OK"
button
to
record
the
change
and
return
to
the
normal
display
or
press
the
"Back"
button
to
cancel.
Languages
Once
the
"LANGUAGES"
menu
has
been
selected,
you
can
choose
the
lan
-
guage
used
by
the
display
,
from
a
pre-
defined
list.For
safety
reasons,
configura
-
tion
of
the
multifunction
screen
by
the
driver
must
only
be
done
when stationary.
Vehicle parameters
Once
the
"VEHICLE
P
ARAM"
menu
has
been
selected,
you
can
activate
or
deactivate
the following equipment:
-
"P
ARK
BRAKE"
(Automatic
electric
parking
brake;
refer
to
the
"Driving"
section).
-
"BEND
LIGHTING"
(Directional
light
-
ing; refer to the "Visibility" section),
-
"AUT
O
HEADLAMPS"
(Automatic
illu
mination
of
headlamps;
refer
to
the "V
isibility" section),
-
"REAR
WIPE
ACT"
(Rear
wiper
coupled
with
reverse
gear;
refer
to
the "V
isibility" section),
- "GUIDE LAMPS" (Guide-me-home
lighting;
refer
to
the
"V
isibility"
sec
-
tion),
-
"ELECTRIC
BOOT"
(Selective
un
-
locking
of
the
boot;
refer
to
the "
a ccess" section),
-
"CABIN
SELECT"
(Selective
un
-
locking;
refer
to
the
"Access"
sec
-
tion),
-
"DA
Y
LAMPS"
(Daytime
running
lamps;
refer
to
the
"V
isibility"
sec
-
tion).
MULTIFUNCTION SCREENS
Page 39 of 328
22
37
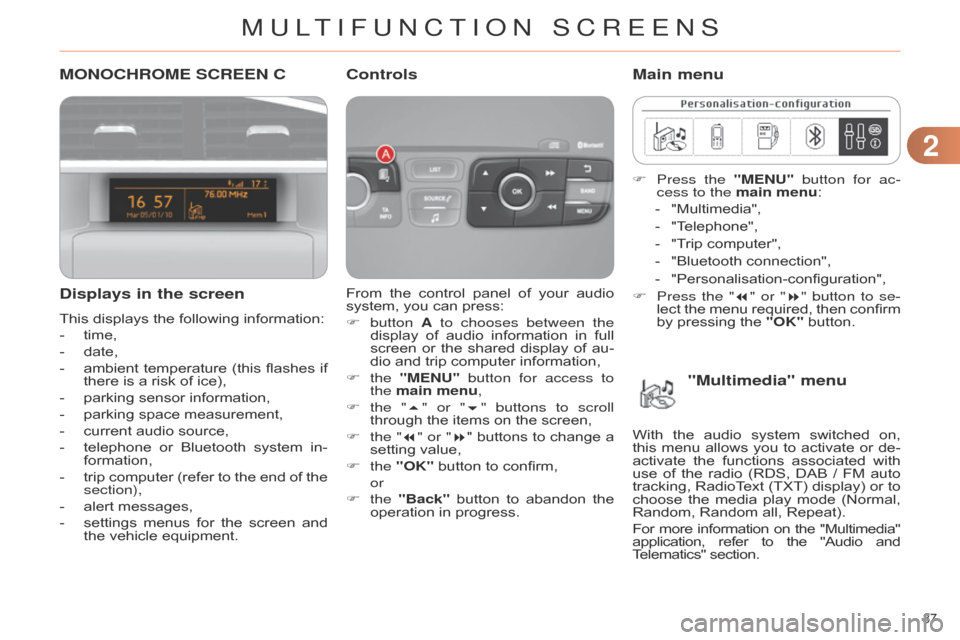
MONOCHROME SCREEN C
Displays in the screen
This displays the following information:
-
time,
-
date,
-
ambient
temperature
(this
flashes
if
there
is a risk of ice),
-
parking
sensor information,
-
parking
space measurement,
-
current
audio source,
-
telephone
or
Bluetooth
system
in
-
formation,
-
trip
computer
(refer
to
the
end
of
the
section),
-
alert
messages,
-
settings
menus
for
the
screen
and
the
vehicle equipment. From
the
control
panel
of
your
audio
system,
you can press:
F button A to chooses between the
display
of
audio
information
in
full
screen
or
the
shared
display
of
au
-
dio
and trip computer information,
F
the "MENU" button for access to
the main menu,
F
the "
5" or "6" buttons to scroll
through
the items on the screen,
F
the
"7" or "8"
buttons
to
change
a
setting
value,
F
the "OK"
button to confirm,
or
F
the "Back"
button
to
abandon
the
operation
in progress.
Controls
F Press the "MENU" button for ac-
cess to the main menu:
-
"Multimedia",
-
"T
elephone",
-
"T
rip computer",
-
"Bluetooth
connection",
-
"Personalisation-configuration",
F
Press
the "7" or "8" button to se-
lect
the
menu
required,
then
confirm
by
pressing the "OK" button.
Main menu
"Multimedia" menu
With the audio system switched on, this
menu allows you to activate or de -
activate
the
functions
associated
with
use
of
the
radio
(RDS,
DAB
/ FM
auto
tracking,
RadioT
ext
(TXT)
display)
or
to
choose
the
media
play
mode
(Normal,
Random,
Random all, Repeat).
For
more
information
on
the
"Multimedia" application,
refer
to
the
"Audio
and T
elematics" section.
MULTIFUNCTION SCREENS
Page 41 of 328

22
39
F Press the "7" or "8" buttons to set
the value required (15, 30 or 60 sec -
onds),
then
press
the
"OK"
button
to
confirm. F
Press
the "5" or "6" buttons,
then the "OK" button to select the
"OK"
box
and
confirm
or
press
the
"Back"
button to cancel.
For
example:
setting
of
the
duration
of
the
"follow-me-home" lighting
F
Press
the "7
" or "8 " buttons, to select
the
"Define
the
vehicle
parameters" menu,
then the "OK" button.
F
Press the "
5" or "6" buttons to
select
the
"Interior
lighting"
line,
then the
"OK" button; then follow
the
same
procedure
to
select
the
"Follow-me-home
headlamps" line.
-
"Driving
assistance":
●
"Parking
brake
automatic"
(Auto
-
matic
electric
parking
brake;
see
the
"Driving"
section),
●
"Rear
wipe
in
reverse
gear"
(Rear
wiper
coupled
to
reverse
gear;
see the "V
isibility" section),
●
"Speeds
memorised"
(Memoris
-
ing
speeds;
see
the
"Driving"
sec
-
tion).
-
"V
ehicle
lighting"
(see
the
"V
isibility"
section):
●
"Directional
headlamps"
(Main
/
additional
directional
lighting),
●
"Daytime
lights"
(Daytime
running
lamps).
-
"Interior
lighting"
(see
the
"V
isibility"
section:
●
"Follow-me-home
headlamps"
(Automatic
operation
of
head
-
lamps
after
switching
of
f
the
igni
-
tion),
●
"W
elcome
lighting"
(Exterior
and
interior
welcome
lighting).
MULTIFUNCTION SCREENS
Page 70 of 328

68
Lost keys
Go to a CITROËN dealer with the vehicle's registration document, your personal
identification documents and if possible the key code label.
The
CITROËN
dealer
will
be
able
to
look
up
the
key
code
and
the
transpon
-
der
code required to order a new key. Do
not
throw
the
remote
con
-
trol batteries away, they contain
metals which are harmful to the environment.
T
ake
them
to
an
approved
col
-
lection
point.
Remote control
The high frequency remote control is a sensitive system; do not operate it while
it is in your pocket as there is a possibility that it may unlock the ve -
hicle,
without you being aware of it.
Do
not
repeatedly
press
the
buttons
of
your
remote
control
out
of
range
and
out
of
sight
of
your
vehicle.
Y
ou
run
the
risk
of
stopping
it
from
working
and
the
remote control would have to be reinitialised.
No
remote
control
can
operate
when
the
key
is
in
the
ignition
switch,
even
when
the ignition is switched off, except for reinitialisation.
Locking the vehicle
Driving with the doors locked may make access to the passenger compart -
ment by the emergency services more difficult in an emergency.
As
a
safety
precaution,
never
leave
children
alone
in
the
vehicle,
except
for
a
very short period.
In
all
cases,
it
is
essential
to
remove
the
key
from
the
ignition
switch
when
leaving
the vehicle.
Anti-theft protection
Do not make any modifications to the electronic engine immobiliser system; this
could cause malfunctions.
When purchasing a second-hand vehicle
Have the pairing of all of the keys in your possession checked by a CITROËN
dealer , to ensure that only your keys can be used to open and
start
the vehicle.
4
ACCESS