Citroen C5 2015 (RD/TD) / 2.G Owner's Manual
Manufacturer: CITROEN, Model Year: 2015, Model line: C5, Model: Citroen C5 2015 (RD/TD) / 2.GPages: 344, PDF Size: 12.95 MB
Page 211 of 344

209
C5_en_Chap08_information_ed01-2014
Pavement lighting
F Detach the cover and use a W 5W bulb.
Floor lighting
F Detach the cover and use a W 5W bulb.
Glove box
F Detach the cover and use a W 5W bulb.
8
Practical information
Page 212 of 344
210
C5_en_Chap08_information_ed01-2014
Changing a fuse
The 2 fuseboxes are located below the dashboard and under the bonnet.
Replacing a fuse
Before replacing a fuse, you must:
- a scertain the cause of the fault and have it
remedied,
-
s
witch off all electrical consumers,
-
p
ark the vehicle and switch off the ignition,
-
i
dentify the failed fuse using the allocation
tables and diagrams presented on the
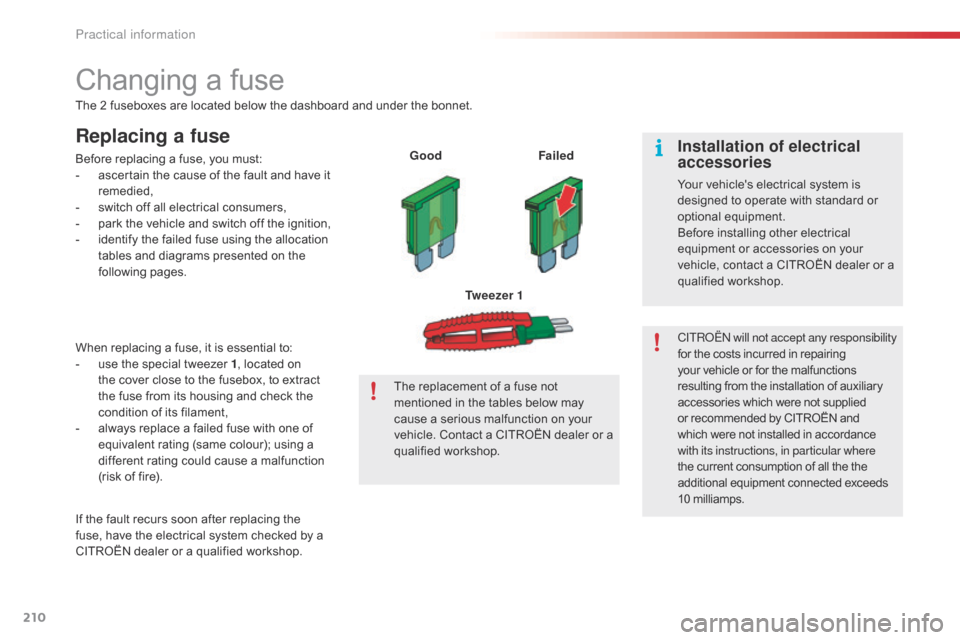
following pages. Good
Failed
Tw e e z e r 1
If the fault recurs soon after replacing the
fuse, have the electrical system checked by a
CITROËN dealer or a qualified workshop. When replacing a fuse, it is essential to:
-
u
se the special tweezer 1 , located on
the cover close to the fusebox, to extract
the fuse from its housing and check the
condition of its filament,
-
a
lways replace a failed fuse with one of
equivalent rating (same colour); using a
different rating could cause a malfunction
(risk of fire). The replacement of a fuse not
mentioned in the tables below may
cause a serious malfunction on your
vehicle. Contact a CITROËN dealer or a
qualified workshop.CITR
oËn
will not accept any responsibility
for the costs incurred in repairing
your vehicle or for the malfunctions
resulting from the installation of auxiliary
accessories which were not supplied
or recommended by CITROËN and
which were not installed in accordance
with its instructions, in particular where
the current consumption of all the the
additional equipment connected exceeds
10 milliamps.Installation of electrical
accessories
Your vehicle's electrical system is
designed to operate with standard or
optional equipment.
Before installing other electrical
equipment or accessories on your
vehicle, contact a CITROËN dealer or a
qualified workshop.
Practical information
Page 213 of 344

211
C5_en_Chap08_information_ed01-2014
Fuses under the dashboard
Access to the fuses
F fully open the storage box then pull firmly on it horizontally,
F
r
emove the trim by pulling sharply on the
bottom.
Fusebox C
Fusebox
A
Tweezer 1
When refitting the storage box, observe the
following advice:
-
W
ith the storage box horizontal, refit the
bottom ensuring that the lower cut-outs are
in line with the pins.
-
G
ive a sharp push to the front.
-
C
lose the storage box, ensuring that the
springs located behind pass over the top.
Fusebox B
8
Practical information
Page 214 of 344

212
C5_en_Chap08_information_ed01-2014
Fusebox A
Fusebox B
Fuse N°Rating Function
G29 -Not used
G30 5 AHeated door mirrors
G31 5 ARain and sunshine sensor
G32 5 ASeat belt not fastened warning lamps
G33 5 AElectrochrome mirrors
G34 20 ASunroof (saloon)
G35 5 APassenger door lighting - Passenger door mirror adjustment
G36 30 AElectric tailgate (Tourer)
G37 20 AHeated front seats
G38 30 ADriver’s electric seat
G39 30 APassenger’s electric seat - Hi-Fi amplifier
G40 3 ATrailer relay unit supply
Fuse N° Rating Function
G36 15 A
6 -speed automatic gearbox
5 A 4-speed automatic gearbox
G37 10 ADaytime running lamps - Diagnostic socket
G38 3 ADSC/ASR
G39 10 AHydraulic suspension
G40 3 AST
o
P
switch
Practical information
Page 215 of 344

213
C5_en_Chap08_information_ed01-2014
Fusebox C
Fuse N°Rating Function
F1 15 ARear screen wipe (Tourer)
F2 30 ALocking and deadlocking relay
F3 5 AAirbags
F4 10 AAutomatic gearbox - Additional heater unit (Diesel) - Electrochrome rear view mirrors
F5 30 AFront window - Sun roof - Passenger door lighting - Passenger door mirror adjustment
F6 30 ARear window
F7 5 AVanity mirror lighting - Glove box lighting - Interior lamps - Torch (Tourer)
F8 20 ARadio - CD changer - Steering mounted controls - Screen - Under-inflation detection - Electric boot ECU
F9 30 ACigarette lighter - Front 12 V socket
F10 15 AAlarm - Steering mounted controls, lighting, signalling and wiper stalks
F11 15 ALow current anti-theft switch
F12 15 ADriver’s electric seat - Instrument panel - Seat belt not fastened warning lamps - Air conditioning controls
F13 5 AEngine relay unit - Hydraulic suspension pump cut-off relay - Airbag ECU supply
F14 15 ARain and sunshine sensor - Parking sensors - Passenger’s electric seat - Trailer relay unit - HI-FI amplifier ECU -
Bluetooth system - Lane Departure Warning System
F15 30 ALocking and deadlocking relay
F17 40 AHeated rear screen - Heated door mirrors
FSH SHUNTPARK SHUNT
8
Practical information
Page 216 of 344
214
C5_en_Chap08_information_ed01-2014
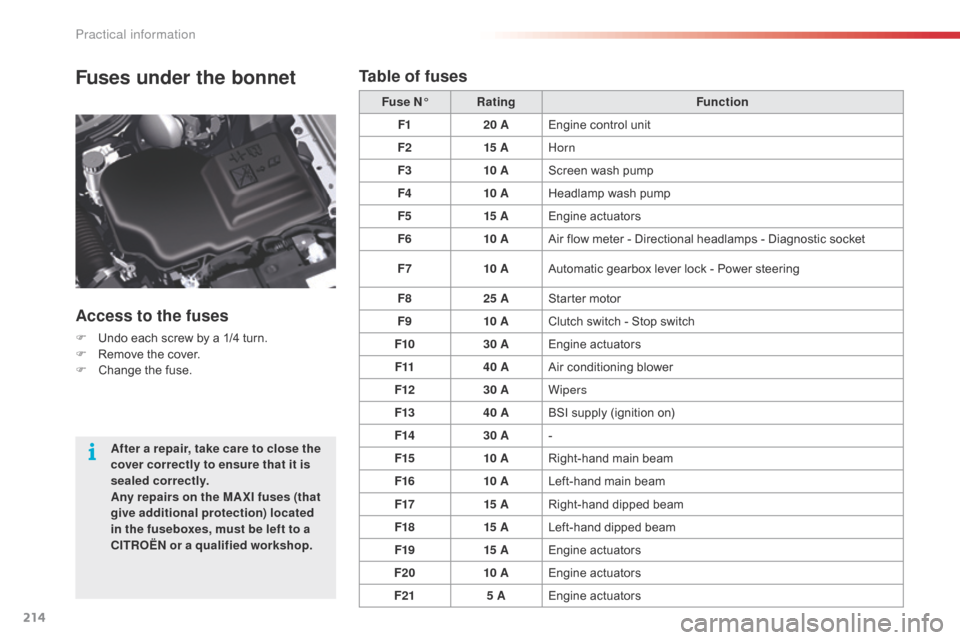
Fuses under the bonnet
Access to the fuses
F Undo each screw by a 1/4 turn.
F R emove the cover.
F
C
hange the fuse. Fuse N°
Rating Function
F1 20 AEngine control unit
F2 15 AHorn
F3 10 AScreen wash pump
F4 10 AHeadlamp wash pump
F5 15 AEngine actuators
F6 10 AAir flow meter - Directional headlamps - Diagnostic socket
F7 10 AAutomatic gearbox lever lock - Power steering
F8 25 AStarter motor
F9 10 AClutch switch - Stop switch
F10 30 AEngine actuators
F11 40 AAir conditioning blower
F12 30 AWipers
F13 40 ABSI supply (ignition on)
F14 30 A-
F15 10 ARight-hand main beam
F16 10 ALeft-hand main beam
F17 15 ARight-hand dipped beam
F18 15 ALeft-hand dipped beam
F19 15 AEngine actuators
F20 10 AEngine actuators
F21 5 AEngine actuators
After a repair, take care to close the
cover correctly to ensure that it is
sealed correctly.
Any repairs on the MA XI fuses (that
give additional protection) located
in the fuseboxes, must be left to a
CITROËN or a qualified workshop.
Table of fuses
Practical information
Page 217 of 344

215
C5_en_Chap08_information_ed01-2014
Table of fuses
Fuse N°Rating Function
F6 25 ARear 12 V socket (max power: 100 W)
F7 15 AFoglamps
F8 20 AAdditional burner (Diesel)
F9 30 AElectric parking brake
8
Practical information
Page 218 of 344
216
C5_en_Chap08_information_ed01-2014
battery
Access to the battery
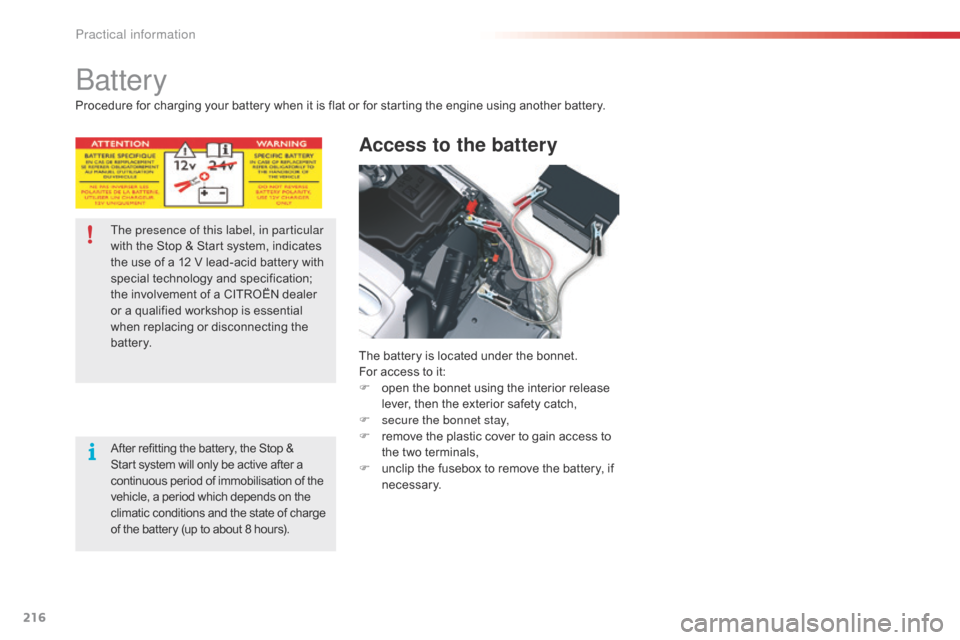
The battery is located under the bonnet.
For access to it:
F
o
pen the bonnet using the interior release
lever, then the exterior safety catch,
F
s
ecure the bonnet stay,
F
r
emove the plastic cover to gain access to
the two terminals,
F
u
nclip the fusebox to remove the battery, if
necessary.
The presence of this label, in particular
with the Stop & Start system, indicates
the use of a 12 V lead-acid battery with
special technology and specification;
the involvement of a CITROËN dealer
or a qualified workshop is essential
when replacing or disconnecting the
battery.
After refitting the battery, the Stop &
Start system will only be active after a
continuous period of immobilisation of the
vehicle, a period which depends on the
climatic conditions and the state of charge
of the battery (up to about 8 hours).
Procedure for charging your battery when it is flat or for starting the engine using another battery.
Practical information
Page 219 of 344
217
C5_en_Chap08_information_ed01-2014
Following reconnection of
the battery
Following reconnection of the battery,
switch on the ignition and wait 1 minute
before starting to permit initialisation
of the electronic systems. However, if
slight malfunctions remain following this
operation, contact a CITROËN dealer
or a qualified workshop.
Referring to the corresponding section,
you must yourself reinitialise:
-
t
he remote control key,
-
t
he glass panoramic roof blind,
-
t
he GPS satellite navigation
system.
Starting using another
battery
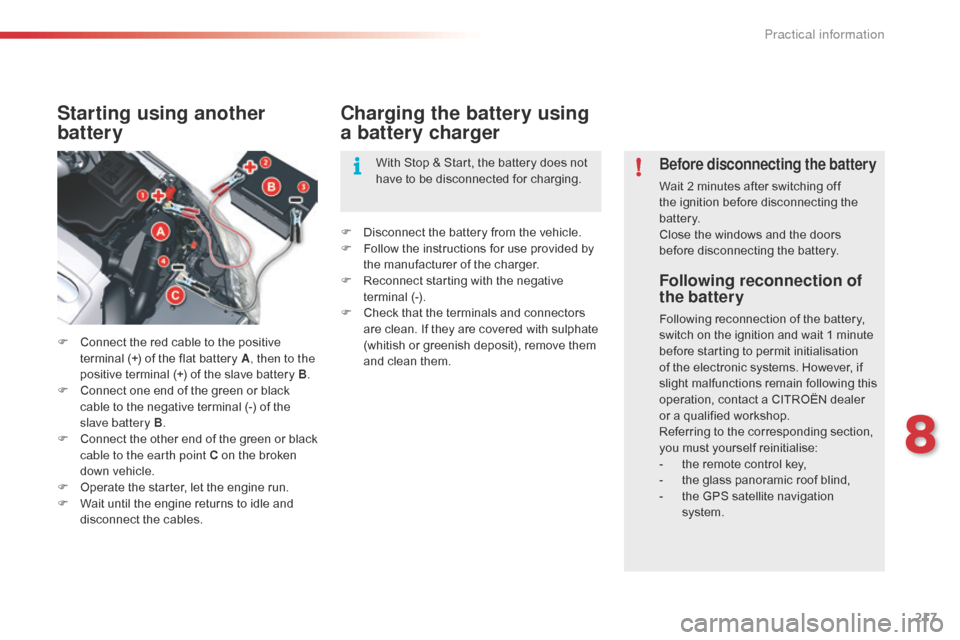
F Connect the red cable to the positive terminal (+) of the flat battery A , then to the
positive terminal (+) of the slave battery B.
F
C
onnect one end of the green or black
cable to the negative terminal (-) of the
slave battery B .
F
C
onnect the other end of the green or black
cable to the earth point C on the broken
down vehicle.
F
O
perate the starter, let the engine run.
F
W
ait until the engine returns to idle and
disconnect the cables.
Charging the battery using
a battery charger
F Disconnect the battery from the vehicle.
F F ollow the instructions for use provided by
the manufacturer of the charger.
F
R
econnect starting with the negative
terminal (-).
F
C
heck that the terminals and connectors
are clean. If they are covered with sulphate
(whitish or greenish deposit), remove them
and clean them. With Stop & Start, the battery does not
have to be disconnected for charging.
Before disconnecting the battery
Wait 2 minutes after switching off
the ignition before disconnecting the
battery.
Close the windows and the doors
before disconnecting the battery.
8
Practical information
Page 220 of 344
218
C5_en_Chap08_information_ed01-2014
Some functions are not available if the
battery is not sufficiently charged.
Protect your eyes and face before
handling the battery.
All operations on the battery must be
carried out in a well ventilated area and
away from naked flames and sources
of sparks, so as to avoid the risk of
explosion or fire.
Do not try to charge a frozen battery;
the battery must first be thawed out to
avoid the risk of explosion. If the battery
has been frozen, before charging have
it checked by a CITROËN dealer or a
qualified workshop who will check that
the internal components have not been
damaged and the casing is not cracked,
which could cause a leak of toxic and
corrosive acid.
Do not reverse the polarity and use only
a 12 V charger.
Do not disconnect the terminals while
the engine is running.
Do not charge the batteries without
disconnecting the terminals first.
Wash your hands after wards.
It is advisable to disconnect the battery
if the vehicle is to be left unused for
more than one month.The batteries contain harmful substances
such as sulphuric acid and lead. They
must be disposed of in accordance
with regulations and must not, in any
circumstances, be discarded with household
waste.
Take used remote control batteries and
vehicle batteries to a special collection point.
do not push the vehicle to start the
engine if you have an electronic or
automatic gearbox.
Practical information