ignition Citroen C5 2016 (RD/TD) / 2.G Workshop Manual
[x] Cancel search | Manufacturer: CITROEN, Model Year: 2016, Model line: C5, Model: Citroen C5 2016 (RD/TD) / 2.GPages: 366, PDF Size: 30.93 MB
Page 160 of 366
158
C5_en_Chap06_securite_ed01-2015
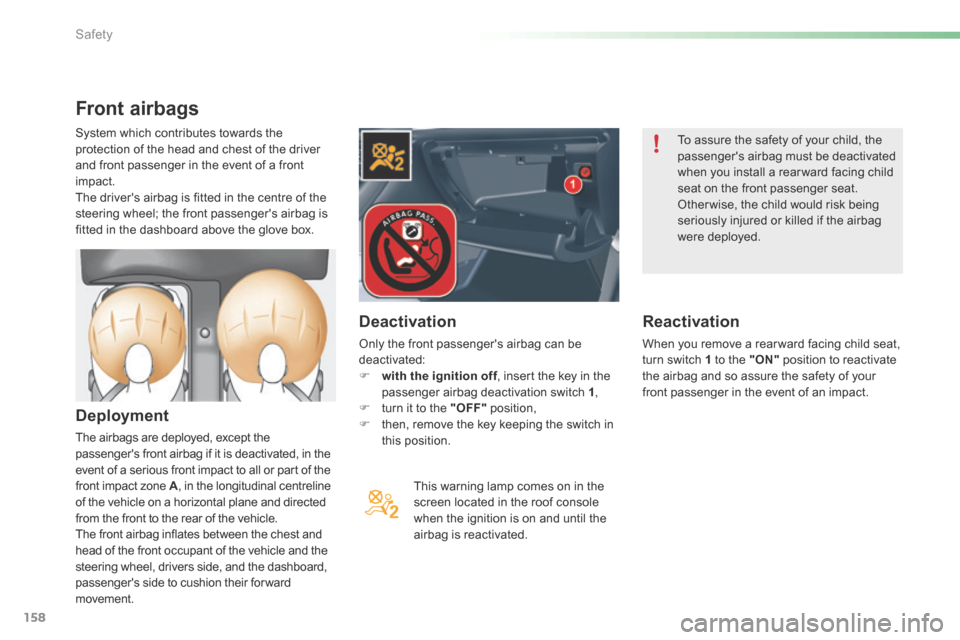
Front airbags
Deployment
The airbags are deployed, except the
passenger's front airbag if it is deactivated, in the
event of a serious front impact to all or part of the
front impact zone A, in the longitudinal centreline
of the vehicle on a horizontal plane and directed
from the front to the rear of the vehicle.
The front airbag inflates between the chest and
head of the front occupant of the vehicle and the
steering wheel, drivers side, and the dashboard,
passenger's side to cushion their for ward
movement. This warning lamp comes on in the
screen located in the roof console
when the ignition is on and until the
airbag is reactivated.
Deactivation
Only the front passenger's airbag can be
deactivated:
F
with the ignition off , insert the key in the
passenger airbag deactivation switch 1 ,
F turn it to the "OFF" position,
F then, remove the key keeping the switch in
this position. To assure the safety of your child, the
passenger's airbag must be deactivated
when you install a rear ward facing child
seat on the front passenger seat.
Other wise, the child would risk being
seriously injured or killed if the airbag
were deployed.
Reactivation
When you remove a rear ward facing child seat,
turn switch 1 to the "ON"
position to reactivate
the airbag and so assure the safety of your
front passenger in the event of an impact.
System which contributes towards the
protection of the head and chest of the driver
and front passenger in the event of a front
impact.
The driver's airbag is fitted in the centre of the
steering wheel; the front passenger's airbag is
fitted in the dashboard above the glove box.
Safety
Page 178 of 366

176
C5_en_Chap07_securite-enfant_ed01-2015
Electric child lock
Activation
F Press button A .
The indicator lamp in button A comes on,
accompanied by a message in the instrument
panel screen. Remote control system to prevent opening of the rear doors using their interior controls and use of
the rear electric windows.
The control is located on the driver's door, with the electric window controls.
Deactivation
F Press button A again.
The indicator lamp in button A goes off,
accompanied by a message in the instrument
panel screen.
This indicator lamp remains off until the child
lock is activated. This system is independent and in no
circumstances does it take the place of
the central locking control.
Check the status of the child lock each
time you switch on the ignition.
Always remove the key from the ignition
when leaving the vehicle, even for a
short time.
In the event of a serious impact,
the electric child lock is deactivated
automatically to permit the exit of the
rear passengers. Any other status of the indicator lamp
indicates a fault with the electric child
lock. Have it checked by a CITROËN
dealer or a qualified workshop.
Child safety
Page 179 of 366

177
C5_en_Chap08_information_ed01-2015
Fuel tank
Capacity of the tank: approximately 71 litres*.
Low fuel level
When the low fuel level in the
tank is reached, this warning
lamp comes on in the instrument
panel, accompanied by an
audible warning and a message in the display
screen. When it first comes on, there remains
around 5 litres of fuel in the tank.
You must refuel to avoid running out of fuel.
F Press at the top left corner, then pull on its
edge. While you are refuelling, the engine must be
stopped and the ignition switched off.
F
Turn the key a quarter turn to lock and
unlock the filler cap.
F When refuelling, place the cap on hook A .
F Fill the tank, but do not persist after the
third cut-off ; this could cause your vehicle
to malfunction.
For a petrol engine with a catalytic
converter, the use of unleaded fuel is
compulsory.
The filler neck is narrower to ensure that only
unleaded petrol nozzles can be put in.
Opening the fuel flap Refuelling
Additions of fuel must be of at least
5 litres to be taken into account by the
fuel gauge.
Opening the filler cap may create a
noise of an inrush of air. This vacuum,
which is entirely normal, is caused by
the sealing of the fuel system.
With Stop & Start, never refuel with the
system in STOP mode; you must switch
off the ignition with the key.
* 55 litres for Slovakia.
8
Practical information
Page 182 of 366
180
C5_en_Chap08_information_ed01-2015
HDi engines make use of advanced
technology.
For any work on your vehicle, contact
a qualified workshop that has the
skills and equipment required, which a
CITROËN dealer is able to provide.
BlueHDi engines
Running out of fuel (Diesel)
Priming the fuel system
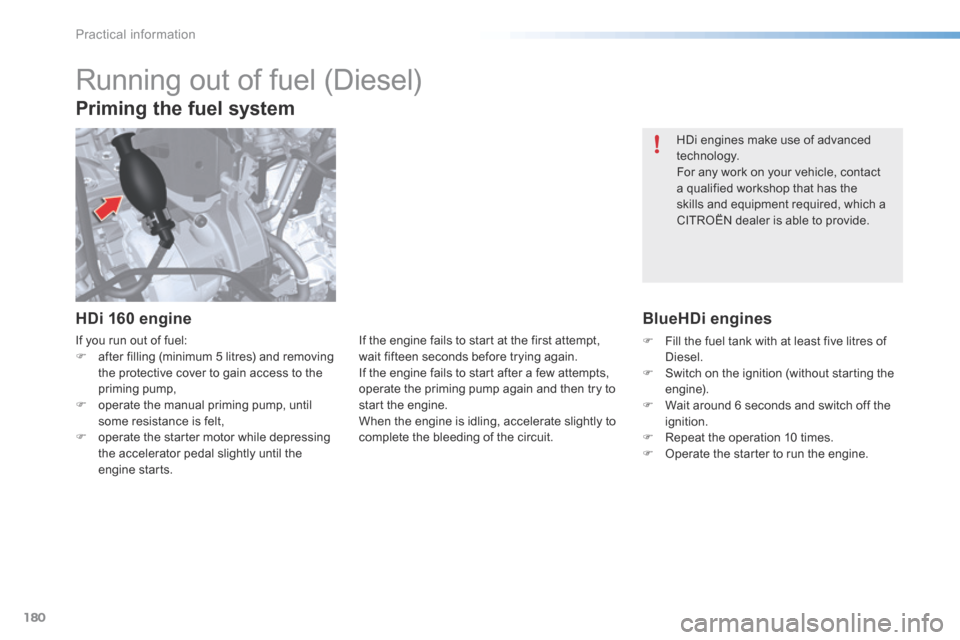
HDi 160 engine
If you run out of fuel:
F after filling (minimum 5 litres) and removing
the protective cover to gain access to the
priming pump,
F operate the manual priming pump, until
some resistance is felt,
F operate the starter motor while depressing
the accelerator pedal slightly until the
engine starts. If the engine fails to start at the first attempt,
wait fifteen seconds before trying again.
If the engine fails to start after a few attempts,
operate the priming pump again and then try to
start the engine.
When the engine is idling, accelerate slightly to
complete the bleeding of the circuit.
F
Fill the fuel tank with at least five litres of
Diesel.
F Switch on the ignition (without starting the
engine).
F Wait around 6 seconds and switch off the
ignition.
F Repeat the operation 10 times.
F Operate the starter to run the engine.
Practical information
Page 184 of 366
182
C5_en_Chap08_information_ed01-2015
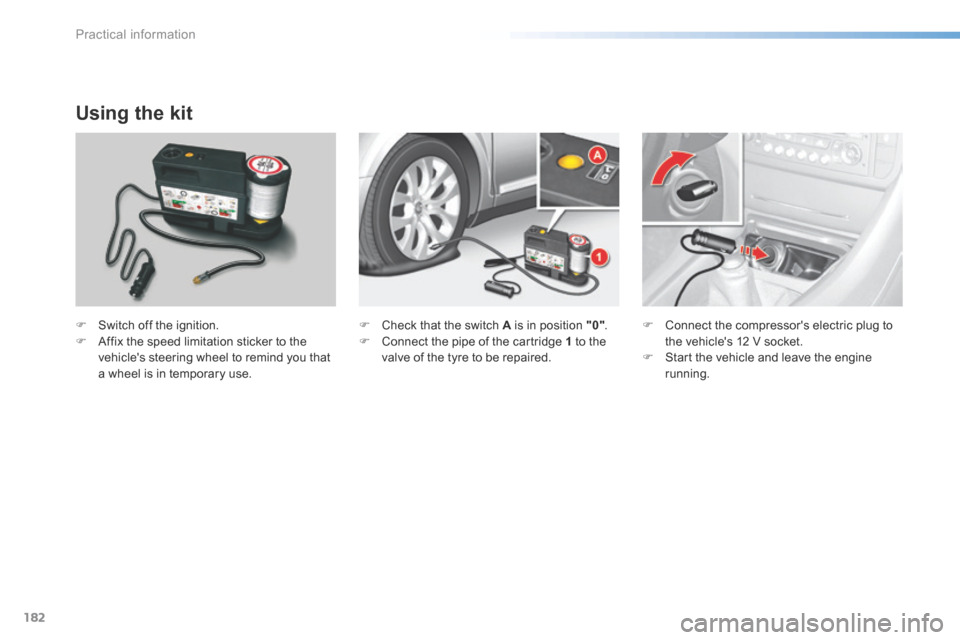
Using the kit
F Switch off the ignition.
F Affix the speed limitation sticker to the
vehicle's steering wheel to remind you that
a wheel is in temporary use. F
Check that the switch A is in position "0" .
F Connect the pipe of the cartridge 1 to the
valve of the tyre to be repaired. F
Connect the compressor's electric plug to
the vehicle's 12 V socket.
F Start the vehicle and leave the engine
running.
Practical information
Page 190 of 366
188
C5_en_Chap08_information_ed01-2015
Removing a wheel
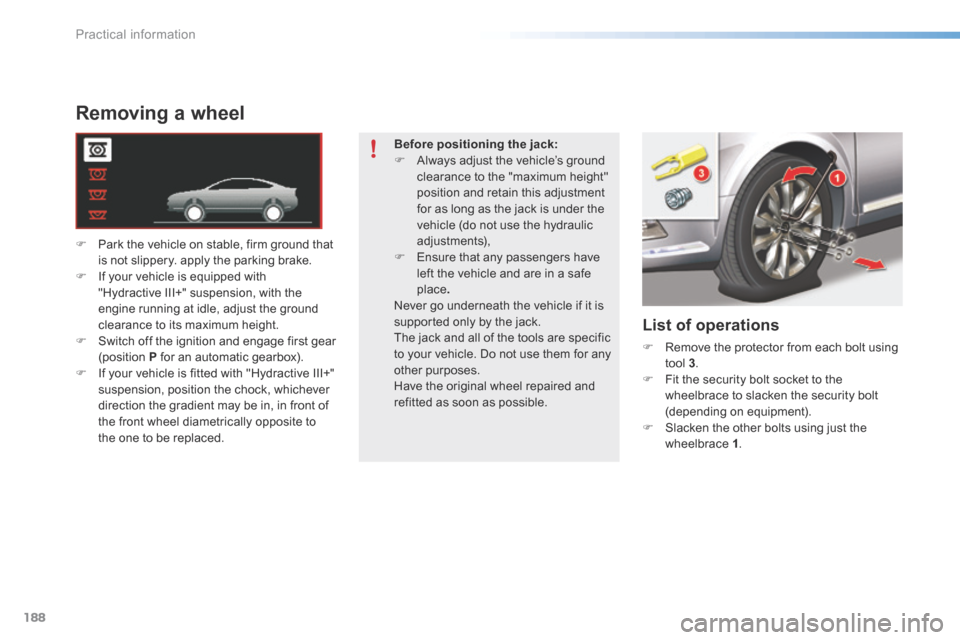
F Park the vehicle on stable, firm ground that
is not slippery. apply the parking brake.
F If your vehicle is equipped with
"Hydractive III+" suspension, with the
engine running at idle, adjust the ground
clearance to its maximum height.
F Switch off the ignition and engage first gear
(position P for an automatic gearbox).
F If your vehicle is fitted with "Hydractive III+"
suspension, position the chock, whichever
direction the gradient may be in, in front of
the front wheel diametrically opposite to
the one to be replaced.
List of operations
F Remove the protector from each bolt using
tool 3 .
F Fit the security bolt socket to the
wheelbrace to slacken the security bolt
(depending on equipment).
F Slacken the other bolts using just the
wheelbrace 1 .
Before positioning the jack:
F
Always adjust the vehicle’s ground
clearance to the "maximum height"
position and retain this adjustment
for as long as the jack is under the
vehicle (do not use the hydraulic
adjustments),
F Ensure that any passengers have
left the vehicle and are in a safe
place.
Never go underneath the vehicle if it is
supported only by the jack.
The jack and all of the tools are specific
to your vehicle. Do not use them for any
other purposes.
Have the original wheel repaired and
refitted as soon as possible.
Practical information
Page 206 of 366
204
C5_en_Chap08_information_ed01-2015
Changing a fuse
The 2 fuseboxes are located below the dashboard and under the bonnet.
Replacing a fuse
Before replacing a fuse, you must:
- ascertain the cause of the fault and have it
remedied,
- switch off all electrical consumers,
- park the vehicle and switch off the ignition,
- identify the failed fuse using the allocation
tables and diagrams presented on the
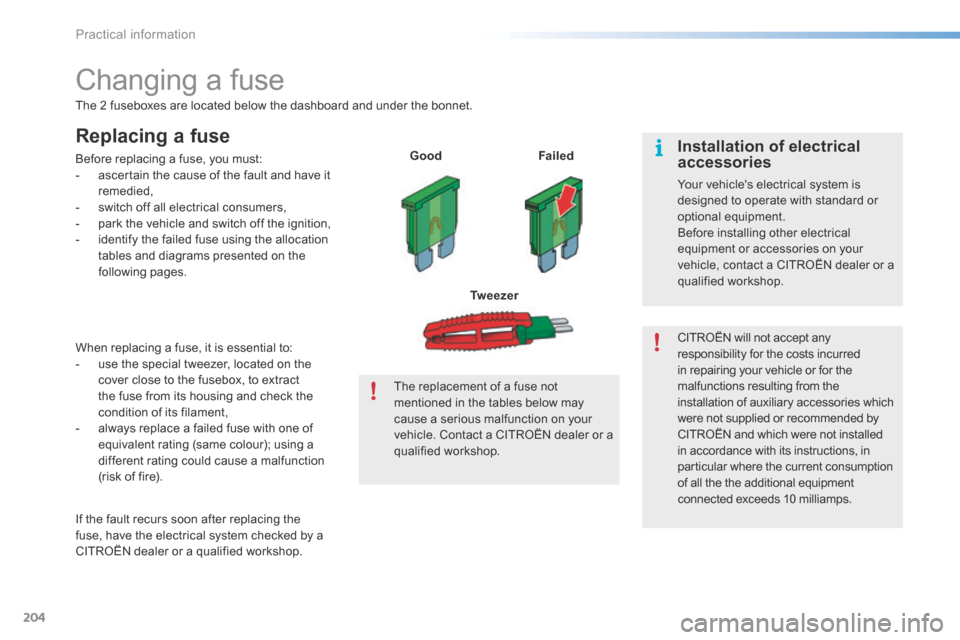
following pages. Good
Failed
Tw e e z e r
If the fault recurs soon after replacing the
fuse, have the electrical system checked by a
CITROËN dealer or a qualified workshop. When replacing a fuse, it is essential to:
- use the special tweezer, located on the
cover close to the fusebox, to extract
the fuse from its housing and check the
condition of its filament,
- always replace a failed fuse with one of
equivalent rating (same colour); using a
different rating could cause a malfunction
(risk of fire). The replacement of a fuse not
mentioned in the tables below may
cause a serious malfunction on your
vehicle. Contact a CITROËN dealer or a
qualified workshop.CITR
oËn will not accept any
responsibility for the costs incurred
in repairing your vehicle or for the
malfunctions resulting from the
installation of auxiliary accessories which
were not supplied or recommended by
CITR oËn and which were not installed
in accordance with its instructions, in
particular where the current consumption
of all the the additional equipment
connected exceeds 10 milliamps.Installation of electrical
accessories
Your vehicle's electrical system is
designed to operate with standard or
optional equipment.
Before installing other electrical
equipment or accessories on your
vehicle, contact a CITR oËn dealer or a
qualified workshop.
Practical information
Page 210 of 366
208
C5_en_Chap08_information_ed01-2015
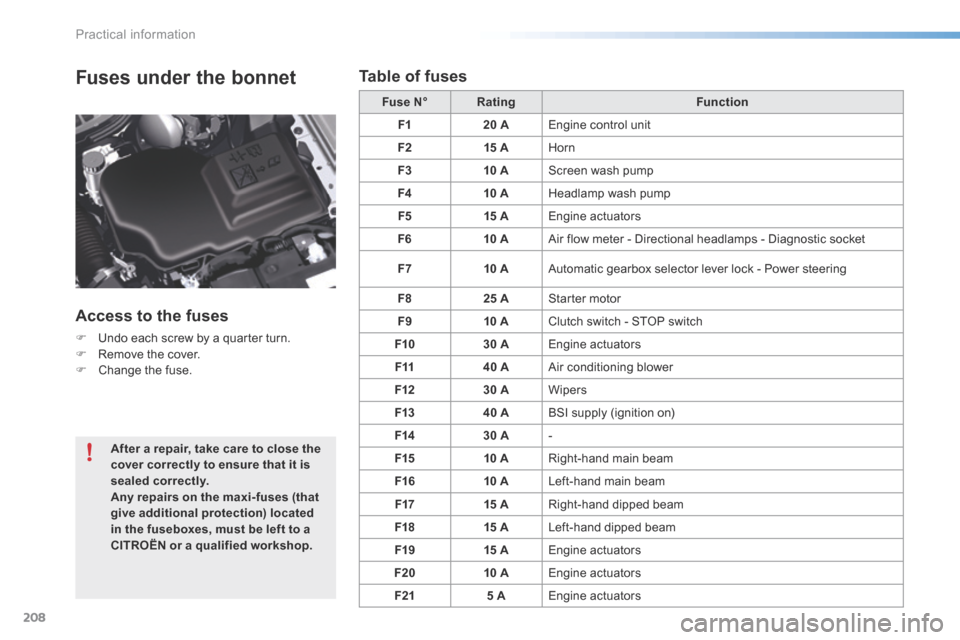
Fuses under the bonnet
Access to the fuses
F Undo each screw by a quarter turn.
F Remove the cover.
F Change the fuse. Fuse N°
Rating Function
F1 20 AEngine control unit
F2 15 AHorn
F3 10 AScreen wash pump
F4 10 AHeadlamp wash pump
F5 15 AEngine actuators
F6 10 AAir flow meter - Directional headlamps - Diagnostic socket
F7 10 AAutomatic gearbox selector lever lock - Power steering
F8 25 AStarter motor
F9 10 AClutch switch - S ToP switch
F10 30 AEngine actuators
F11 40 AAir conditioning blower
F12 30 AWipers
F13 40 ABSI supply (ignition on)
F14 30 A-
F15 10 ARight-hand main beam
F16 10 ALeft-hand main beam
F17 15 ARight-hand dipped beam
F18 15 ALeft-hand dipped beam
F19 15 AEngine actuators
F20 10 AEngine actuators
F21 5 AEngine actuators
After a repair, take care to close the
cover correctly to ensure that it is
sealed correctly.
Any repairs on the maxi-fuses (that
give additional protection) located
in the fuseboxes, must be left to a
CITROËN or a qualified workshop.
Table of fuses
Practical information
Page 213 of 366
211
C5_en_Chap08_information_ed01-2015
Following reconnection of
the battery
Following reconnection of the battery,
switch on the ignition and wait 1 minute
before starting to permit initialisation
of the electronic systems. However, if
slight malfunctions remain following this
operation, contact a CITRoËn dealer
or a qualified workshop.
Referring to the corresponding section,
you must yourself reinitialise:
- the remote control key,
- the glass panoramic roof blind,
- the radio station presets, the date
and time in the audio system.
Starting using another
battery
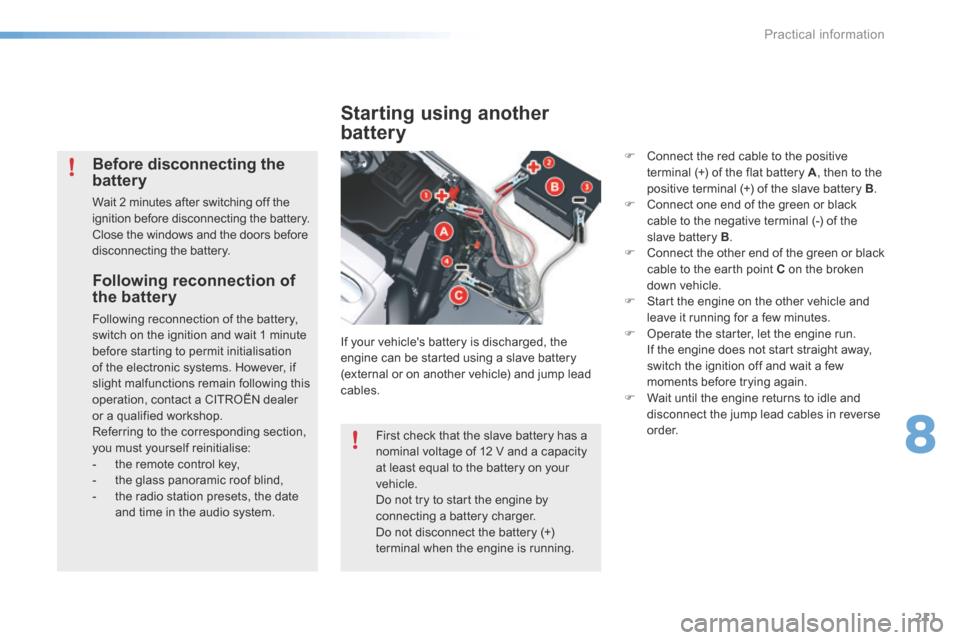
If your vehicle's battery is discharged, the
engine can be started using a slave battery
(external or on another vehicle) and jump lead
cables.
Before disconnecting the
battery
Wait 2 minutes after switching off the
ignition before disconnecting the battery.
Close the windows and the doors before
disconnecting the battery. F
Connect the red cable to the positive
terminal (+) of the flat battery A , then to the
positive terminal (+) of the slave battery B .
F Connect one end of the green or black
cable to the negative terminal (-) of the
slave battery B .
F Connect the other end of the green or black
cable to the earth point C on the broken
down vehicle.
F Start the engine on the other vehicle and
leave it running for a few minutes.
F Operate the starter, let the engine run.
If the engine does not start straight away,
switch the ignition off and wait a few
moments before trying again.
F Wait until the engine returns to idle and
disconnect the jump lead cables in reverse
o r d e r.
First check that the slave battery has a
nominal voltage of 12 V and a capacity
at least equal to the battery on your
vehicle.
Do not try to start the engine by
connecting a battery charger.
Do not disconnect the battery (+)
terminal when the engine is running.
8
Practical information
Page 229 of 366
227
C5_en_Chap09_verification_ed01-2015
Checking levels
Engine oil level
The check is carried out either when
the ignition is switched on using the
oil level indicator in the instrument
panel for vehicles so equipped, or
using the dipstick.
Check all of these levels regularly, in line with the manufacturer's service schedule. Top them up if necessary, unless other wise indicated.
If a level drops significantly, have the corresponding system checked by a CITROËN dealer or a qualified workshop.
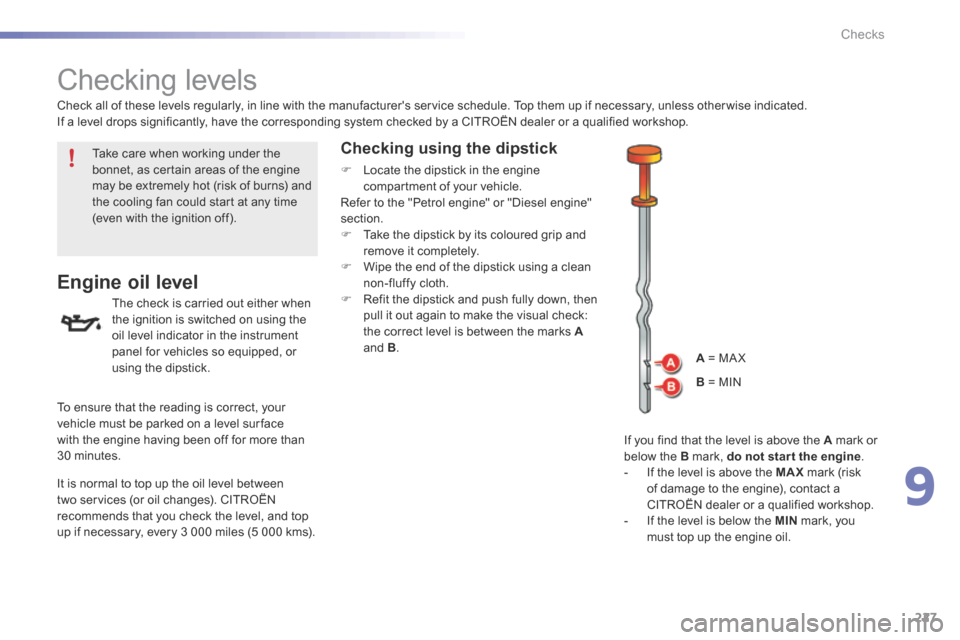
If you find that the level is above the A mark or
below the B mark, do not star t the engine.
- If the level is above the MAX mark (risk
of damage to the engine), contact a
CITROËN dealer or a qualified workshop.
- If the level is below the MIN mark, you
must top up the engine oil.
Take care when working under the
bonnet, as certain areas of the engine
may be extremely hot (risk of burns) and
the cooling fan could start at any time
(even with the ignition off).
To ensure that the reading is correct, your
vehicle must be parked on a level sur face
with the engine having been off for more than
30 minutes.
It is normal to top up the oil level between
two services (or oil changes). CITROËN
recommends that you check the level, and top
up if necessary, every 3 000 miles (5 000 kms).
Checking using the dipstick
F Locate the dipstick in the engine
compartment of your vehicle.
Refer to the "Petrol engine" or "Diesel engine"
section.
F Take the dipstick by its coloured grip and
remove it completely.
F Wipe the end of the dipstick using a clean
non-fluffy cloth.
F Refit the dipstick and push fully down, then
pull it out again to make the visual check:
the correct level is between the marks A
and B .
A = MaX
B = MI n
9
Checks