Citroen C5 2017 (RD/TD) / 2.G Owner's Manual
Manufacturer: CITROEN, Model Year: 2017, Model line: C5, Model: Citroen C5 2017 (RD/TD) / 2.GPages: 348, PDF Size: 10.72 MB
Page 171 of 348
169
C5_en_Chap06_securite_ed01-2016
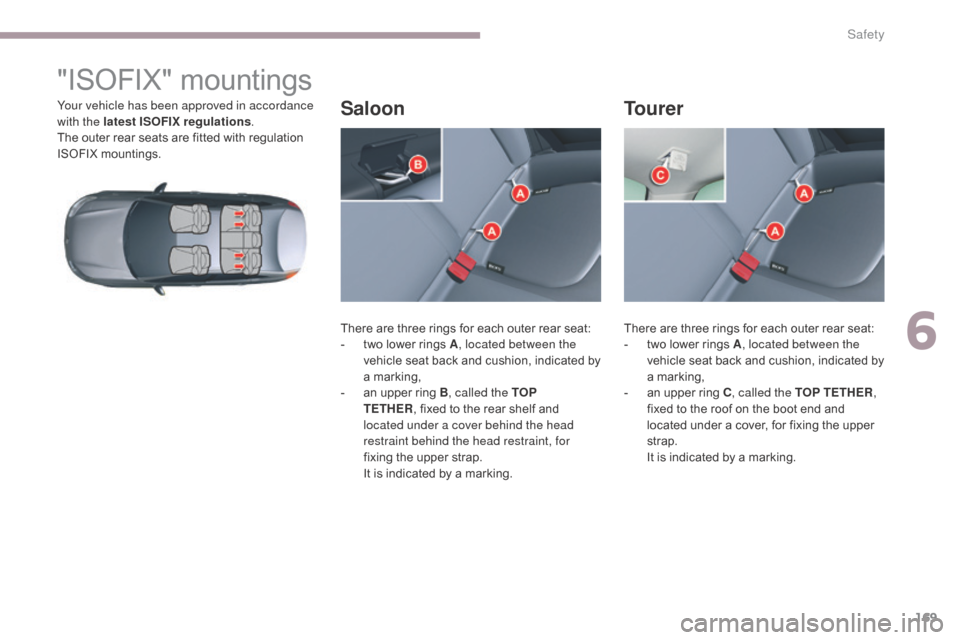
"ISOFIX" mountings
Your vehicle has been approved in accordance
with the latest ISOFIX regulations.
The outer rear seats are fitted with regulation
ISOFIX mountings.
There are three rings for each outer rear seat:
-
t
wo lower rings A, located between the
vehicle seat back and cushion, indicated by
a marking,
-
a
n upper ring B, called the TOP
TETHER ,
fixed to the rear shelf and
located under a cover behind the head
restraint behind the head restraint, for
fixing the upper strap.
I
t is indicated by a marking.There are three rings for each outer rear seat:
-
t
wo lower rings A, located between the
vehicle seat back and cushion, indicated by
a marking,
-
a
n upper ring C, called the TOP TETHER ,
fixed to the roof on the boot end and
located under a cover, for fixing the upper
strap.
I
t is indicated by a marking.SaloonTourer
6
Safety
Page 172 of 348
170
C5_en_Chap06_securite_ed01-2016
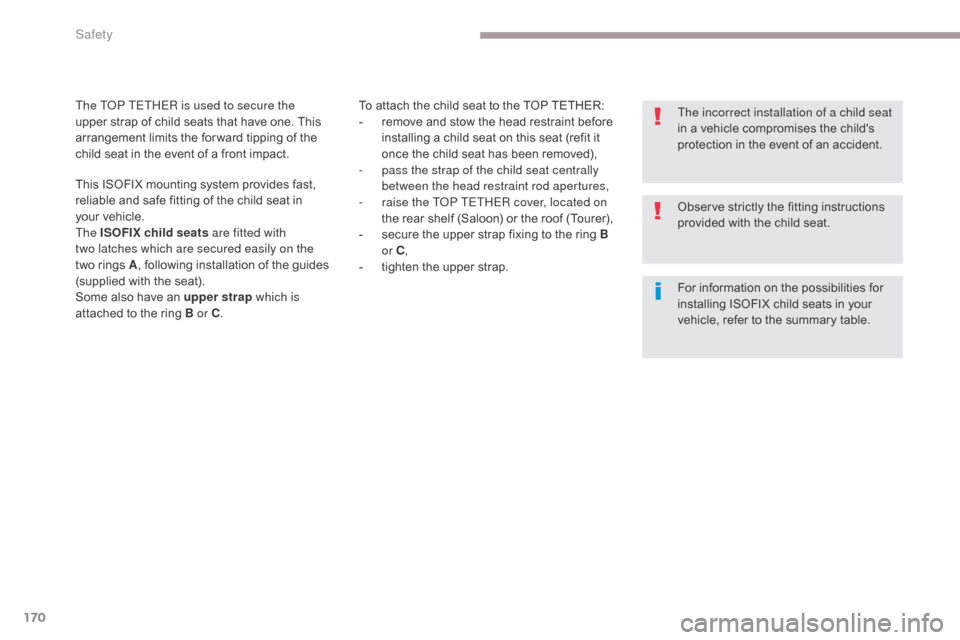
To attach the child seat to the TOP TETHER:
- r emove and stow the head restraint before
installing a child seat on this seat (refit it
once the child seat has been removed),
-
p
ass the strap of the child seat centrally
between the head restraint rod apertures,
-
r
aise the TOP TETHER cover, located on
the rear shelf (Saloon) or the roof (Tourer),
-
s
ecure the upper strap fixing to the ring B
or C ,
-
t
ighten the upper strap.
The TOP TETHER is used to secure the
upper strap of child seats that have one. This
arrangement limits the for ward tipping of the
child seat in the event of a front impact.
The incorrect installation of a child seat
in a vehicle compromises the child's
protection in the event of an accident.
Observe strictly the fitting instructions
provided with the child seat.
This ISOFIX mounting system provides fast,
reliable and safe fitting of the child seat in
your
vehicle.
The ISOFIX child seats are fitted with
two
latches which are secured easily on the
two rings A , following installation of the guides
(supplied with the seat).
Some also have an upper strap which is
attached to the ring B or C . For information on the possibilities for
installing ISOFIX child seats in your
vehicle, refer to the summary table.
Safety
Page 173 of 348
171
C5_en_Chap06_securite_ed01-2016
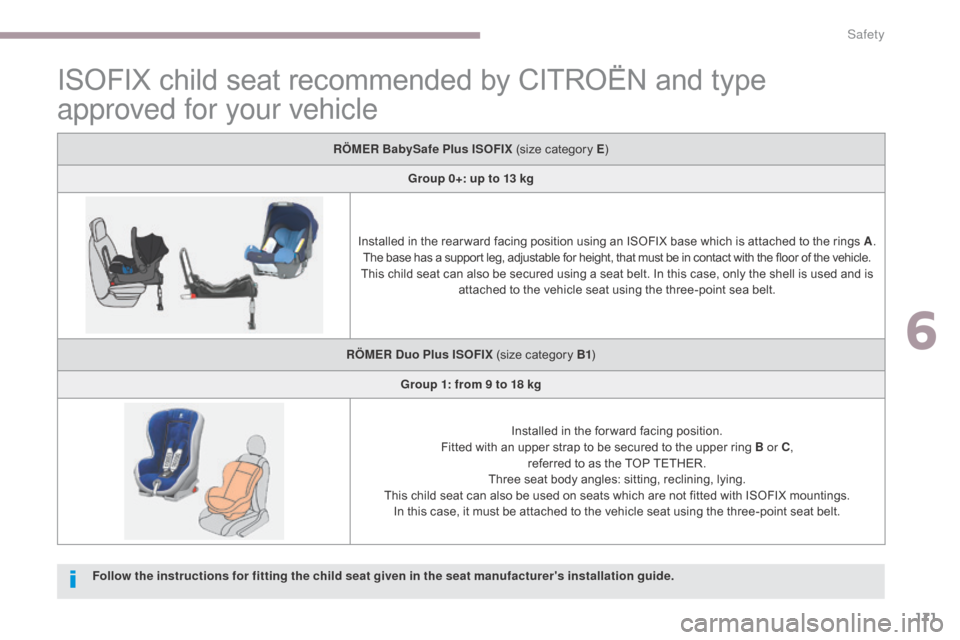
ISOFIX child seat recommended by CITROËN and type
approved for your vehicle
RÖMER BabySafe Plus ISOFIX (size category E)
Group 0+: up to 13 kg
Installed in the rear ward facing position using an ISOFIX base which is attached to the rings A .
The base has a support leg, adjustable for height, that must be in contact with the floor of the vehicle.
This child seat can also be secured using a seat belt. In this case, only the shell is used and is attached to the vehicle seat using the three-point sea belt.
RÖMER Duo Plus ISOFIX (size category B1 )
Group 1: from 9 to 18 kg
Installed in the for ward facing position.
Fitted with an upper strap to be secured to the upper ring B or C ,
referred to as the TOP TETHER.
Three seat body angles: sitting, reclining, lying.
This child seat can also be used on seats which are not fitted with ISOFIX mountings. In this case, it must be attached to the vehicle seat using the three-point seat belt.
Follow the instructions for fitting the child seat given in the seat manufacturer's installation guide.
6
Safety
Page 174 of 348
172
C5_en_Chap06_securite_ed01-2016
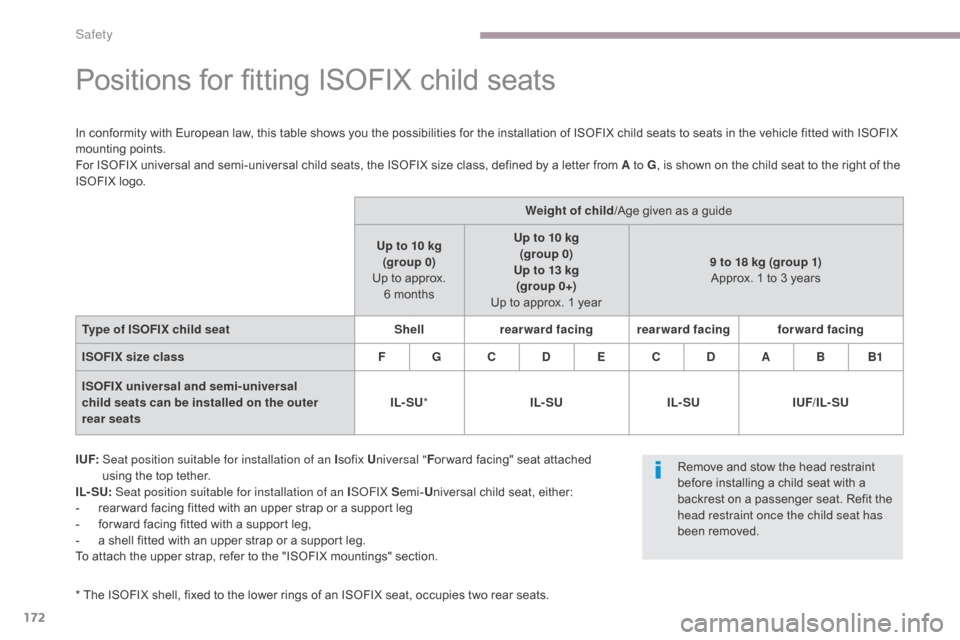
Positions for fitting ISOFIX child seats
I UF: Seat position suitable for installation of an I sofix Universal " For ward facing" seat attached
using the top tether.
IL- SU: Seat position suitable for installation of an I SOFIX Semi-Universal child seat, either:
-
r
ear ward facing fitted with an upper strap or a support leg
-
f
or ward facing fitted with a support leg,
-
a s
hell fitted with an upper strap or a support leg.
To attach the upper strap, refer to the "ISOFIX mountings" section. Weight of child/
Age given as a guide
Up to 10 kg (group 0)
Up to approx. 6 months Up to 10 kg
(group 0)
Up to 13 kg (group 0+)
Up to approx. 1 year 9 to 18 kg (group 1)
Approx. 1 to 3 years
Type of ISOFIX child seat Shellrearward facing rearward facing forward facing
ISOFIX size class F G C D E C D A B B1
ISOFIX universal and semi-universal
child seats can be installed on the outer
rear seats IL- SU
* IL- SU IL- SUIUF/IL- SU
*
T
he ISOFIX shell, fixed to the lower rings of an ISOFIX seat, occupies two rear seats.
In conformity with European law, this table shows you the possibilities for the installation of ISOFIX child seats to seats in the vehicle fitted with ISOFIX
mounting points.
For ISOFIX universal and semi-universal child seats, the ISOFIX size class, defined by a letter from A to G
, is shown on the child seat to the right of the
ISOFIX logo.
Remove and stow the head restraint
before installing a child seat with a
backrest on a passenger seat. Refit the
head restraint once the child seat has
been removed.
Safety
Page 175 of 348
173
C5_en_Chap06_securite_ed01-2016
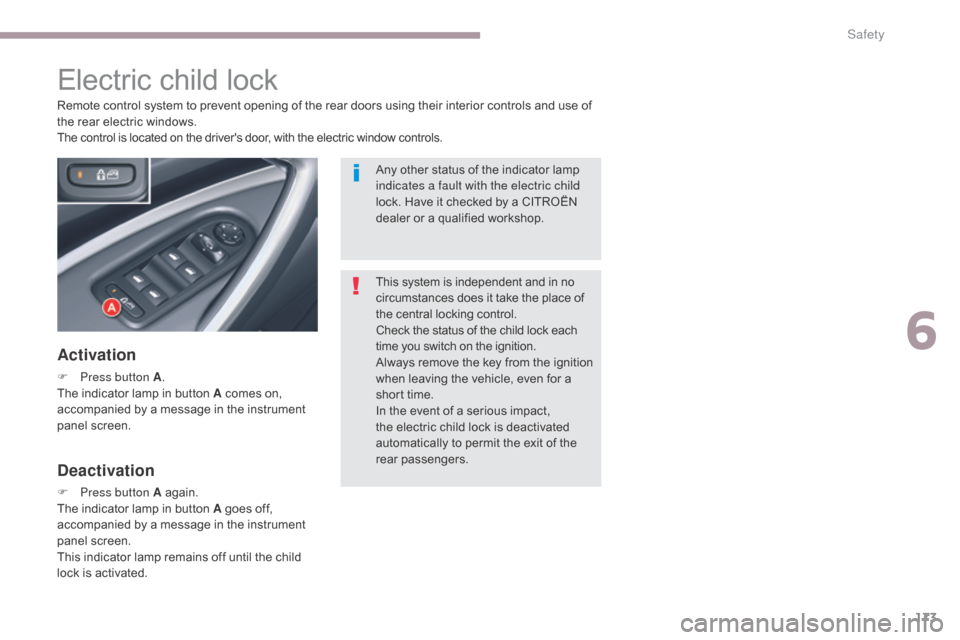
Electric child lock
Activation
F Press button A.
The indicator lamp in button A comes on,
accompanied by a message in the instrument
panel screen. Remote control system to prevent opening of the rear doors using their interior controls and use of
the rear electric windows.
The control is located on the driver's door, with the electric window controls.
Deactivation
F Press button A again.
The indicator lamp in button A goes off,
accompanied by a message in the instrument
panel screen.
This indicator lamp remains off until the child
lock is activated. This system is independent and in no
circumstances does it take the place of
the central locking control.
Check the status of the child lock each
time you switch on the ignition.
Always remove the key from the ignition
when leaving the vehicle, even for a
short time.
In the event of a serious impact,
the electric child lock is deactivated
automatically to permit the exit of the
rear passengers. Any other status of the indicator lamp
indicates a fault with the electric child
lock. Have it checked by a CITROËN
dealer or a qualified workshop.
6
Safety
Page 176 of 348

174
C5_en_Chap07_info-pratiques_ed01-2016
TOTAL & CITROËN
Partners in performance and
protecting the environment
Innovation in the search for
performance
For over 40 years, the TOTAL Research and
Development departments have developed
lubricants for CITROËN, to match the latest
technical innovations on CITROËN vehicles, both for
competition and for everyday motoring.
For you, this is an assurance that you will obtain the
best per formance from your engine.
Optimum protection for your
engine
By having your CITROËN vehicle
serviced with TOTAL lubricants, you are
contributing towards improving the life
and per formance of your engine, while
also protecting the environment.
Practical information
Page 177 of 348
175
C5_en_Chap07_info-pratiques_ed01-2016
Fuel tank
Capacity of the tank: approximately 71 litres*.
Low fuel level
When the low fuel level in the
tank is reached, this warning
lamp comes on in the instrument
panel, accompanied by an
audible warning and a message
in the display screen. When it
first comes on, there remains
around 5 litres of fuel in the tank.
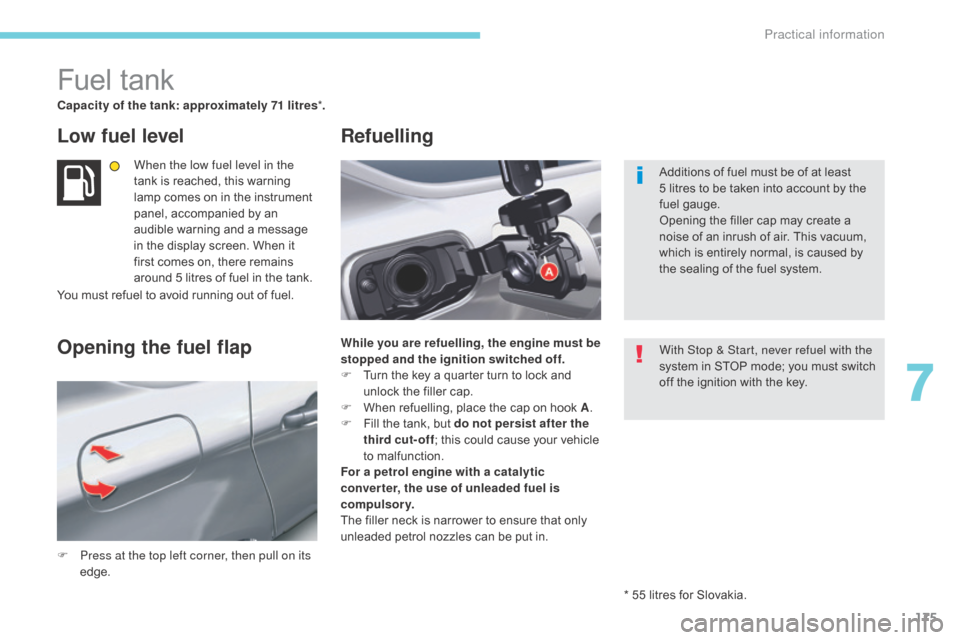
F
P
ress at the top left corner, then pull on its
edge. While you are refuelling, the engine must be
stopped and the ignition switched off.
F
T
urn the key a quarter turn to lock and
unlock the filler cap.
F
W
hen refuelling, place the cap on hook A.
F
F
ill the tank, but do not persist after the
third cut-off ; this could cause your vehicle
to malfunction.
For a petrol engine with a catalytic
converter, the use of unleaded fuel is
compulsory.
The filler neck is narrower to ensure that only
unleaded petrol nozzles can be put in.
Opening the fuel flap Refuelling
Additions of fuel must be of at least
5
litres to be taken into account by the
fuel gauge.
Opening the filler cap may create a
noise of an inrush of air. This vacuum,
which is entirely normal, is caused by
the sealing of the fuel system.
With Stop & Start, never refuel with the
system in STOP mode; you must switch
off the ignition with the key.
* 55 litres for Slovakia.
You must refuel to avoid running out of fuel.
7
Practical information
Page 178 of 348
176
C5_en_Chap07_info-pratiques_ed01-2016
Fuel used for petrol engines
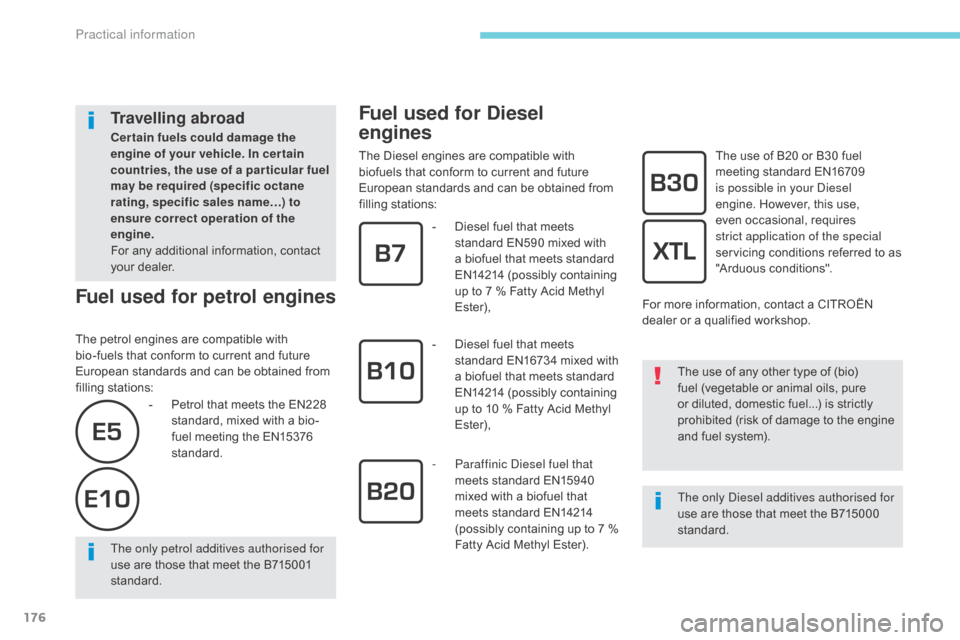
The petrol engines are compatible with
bio-fuels that conform to current and future
European standards and can be obtained from
filling stations:
Fuel used for Diesel
engines
The Diesel engines are compatible with
biofuels that conform to current and future
European standards and can be obtained from
filling stations:The only Diesel additives authorised for
use are those that meet the B715000
standard.
-
Pe
trol that meets the EN228
standard, mixed with a bio-
fuel meeting the EN15376
standard.
The only petrol additives authorised for
use are those that meet the B715001
standard. The use of any other type of (bio)
fuel (vegetable or animal oils, pure
or diluted, domestic fuel...) is strictly
prohibited (risk of damage to the engine
and fuel system).
-
D
iesel fuel that meets
standard EN590 mixed with
a biofuel that meets standard
EN14214 (possibly containing
up to 7 % Fatty Acid Methyl
Ester),
-
D
iesel fuel that meets
standard EN16734 mixed with
a biofuel that meets standard
EN14214 (possibly containing
up to 10 % Fatty Acid Methyl
Ester),
-
P
araffinic Diesel fuel that
meets standard EN15940
mixed with a biofuel that
meets standard EN14214
(possibly containing up to 7 %
Fatty Acid Methyl Ester). The use of B20 or B30 fuel
meeting standard EN16709
is possible in your Diesel
engine. However, this use,
even occasional, requires
strict application of the special
servicing conditions referred to as
"Arduous conditions".
For more information, contact a CITROËN
dealer or a qualified workshop.
Travelling abroad
Cer tain fuels could damage the
engine of your vehicle. In cer tain
countries, the use of a par ticular fuel
may be required (specific octane
rating, specific sales name…) to
ensure correct operation of the
engine.
For any additional information, contact
your dealer.
Practical information
Page 179 of 348
177
C5_en_Chap07_info-pratiques_ed01-2016
Misfuel prevention (Diesel)*
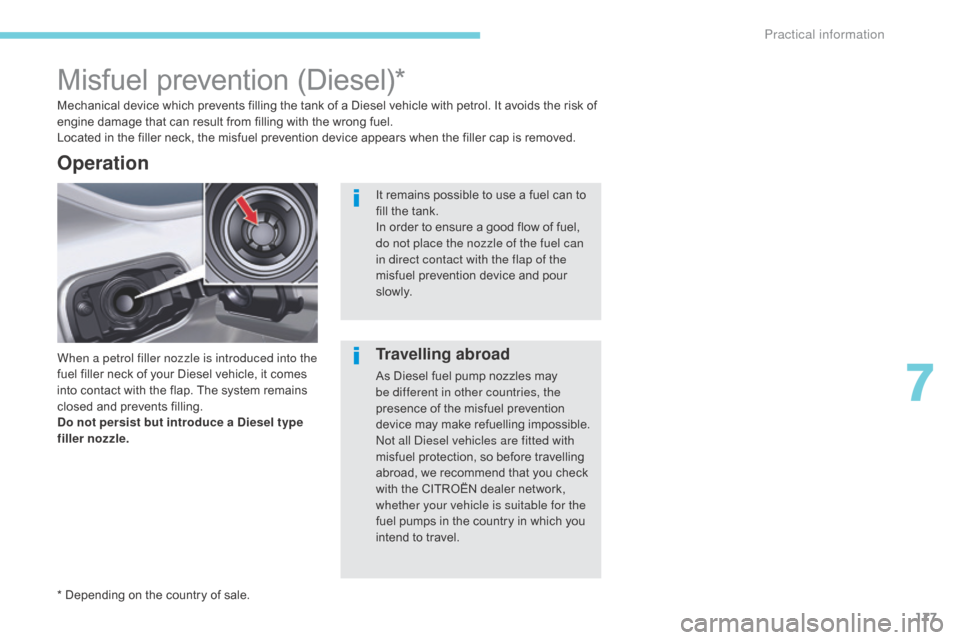
When a petrol filler nozzle is introduced into the
fuel filler neck of your Diesel vehicle, it comes
into contact with the flap. The system remains
closed and prevents filling.
Do not persist but introduce a Diesel type
filler nozzle. Mechanical device which prevents filling the tank of a Diesel vehicle with petrol. It avoids the risk of
engine damage that can result from filling with the wrong fuel.
Located in the filler neck, the misfuel prevention device appears when the filler cap is removed.
Operation
It remains possible to use a fuel can to
fill the tank.
In order to ensure a good flow of fuel,
do not place the nozzle of the fuel can
in direct contact with the flap of the
misfuel prevention device and pour
s l ow l y.
*
Depending on the country of sale.
Travelling abroad
As Diesel fuel pump nozzles may
be different in other countries, the
presence of the misfuel prevention
device may make refuelling impossible.
Not all Diesel vehicles are fitted with
misfuel protection, so before travelling
abroad, we recommend that you check
with the CITROËN dealer network,
whether your vehicle is suitable for the
fuel pumps in the country in which you
intend to travel.
7
Practical information
Page 180 of 348
178
C5_en_Chap07_info-pratiques_ed01-2016
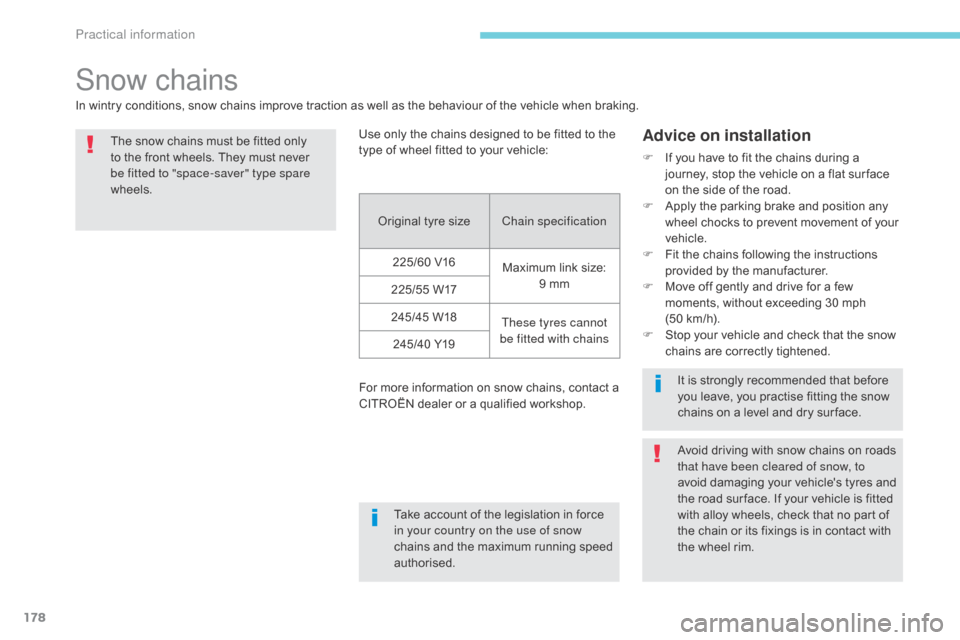
Snow chains
In wintry conditions, snow chains improve traction as well as the behaviour of the vehicle when braking.The snow chains must be fitted only
to the front wheels. They must never
be fitted to "space-saver" type spare
wheels.
Take account of the legislation in force
in your country on the use of snow
chains and the maximum running speed
authorised.Avoid driving with snow chains on roads
that have been cleared of snow, to
avoid damaging your vehicle's tyres and
the road sur face. If your vehicle is fitted
with alloy wheels, check that no part of
the chain or its fixings is in contact with
the wheel rim.
Advice on installation
F If you have to fit the chains during a
journey, stop the vehicle on a flat sur face
on the side of the road.
F
A
pply the parking brake and position any
wheel chocks to prevent movement of your
vehicle.
F
F
it the chains following the instructions
provided by the manufacturer.
F
M
ove off gently and drive for a few
moments, without exceeding 30 mph
(50
km/h).
F
S
top your vehicle and check that the snow
chains are correctly tightened.
Use only the chains designed to be fitted to the
type of wheel fitted to your vehicle:
Original tyre size Chain specification
225/60 V16 Maximum link size:
9 mm
225/55 W17
245/45 W18 These tyres cannot
be fitted with chains
245/40 Y19
For more information on snow chains, contact a
CITROËN dealer or a qualified workshop. It is strongly recommended that before
you leave, you practise fitting the snow
chains on a level and dry sur face.
Practical information