tow CITROEN C5 AIRCROSS 2020 Handbook (in English)
[x] Cancel search | Manufacturer: CITROEN, Model Year: 2020, Model line: C5 AIRCROSS, Model: CITROEN C5 AIRCROSS 2020Pages: 292, PDF Size: 8.59 MB
Page 96 of 292
94
ASR/DSC
These systems offer increased safety
in normal driving, but they should not
encourage the driver to take extra risks or
drive at high speed.
It is in conditions of reduced grip (rain,
snow, ice) that the risk of loss of grip
increases. It is therefore important for your
safety to keep these systems activated in
all conditions, and particularly in difficult
conditions.
The correct operation of these
systems depends on obser vation of
the manufacturer's recommendations
regarding both the wheels (tyres and
rims), braking and electronic components
and the assembly and repair procedures
used by CITROËN dealers.
The use of snow tyres is recommended,
in order to be able to benefit from the
efficiency of these systems in winter
conditions.
In this case, it is essential to equip the
four wheels with tyres approved for your
vehicle.Trailer stability assist (TSA)
When towing, this system reduces the risk of
the vehicle or trailer swaying.
Operation
The system is activated automatically when the
ignition is switched on.
The electronic stability control (ESC) must not
have any faults.
If the system detects oscillations (snaking) in
the movement of the trailer at speeds between
37 and 99 mph (60 and 160 km/h), it acts
on the brakes to stabilise the trailer and, if
necessary, reduces the engine power to slow
down the vehicle.
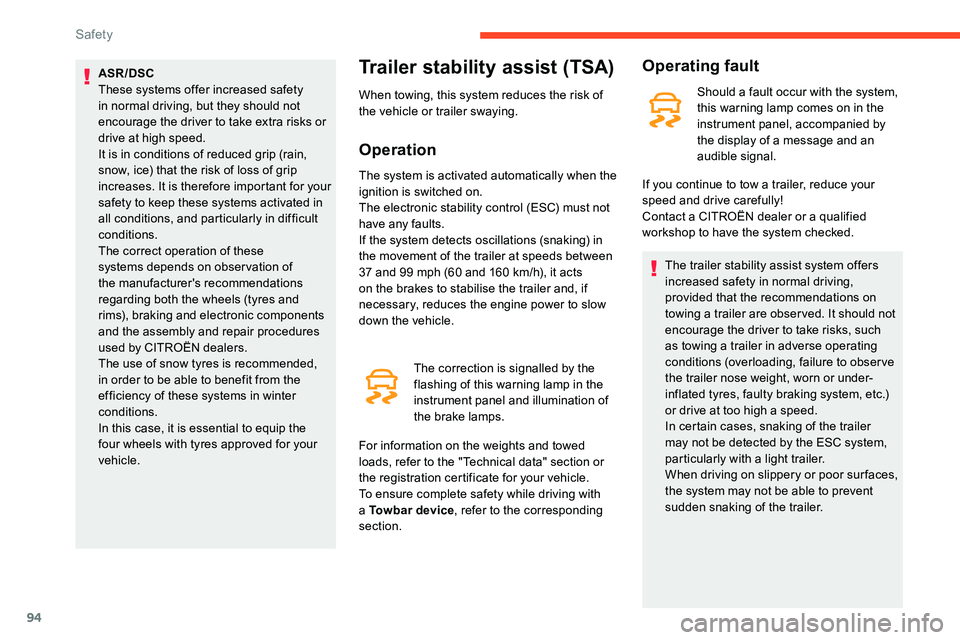
The correction is signalled by the
flashing of this warning lamp in the
instrument panel and illumination of
the brake lamps.
For information on the weights and towed
loads, refer to the "Technical data" section or
the registration certificate for your vehicle.
To ensure complete safety while driving with
a
To w b a r d e v i c e , refer to the corresponding
section.
Operating fault
Should a fault occur with the system,
t his warning lamp comes on in the
instrument panel, accompanied by
the display of a
message and an
audible signal.
The trailer stability assist system offers
increased safety in normal driving,
provided that the recommendations on
towing a
trailer are obser ved. It should not
encourage the driver to take risks, such
as towing a
trailer in adverse operating
conditions (overloading, failure to obser ve
the trailer nose weight, worn or under-
inflated tyres, faulty braking system, etc.)
or drive at too high a
speed.
In certain cases, snaking of the trailer
may not be detected by the ESC system,
particularly with a
light trailer.
When driving on slippery or poor sur faces,
the system may not be able to prevent
sudden snaking of the trailer.
If you continue to tow a
trailer, reduce your
speed and drive carefully!
Contact a
CITROËN dealer or a qualified
workshop to have the system checked.
Safety
Page 100 of 292

98
This system improves safety in the front
seats in the event of a front or side impact.
Depending on the severity of the impact, the
pyrotechnic pretensioning system instantly
tightens the seat belts against the body of the
occupants.
The pyrotechnic pretensioning seat belts are
enabled when the ignition is on.
The force limiter reduces the pressure of the
seat belt on the chest of the occupant, thus
improving their protection.
Fastening
F Pull the strap, then insert the tongue in the buckle.
F
C
heck that the seat belt is fastened
correctly by pulling the strap.
Unfastening
F Press the red button on the buckle.
F G uide the seat belt as it is reeled in.
Height adjustment
F To adjust the height of the anchorage point, squeeze control A and slide it to the notch
desired.
Rear seat belts
Each of the rear seats has a three-point seat
b elt with inertia reel.
The outer seats are fitted with a
pyrotechnic
pretensioning and force limiting system. Before per forming any operations on the
rear seats, to avoid damage to the seat
belts, check that:
-
t
he outer seat belts are correctly in the
storage position, lying vertically along
the pillar,
-
t
he central seat belt is stowed.
Fastening
F Pull the strap then insert the tongue in the
buckle.
F
C
heck that the seat belt is fastened
correctly by pulling the strap.
Unfastening
F Press the red button on the buckle.
F G uide the seat belt as it is reeled in.
F
O
n the side seat belts, raise the bar to the
top of the backrest to prevent the tongue
from knocking against the side trim.
Rear central seat belt
The seat belt for the rear central seat is
integrated into the roof.
Safety
Page 103 of 292
101
Airbags
General information
System designed to help improve the safety
of the occupants sitting in the front seats and
the rear outer seats in the event of violent
collisions. The airbags supplement the action
of the seat belts fitted with force limiters at the
front seats and at the rear outer seats.
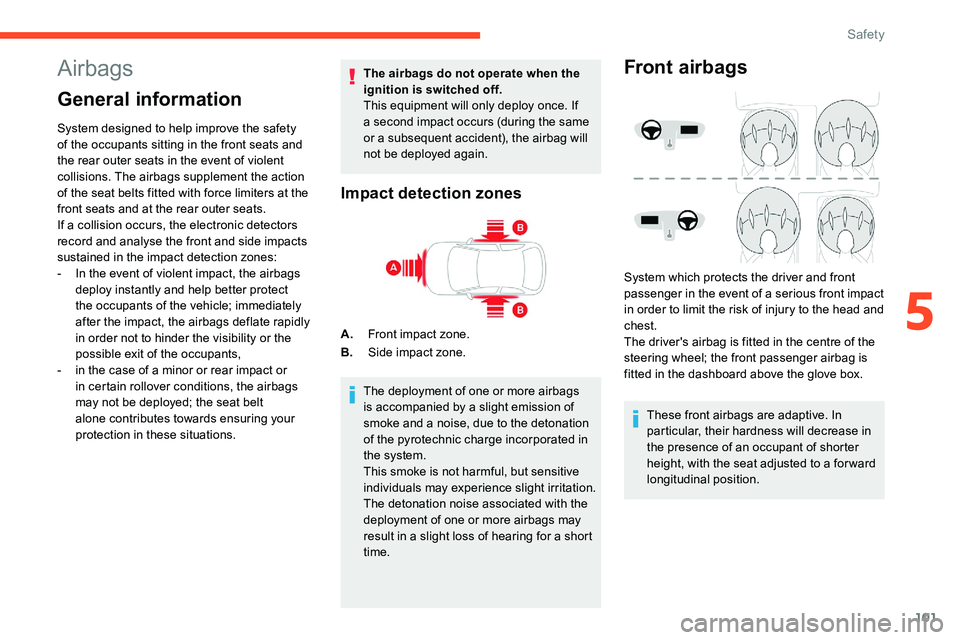
If a collision occurs, the electronic detectors
record and analyse the front and side impacts
sustained in the impact detection zones:
-
I
n the event of violent impact, the airbags
deploy instantly and help better protect
the occupants of the vehicle; immediately
after the impact, the airbags deflate rapidly
in order not to hinder the visibility or the
possible exit of the occupants,
-
i
n the case of a minor or rear impact or
in certain rollover conditions, the airbags
may not be deployed; the seat belt
alone contributes towards ensuring your
protection in these situations. The airbags do not operate when the
ignition is switched off.
This equipment will only deploy once. If
a
second impact occurs (during the same
or a subsequent accident), the airbag will
not be deployed again.
Impact detection zones
A. Front impact zone.
B. Side impact zone.
The deployment of one or more airbags
is accompanied by a
slight emission of
smoke and a
noise, due to the detonation
of the pyrotechnic charge incorporated in
the system.
This smoke is not harmful, but sensitive
individuals may experience slight irritation.
The detonation noise associated with the
deployment of one or more airbags may
result in a
slight loss of hearing for a short
time.
Front airbags
System which protects the driver and front
passenger in the event of a serious front impact
in order to limit the risk of injury to the head and
chest.
The driver's airbag is fitted in the centre of the
steering wheel; the front passenger airbag is
fitted in the dashboard above the glove box.
These front airbags are adaptive. In
particular, their hardness will decrease in
the presence of an occupant of shorter
height, with the seat adjusted to a
for ward
longitudinal position.
5
Safety
Page 104 of 292
102
Deployment
* For more information on Deactivating the front passenger airbag , refer to the
corresponding section.
They deploy, except the front passenger airbag
if it is deactivated*, in the event of a
serious
front impact to all or part of the front impact
zone A .
The front airbag inflates between the thorax
and head of the front occupant of the vehicle
and the steering wheel, driver's side, and the
dashboard, passenger's side, to cushion their
for ward movement.
Lateral airbags
At the front
Deployment
They deploy on one side in the event of
a serious side impact applied to all or part of
the side impact zone B .
The lateral airbag inflates between the hip and
shoulder of the vehicle's occupant and the
corresponding door trim panel.
Curtain airbags
System contributing towards greater protection
for the driver and passengers (with the
exception of the rear centre passenger) in the
event of a
serious side impact in order to limit
the risk of injury to the side of the head.
Each curtain airbag is built into the pillars and
the upper passenger compartment area.
Deployment
It deploys simultaneously with the
corresponding lateral airbag in the event of
a
serious side impact applied to all or part of
the side impact zone B .
The curtain airbag inflates between the front
and rear occupants of the vehicle and the
corresponding windows.
Malfunction
If this warning lamp comes on in the
instrument panel, you must contact
a
CITROËN dealer or a qualified
workshop to have the system
checked.
The airbags may no longer be deployed in the
event of a
serious impact.
In the event of a
minor impact or bump on
the side of the vehicle or if the vehicle rolls
over, the airbags may not be deployed.
In the event of a
rear or front collision,
none of the lateral airbags are deployed.
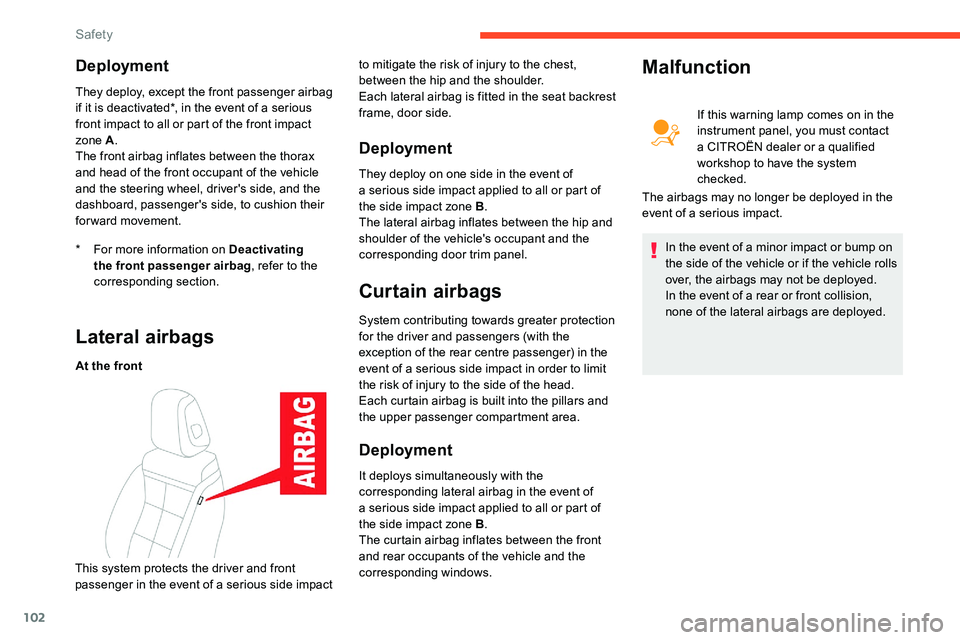
This system protects the driver and front
passenger in the event of a
serious side impact to mitigate the risk of injury to the chest,
between the hip and the shoulder.
Each lateral airbag is fitted in the seat backrest
frame, door side.
Safety
Page 106 of 292
104
General points relating to
child seats
The legislation on carrying children is
specific to each country. Refer to the
legislation in force in your country.
For maximum safety, please obser ve the
following recommendations:
-
I
n accordance with European regulations,
all children under the age of 12
or less
than one and a
half metres tall must
travel in approved child seats suited to
their weight , on seats fitted with a
seat belt
or ISOFIX mountings.
-
S
tatistically, the safest seats in your
vehicle for carr ying children are the rear
seats.
-
A c
hild weighing less than 9 kg must
travel in the " rearward facing " position
both in the front and in the rear.
It is recommended that children travel on
the rear seats of your vehicle:
-
"rearward facing " up to the age of 3,
-
"forward facing " over the age of 3. Ensure that the seat belt is positioned and
tightened correctly.
For child seats with a
support leg, ensure
that the support leg is in firm and steady
contact with the floor.
At the front: if necessary, adjust the
passenger seat.
At the rear: if necessary, adjust the
relevant front seat.
Remove and stow the head restraint
before installing a
child seat with backrest
on a
passenger seat. Refit the head
restraint once the child seat has been
removed.
Advice
An incorrectly installed child seat
compromises the child's safety in the
event of an accident.
Ensure that there is no seat belt or seat
belt buckle under the child seat, as this
could destabilise it.
Remember to fasten the seat belts or
the child seat harness keeping the slack
relative to the child's body to a
minimum,
even for short journeys.
When installing a
child seat using the seat
belt, ensure that the seat belt is tightened
correctly on the child seat and that it
secures the child seat firmly on the seat
of your vehicle. If your passenger seat is
adjustable, move it forwards if necessary.
The head restraint must be removed
before installing a
child seat with
a
backrest on a passenger seat.
Ensure that the head restraint is stored or
attached securely to prevent it from being
thrown around the vehicle in the event
of sharp braking. Refit the head restraint
once the child seat has been removed.
Safety
Page 113 of 292

111
"ISOFIX" mountings
The seats, shown below, are fitted with ISOFIX
compliant mountings:
The mountings comprise three rings for each
seat: ISOFIX child seats are fitted with two latches
which are secured on the two rings A
.
Some seats also have an upper strap which is
attached to ring B .
To secure the child seat to the TOP TETHER :
F
r
emove and stow the head restraint before
installing the child seat on the seat (refit it
once the child seat has been removed),
F
p
ass the strap of the child seat behind
the seat backrest, centring it between the
apertures for the head restraint rods,
F
s
ecure the upper strap hook to ring B,
F
t
ighten the upper strap.When fitting an ISOFIX child seat to the
left-hand rear seat of the bench seat,
before fitting the seat, first move the
centre rear seat belt towards the middle
of the vehicle, so as to avoid the seat
interfering with the operation of the seat
belt.
-
t
wo rings A , located between the vehicle
seat backrest and cushion, indicated by
a
marking, Front seat
Rear seats
-
o
ne ring B, located behind the seat and
indicated by a
marking, referred to as the
TOP TETHER for fixing the upper strap.
This system prevents the child seat from tipping
for ward in the event of a
front impact.
This ISOFIX mounting system ensures fast,
reliable and safe fitting of the child seat in your
vehicle.
5
Safety
Page 119 of 292
117
In case of towing
Driving with a trailer places greater
d emands on the towing vehicle and
requires extra care from the driver.
Respect the maximum towable weights.
At altitude: reduce the maximum load
by 10% per 1,000
metres of altitude; the
decreased air density at altitude reduces
engine performance.
New vehicle: do not pull a
trailer
before having driven at least 620
miles
(1,000
kilometres). If the outside temperature is high, let the
engine idle for 1
to 2 minutes after the
vehicle comes to a stop, to help it to cool.
Before setting off
Nose weight
On leaving the flooded road, as soon as safety
conditions allow, make several light brake
applications to dry the brake discs and pads.
If in doubt about the state of your vehicle,
contact a
CITROËN dealer or a qualified
workshop.
F
D
istribute the load in the trailer so that the
heaviest items are as close as possible to
the axle and the nose weight (at the point
where it joins your vehicle) approaches the
maximum permitted without exceeding it.
Ty r e s
F Check the tyre pressures of the towing vehicle and of the trailer, observing the
recommended pressures.
Lighting
F Check the electrical signalling on the trailer and the headlamp beam height of your
vehicle.
If a
genuine CITROËN towing device is
used, the rear parking sensors will be
deactivated automatically to avoid the
audible signal.
When driving
Cooling
Towing a trailer uphill increases the
t emperature of the coolant. The maximum
towable load depends on the gradient and the
exterior temperature. The cooling capacity of
the fan does not increase with engine speed.
F
R
educe speed and lower the engine speed,
so as to limit the heating-up.
In all cases, pay attention to the coolant
temperature.
If this warning lamp and the STOP
warning lamp come on, stop the
vehicle and switch off the engine as
soon as possible.
Brakes
Braking distances are increased when towing
a trailer. To avoid overheating of the brakes, the
use of engine braking is recommended.
Side wind
Bear in mind the increased susceptibility to the
wind that the vehicle will have.
6
Driving
Page 124 of 292
122
Indicator lamp
This indicator lamp comes on in the
instrument panel and on the control
lever to confirm the application of
the parking brake, accompanied by
display of the message "Parking
brake applied".
It goes off to confirm the release of the parking
brake.
This indicator lamp flashes on the control lever
when manual parking brake application or
release is performed. In the event of a
battery failure, the
electric parking brake no longer works.
As a safety measure with a manual
gearbox, if the parking brake is not
applied, immobilise the vehicle by
engaging a
gear.
As a safety measure with an automatic
gearbox, if the parking brake is not
applied, immobilise the vehicle by placing
the chocks supplied against one of the
wheels.
Contact a CITROËN dealer or a qualified
workshop.
Before leaving the vehicle, check that the
parking brake is applied: the indicator
lamps in the instrument panel and the
control lever must be on fixed.
If the parking brake is not applied, there
is an audible signal and a
message is
displayed on opening the driver's door. Never leave a
child alone inside the
vehicle as they could release the parking
brake.
Any time that the engine is running, the driver
can take over to apply or release the parking
brake by operating the control lever:
F
b
y briefly pulling
the control lever to apply
the brake,
F
b
y briefly pushing
the control lever, while
pressing the brake pedal, to release it.
Automatic mode is activated by default. When towing, parking on a steep slope
or if your vehicle is heavily laden, turn
the wheels towards the kerb and with
a
manual gearbox, engage a
gear.
When towing, parking on a steep slope,
or if your vehicle is heavily laden, turn the
wheels towards the kerb and select mode
P with an automatic gearbox.
For towing, your vehicle is approved for
parking on slopes of up to 12%.
Manual operation
Manual release
With the ignition on or engine running:
F p ress the brake pedal,
F
w
hile maintaining pressure on the brake
pedal, briefly push the control lever.
The complete release of the parking brake is
confirmed by the brake indicator lamp and the
P indicator lamp in the control lever going off,
accompanied by the display of the message
"Parking brake released".
Driving
Page 126 of 292

124
Special cases
Parking the vehicle with the
brake released
In very cold conditions (ice), it is
recommended that the parking brake not
be applied.
To immobilise your vehicle, engage a gear
or place the chocks against one of the
wheels.
Immobilisation of the vehicle with the
parking brake released
F
S
witch off the engine.
Illumination of the indicator lamps in the
instrument panel and the control lever
confirm the application of the parking brake.
F
S
witch on the ignition again, without starting
the engine.
F
R
elease the parking brake manually by
pushing the control lever while keeping your
foot on the brake pedal.
The complete release of the parking brake
is confirmed by the indicator lamp in the
instrument panel and the P indicator lamp in
the control lever going off, accompanied by
the display of the message "Parking brake
released".
F
S
witch off the ignition. With an automatic gearbox, mode P is
automatically selected when the ignition is
switched off. The wheels are blocked.
For further information on the Automatic
gearbox
, particularly in relation to leaving
the vehicle in free-wheeling mode, refer to
the corresponding section.
With an automatic gearbox, when mode N
is engaged, an audible signal will sound
if the driver's door is opened. It will stop
when you close the driver's door again.
Deactivating automatic
operation
In some situations, for example when it is
extremely cold or during towing (caravan,
breakdown), it may be necessary to deactivate
automatic operation of the system. F
P
ush and hold the control lever in the
release direction for at least 10 seconds and
no more than 15 seconds.
F
R
elease the control lever.
F
P
ress and hold the brake pedal.
F
P
ull the control lever in the application
direction for 2
seconds.
Deactivation of the automatic
functions is confirmed by
illumination of this indicator lamp in
the instrument panel.
F
R
elease the control lever and the brake
pedal.
F
S
tart the engine.
F
A
pply the parking brake with the control
lever, if it is released.
F
T
ake your foot off the brake pedal. From now on, the parking brake can only
be applied and released manually using the
control lever.
Repeat this procedure to reactivate automatic
operation (confirmed by the indicator lamp in
the instrument panel going off).
Emergency braking
In the event of a fault with the brake pedal or
i n an exceptional situation (e.g. driver taken
ill, driver under instruction, etc.), a continuous
pull on the control lever will brake the vehicle.
Braking takes place while the control lever is
being pulled. It is interrupted if the control lever
is released.
Driving
Page 127 of 292

125
The ABS and DSC systems ensure stability of
the vehicle during emergency braking.
If the emergency braking malfunctions, the
message "Parking brake control faulty" will be
displayed in the instrument panel.
If the ABS and DSC systems malfunction,
signalled by the illumination of one or both
warning lamps in the instrument panel, then
stability of the vehicle is no longer guaranteed.
In this event, stability must be assured by the
driver by repeating alternate "pull-release"
actions on the control lever until the vehicle is
immobilised.
6-speed manual gearbox
Engaging reverse gear
F Raise the trigger under the knob and move the gear lever to the left, then for wards. Only engage reverse gear when the
vehicle is stationary with the engine at
idle.
As a
safety precaution and to facilitate
starting of the engine, always select
neutral and depress the clutch pedal.
Engaging 5th or 6th gear
F Move the lever fully to the right to engage 5th
or 6th g e a r.
Failure to follow this advice may cause
permanent damage to the gearbox
(engagement of 3
rd or 4th gear by mistake).
Automatic gearbox (EAT6/
E AT 8)
Automatic 6 or 8 -speed gearbox with a push
s elector. It also offers a manual mode with gear
changes via control paddles situated behind
the steering wheel.
Gearbox selector positions
P. Park.
For parking the vehicle: the front wheels
are blocked.
R. Reverse.
N. Neutral.
For moving the vehicle with the ignition
off: in certain car washing machines,
when towing the vehicle, etc.
D. Automatic mode.
The gearbox manages gear changes
according to the style of driving, the road
profile and the vehicle load.
M. Manual mode.
The driver changes gear using the
steering mounted controls.
6
Driving