key CITROEN C5 AIRCROSS 2020 Handbook (in English)
[x] Cancel search | Manufacturer: CITROEN, Model Year: 2020, Model line: C5 AIRCROSS, Model: CITROEN C5 AIRCROSS 2020Pages: 292, PDF Size: 8.59 MB
Page 134 of 292
132
Special cases:
The engine does not go into standby in the
following cases.
-
S
teep slope (rising or falling).
-
V
ehicle has not exceeded 6 mph (10 km/h)
since the last engine start (with the key or
the " START/STOP " b u t to n).
-
N
eeded to maintain a comfortable
temperature in the passenger compartment.
-
D
emisting active. In these cases, this indicator lamp
flashes for a
few seconds, then
goes off.
Restarting the engine (START
mode)
F With a manual gearbox : with the clutch
pedal fully depressed.
F
W
ith an automatic gearbox :
•
W
ith the selector in position D or M : with
the brake pedal released.
•
W
ith the selector in position N and the
brake pedal released: with the selector at
D or M .
•
W
ith the selector in position P and the
brake pedal depressed: with the selector
at R , N, D or M .
•
R
everse gear engaged.
Special cases
The engine restarts automatically in the
following cases.
-
W
ith a manual gearbox: vehicle speed
exceeds 2.5
mph (4 km/h),
-
W
ith an automatic gearbox:
•
W
ith the gear selector in position N and
the brake pedal released, vehicle speed
exceeds 0.6
mph (1 km/h).
•
A
daptive Cruise Control function
deactivated.
In these cases, this indicator lamp
flashes for a
few seconds, then
goes off.
Malfunctions
In the event of a malfunction,
t his warning lamp flashes for
a
few moments, then remains on,
accompanied by the display of
a
message.
F
H
ave the vehicle checked by a CITROËN
dealer or a
qualified workshop.
The vehicle stalls in STOP mode
All of the instrument panel warning lamps come
on if this fault occurs.The Stop & Start system requires a
12 V
battery of specific technology and
specification.
All work concerning the battery must be
carried out only by a
CITROËN dealer or
a
qualified workshop.
After the engine has restarted, STOP
mode is not available until the vehicle has
reached a speed of 5 mph (8 km/h).
During parking manoeuvres, STOP mode
is not available for a few seconds after
coming out of reverse gear or turning the
steering wheel.
The engine automatically restarts as soon as
the driver indicates the intention of moving off
again.
Tyre under-inflation
detection
This system automatically checks the
pressures of the tyres while driving.
It compares the information given by the wheel
speed sensors with reference values, which
Driving
Page 184 of 292
182
Obser ve the maximum authorised towable
weight, indicated on your vehicle's
registration certificate, the manufacturer's
label as well as in the Technical data
section of this guide.
Complying with the maximum
authorised nose weight (towball)
also includes the use of accessories
(bicycle carriers, tow boxes, etc.).
Obser ve the legislation in force in the
country in which you are driving.
Vehicle equipped with motorised tailgate
with " Hands-Free Tailgate Access "
function
To avoid unwanted opening of the tailgate
when using the towing device:
-
d
eactivate the "Hands-Free Tailgate
Access" function in advance in your
vehicle's configuration menu,
-
o
r remove the electronic key from the
recognition zone, with the tailgate closed.
Towing device
Load distribution
F Distribute the load in the trailer so that the
heaviest items are as close as possible to
the axle and the nose weight approaches the
maximum permitted without exceeding it.
Air density decreases with altitude, thus
reducing engine performance. The maximum
towed load must be reduced by 10% for every
1,000
metres of altitude. Use towing devices and their genuine
harnesses approved by CITROËN. It
is recommended that the installation
be per formed by a
CITROËN dealer or
a
qualified workshop.
If the towing device is not fitted by
a CITROËN dealer, it must still be
fitted in accordance with the vehicle
manufacturer's instructions.
Important: for versions equipped with
the motorised tailgate with Hands-Free
Tailgate Access function, if a
towing
device other than a
genuine CITROËN
one is installed, it is essential to visit
a
CITROËN dealer or a qualified
workshop to recalibrate the detection
system: risk of "Hands-Free Tailgate
Access" function failure.
Certain driving or manoeuvring aid
functions are automatically disabled if an
approved towing system is used.
Practical information
Page 185 of 292

183
Towing device with
quickly detachable towball
Presentation
1.Carrier.
2. Protective plug.
3. Connection socket.
4. Safety eye.
5. Detachable towball.
6. Locking/unlocking wheel.
7. Security key lock.
8. Key reference label. Trailers with LED lamps are not
compatible with the wiring harness of this
device.
To know the Technical data
, and in
particular the towable weights for your
vehicle, refer to the corresponding section.
To ensure complete safety while driving
with a
Towing device, refer to the
corresponding section.
A.
Locked position (the green marks are
opposite each other); the wheel is in
contact with the towball (no gap).
B. Unlocked position (red mark opposite
the green mark); the wheel is no longer
in contact with the towball (gap of around
5 m m).Before each use
Check that the towball is correctly fitted,
verifying the follow points:
-
t
he green mark on the wheel is in line
with the green mark on the towball,
-
t
he wheel is in contact with the towball
(position A ),
-
t
he security key lock is closed and the
key removed; the wheel can no longer
be operated,
-
t
he towball must not be able to move in
its carrier; test by shaking it with your
hand.
If the towball is not locked, the trailer can
detach – accident risk!
7
Practical information
Page 186 of 292

184
F The wheel 6 turns a quarter of a turn anti-
clockwise; take care to keep your hands
clear!
F
C
heck that the mechanism has correctly
locked into place (position A ).
F
C
lose the lock 7 using the key.
F
A
lways remove the key. The key cannot be
removed when the lock is open.
F
C
lip the cap onto the lock.
During use
Never release the locking system with
a
trailer or load carrier on the towball.
Never exceed the maximum authorised
weight for the vehicle – the Gross Train
Weight or GTW.
It is essential that the maximum
authorised load be complied with on the
towing device: if it is exceeded, this device
may detach from the vehicle, which is
a
serious accident risk.
Check that the trailer lamps work
c o r r e c t l y.
Before setting off, check the adjustment of
the headlamp beam height.
For more information on Headlamp
adjustment , refer to the corresponding
section.
After use
When travelling without a
trailer or load
carrier, the towball must be removed and
the protective plug inserted in the carrier
for good visibility of the number plate and
its lighting.Fitting the towball
F Insert the end of the towball 5 into the
carrier 1 and push it upwards; the locking
will take place automatically.
F
B
elow the rear bumper, remove the
protective plug 2 from the carrier 1
.
Practical information
Page 187 of 292
185
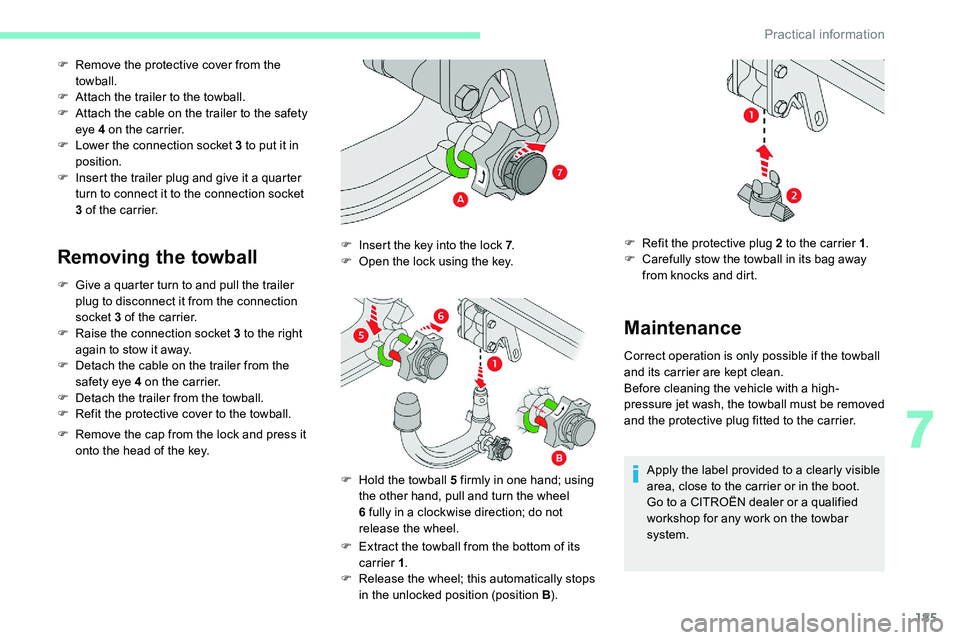
F Remove the protective cover from the towball.
F
A
ttach the trailer to the towball.
F
A
ttach the cable on the trailer to the safety
eye 4
on the carrier.
F
L
ower the connection socket 3 to put it in
position.
F
I
nsert the trailer plug and give it a quarter
turn to connect it to the connection socket
3
of the carrier.
Removing the towball
F Give a quarter turn to and pull the trailer
plug to disconnect it from the connection
socket 3
of the carrier.
F
R
aise the connection socket 3 to the right
again to stow it away.
F
D
etach the cable on the trailer from the
safety eye 4
on the carrier.
F
D
etach the trailer from the towball.
F
R
efit the protective cover to the towball.
F
R
emove the cap from the lock and press it
onto the head of the key.
F
E
xtract the towball from the bottom of its
carrier 1 .
F
R
elease the wheel; this automatically stops
in the unlocked position (position B ).
F
I
nsert the key into the lock 7
.
F
O
pen the lock using the key.
F
H
old the towball 5 firmly in one hand; using
the other hand, pull and turn the wheel
6
fully in a clockwise direction; do not
release the wheel.
Maintenance
Correct operation is only possible if the towball
and its carrier are kept clean.
Before cleaning the vehicle with a
high-
pressure jet wash, the towball must be removed
and the protective plug fitted to the carrier.
Apply the label provided to a
clearly visible
area, close to the carrier or in the boot.
Go to a
CITROËN dealer or a qualified
workshop for any work on the towbar
system.
F
R
efit the protective plug 2 to the carrier 1
.
F
C
arefully stow the towball in its bag away
from knocks and dirt.
7
Practical information
Page 198 of 292
196
Access to the AdBlue® tank
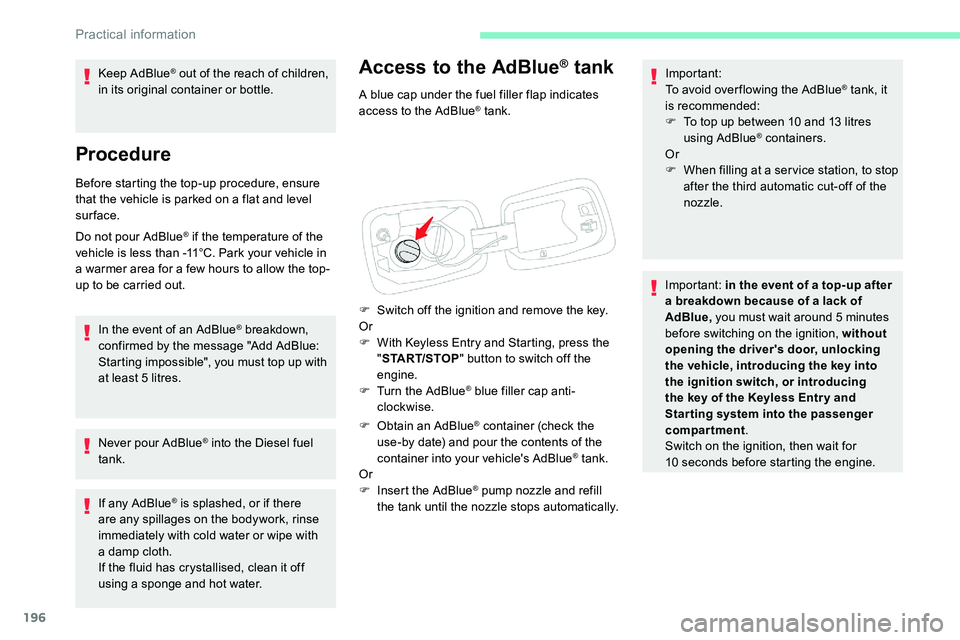
A blue cap under the fuel filler flap indicates
access to the AdBlue® tank.
F
S
witch off the ignition and remove the key.
Or
F
W
ith Keyless Entry and Starting, press the
" START/STOP " button to switch off the
engine.
F
T
urn the AdBlue
® blue filler cap anti-
clockwise.
F
O
btain an AdBlue
® container (check the
use-by date) and pour the contents of the
container into your vehicle's AdBlue
® tank.
Or
F
I
nsert the AdBlue
® pump nozzle and refill
the tank until the nozzle stops automatically. Important:
To avoid over flowing the AdBlue
® tank, it
is recommended:
F
T
o top up between 10
and 13
litres
using AdBlue
® containers.
Or
F
W
hen filling at a ser vice station, to stop
after the third automatic cut-off of the
nozzle.
Important: in the event of a
top-up after
a
breakdown because of a lack of
AdBlue, you must wait around 5
minutes
before switching on the ignition, without
opening the driver's door, unlocking
the vehicle, introducing the key into
the ignition switch, or introducing
the key of the Keyless Entr y and
Star ting system into the passenger
compartment .
Switch on the ignition, then wait for
10
seconds before starting the engine.
Keep AdBlue
® out of the reach of children,
in its original container or bottle.
Procedure
Before starting the top-up procedure, ensure
that the vehicle is parked on a flat and level
sur face.
Do not pour AdBlue
® if the temperature of the
vehicle is less than -11°C. Park your vehicle in
a
warmer area for a
few hours to allow the top-
up to be carried out.
In the event of an AdBlue
® breakdown,
confirmed by the message "Add AdBlue:
Starting impossible", you must top up with
at least 5
litres.
Never pour AdBlue
® into the Diesel fuel
tank.
If any AdBlue
® is splashed, or if there
are any spillages on the bodywork, rinse
immediately with cold water or wipe with
a
damp cloth.
If the fluid has crystallised, clean it off
using a
sponge and hot water.
Practical information
Page 220 of 292

218
F switch off the ignition and wait for four minutes.
At the battery, it is only necessary to
disconnect the (+) terminal.
Quick-release terminal clamp
Disconnecting the (+) terminal Reconnecting the (+) terminal
Do not apply force when pressing the
lever, as if the clamp is not positioned
correctly, locking will be impossible; start
the procedure again.
After reconnecting the battery
F Depending on equipment, lift the plastic
cover on the (+) terminal.
F
Ra
ise the lever A fully to release the clamp B .
F
R
emove the clamp B by lifting it off.
F Raise the lever A fully.
F R eplace the open clamp B on the (+)
terminal.
F
P
ush the clamp B fully down.
F
L
ower the lever A to lock the clamp B .
F
D
epending on equipment, lower the plastic
cover on the (+) terminal. After reconnecting the battery, turn on the
ignition and wait 1
minute before starting
the engine, in order to enable the electronic
systems to initialise.
If minor problems nevertheless persist
following this operation, contact a CITROËN
dealer or a qualified workshop.
Referring to the corresponding section, you
must reinitialise certain systems yourself, such
as:
-
t
he key with remote control or electronic key
(depending on version),
- t he sunroof and its electric blind,
-
t
he electric windows,
-
t
he date and time,
-
t
he preset radio stations.
The Stop & Start system may not be
operational during the trip following the
first engine start.
In this case, the system will only be
available again after a
continuous
period of immobilisation of the vehicle,
a period which depends on the exterior
temperature and the state of charge of the
battery (up to about 8
hours).
In the event of a breakdown
Page 231 of 292
5
Applications
Viewing photos
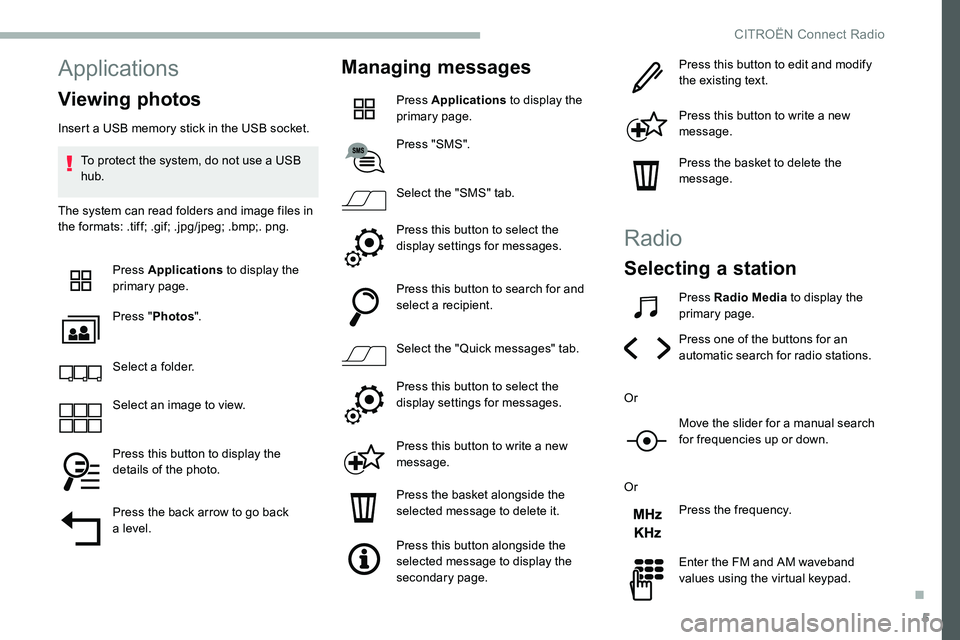
Insert a USB memory stick in the USB socket.
T o protect the system, do not use a USB
hub.
The system can read folders and image files in
the formats: .tiff; .gif; .jpg/jpeg; .bmp;. png.
Press Applications to display the
primary page.
Press " Photos ".
Select a
folder.
Select an image to view.
Press this button to display the
details of the photo.
Press the back arrow to go back
a
level.
Managing messages
Press Applications to display the
primary page.
Press "SMS".
Select the "SMS" tab.
Press this button to select the
display settings for messages.
Press this button to search for and
select a
recipient.
Select the "Quick messages" tab.
Press this button to select the
display settings for messages.
Press this button to write a
new
message.
Press the basket alongside the
selected message to delete it.
Press this button alongside the
selected message to display the
secondary page. Press this button to edit and modify
the existing text.
Press this button to write a
new
message.
Press the basket to delete the
message.
Radio
Selecting a station
Press Radio Media to display the
primary page.
Press one of the buttons for an
automatic search for radio stations.
Or Move the slider for a
manual search
for frequencies up or down.
Or Press the frequency.
Enter the FM and AM waveband
values using the virtual keypad.
.
CITROËN Connect Radio
Page 239 of 292
13
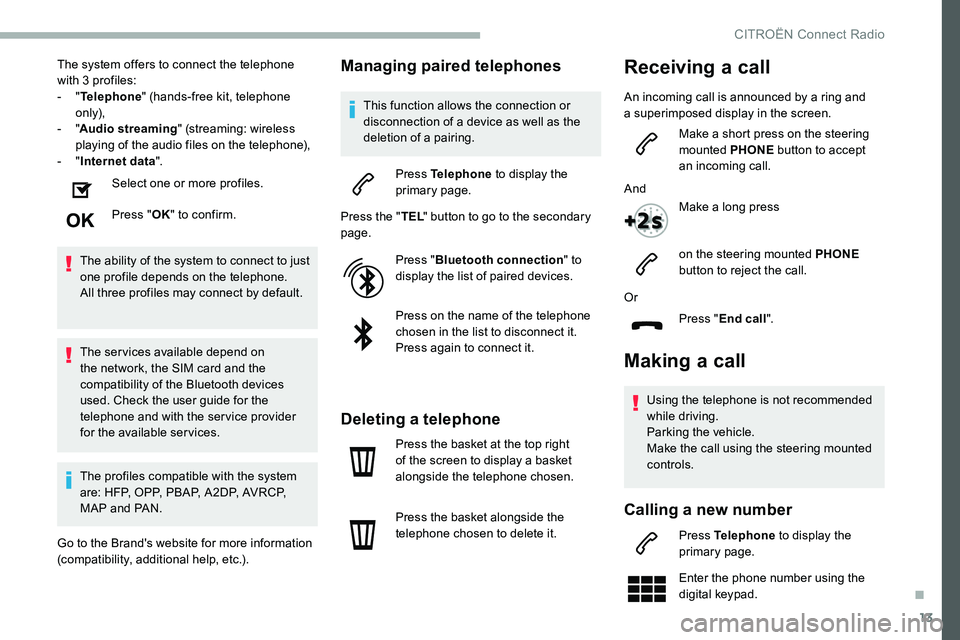
The system offers to connect the telephone
with 3 profiles:
-
"Telephone " (hands-free kit, telephone
only),
-
"Audio streaming " (streaming: wireless
playing of the audio files on the telephone),
-
"Internet data ".
Select one or more profiles.
Press " OK" to confirm.
The ability of the system to connect to just
one profile depends on the telephone.
All three profiles may connect by default.
The services available depend on
the network, the SIM card and the
compatibility of the Bluetooth devices
used. Check the user guide for the
telephone and with the service provider
for the available services.
The profiles compatible with the system
are: HFP, OPP, PBAP, A 2DP, AVRCP,
MAP and PAN.
Go to the Brand's website for more information
(compatibility, additional help, etc.).Managing paired telephones
This function allows the connection or
disconnection of a device as well as the
deletion of a
pairing.
Press Telephone to display the
primary page.
Press the " TEL" button to go to the secondary
page.
Press "Bluetooth connection " to
display the list of paired devices.
Press on the name of the telephone
chosen in the list to disconnect it.
Press again to connect it.
Deleting a telephone
Press the basket at the top right
of the screen to display a
basket
alongside the telephone chosen.
Press the basket alongside the
telephone chosen to delete it.
Making a call
Using the telephone is not recommended
while driving.
Parking the vehicle.
Make the call using the steering mounted
controls.
Calling a new number
Press Telephone to display the
primary page.
Enter the phone number using the
digital keypad.
Or
Press "End call".
Receiving a call
An incoming call is announced by a ring and
a superimposed display in the screen.
Make a
short press on the steering
mounted PHONE button to accept
an incoming call.
And Make a
long press
on the steering mounted PHONE
button to reject the call.
.
CITROËN Connect Radio
Page 240 of 292

14
Press "Call" to start the call.
Calling a contact
Press Telephone to display the
primary page.
Or make a
long press
on the steering mounted TEL button.
Press " Contacts ".
Select the desired contact from the list offered. Press "Call".
Calling a recently used
n umber
Press Telephone to display the
primary page.
Or Make a
long press
on the steering mounted button.
Press " Recent calls ".
Select the desired contact from the list offered. It is always possible to make a
call directly
from the telephone; as a safety measure,
first park the vehicle.
Setting the ringtone
Press Telephone to display the
primary page.
Press the " OPTIONS" button to go to the
secondary page.
Press "Ring volume " to display the
volume bar.
Press the arrows or move the slider
to set the ring volume.
Settings
Setting the profiles
Press " Profiles ".
Select " Profile 1 " or "Profile 2 " or "Profile 3 "
or " Common profile ". Press this button to enter a
name for
the profile using the virtual keypad.
Press " OK" to save.
Press the back arrow to confirm.
Press this button to activate the
profile.
Press the back arrow again to
confirm.
Press this button to reinitialise the
profile selected.
Adjusting brightness
Press Settings to display the
primary page.
Press Brightness .
Move the slider to adjust the brightness
of the screen and/or of the instrument
panel (according to version).
Press in the grey zone to confirm.
Press Settings
to display the
primary page.
CITROËN Connect Radio