check engine light CITROEN C5 AIRCROSS 2022 Handbook (in English)
[x] Cancel search | Manufacturer: CITROEN, Model Year: 2022, Model line: C5 AIRCROSS, Model: CITROEN C5 AIRCROSS 2022Pages: 276, PDF Size: 7.92 MB
Page 100 of 276
 98
Driving
automatically to preserve the remaining battery
charge.
Switching off the engine leads to a loss
of braking assistance.
Starting the engine
Parking brake applied:
► With a manual gearbo")
98
Driving
automatically to preserve the remaining battery
charge.
Switching off the engine leads to a loss
of braking assistance.
Starting the engine
Parking brake applied:
► With a manual gearbox, place the gear lever
in neutral then depress the clutch pedal fully.
► With an automatic gearbox, place the gear
selector in mode N or P then depress the brake
pedal fully.
► Insert the key into the ignition switch; the
system recognises the code.
► Unlock the steering column by simultaneously
turning the steering wheel and the key.
In certain cases, you may have to apply
significant force to move the steering
wheel (wheels on full lock, for example).
► With a petrol engine , operate the starter
motor by turning the key to position 3 without
pressing the accelerator pedal, until the engine
starts. Once the engine starts, release the key.
With petrol engines , after a cold start,
pre-heating the catalytic converter can
cause clearly-felt engine vibrations when
stationary, with the engine running, for
anything up to two minutes (accelerated idle
speed).
If the outside temperature is high, let the
engine idle for 1 to 2 minutes after the
vehicle comes to a stop, to help it to cool.
Before setting off
Nose weight
► Distribute the load in the trailer so that the
heaviest items are as close as possible to the
axle and the nose weight (at the point where it
joins your vehicle) approaches the maximum
permitted without exceeding it.
Tyres
► Check the tyre pressures of the towing
vehicle and of the trailer , observing the
recommended pressures.
Lighting
► Check the electrical signalling on the trailer
and the headlamp beam height of your vehicle.
If a genuine CITROËN towing device is
used, the rear parking sensors will be
deactivated automatically to avoid the audible
signal.
When driving
Cooling
Towing a trailer uphill causes the coolant
temperature to increase. The maximum towable
load depends on the gradient and the exterior temperature. The fan’s cooling capacity does not
increase with engine speed.
►
Reduce speed and lower the engine speed to
limit the amount of heating produced.
In all cases, pay attention to the coolant
temperature.
If this warning lamp and the STOP
warning lamp come on, stop the
vehicle and switch off the engine as soon as
possible.
Brakes
Braking distances are increased when towing a
trailer. To avoid overheating the brakes, the use
of engine braking is recommended.
Side wind
Bear in mind that the vehicle will be more
susceptible to wind when towing.
Anti-theft protection
Electronic immobiliser
The keys include an electronic engine
immobiliser system, which secret code must be
recognised in order for starting to be possible.
If the system malfunctions, indicated by the
display of a message, the engine will not start.
Contact the CITROËN dealer.
Starting / Switching off the
engine with the key
Key ignition switch
It has 3 positions:
– position 1 (Stop): inserting and removing the
key, steering column locked.
–
position 2 (Ignition on) : steering column
unlocked, ignition on, Diesel preheating, engine
running,
–
position 3 (Starting).
Avoid attaching heavy objects to the key
or the remote control, which would weigh
down on its blade in the ignition switch and
could cause a malfunction.
Ignition on position
It allows the use of the vehicle's electric
equipment or portable devices to be charged.
Once the state of charge of the battery drops to
the reserve level, the system switches to energy
economy mode : the power supply is cut off
Page 103 of 276
 101
Driving
6When the vehicle starts in electric mode,
it makes no noise.
Pay particular attention to pedestrians and
cyclists who may not hear the vehicle coming
despite the pedestrian horn.
Swit")
101
Driving
6When the vehicle starts in electric mode,
it makes no noise.
Pay particular attention to pedestrians and
cyclists who may not hear the vehicle coming
despite the pedestrian horn.
Switching off
► Immobilise the vehicle.
► With a manual gearbox, ideally put the gear
lever into neutral.
►
With an
automatic gearbox, ideally select
mode
P or N.
►
Press the "
START/STOP" button..
►
For rechargeable hybrid vehicles, before
leaving the vehicle, check that the READY
indicator lamp is switched off.
In some circumstances, it is necessary to turn
the steering wheel to lock the steering column.
On certain versions with an automatic gearbox
(EAT6/EAT8), the steering column does not lock,
but the gearbox locks in mode P.
If the vehicle is not immobilised, the
engine will not switch off.
With the engine off, the braking and
steering assistance systems are also cut
off - risk of loss of control of the vehicle!
Never leave your vehicle with the
electronic key still inside.
Switching on the ignition
without starting the engine
With the electronic key in the passenger
compartment, pressing the “ START/STOP”
button, without pressing any of the pedals ,
allows the ignition to be switched on without
starting the engine (turning on the instrument
panel and accessories such as the audio system
and the lighting).
►
Press this button
again to switch off the
ignition and allow the vehicle to be locked.
Key not detected
Back-up starting
A back-up reader is fitted to the steering column,
to enable the engine to be started if the system
fails to detect the key in the recognition zone, or
if the battery in the electronic key is flat.
► Place and hold the remote control against the
reader .
►
W
ith a manual gearbox, place the gear lever
in neutral, then fully depress the clutch pedal.
►
W
ith an automatic gearbox, select mode P,
then depress the brake pedal.
► Press the " START/STOP" button.
The engine starts.
Page 115 of 276
 11 3
Driving
6Malfunction
These warning lamps come on in the event of a malfunction,
accompanied by the display of a message.
Contact a CITROËN dealer or a qualified
workshop to have the system che")
11 3
Driving
6Malfunction
These warning lamps come on in the event of a malfunction,
accompanied by the display of a message.
Contact a CITROËN dealer or a qualified
workshop to have the system checked.
Gear shift indicator
(Depending on engine.)
System which reduces fuel consumption by
recommending the most appropriate gear.
Operation
Depending on the driving situation and the
vehicle's equipment, the system may advise to
skip one or more gears.
Gear shift recommendations should not be
considered compulsory. In fact, the road layout,
the traffic density and safety remain the deciding
factors when choosing the best gear. The driver
therefore remains responsible for deciding
whether or not to follow the indications issued by
the system.
This function cannot be deactivated.
With an automatic gearbox, the system is
only active in manual operation.
The information appears in the instrument panel, in the form of an arrow and the
recommended gear.
The system adapts its gear shift recommendation according to the driving
conditions (slope, load, etc.) and the driver’s
requirements (request for power, acceleration,
braking, etc.).
The system never suggests:
–
engaging first gear
.
–
engaging reverse.
Stop & Start
The Stop & Start function puts the engine temporarily into standby - STOP mode - during
phases when the vehicle is stopped (red lights,
queues, etc.). The engine restarts automatically
- START mode - as soon as the driver wishes to
move off again.
Primarily designed for urban use, the function
is intended to reduce fuel consumption and
exhaust emissions as well as the noise level
when stationary.
The function does not affect the functionalities of
the vehicle, in particular the braking.
Opening the bonnet
Before doing anything under the bonnet,
deactivate the Stop & Start system to avoid
any risk of injury caused by the engine
restarting automatically.
Driving on flooded roads
Before entering into a flooded area, it is
strongly recommended that you deactivate
the Stop & Start system.
For more information on Driving
recommendations, particularly on flooded
roads, refer to the corresponding section.
Deactivation/Reactivation
The function is activated by default when the
ignition is switched on.
To deactivate/reactivate the function:
► Press the button.
A message in the instrument panel confirms the
change of status.
When the function is deactivated, the orange
indicator lamp is lit; if the engine was in standby,
it restarts immediately.
Associated indicator lamps
Function activated.
Function deactivated or malfunction.
Page 136 of 276
134
Driving
first level of alert may not be displayed: the
level 2 alert may be displayed directly.
Important: the level 1 alert is not displayed
when there is a stationary obstacle or
when the "Near" trigger threshold has been
selected.
Intelligent emergency
braking assistance
If the driver brakes, but not sufficiently to avoid a
collision, this system will supplement the braking,
within the limits of the laws of physics.
This assistance will only be provided if the driver
presses the brake pedal.
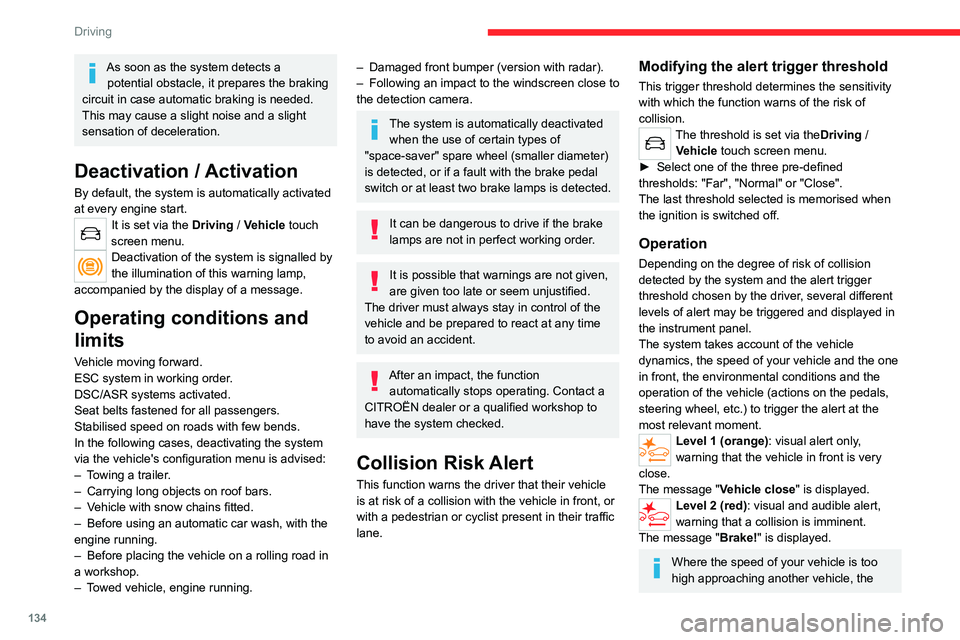
As soon as the system detects a potential obstacle, it prepares the braking
circuit in case automatic braking is needed.
This may cause a slight noise and a slight
sensation of deceleration.
Deactivation / Activation
By default, the system is automatically activated
at every engine start.
It is set via the Driving / Vehicle touch
screen menu.
Deactivation of the system is signalled by
the illumination of this warning lamp,
accompanied by the display of a message.
Operating conditions and
limits
Vehicle moving forward.
ESC system in working order.
DSC/ASR systems activated.
Seat belts fastened for all passengers.
Stabilised speed on roads with few bends.
In the following cases, deactivating the system
via the vehicle's configuration menu is advised:
–
T
owing a trailer.
–
Carrying long objects on roof bars.
–
V
ehicle with snow chains fitted.
–
Before using an automatic car wash, with the
engine running.
–
Before placing the vehicle on a rolling road in
a workshop.
–
T
owed vehicle, engine running.
– Damaged front bumper (version with radar).
– Following an impact to the windscreen close to
the detection camera.
The system is automatically deactivated when the use of certain types of
"space-saver" spare wheel (smaller diameter)
is detected, or if a fault with the brake pedal
switch or at least two brake lamps is detected.
It can be dangerous to drive if the brake
lamps are not in perfect working order.
It is possible that warnings are not given,
are given too late or seem unjustified.
The driver must always stay in control of the
vehicle and be prepared to react at any time
to avoid an accident.
After an impact, the function automatically stops operating. Contact a
CITROËN dealer or a qualified workshop to
have the system checked.
Collision Risk Alert
This function warns the driver that their vehicle
is at risk of a collision with the vehicle in front, or
with a pedestrian or cyclist present in their traffic
lane.
Modifying the alert trigger threshold
This trigger threshold determines the sensitivity
with which the function warns of the risk of
collision.
The threshold is set via the Driving /
Vehicle touch screen menu.
►
Select one of the three pre-defined
thresholds: "Far", "Normal" or "Close".
The last threshold selected is memorised when
the ignition is switched off.
Operation
Depending on the degree of risk of collision
detected by the system and the alert trigger
threshold chosen by the driver, several different
levels of alert may be triggered and displayed in
the instrument panel.
The system takes account of the vehicle
dynamics, the speed of your vehicle and the one
in front, the environmental conditions and the
operation of the vehicle (actions on the pedals,
steering wheel, etc.) to trigger the alert at the
most relevant moment.
Level 1 (orange): visual alert only,
warning that the vehicle in front is very
close.
The message
"Vehicle close" is displayed.
Level 2 (red): visual and audible alert,
warning that a collision is imminent.
The message "Brake! " is displayed.
Where the speed of your vehicle is too
high approaching another vehicle, the
Page 162 of 276
 160
Practical information
or electrocution in the event of contact with or
immersion in water!
Charging procedure
Connection
► Before charging, check that the gear selector
is in mode P and the i")
160
Practical information
or electrocution in the event of contact with or
immersion in water!
Charging procedure
Connection
► Before charging, check that the gear selector
is in mode P and the ignition is off, otherwise
charging is impossible.
► Open the charging flap by pressing the top
right push-button, and check that there are
no foreign bodies on the vehicle's charging
connector.
The light guides in the flap come on white.
Domestic charging (mode 2)
► First, connect the charging cable from the
control unit to the domestic socket.
Charging the traction
battery (Rechargeable
hybrid)
For a full charge, follow the charging procedure
without interrupting it, until it stops automatically.
Charging may be performed either immediately
(by default) or deferred.
Deferred charging is set via the touch
screen or the MyCitroën application.
When the vehicle is connected, the following
information is displayed on the instrument panel:
–
Status of the battery (%).
–
Remaining range (miles or km).
–
Estimated charging time (calculation may take
a few seconds).
–
Charging speed (kW/h).
After the instrument panel has been put into
standby mode, this information can be displayed
again by unlocking the vehicle or opening a door
.
It is also possible to monitor the charging
progress using the MyCitroën
application.
For more information on Remote functions,
refer to the corresponding section.
Vehicle immobilised for up to 4 weeks
Park the vehicle in a covered area.
Connect the charging cable to supply power
to the traction battery.
Vehicle immobilised for 1 to 12
months
Discharge the traction battery down to 2 or
3 bars on the charge level indicator on the
instrument panel.
Do not connect the charging cable.
Always park the vehicle in a place with
temperatures between -10°C and 30°C
(parking in a place with extreme temperatures
can damage the traction battery).
Disconnect the black cable from the (-)
terminal of the accessory batteries.
Precautions
Rechargeable hybrid vehicles have
been developed in accordance with the
recommendations for maximum electromagnetic
field limits established by the ICNIRP
(International Commission on Non-Ionizing
Radiation Protection - 1998 Guidelines).
Wearers of pacemakers or equivalent
devices should consult a doctor to enquire
about any applicable precautionary measures, or
contact the manufacturer of their implanted
electronic medical device to check that it is
guaranteed to operate in an environment
compliant with the ICNIRP guidelines.
If in doubt , during charging, do not remain
inside or near the vehicle, near the charging
cable or the charging unit, even for a short time.
Before charging
Depending on the context:
► Have a professional check that the
electrical system to be used complies with
applicable standards and is compatible with
the vehicle.
►
Have a professional electrician install
a dedicated domestic power socket or
accelerated charging unit (W
allbox)
compatible with the vehicle.
Use the charging cable supplied with the
vehicle.
(During charging)
As a safety measure, the engine will
not start if the charging cable is plugged into
the connector on the vehicle. A warning is
displayed on the instrument panel.
While charging is in progress, unlocking the
vehicle will cause the charging to stop.
If no action is taken on one of the openings
(door or boot) or on the charging nozzle, the
vehicle will lock again after 30 seconds and
charging will resume automatically.
Never work under the bonnet:
–
Some areas remain very hot, even an hour
after charging ends - risk of burns!
–
The fan may start at any time - risk of cuts
or strangulation!
After charging
Check that the charging flap is closed.
Do not leave the cable connected to the
domestic power socket - risk of short-circuit
Page 176 of 276
 174
Practical information
► With an AdBlue® pump: insert the nozzle and
fill the tank until the nozzle automatically cuts
out.
In order not to overfill the AdBlue® tank:
– Add between 10 and")
174
Practical information
► With an AdBlue® pump: insert the nozzle and
fill the tank until the nozzle automatically cuts
out.
In order not to overfill the AdBlue® tank:
– Add between 10 and 13 litres using
AdBlue
® containers.
– Stop after the nozzle’s first automatic cut-
out, if you are refilling at a service station.
The system only registers AdBlue
® top-ups of
5 litres or more.
If the AdBlue® tank is completely empty
– which is confirmed by the message
"Top up AdBlue: Starting impossible" – it is
essential to add at least 5 litres.
Free-wheeling
In certain situations, you must allow the vehicle
to free-wheel (while being towed, on a rolling
road, in an automatic car wash, or being
transported by rail or sea freight, etc.).
The procedure varies according to the type of
gearbox and parking brake.
With manual or EAT6
automatic gearbox and
electric parking brake
/
For the correct operation of the SCR
system:
–
Use
only AdBlue
® fluid that meets the ISO
22241 standard.
–
Never
transfer AdBlue
® to another container
as it would lose its purity.
–
Never
dilute AdBlue
® with water.
You can obtain AdBlue
® from a CITROËN dealer
or a qualified workshop, as well as service
stations equipped with AdBlue
® pumps specially
designed for passenger vehicles.
Recommendations on storage
AdBlue® freezes at about -11°C and deteriorates
above +25°C. Containers should be stored in a
cool area and protected from direct sunlight.
Under these conditions, the fluid can be kept for
at least a year.
If the fluid has frozen, it can be used once it has
completely thawed out at room temperature.
Never store AdBlue® containers in your
vehicle.
Precautions for use
AdBlue® is a urea-based solution. This fluid is
non-flammable, colourless and odourless (when
kept in a cool place).
In the event of contact with the skin, wash the
affected area with soap and running water. In the
event of contact with the eyes, immediately rinse
the eyes with large amounts of water or with an
eye wash solution for at least 15 minutes. Seek
medical attention if you feel a persistent burning
sensation or irritation.
If swallowed, immediately wash out the mouth
with clean water and then drink plenty of water.
In certain conditions (high temperature, for
example), the risk of release of ammonia cannot
be excluded: do not inhale the fluid. Ammonia
vapours have an irritant effect on mucous
membranes (eyes, nose and throat).
Store AdBlue® out of the reach of
children, in its original container.
Procedure
Before starting the top-up procedure, ensure that
the vehicle is parked on a flat and level surface.
In wintry conditions, ensure that the temperature
of the vehicle is above -11
°C. Otherwise, the
AdBlue
® may be frozen and therefore cannot
be poured into its tank. Park your vehicle in a
warmer area for a few hours to allow the top-up
to be carried out.
Never pour AdBlue® into the Diesel fuel
tank.
If any AdBlue® is splashed, or if there are
any spillages on the bodywork, rinse
immediately with cold water or wipe with a
damp cloth.
If the fluid has crystallised, clean it off using a
sponge and hot water.
Important: in the event of a top-up after
a breakdown because of a lack of
AdBlue, it is essential to wait around 5
minutes before switching on the ignition,
without opening the driver’s door,
unlocking the vehicle, introducing the key
into the ignition switch, or introducing the
key of the “Keyless Entry and Starting
”
system into the passenger compartment
.
Switch on the ignition, then wait for 10
seconds before starting the engine.
►
Switch off the ignition and remove the key
from the switch to switch off the engine.
or
►
With Keyless Entry and Starting, press the
"
START/STOP" button to switch off the engine.
► Turn the blue cap of the AdBlue® tank anti-
clockwise and remove it.
►
With a container of
AdBlue
®: after checking
the expiry date, read the instructions on the
label carefully before pouring the contents of the
container into the vehicle's AdBlue tank.
Page 196 of 276
 194
In the event of a breakdown
Fuse No.Rating
(Amps) Functions
F24 40Trailer power supply.
F26 25Front foglamps.
12 V battery
Procedure for starting the engine using another
battery or for charging")
194
In the event of a breakdown
Fuse No.Rating
(Amps) Functions
F24 40Trailer power supply.
F26 25Front foglamps.
12 V battery
Procedure for starting the engine using another
battery or for charging a discharged battery.
Lead-acid starter batteries
These batteries contain harmful
substances (sulphuric acid and lead).
They must be disposed of in accordance
with regulations and must never under any
circumstances be discarded with household
waste.
Take used remote control batteries and
vehicle batteries to a special collection point.
Protect your eyes and face before
handling the battery.
All operations on the battery must be carried
out in a well ventilated area and away from
naked flames and sources of sparks, to avoid
any risk of explosion or fire.
Wash your hands afterwards.
Access to the battery
The battery is located under the bonnet.
For access to the (+) terminal:
► Unlock the bonnet by activating the internal
release lever
, then the external safety catch.
►
Raise the bonnet.
(+)
Positive terminal.
It has a quick-release clamp.
(-) Negative terminal.
As the battery's negative terminal is not
accessible, a remote earth point is placed near
the battery.
Starting using another
battery
If your vehicle's battery is flat, the engine can be
started using a backup battery (either external or
from another vehicle) and jump leads or using a
battery booster.
Never start the engine by connecting a
battery charger.
Never use a 24
V or higher battery booster.
Check beforehand that the backup battery
has a nominal voltage of 12
V and a capacity
at least equal to that of the discharged
battery.
The two vehicles must not be in contact with
each other.
Switch off all electricity-consuming equipment
on both vehicles (audio system, wipers,
lighting, etc.).
Make sure that the jump leads are well away
from the engine’s moving parts (fan, belt,
etc.).
Do not disconnect the (+) terminal while the
engine is running.
Page 198 of 276
 196
In the event of a breakdown
► At the end of the charging operation, switch
off charger B
before disconnecting the cables
from battery A.
If this label is present, use only a 12 V
charger to")
196
In the event of a breakdown
► At the end of the charging operation, switch
off charger B
before disconnecting the cables
from battery A.
If this label is present, use only a 12 V
charger to avoid causing irreversible
damage to the electrical components
connected to the Stop & Start system.
24V
12V
Never try to charge a frozen battery - risk
of explosion!
If the battery has frozen, have it checked by a
CITROËN dealer or by a qualified workshop
who will verify that the internal components
have not been damaged and that the case
has not cracked, which would mean a risk of
toxic and corrosive acid leaking.
Disconnecting the battery
In order to maintain an adequate state of charge
for starting the engine, it is recommended that
the battery be disconnected if the vehicle is
taken out of service for a long period.
Before disconnecting the battery:
►
Close all openings (doors, boot, windows,
roof). ►
Switch off all electrical consumers (audio
system, wipers, lighting, etc.).
►
Switch off the ignition and wait for 4
minutes.
At the battery, it is only necessary to disconnect
the (+) terminal.
Quick-release terminal clamp
Disconnecting the (+) terminal
► Depending on equipment, lift the plastic cover
on the (+) terminal.
►
Raise lever
A
fully to release clamp
B
.
►
Remove clamp
B
by lifting it off.
Reconnecting the (+) terminal
► Raise lever A fully.
► Refit the open clamp B on the (+) terminal.
►
Push clamp
B fully down.
►
Lower lever
A
to lock clamp B.
►
Depending on equipment, lower the plastic
cover on the
(+) terminal.
Do not force the lever as locking will be
impossible if the clamp is not positioned
correctly; start the procedure again.
After reconnection
After reconnecting the battery, turn on the
ignition and wait 1 minute before starting the
engine, to enable the electronic systems to
initialise.
If minor problems nevertheless persist following
this operation, contact a CITROËN dealer or a
qualified workshop.
Referring to the relevant section, reset certain
equipment:
– Remote control key or electronic key
(depending on version).
– Sunroof and electric sun blind.
– Electric windows.
– Date and time.
– Preset radio stations.
The Stop & Start system may not be
operational during the trip following the
first engine start.
In this case, the system will only be
available again after a continuous period of
immobilisation of the vehicle, a period which
depends on the exterior temperature and the
state of charge of the battery (up to about 8
hours).
Accessory battery (Rechargeable hybrid)
The rechargeable hybrid system has two
accessory batteries: one at the front and one at
the rear of the vehicle.
The batteries contain harmful substances (sulphuric acid and lead).
They must be disposed of in accordance
with regulations and must never under any
circumstances be discarded with household
waste.
Page 248 of 276
 246
Alphabetical index
Charging cable (Rechargeable
hybrid)
155, 161
Charging connector (Rechargeable
hybrid)
155, 160–162
Charging flap (Rechargeable
hybrid)
155, 160–162
Cha")
246
Alphabetical index
Charging cable (Rechargeable
hybrid)
155, 161
Charging connector (Rechargeable
hybrid)
155, 160–162
Charging flap (Rechargeable
hybrid)
155, 160–162
Charging the traction battery (Rechargeable
hybrid)
20, 154, 160–162
CHECK
21
Checking the engine oil level
17
Checking the levels
169–171
Checking tyre pressures
(using the kit)
180, 182
Checks
169, 171–173
Checks, routine
171–172
Child lock
95–96
Children
85, 90–92
Children (safety)
95
Child seats
85, 88–90
Child seats, conventional
90
Child seats, i-Size
92
Child seats, ISOFIX
90–92
Cigar lighter
60
Cleaning (advice)
154, 175–176
Closing the boot
30, 35
Closing the doors
30, 34
Collision Risk Alert
133–134
Configuration, vehicle
23, 25
Connected applications
232
ConnectedCAM Citroën™
11 6
Connection, Bluetooth
215–216,
232–233, 237–238
Connection, Wi-Fi network
233Connectivity 231
Consumption figures
24
Container, AdBlue®
174
Control, emergency boot release
35
Control, emergency door
32–33
Control, heated seats
47
Controls, steering mounted
107–109
Control stalk, lighting
67–68
Control stalk, wipers
72–74
Control unit
155, 157, 161
Courtesy lamp
63, 189
Courtesy lamps
63–64
Cover, load space
63
Cruise control
121, 123–125
Cruise control, adaptive
126
Cruise control by speed limit recognition
121
Cruise control, dynamic with Stop function
121
Cup holder
60
D
DAB (Digital Audio Broadcasting) -
Digital radio
212, 235
Date (setting)
25, 218, 240
Daytime running lamps
68
Deactivating the passenger airbag
86, 89
Deadlocking
29, 31
Deferred charging
25, 161
Deferred charging (Rechargeable
hybrid)
24, 155, 160
Defrosting
56–57
Defrosting, front
56
Demisting 56
Demisting, front
56
Demisting, rear
57
Demisting, rear screen
57
Dials and gauges
9–10
Digital instrument panel
10
Dimensions
206
Dipstick
17, 169
Direction indicators
68, 186–187
Domestic charging
157
Domestic charging (Rechargeable
hybrid)
161–162
Door pockets
60
Doors
34
Driver’s attention warning
136
Driving
97
Driving aids camera (warnings)
11 8
Driving aids (recommendations)
11 7
Driving economically
7
Driving modes
111
Driving positions (storing)
46
Dynamic stability control (DSC)
78–80
E
EBFD 78
Eco-driving (advice)
7
ECO mode
111
Economy mode
165
Electric automatic gearbox (Rechargeable
hybrid)
109
Electric windows
41
Page 250 of 276
 248
Alphabetical index
Inflating tyres 172, 206
Inflating tyres and accessories
(using the kit)
180, 182
Infrared camera
11 8
Instrument panel
9–10, 21–22, 118
Intelligent Tra")
248
Alphabetical index
Inflating tyres 172, 206
Inflating tyres and accessories
(using the kit)
180, 182
Infrared camera
11 8
Instrument panel
9–10, 21–22, 118
Intelligent Traction Control
79
Internet browser
229, 232
ISOFIX mountings
90
J
Jack 180, 182, 235
Jump starting
194
K
Key 27, 31–33
Key, electronic
29–30
Keyless Entry and Starting
29–31, 100–101
Key not recognised
101–102
Key with remote control
27–28, 98
Kit, hands-free
215, 237
Kit, puncture repair
179
Kit, temporary puncture repair
179–180, 182
L
Labels, identification 206
Lamp, boot
66, 189
Lamps, parking
68
Lamps, rear 187
Lams with Full LED technology
71
Lane assist
126, 130–131, 133
Lane departure warning active
137, 141
Leather (care)
176
LEDs - Light-emitting diodes
68, 185, 187
Level, AdBlue®
171
Level, brake fluid
170
Level, Diesel additive
171–172
Level, engine coolant
18, 170
Level, engine oil
17, 169
Levels and checks
169–171
Level, screenwash fluid
72, 171
Light-emitting diodes - LEDs
68, 185, 187
Lighting, cornering
71
Lighting dimmer
21
Lighting, exterior
67
Lighting, guide-me home
29, 69
Lighting, interior
63–64
Lighting, mood
63
Lighting, welcome
69
Loading
64–65, 167
Load reduction mode
165
Locating your vehicle
29
Locking
30–31
Locking from the inside
32
Locking the doors
32
Low fuel level
152
Lumbar
45M
Mains socket (domestic network) 155
Maintenance (advice)
154, 175
Maintenance, routine
118, 171
Manoeuvring aids (recommendations)
11 7
Markings, identification
206
Massage function
47
Massage, multi-point
47
Mat
62, 118
Memorising a speed
125
Menu
214
Menu, main
24
Menus (audio)
209–210, 221–222
Menu short cuts
24
Messages
239
Messages, quick
239
Mirror, rear view
49
Mirrors, door
48, 57, 140
Mirror, vanity
60
Misfuel prevention
153
Mobile application
25–26, 59, 160–161
Motor, electric
111–112, 154, 205
Motorised tailgate
36–38
Mountings, ISOFIX
90
N
Navigation 226–228
Navigation, connected
229–231
Net, high load retaining
64–65
Number plate lamps
188