light CITROEN C5 AIRCROSS 2022 Handbook (in English)
[x] Cancel search | Manufacturer: CITROEN, Model Year: 2022, Model line: C5 AIRCROSS, Model: CITROEN C5 AIRCROSS 2022Pages: 276, PDF Size: 7.92 MB
Page 30 of 276
28
Access
illumination of the direction indicators for a
few seconds.
With the remote control
► Within 5 seconds of locking the
vehicle, press the button again to
deadlock it.
With the key
► Within 5 seconds of locking the vehicle, turn
the key to the rear again to deadlock it.
Locating your vehicle
This function allows you to identify your vehicle
from a distance, particularly in poor light. Your
vehicle must be locked.
► Press this button. The courtesy lamps
will come on and the direction indicators
will flash for a few seconds.
Remote lighting of the
lamps
Availability of this function depends on version.► Press this button. The sidelamps,
dipped beam headlamps, number plate
lamps and door mirror spotlamps come on for 30
seconds.
Pressing again before the end of the timed
period switches off the lamps immediately.
Complete or selective unlocking, and alarm
deactivation (depending on version), is confirmed
by the flashing of the direction indicators.
Depending on version, the door mirrors unfold.
Opening the windows
Depending on version, holding the
unlocking button pressed for more than 3
seconds opens the windows.
The windows stop when the button is released.
With the key
► Turn the key in the front left-hand door lock
towards the front of the vehicle to unlock it.
Selective unlocking and opening of
the tailgate
The settings for the selective tailgate unlocking
and motorised operation are made in the vehicle
configuration menu.
By default, selective tailgate unlocking is
activated and and motorised operation is
deactivated.
► Make a long press on the button to
unlock the boot and trigger the motorised
opening of the tailgate.
The doors and fuel filler flap remain locked.
If selective unlocking of the tailgate is
deactivated, pressing the button unlocks
the whole vehicle.
If motorised operation of the tailgate is
deactivated, pressing the button releases
the tailgate.
To lock the vehicle, it is necessary to close
the tailgate again.
Locking the vehicle
With the remote control
► Press this button to lock the vehicle.
Locking is confirmed by fixed illumination of
the direction indicators for approximately two
seconds. Depending on version, the door mirrors
fold.
If one of the doors or the boot is still open, the
central locking does not work; the vehicle locks,
then immediately unlocks, identifiable by the
locks making a rebound sound.
When the vehicle is locked, if it is
unlocked without the opening of a door
or the boot, it will automatically lock itself
again after thirty seconds.
The automatic folding and unfolding of the door mirrors can be deactivated via
the vehicle's configuration menu.
With the key
► Turn the key in the front left-hand door lock
towards the rear of the vehicle to unlock it.
Check that the doors and boot are fully
closed.
Closing the windows and sunroof
Maintaining pressure on the locking button
allows the windows and, depending on version,
the sunroof to be closed to the desired position.
This operation also closes the sunroof blind.
Ensure that no person or object could
prevent the correct closing of the
windows and sunroof.
If, on versions with alarm, you want to leave
the windows and/or sunroof partly open, you
must first deactivate the volumetric alarm
protection.
For more information on the Alarm, refer to
the corresponding section.
Deadlocking
Deadlocking deactivates the exterior and
interior door controls, as well as the
central locking button on the dashboard.
The horn remains operational.
You must therefore never leave anyone inside
the vehicle when it is deadlocked.
If your vehicle is fitted with an alarm,
activation is confirmed by fixed
Page 31 of 276
29
Access
2illumination of the direction indicators for a
few seconds.
With the remote control
► Within 5 seconds of locking the
vehicle, press the button again to
deadlock it.
With the key
► Within 5 seconds of locking the vehicle, turn
the key to the rear again to deadlock it.
Locating your vehicle
This function allows you to identify your vehicle
from a distance, particularly in poor light. Your
vehicle must be locked.
► Press this button. The courtesy lamps
will come on and the direction indicators
will flash for a few seconds.
Remote lighting of the
lamps
Availability of this function depends on version.► Press this button. The sidelamps,
dipped beam headlamps, number plate
lamps and door mirror spotlamps come on for 30
seconds.
Pressing again before the end of the timed
period switches off the lamps immediately.
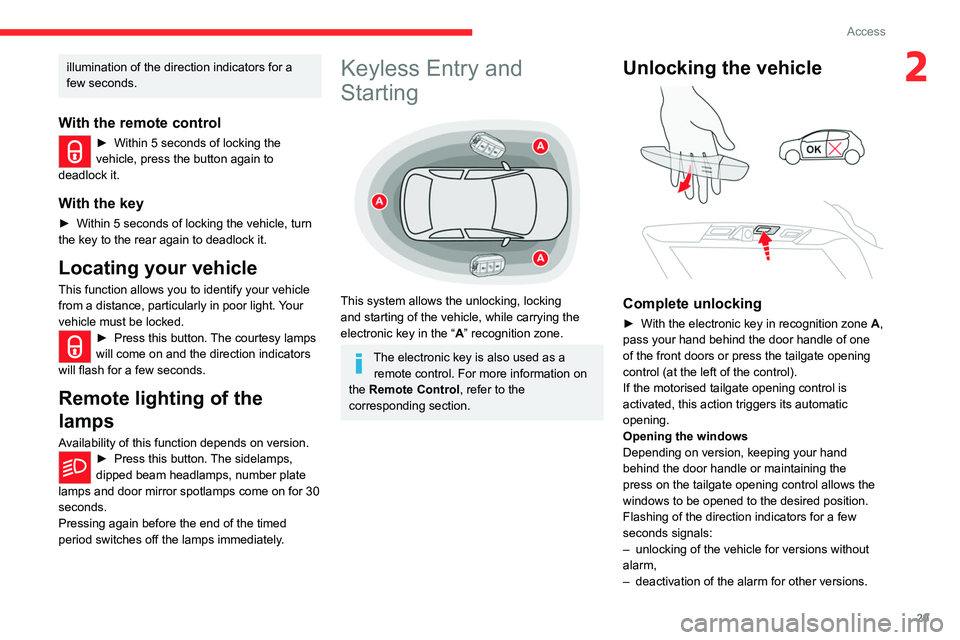
Keyless Entry and
Starting
This system allows the unlocking, locking
and starting of the vehicle, while carrying the
electronic key in the “ A” recognition zone.
The electronic key is also used as a
remote control. For more information on
the Remote Control, refer to the
corresponding section.
Unlocking the vehicle
Complete unlocking
► With the electronic key in recognition zone A ,
pass your hand behind the door handle of one
of the front doors or press the tailgate opening
control (at the left of the control).
If the motorised tailgate opening control is
activated, this action triggers its automatic
opening.
Opening the windows
Depending on version, keeping your hand
behind the door handle or maintaining the
press on the tailgate opening control allows the
windows to be opened to the desired position.
Flashing of the direction indicators for a few
seconds signals:
–
unlocking of the vehicle for versions without
alarm,
–
deactivation of the alarm for other versions.
Page 40 of 276
38
Access
► press button C or the exterior control B for
more than 3 seconds (deletion is confirmed by a
long audible signal).
Manual operation
The tailgate can be manoeuvred by hand, even
with motorised operation activated.
The tailgate must be stationary.
When opening and closing the motorised tailgate
manually, there is no assistance from gas struts.
Resistance to opening and closing is therefore
entirely normal.
Repeatedly opening and closing the
motorised tailgate can cause overheating
of its electric motor, after which opening and
closing will not be possible.
Allow at least 10 minutes for the electric
motor to cool down before operating the
tailgate again.
If you are unable to wait, operate it manually.
Manual closing of the
motorised tailgate in case of
failure
This operation is only necessary in the case of
failure of the tailgate motor .
If the failure originates from the battery, it is
recommended to recharge it or change it with the
tailgate closed.
In this situation, a significant force may be
needed to close the tailgate.
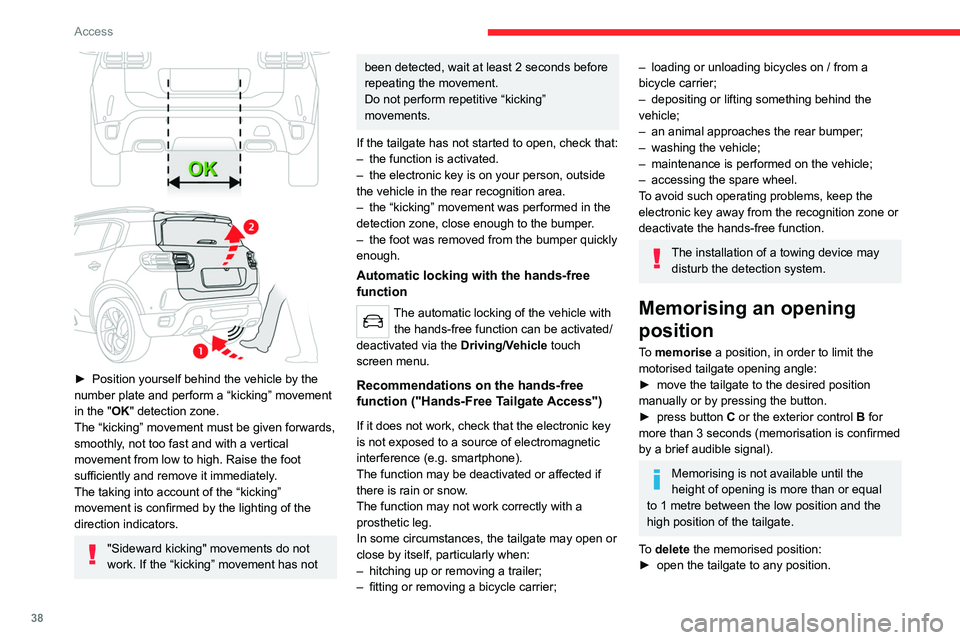
► Position yourself behind the vehicle by the
number plate and perform a “kicking” movement
in the
"OK" detection zone.
The “kicking” movement must be given forwards,
smoothly, not too fast and with a vertical
movement from low to high. Raise the foot
sufficiently and remove it immediately.
The taking into account of the “kicking”
movement is confirmed by the lighting of the
direction indicators.
"Sideward kicking" movements do not
work. If the “kicking” movement has not
been detected, wait at least 2 seconds before
repeating the movement.
Do not perform repetitive “kicking”
movements.
If the tailgate has not started to open, check that:
–
the function is activated.
–
the electronic key is on your person, outside
the vehicle in the rear recognition area.
–
the “kicking” movement was performed in the
detection zone, close enough to the bumper
.
–
the foot was removed from the bumper quickly
enough.
Automatic locking with the hands-free
function
The automatic locking of the vehicle with
the hands-free function can be activated/
deactivated via the Driving/V
ehicle touch
screen menu.
Recommendations on the hands-free
function ("Hands-Free Tailgate Access")
If it does not work, check that the electronic key
is not exposed to a source of electromagnetic
interference (e.g. smartphone).
The function may be deactivated or affected if
there is rain or snow.
The function may not work correctly with a
prosthetic leg.
In some circumstances, the tailgate may open or
close by itself, particularly when:
–
hitching up or removing a trailer;
–
fitting or removing a bicycle carrier;
– loading or unloading bicycles on / from a
bicycle carrier;
–
depositing or lifting something behind the
vehicle;
–
an animal approaches the rear bumper;
–
washing the vehicle;
–
maintenance is performed on the vehicle;
–
accessing the spare wheel.
T
o avoid such operating problems, keep the
electronic key away from the recognition zone or
deactivate the hands-free function.
The installation of a towing device may disturb the detection system.
Memorising an opening
position
To memorise a position, in order to limit the
motorised tailgate opening angle:
►
move the tailgate to the desired position
manually or by pressing the button.
►
press button
C or the exterior control B for
more than 3 seconds (memorisation is confirmed
by a brief audible signal).
Memorising is not available until the
height of opening is more than or equal
to 1 metre between the low position and the
high position of the tailgate.
To delete the memorised position:
►
open the tailgate to any position.
Page 42 of 276

40
Access
► Switch on the ignition; this stops the alarm.
The indicator lamp in the button goes off.
Locking the vehicle without
activating the alarm
► Lock or deadlock the vehicle using the key
(integral to the remote control) in the driver's
door lock.
Automatic activation
(Depending on version)
The system is activated automatically 2 minutes
after the last door or the boot is closed.
► To avoid triggering the alarm on entering the
vehicle, first press the unlocking button on the
remote control or unlock the vehicle using the
“Keyless Entry and Starting” system.
Malfunction
When the ignition is switched on, fixed
illumination of the red indicator lamp in the
button indicates a malfunction of the system.
Have it checked by a CITROËN dealer or a
qualified workshop.
Self-protection function
The system checks whether any of its
components are out of service.
The alarm is triggered if the battery, the central
control or the siren wiring is put out of service or
damaged.
Work on the alarm system
Consult a CITROËN dealer or a qualified
workshop.
Locking the vehicle with full
alarm system
Activation/Deactivation
► Lock or deadlock/unlock the vehicle using
the remote control or the "Keyless Entry and
Starting" system (confirmed by the button's red
indicator lamp coming on/going out and the
direction indicators coming on).
The exterior perimeter monitoring is activated
after 5 seconds and the interior volumetric and
anti-tilt monitoring after 45 seconds.
If the vehicle automatically locks itself
again (as happens if a door or the boot is
not opened within 30 seconds of unlocking),
the monitoring system is automatically
reactivated.
If an opening (door, boot or bonnet) is not
properly closed, the vehicle is not locked,
but the exterior perimeter monitoring will be
activated after 45 seconds, at the same time
as the interior volumetric and anti-tilt
monitoring.
Locking the vehicle
with exterior perimeter
monitoring only
Disable volumetric monitoring to avoid unwanted
alarm triggering in certain cases, such as:
–
Slightly open window
.
–
W
ashing the vehicle.
–
Changing a wheel.
–
T
owing your vehicle.
–
T
ransport on a ship or ferry.
Deactivating the interior volumetric
and anti-tilt monitoring
► Switch off the ignition and within 10 seconds
press the alarm button until its red indicator lamp
is on fixed.
►
Get out of the vehicle.
►
Immediately lock the vehicle using the remote
control or the Keyless Entry and Starting system.
Only the exterior perimeter monitoring is
activated; the button's red indicator lamp flashes
once every second.
To take effect, this deactivation must be carried out after each time the ignition is
switched off.
Reactivating the interior volumetric
and anti-tilt monitoring
► Deactivate the exterior perimeter monitoring
by unlocking the vehicle using the remote control
or the Keyless Entry and Starting system.
The indicator lamp in the button goes off.
►
Reactivate all monitoring by locking the
vehicle using the remote control or the Keyless
Entry and Starting system.
The red indicator lamp in the button once again
flashes every second.
Triggering of the alarm
This is indicated by sounding of the siren
and flashing of the direction indicators for 30
seconds.
The monitoring functions remain active until
the alarm has been triggered eleven times in
succession.
When the vehicle is unlocked using the remote
control or the Keyless Entry and Starting system,
rapid flashing of the indicator lamp in the button
informs you that the alarm was triggered during
your absence. When the ignition is switched on,
the flashing stops immediately.
Failure of the remote control
To deactivate the monitoring functions:
► Unlock the vehicle using the key in the
driver's door lock.
►
Open the door; the alarm is triggered.
Page 45 of 276

43
Access
2Before operating the sunroof or blind
control buttons, ensure that no object or
person might prevent the movement.
Be particularly aware of children when
operating the sunroof or blind.
If something is trapped when operating the
sunroof or blind, you should reverse the
movement of the sunroof or blind by pressing
the control in question.
The driver must ensure that passengers use
the sunroof and blind correctly.
Anti-pinch system
If the sunroof or blind encounters an obstacle
when closing, the movement is automatically
reversed.
The roof anti-pinch system is designed to be
effective at speeds of up to 75 mph (120
km/h).
Opening / Closing
► To open the sunroof or the blind, use the part
of the button located towards the rear.
►
T
o close the sunroof or the blind, use the part
of the button located towards the front.
Operation of buttons
► Pressing a button beyond its point of
resistance directly opens or closes the sunroof
fully
.
►
Pressing the button again stops the current
movement.
►
When holding a button (without going
beyond the point of resistance), the movement
of the sunroof or blind stops when this button is
released.
►
When the sunroof is closed: pressing once
without passing the point of resistance moves it
to a partially open position.
►
When the sunroof is partially open: pressing
once without passing the point of resistance
opens or closes it fully
.
The roof and windows, then the blind, can be closed by holding down the door
locking control. The operation stops as soon
as the locking control is released.
Closing of the blind is limited by the
position of the sunroof: the blind cannot
go further than the front of the mobile glass.
During simultaneous movements of the
sunroof and blind, the blind automatically
stops or resumes movement depending on
the position of the sunroof.
Reinitialisation
Following reconnection of the battery or in the
event of a fault or jerky movement of the sunroof
or blind, reinitialisation is required.
►
Check that nothing is interfering with the
sunroof or blind and that the seals are clean.
►
With the ignition on, fully close the sunroof
and blind.
► Press and hold the front part of button B, until
the sunroof and blind move slightly, then hold for
a further 1 second before releasing.
►
W
ait 2 seconds and then press and hold the
front part of button B. The blind and the sunroof
will open and close, one after the other. When
both are completely closed again, hold for a
further 2 seconds and release.
If there is an operating fault, restart the
whole procedure.
Page 58 of 276
56
Ease of use and comfort
► With the engine running, press this button to
activate/deactivate the function (confirmed by an
indicator lamp).
The function is activated when the outside
temperature drops below 0°C. It is deactivated
automatically when the engine is switched off.
Rear screen demist
- defrost
On/Off
► Press this button to demist/defrost the rear
screen and, depending on version, the door
mirrors (confirmed by the illumination/extinction
of the indicator lamp).
Demisting/defrosting switches off automatically
to prevent an excessive consumption of current.
Switch off the demisting/defrosting of
the rear screen and door mirrors as
soon as possible to reduce fuel consumption.
Rear screen demisting - defrosting can
only be operated when the engine is
running.
Maximum air conditioning
This function automatically adjusts the
temperature setting to the lowest possible, the
air distribution towards the central and side air
vents, the air flow to maximum and, if necessary,
activates interior air recirculation.
► Press this button to activate/deactivate
the function (confirmed by the
illumination/extinction of the indicator lamp).
Once the function is deactivated, the system
returns to the previous settings.
Switching the system off
► Press this button.
Its indicator lamp comes on and all of the other
indicator lamps for the system go off.
This action deactivates all of the functions of the
air conditioning system.
The temperature is no longer regulated. A slight
flow of air can still be felt, due to the forward
movement of the vehicle.
Front demist - defrost
Automatic visibility programme
The automatic visibility programme allows the
windscreen and side windows to be demisted or
defrosted as quickly as possible.
► Press this button to activate/deactivate the
function.
When the indicator lamp is on, the function is
activated.
The system automatically manages the air
conditioning (depending on version), air flow
and air intake, and provides optimum distribution
towards the windscreen and side windows.
The system allows the manual modification of air
flow without causing automatic deactivation of
the automatic visibility programme.
With Stop & Start, when demisting
- defrosting has been activated, STOP
mode is not available.
In wintry conditions, remove all snow or
ice on the camera on the windscreen
before moving off.
Otherwise, this can affect the function of the
equipment associated with the camera.
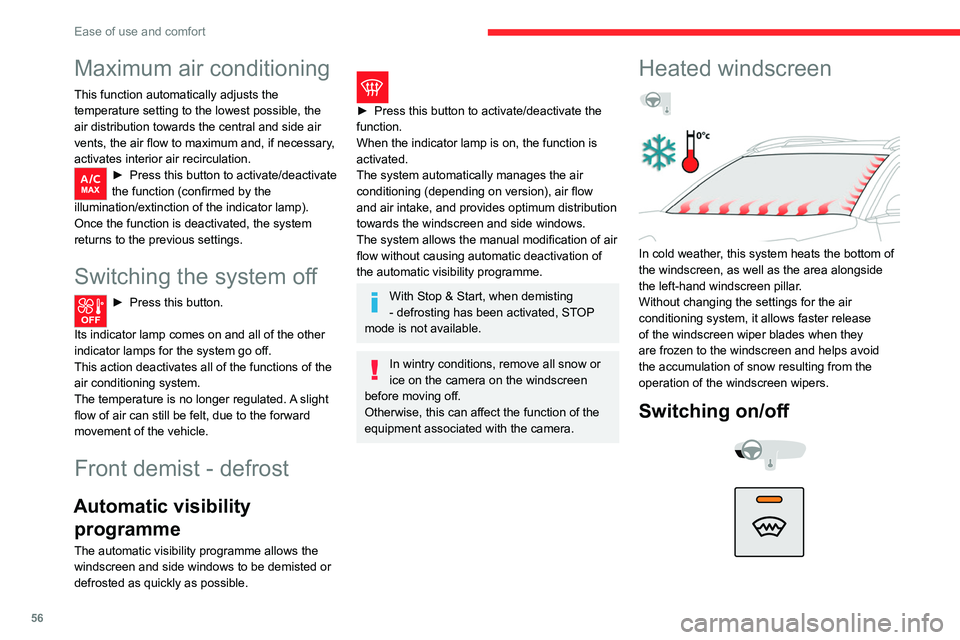
Heated windscreen
In cold weather, this system heats the bottom of
the windscreen, as well as the area alongside
the left-hand windscreen pillar.
Without changing the settings for the air
conditioning system, it allows faster release
of the windscreen wiper blades when they
are frozen to the windscreen and helps avoid
the accumulation of snow resulting from the
operation of the windscreen wipers.
Switching on/off
Page 62 of 276
60
Ease of use and comfort
Wireless smartphone
charger
It allows wireless charging of a portable device
such as a smartphone, using the magnetic
induction principle, in accordance with the Qi 1.1
standard.
The portable device to be charged must be
compatible with the Qi standard, either by design
or by using a compatible holder or shell.
The charging area is identified by the Qi symbol.
The charger works with the engine running and
with the Stop & Start system in STOP mode.
Charging is managed by the smartphone.
With the Keyless Entry and Starting system, the
charger’s operation may be briefly disrupted
when a door is opened or the ignition is switched
off.
Charging
► With the charging area clear, place a device
in its centre.
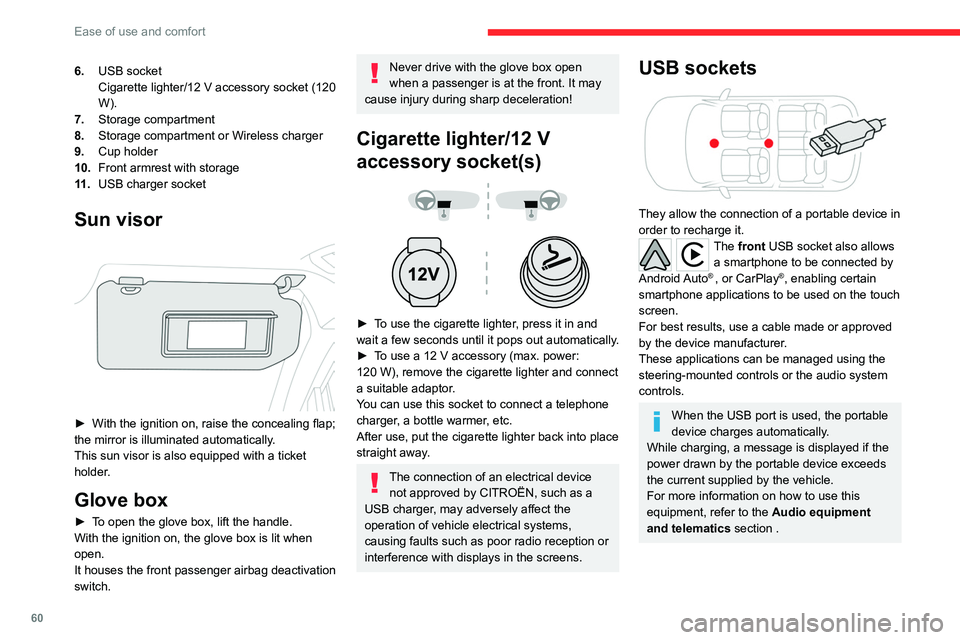
6. USB socket
Cigarette lighter/12
V accessory socket (120
W).
7. Storage compartment
8. Storage compartment or Wireless charger
9. Cup holder
10. Front armrest with storage
11 . USB charger socket
Sun visor
► With the ignition on, raise the concealing flap;
the mirror is illuminated automatically.
This sun visor is also equipped with a ticket
holder.
Glove box
► To open the glove box, lift the handle.
With the ignition on, the glove box is lit when
open.
It houses the front passenger airbag deactivation
switch.
Never drive with the glove box open
when a passenger is at the front. It may
cause injury during sharp deceleration!
Cigarette lighter/12 V
accessory socket(s)
► To use the cigarette lighter, press it in and
wait a few seconds until it pops out automatically.
►
T
o use a 12 V accessory (max. power:
120
W), remove the cigarette lighter and connect
a suitable adaptor.
You can use this socket to connect a telephone
charger, a bottle warmer, etc.
After use, put the cigarette lighter back into place
straight away.
The connection of an electrical device not approved by CITROËN, such as a
USB charger, may adversely affect the
operation of vehicle electrical systems,
causing faults such as poor radio reception or
interference with displays in the screens.
USB sockets
They allow the connection of a portable device in
order to recharge it.
The front USB socket also allows a smartphone to be connected by
Android Auto
® , or CarPlay®, enabling certain
smartphone applications to be used on the touch
screen.
For best results, use a cable made or approved
by the device manufacturer.
These applications can be managed using the
steering-mounted controls or the audio system
controls.
When the USB port is used, the portable
device charges automatically.
While charging, a message is displayed if the
power drawn by the portable device exceeds
the current supplied by the vehicle.
For more information on how to use this
equipment, refer to the Audio equipment
and telematics section .
Page 63 of 276

61
Ease of use and comfort
3Wireless smartphone
charger
It allows wireless charging of a portable device
such as a smartphone, using the magnetic
induction principle, in accordance with the Qi 1.1
standard.
The portable device to be charged must be
compatible with the Qi standard, either by design
or by using a compatible holder or shell.
The charging area is identified by the Qi symbol.
The charger works with the engine running and
with the Stop & Start system in STOP mode.
Charging is managed by the smartphone.
With the Keyless Entry and Starting system, the
charger’s operation may be briefly disrupted
when a door is opened or the ignition is switched
off.
Charging
► With the charging area clear , place a device
in its centre.
When the portable device is detected, the
charger’s indicator lamp lights up green. It
remains lit for the whole time that the battery is
being charged.
The system is not designed to charge multiple devices simultaneously.
Do not leave any metal objects (coins,
keys, vehicle remote control, etc.) in the
charging area while a device is being
charged, due to the risk of overheating or
interrupting the charging process.
Operating check
The state of the indicator lamp allows the
operation of the charger to be monitored.
State of the
indicator lamp Meaning
Off Engine switched off.
No compatible devices
detected.
Charging finished.
Fixed green Compatible device detected.
Charging.
State of the
indicator lampMeaning
Flashing orange Foreign object detected in the charging zone.
Device not well centred in
the charging zone.
Fixed orange Fault with the device's battery meter.
Device battery
temperature too high.
Charger malfunction.
If the indicator lamp is lit orange:
– remove the device, then place it back in the
centre of the charging zone.
or
–
remove the device and try again in a quarter
of an hour
.
If the problem persists, have the system checked
by a CITROËN dealer or a qualified workshop.
Front armrest
It includes a refrigerated storage space
(depending on version) and is illuminated when
the cover is opened.
Page 64 of 276
62
Ease of use and comfort
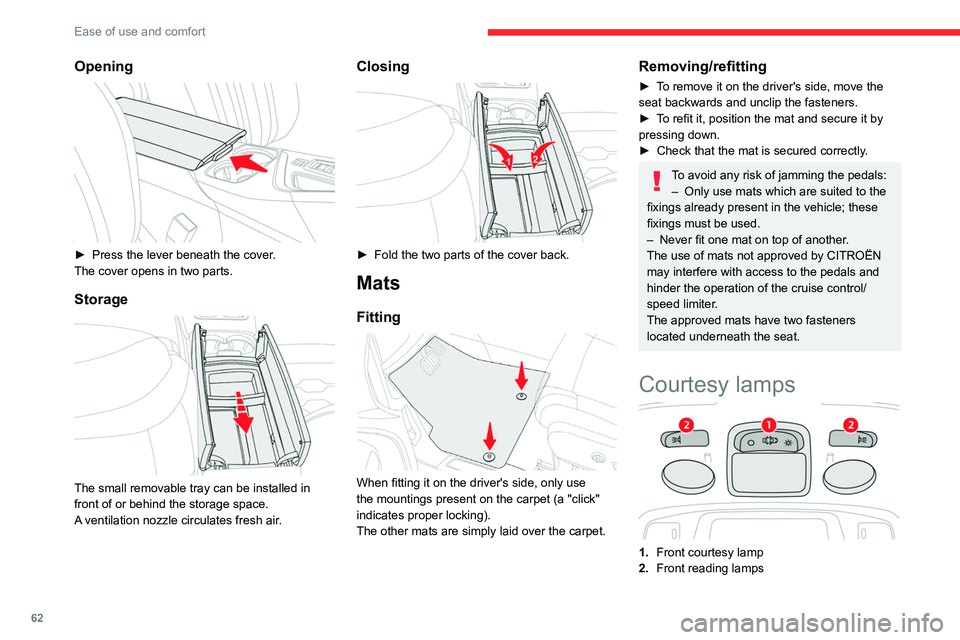
3.Rear courtesy lamp
4. Rear reading lamps
Front and rear courtesy
lamps
In this position, the courtesy lamp comes
on gradually:
– when the vehicle is unlocked.
– when the key is removed from the ignition
switch.
– when a door is opened.
– when the remote control locking button is
activated, in order to locate the vehicle.
It switches off gradually:
– when the vehicle is locked.
– when the ignition is switched on.
– 30 seconds after the last door is closed.
Permanently off.
Permanent lighting.
In "Permanent lighting" mode, the lighting time
varies according to the circumstances:
Opening
► Press the lever beneath the cover .
The cover opens in two parts.
Storage
The small removable tray can be installed in
front of or behind the storage space.
A ventilation nozzle circulates fresh air.
Closing
► Fold the two parts of the cover back.
Mats
Fitting
When fitting it on the driver's side, only use
the mountings present on the carpet (a "click"
indicates proper locking).
The other mats are simply laid over the carpet.
Removing/refitting
► To remove it on the driver's side, move the
seat backwards and unclip the fasteners.
►
T
o refit it, position the mat and secure it by
pressing down.
►
Check that the mat is secured correctly
.
To avoid any risk of jamming the pedals:– Only use mats which are suited to the
fixings already present in the vehicle; these
fixings must be used.
–
Never fit one mat on top of another
.
The use of mats not approved by CITROËN
may interfere with access to the pedals and
hinder the operation of the cruise control/
speed limiter.
The approved mats have two fasteners
located underneath the seat.
Courtesy lamps
1. Front courtesy lamp
2. Front reading lamps
Page 65 of 276

63
Ease of use and comfort
3
3.Rear courtesy lamp
4. Rear reading lamps
Front and rear courtesy
lamps
In this position, the courtesy lamp comes
on gradually:
–
when the vehicle is unlocked.
–
when the key is removed from the ignition
switch.
–
when a door is opened.
–
when the remote control locking button is
activated, in order to locate the vehicle.
It switches off gradually:
–
when the vehicle is locked.
–
when the ignition is switched on.
–
30 seconds after the last door is closed.
Permanently off.
Permanent lighting.
In "Permanent lighting" mode, the lighting time
varies according to the circumstances:
– With the ignition off, approximately 10 minutes.
– In energy saving mode, approximately 30
seconds.
–
With the engine running, unlimited.
When the front courtesy lamp is in the
"Permanent lighting" position, the rear
courtesy lamp also comes on, unless it is in
the "Permanently off" position.
To switch off the rear courtesy lamp, put it in
the "Permanently off" position.
Reading lamps
► With the ignition on, operate the
corresponding switch.
Take care not to place anything in contact with the courtesy lamps.
Interior ambient lighting
The dimmed passenger compartment lighting
improves visibility in the vehicle when the light
is poor.
At night, the ambient lighting comes on/goes off
automatically when the sidelamps are switched
on/off.
Switching on/off, as well as adjusting the
brightness and choosing a colour are
carried out using the Driving
/ Vehicle menu of
the touch screen.
Boot fittings
1. Load space cover
2. 12
V accessory socket (120 W)
3. Boot lamp
4. Removable rear seat crossmember (to
increase the volume of the boot).
5. Stowing rings
6. Adjustable boot floor (2-position)
Folding boot carpet (Rechargeable hybrid)
7. Storage wells/Tool box under the floor
The stowing rings are designed to secure
luggage using different types of retaining
nets.
For more information, contact a CITROËN
dealer.
Load space cover
It is in two parts:
– a fixed part with an open storage space,