tow CITROEN C5 AIRCROSS 2022 Handbook (in English)
[x] Cancel search | Manufacturer: CITROEN, Model Year: 2022, Model line: C5 AIRCROSS, Model: CITROEN C5 AIRCROSS 2022Pages: 276, PDF Size: 7.92 MB
Page 5 of 276
3
Contents
Memorising speeds 125
Highway Driver Assist 126
Adaptive Cruise Control 126
Active Lane Keeping Assist 130
Active Safety Brake with Collision Risk Alert
and Intelligent emergency braking assistance
133
Distraction detection 136
Active Lane Departure Warning System 137
Blind Spot Monitoring 140
Active Blind Spot Monitoring System 141
Parking sensors 141
Top Rear Vision - Top 360 Vision 143
Park Assist 147
7Practical informationCompatibility of fuels 152
Refuelling 152
Misfuel prevention (Diesel) 153
Rechargeable hybrid system 154
Charging the traction battery
(Rechargeable hybrid engine)
160
Towing device 162
Energy economy mode 165
Snow chains 166
Very cold climate screen 166
Roof bars 167
Bonnet 168
Engine compartment 169
Checking levels 169
Checks 171
AdBlue® (BlueHDi) 173
Free-wheeling 175
Advice on care and maintenance 175
8In the event of a breakdownWarning triangle 178
Running out of fuel (Diesel) 178
Tool kit 178
Temporary puncture repair kit 180
Spare wheel 182
Changing a bulb 185
Changing a fuse 189
12
V battery 194
Accessory battery (Rechargeable hybrid) 197
Towing the vehicle 199
9Technical dataEngine technical data and towed loads 202
Petrol engines 203
Diesel engines 204
Rechargeable hybrid engine 205
Dimensions 206
Identification markings 206
10CITROËN Connect RadioFirst steps 207
Steering mounted controls 208
Menus 209
Applications 210
Radio 210
DAB (Digital Audio Broadcasting) radio 212
Media 212
Telephone 214
Settings 217
Frequently asked questions 218
11CITROËN Connect NavFirst steps 220
Steering mounted controls 221
Menus 221
Voice commands 223
Navigation 226
Connected navigation 229
Applications 231
Radio 234
DAB (Digital Audio Broadcasting) radio 235
Media 235
Telephone 237
Settings 239
Frequently asked questions 241
■
Alphabetical index
bit.ly/helpPSA
Access to additional videos
Page 17 of 276
15
Instruments
1If the engine does not start, switch the ignition off
and then on, wait until the indicator lamp goes off
again, then start the engine.
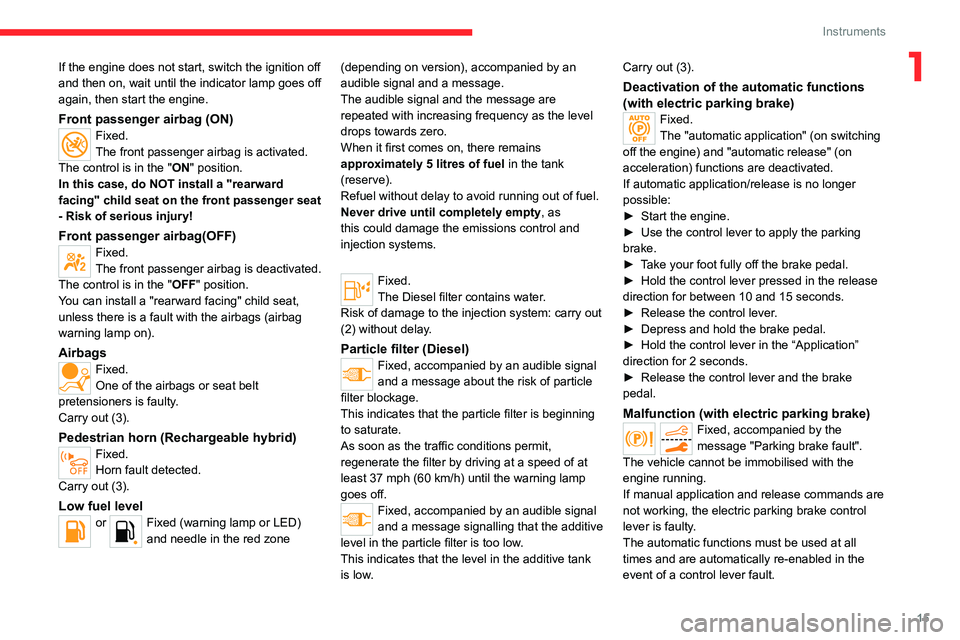
Front passenger airbag (ON)Fixed.
The front passenger airbag is activated.
The control is in the "ON" position.
In this case, do NOT install a "rearward
facing" child seat on the front passenger seat
- Risk of serious injury!
Front passenger airbag(OFF)Fixed.
The front passenger airbag is deactivated.
The control is in the "OFF" position.
You can install a "rearward facing" child seat,
unless there is a fault with the airbags (airbag
warning lamp on).
AirbagsFixed.
One of the airbags or seat belt
pretensioners is faulty.
Carry out (3).
Pedestrian horn (Rechargeable hybrid)Fixed.
Horn fault detected.
Carry out (3).
Low fuel levelor Fixed (warning lamp or LED)
and needle in the red zone (depending on version), accompanied by an
audible signal and a message.
The audible signal and the message are
repeated with increasing frequency as the level
drops towards zero.
When it first comes on, there remains
approximately 5 litres of fuel in the tank
(reserve).
Refuel without delay to avoid running out of fuel.
Never drive until completely empty, as
this could damage the emissions control and
injection systems.
Fixed.
The Diesel filter contains water.
Risk of damage to the injection system: carry out
(2) without delay.
Particle filter (Diesel)Fixed, accompanied by an audible signal
and a message about the risk of particle
filter blockage.
This indicates that the particle filter is beginning
to saturate.
As soon as the traffic conditions permit,
regenerate the filter by driving at a speed of at
least 37 mph (60 km/h) until the warning lamp
goes off.
Fixed, accompanied by an audible signal
and a message signalling that the additive
level in the particle filter is too low.
This indicates that the level in the additive tank
is low. Carry out (3).
Deactivation of the automatic functions
(with electric parking brake)
Fixed.
The "automatic application" (on switching
off the engine) and "automatic release" (on
acceleration) functions are deactivated.
If automatic application/release is no longer
possible:
►
Start the engine.
►
Use the control lever to apply the parking
brake.
►
T
ake your foot fully off the brake pedal.
►
Hold the control lever pressed in the release
direction for between 10 and 15 seconds.
►
Release the control lever
.
►
Depress and hold the brake pedal.
►
Hold the control lever in the “Application”
direction for 2
seconds.
►
Release the control lever and the brake
pedal.
Malfunction (with electric parking brake)
Fixed, accompanied by the
message "Parking brake fault".
The vehicle cannot be immobilised with the
engine running.
If manual application and release commands are
not working, the electric parking brake control
lever is faulty.
The automatic functions must be used at all
times and are automatically re-enabled in the
event of a control lever fault.
Page 30 of 276
28
Access
illumination of the direction indicators for a
few seconds.
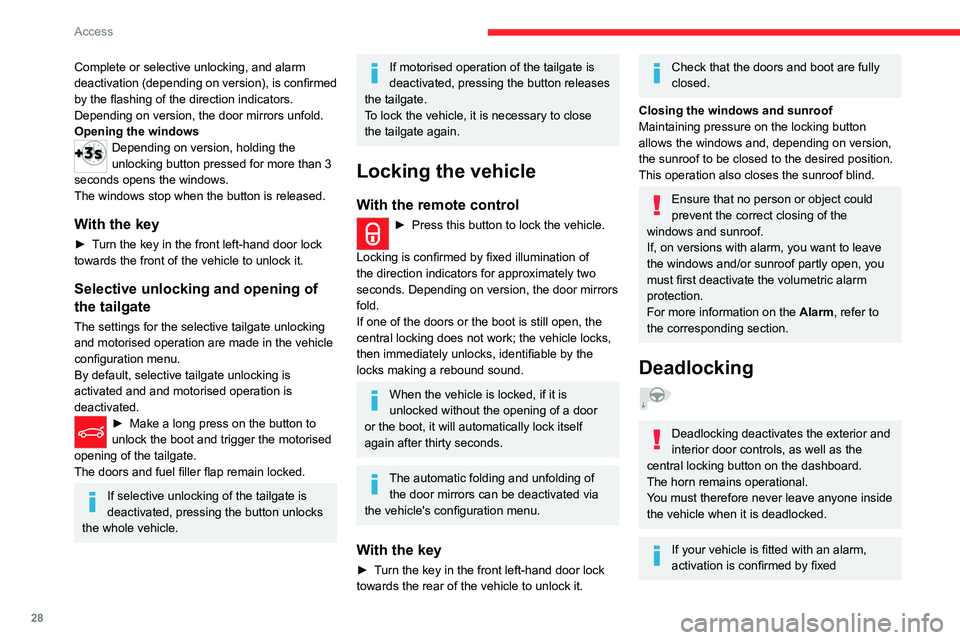
With the remote control
► Within 5 seconds of locking the
vehicle, press the button again to
deadlock it.
With the key
► Within 5 seconds of locking the vehicle, turn
the key to the rear again to deadlock it.
Locating your vehicle
This function allows you to identify your vehicle
from a distance, particularly in poor light. Your
vehicle must be locked.
► Press this button. The courtesy lamps
will come on and the direction indicators
will flash for a few seconds.
Remote lighting of the
lamps
Availability of this function depends on version.► Press this button. The sidelamps,
dipped beam headlamps, number plate
lamps and door mirror spotlamps come on for 30
seconds.
Pressing again before the end of the timed
period switches off the lamps immediately.
Complete or selective unlocking, and alarm
deactivation (depending on version), is confirmed
by the flashing of the direction indicators.
Depending on version, the door mirrors unfold.
Opening the windows
Depending on version, holding the
unlocking button pressed for more than 3
seconds opens the windows.
The windows stop when the button is released.
With the key
► Turn the key in the front left-hand door lock
towards the front of the vehicle to unlock it.
Selective unlocking and opening of
the tailgate
The settings for the selective tailgate unlocking
and motorised operation are made in the vehicle
configuration menu.
By default, selective tailgate unlocking is
activated and and motorised operation is
deactivated.
► Make a long press on the button to
unlock the boot and trigger the motorised
opening of the tailgate.
The doors and fuel filler flap remain locked.
If selective unlocking of the tailgate is
deactivated, pressing the button unlocks
the whole vehicle.
If motorised operation of the tailgate is
deactivated, pressing the button releases
the tailgate.
To lock the vehicle, it is necessary to close
the tailgate again.
Locking the vehicle
With the remote control
► Press this button to lock the vehicle.
Locking is confirmed by fixed illumination of
the direction indicators for approximately two
seconds. Depending on version, the door mirrors
fold.
If one of the doors or the boot is still open, the
central locking does not work; the vehicle locks,
then immediately unlocks, identifiable by the
locks making a rebound sound.
When the vehicle is locked, if it is
unlocked without the opening of a door
or the boot, it will automatically lock itself
again after thirty seconds.
The automatic folding and unfolding of the door mirrors can be deactivated via
the vehicle's configuration menu.
With the key
► Turn the key in the front left-hand door lock
towards the rear of the vehicle to unlock it.
Check that the doors and boot are fully
closed.
Closing the windows and sunroof
Maintaining pressure on the locking button
allows the windows and, depending on version,
the sunroof to be closed to the desired position.
This operation also closes the sunroof blind.
Ensure that no person or object could
prevent the correct closing of the
windows and sunroof.
If, on versions with alarm, you want to leave
the windows and/or sunroof partly open, you
must first deactivate the volumetric alarm
protection.
For more information on the Alarm, refer to
the corresponding section.
Deadlocking
Deadlocking deactivates the exterior and
interior door controls, as well as the
central locking button on the dashboard.
The horn remains operational.
You must therefore never leave anyone inside
the vehicle when it is deadlocked.
If your vehicle is fitted with an alarm,
activation is confirmed by fixed
Page 34 of 276
32
Access
Central locking not
functioning
Use these procedures in the following cases:
– Central locking malfunction.
– Battery disconnected or discharged.
In the event of a malfunction of the
central locking system, the battery must
be disconnected to ensure that the vehicle is
locked fully.
Front left-hand door
► Insert the key into the lock and turn it towards
the rear of the vehicle to lock the door, or
towards the front to unlock it.
Passenger doors
Unlocking
► Pull the interior door opening control.
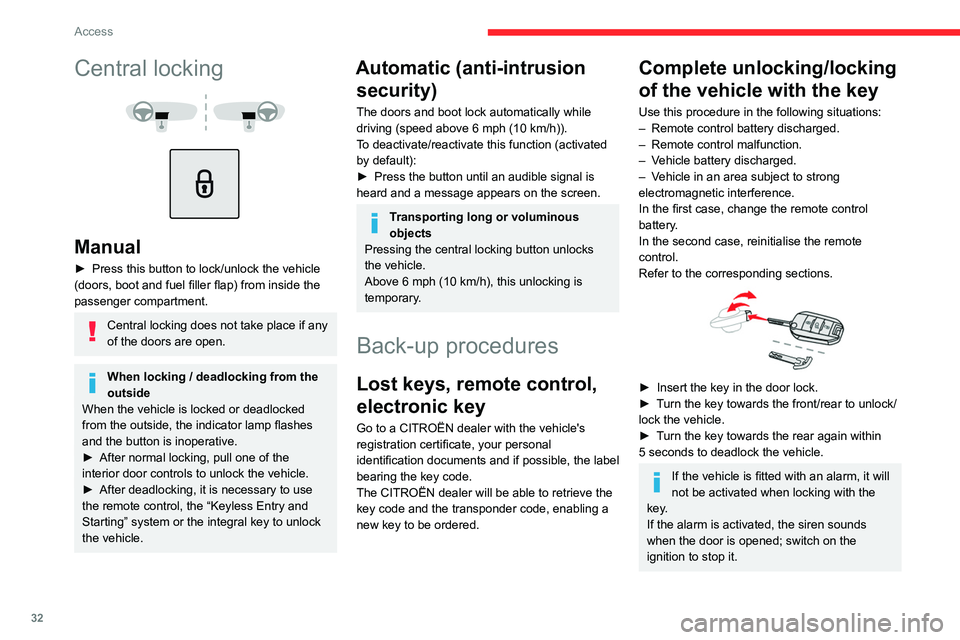
Central locking
Manual
► Press this button to lock/unlock the vehicle
(doors, boot and fuel filler flap) from inside the
passenger compartment.
Central locking does not take place if any
of the doors are open.
When locking / deadlocking from the
outside
When the vehicle is locked or deadlocked
from the outside, the indicator lamp flashes
and the button is inoperative.
►
After normal locking, pull one of the
interior door controls to unlock the vehicle.
►
After deadlocking, it is necessary to use
the remote control, the “Keyless Entry and
Starting” system or the integral key to unlock
the vehicle.
Automatic (anti-intrusion security)
The doors and boot lock automatically while
driving (speed above 6 mph (10
km/h)).
To deactivate/reactivate this function (activated
by default):
►
Press the button until an audible signal is
heard and a message appears on the screen.
Transporting long or voluminous
objects
Pressing the central locking button unlocks
the vehicle.
Above 6 mph (10 km/h), this unlocking is
temporary.
Back-up procedures
Lost keys, remote control,
electronic key
Go to a CITROËN dealer with the vehicle's
registration certificate, your personal
identification documents and if possible, the label
bearing the key code.
The CITROËN dealer will be able to retrieve the
key code and the transponder code, enabling a
new key to be ordered.
Complete unlocking/locking
of the vehicle with the key
Use this procedure in the following situations:
– Remote control battery discharged.
–
Remote control malfunction.
–
V
ehicle battery discharged.
–
V
ehicle in an area subject to strong
electromagnetic interference.
In the first case, change the remote control
battery.
In the second case, reinitialise
the remote
control.
Refer to the corresponding sections.
► Insert the key in the door lock.
► T urn the key towards the front/rear to unlock/
lock the vehicle.
►
T
urn the key towards the rear again within
5
seconds to deadlock the vehicle.
If the vehicle is fitted with an alarm, it will
not be activated when locking with the
key.
If the alarm is activated, the siren sounds
when the door is opened; switch on the
ignition to stop it.
Page 35 of 276

33
Access
2Central locking not
functioning
Use these procedures in the following cases:
– Central locking malfunction.
–
Battery disconnected or discharged.
In the event of a malfunction of the
central locking system, the battery must
be disconnected to ensure that the vehicle is
locked fully.
Front left-hand door
► Insert the key into the lock and turn it towards
the rear of the vehicle to lock the door , or
towards the front to unlock it.
Passenger doors
Unlocking
► Pull the interior door opening control.
Locking
► Open the doors.
► For the rear doors, check that the child lock
is not on.
Refer to the corresponding section.
►
Remove the black cap
, located on the edge
of the door, using the key.
►
Insert the key into the socket without forcing
it, then turn the latch towards the inside of the
door
.
►
Remove the key and refit the black cap.
►
Close the doors and check from the outside
that the vehicle is locked.
Changing the battery
A message is displayed on the instrument panel
when the battery needs changing.
Battery type: CR2032/3 volts.
Without
Keyless Entry and Starting
With Keyless Entry and Starting
► Unclip the cover by inserting a small
screwdriver in the slot and lift the cover .
►
Remove the flat battery from its housing.
►
Put the new battery in place, respecting the
polarity
. Start by inserting it into the contacts
Page 38 of 276
36
Access
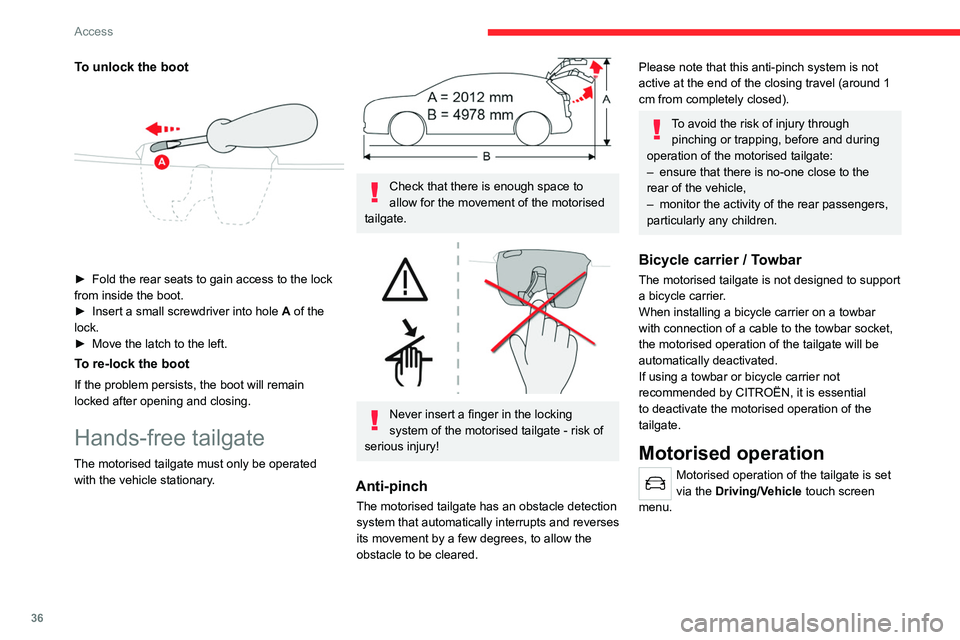
There are several ways of operating the tailgate:
A.Using the Keyless Entry and Starting system
electronic key.
B. Using the exterior tailgate control.
C. Using the interior tailgate control.
D. Using the control on the dashboard*.
E. Using the “Hands-Free Tailgate Access”
function below the rear bumper.
Opening / Closing
► Press and hold the central button A of the
electronic key.
or
► Briefly press the exterior tailgate control B,
with the electronic key on your person.
* Depending on version.
To unlock the boot
► Fold the rear seats to gain access to the lock
from inside the boot.
►
Insert a small screwdriver into hole A
of the
lock.
►
Move the latch to the left.
To re-lock the boot
If the problem persists, the boot will remain
locked after opening and closing.
Hands-free tailgate
The motorised tailgate must only be operated with the vehicle stationary.
Check that there is enough space to
allow for the movement of the motorised
tailgate.
Never insert a finger in the locking
system of the motorised tailgate - risk of
serious injury!
Anti-pinch
The motorised tailgate has an obstacle detection
system that automatically interrupts and reverses
its movement by a few degrees, to allow the
obstacle to be cleared.
Please note that this anti-pinch system is not
active at the end of the closing travel (around 1
cm from completely closed).
To avoid the risk of injury through pinching or trapping, before and during
operation of the motorised tailgate:
–
ensure that there is no-one close to the
rear of the vehicle,
–
monitor the activity of the rear passengers,
particularly any children.
Bicycle carrier / Towbar
The motorised tailgate is not designed to support
a bicycle carrier.
When installing a bicycle carrier on a towbar
with connection of a cable to the towbar socket,
the motorised operation of the tailgate will be
automatically deactivated.
If using a towbar or bicycle carrier not
recommended by CITROËN, it is essential
to deactivate the motorised operation of the
tailgate.
Motorised operation
Motorised operation of the tailgate is set
via the Driving/Vehicle touch screen
menu.
Page 40 of 276
38
Access
► press button C or the exterior control B for
more than 3 seconds (deletion is confirmed by a
long audible signal).
Manual operation
The tailgate can be manoeuvred by hand, even
with motorised operation activated.
The tailgate must be stationary.
When opening and closing the motorised tailgate
manually, there is no assistance from gas struts.
Resistance to opening and closing is therefore
entirely normal.
Repeatedly opening and closing the
motorised tailgate can cause overheating
of its electric motor, after which opening and
closing will not be possible.
Allow at least 10 minutes for the electric
motor to cool down before operating the
tailgate again.
If you are unable to wait, operate it manually.
Manual closing of the
motorised tailgate in case of
failure
This operation is only necessary in the case of
failure of the tailgate motor .
If the failure originates from the battery, it is
recommended to recharge it or change it with the
tailgate closed.
In this situation, a significant force may be
needed to close the tailgate.
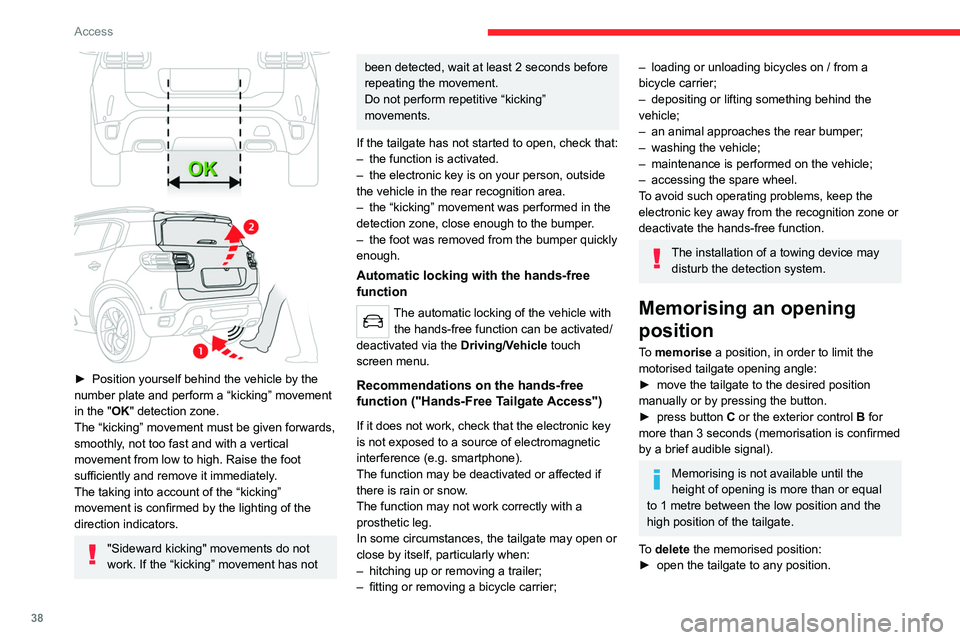
► Position yourself behind the vehicle by the
number plate and perform a “kicking” movement
in the
"OK" detection zone.
The “kicking” movement must be given forwards,
smoothly, not too fast and with a vertical
movement from low to high. Raise the foot
sufficiently and remove it immediately.
The taking into account of the “kicking”
movement is confirmed by the lighting of the
direction indicators.
"Sideward kicking" movements do not
work. If the “kicking” movement has not
been detected, wait at least 2 seconds before
repeating the movement.
Do not perform repetitive “kicking”
movements.
If the tailgate has not started to open, check that:
–
the function is activated.
–
the electronic key is on your person, outside
the vehicle in the rear recognition area.
–
the “kicking” movement was performed in the
detection zone, close enough to the bumper
.
–
the foot was removed from the bumper quickly
enough.
Automatic locking with the hands-free
function
The automatic locking of the vehicle with
the hands-free function can be activated/
deactivated via the Driving/V
ehicle touch
screen menu.
Recommendations on the hands-free
function ("Hands-Free Tailgate Access")
If it does not work, check that the electronic key
is not exposed to a source of electromagnetic
interference (e.g. smartphone).
The function may be deactivated or affected if
there is rain or snow.
The function may not work correctly with a
prosthetic leg.
In some circumstances, the tailgate may open or
close by itself, particularly when:
–
hitching up or removing a trailer;
–
fitting or removing a bicycle carrier;
– loading or unloading bicycles on / from a
bicycle carrier;
–
depositing or lifting something behind the
vehicle;
–
an animal approaches the rear bumper;
–
washing the vehicle;
–
maintenance is performed on the vehicle;
–
accessing the spare wheel.
T
o avoid such operating problems, keep the
electronic key away from the recognition zone or
deactivate the hands-free function.
The installation of a towing device may disturb the detection system.
Memorising an opening
position
To memorise a position, in order to limit the
motorised tailgate opening angle:
►
move the tailgate to the desired position
manually or by pressing the button.
►
press button
C or the exterior control B for
more than 3 seconds (memorisation is confirmed
by a brief audible signal).
Memorising is not available until the
height of opening is more than or equal
to 1 metre between the low position and the
high position of the tailgate.
To delete the memorised position:
►
open the tailgate to any position.
Page 41 of 276

39
Access
2► press button C or the exterior control B for
more than 3 seconds (deletion is confirmed by a
long audible signal).
Manual operation
The tailgate can be manoeuvred by hand, even
with motorised operation activated.
The tailgate must be stationary.
When opening and closing the motorised tailgate
manually, there is no assistance from gas struts.
Resistance to opening and closing is therefore
entirely normal.
Repeatedly opening and closing the
motorised tailgate can cause overheating
of its electric motor, after which opening and
closing will not be possible.
Allow at least 10 minutes for the electric
motor to cool down before operating the
tailgate again.
If you are unable to wait, operate it manually.
Manual closing of the
motorised tailgate in case of
failure
This operation is only necessary in the case of
failure of the tailgate motor .
If the failure originates from the battery, it is
recommended to recharge it or change it with the
tailgate closed.
In this situation, a significant force may be
needed to close the tailgate.
► Close it gently without slamming, as slowly as
possible, by pushing at the centre of the tailgate.
Do not lower the tailgate by pushing at
one of its sides - risk of damage!
Precautions in use
To avoid unintentionally opening the tailgate while operating the towing
device:
–
Deactivate the “Hands-Free
Tailgate
Access” function in advance in the vehicle
configuration menu.
–
Or remove the electronic key from the
recognition zone, with the tailgate closed.
In wintry conditions
To avoid any operating problems, remove
the snow or wait until the ice melts before
requesting motorised opening of the tailgate.
When washing
When washing the vehicle in an
automatic car wash, do not forget to lock
the vehicle to prevent any risk of unwanted
opening.
Alarm
(Depending on version)
System which protects and provides a deterrent
against theft and break-ins.
Exterior perimeter monitoring
The system checks for opening of the vehicle.
The alarm is triggered if anyone tries to open a
door, the boot or the bonnet, for example.
Interior volumetric monitoring
The system checks for any variation in volume in
the passenger compartment.
The alarm is triggered if anyone breaks a
window, enters the passenger compartment or
moves inside the vehicle.
Anti-tilt monitoring
The system checks for any change in the attitude
of the vehicle.
The alarm goes off if the vehicle is lifted or
moved.
When the vehicle is parked, the alarm
will not be triggered if the vehicle is
knocked.
Page 45 of 276

43
Access
2Before operating the sunroof or blind
control buttons, ensure that no object or
person might prevent the movement.
Be particularly aware of children when
operating the sunroof or blind.
If something is trapped when operating the
sunroof or blind, you should reverse the
movement of the sunroof or blind by pressing
the control in question.
The driver must ensure that passengers use
the sunroof and blind correctly.
Anti-pinch system
If the sunroof or blind encounters an obstacle
when closing, the movement is automatically
reversed.
The roof anti-pinch system is designed to be
effective at speeds of up to 75 mph (120
km/h).
Opening / Closing
► To open the sunroof or the blind, use the part
of the button located towards the rear.
►
T
o close the sunroof or the blind, use the part
of the button located towards the front.
Operation of buttons
► Pressing a button beyond its point of
resistance directly opens or closes the sunroof
fully
.
►
Pressing the button again stops the current
movement.
►
When holding a button (without going
beyond the point of resistance), the movement
of the sunroof or blind stops when this button is
released.
►
When the sunroof is closed: pressing once
without passing the point of resistance moves it
to a partially open position.
►
When the sunroof is partially open: pressing
once without passing the point of resistance
opens or closes it fully
.
The roof and windows, then the blind, can be closed by holding down the door
locking control. The operation stops as soon
as the locking control is released.
Closing of the blind is limited by the
position of the sunroof: the blind cannot
go further than the front of the mobile glass.
During simultaneous movements of the
sunroof and blind, the blind automatically
stops or resumes movement depending on
the position of the sunroof.
Reinitialisation
Following reconnection of the battery or in the
event of a fault or jerky movement of the sunroof
or blind, reinitialisation is required.
►
Check that nothing is interfering with the
sunroof or blind and that the seals are clean.
►
With the ignition on, fully close the sunroof
and blind.
► Press and hold the front part of button B, until
the sunroof and blind move slightly, then hold for
a further 1 second before releasing.
►
W
ait 2 seconds and then press and hold the
front part of button B. The blind and the sunroof
will open and close, one after the other. When
both are completely closed again, hold for a
further 2 seconds and release.
If there is an operating fault, restart the
whole procedure.
Page 46 of 276

44
Ease of use and comfort
Correct driving position
Before taking to the road and to make the most
of the ergonomic layout of the instruments and
controls, carry out these adjustments in the
following order:
–
the height of the head restraint,
–
the seat backrest angle,
–
the seat cushion height,
–
the longitudinal position of the seat,
–
the height and reach of the steering wheel,
–
the rear view mirror and door mirrors.
Once these adjustments have been
made, check the instrument panel can be
viewed correctly from your driving position.
Front seats
Caution when moving the
front seats
For safety reasons, only adjust seats
when the vehicle is stationary.
Before moving the seat backwards,
ensure that there is no person or object
that might prevent the full travel of the seat.
There is a risk of trapping or pinching
passengers if present in the rear seats or of
jamming the seat if large objects are placed
on the floor behind the seat.
Front head restraints
Adjusting the height
The adjustment is correct when the upper edge of the head restraint is level
with the top of the head.
‘Two-way’ adjustment model
Upwards:
► pull the head restraint up to the desired
position; the head restraint can be felt to click
into position.
Downwards:
►
press lug
A and push the head restraint down
to the desired position.
‘Four-way’ adjustment model
Upwards:
► pull the head restraint up to the desired
position; the head restraint can be felt to click
into position.
Downwards:
► press and hold button B and push the head
restraint down to the desired position.
Adjusting the angle
“Four-way” adjustment model
► press and hold button B and push the lower
part of the head restraint forwards or backwards.
Removing a head restraint
► Pull the head restraint up as far as it will go.
► Press the lug(s) A (depending on version)
to unlock the head restraint and remove it
completely,
► Stow the head restraint securely.