phone CITROEN C5 AIRCROSS 2022 Handbook (in English)
[x] Cancel search | Manufacturer: CITROEN, Model Year: 2022, Model line: C5 AIRCROSS, Model: CITROEN C5 AIRCROSS 2022Pages: 276, PDF Size: 7.92 MB
Page 63 of 276

61
Ease of use and comfort
3Wireless smartphone
charger
It allows wireless charging of a portable device
such as a smartphone, using the magnetic
induction principle, in accordance with the Qi 1.1
standard.
The portable device to be charged must be
compatible with the Qi standard, either by design
or by using a compatible holder or shell.
The charging area is identified by the Qi symbol.
The charger works with the engine running and
with the Stop & Start system in STOP mode.
Charging is managed by the smartphone.
With the Keyless Entry and Starting system, the
charger’s operation may be briefly disrupted
when a door is opened or the ignition is switched
off.
Charging
► With the charging area clear , place a device
in its centre.
When the portable device is detected, the
charger’s indicator lamp lights up green. It
remains lit for the whole time that the battery is
being charged.
The system is not designed to charge multiple devices simultaneously.
Do not leave any metal objects (coins,
keys, vehicle remote control, etc.) in the
charging area while a device is being
charged, due to the risk of overheating or
interrupting the charging process.
Operating check
The state of the indicator lamp allows the
operation of the charger to be monitored.
State of the
indicator lamp Meaning
Off Engine switched off.
No compatible devices
detected.
Charging finished.
Fixed green Compatible device detected.
Charging.
State of the
indicator lampMeaning
Flashing orange Foreign object detected in the charging zone.
Device not well centred in
the charging zone.
Fixed orange Fault with the device's battery meter.
Device battery
temperature too high.
Charger malfunction.
If the indicator lamp is lit orange:
– remove the device, then place it back in the
centre of the charging zone.
or
–
remove the device and try again in a quarter
of an hour
.
If the problem persists, have the system checked
by a CITROËN dealer or a qualified workshop.
Front armrest
It includes a refrigerated storage space
(depending on version) and is illuminated when
the cover is opened.
Page 118 of 276
11 6
Driving
► Pair the smartphone with the camera
following the instructions given by the
application.
Pairing is necessary at the first connection. After
this it will be automatic.
The default pairing code is: “ConnectedCAM”.
On/Off
► Press and hold this button to switch
the camera on/off (confirmed by the
indicator lamp coming on/going off).
When the camera is switched on, video
recording is automatic and permanent.
The status of the function is stored when the
ignition is switched off.
Managing photos and videos
► Press this button briefly to take a
photo.
An audible signal confirms that the request has
been acknowledged.
► Press and hold this button to record a
video.
A micro USB socket also allows the data from
the camera to be saved onto other media such
as computers, tablets, etc.
Thanks to the CITROËN ConnectedCAM®
application, you can then automatically and
immediately share your photos and videos on
social networks or by email.
An audible signal confirms that the request has
been acknowledged.
Under-inflation alert
This is signalled by the fixed illumination of this warning lamp, accompanied by an
audible signal and the display of a message.
►
Reduce speed immediately
, avoid excessive
steering movements and avoid sudden braking.
►
Stop the vehicle as soon as it is safe to do
so.
The loss of pressure detected does not always cause visible bulging of the tyre.
Do not rely on just a visual check.
►
Using a compressor
, such as the one in
the temporary puncture repair kit, check the
pressures of the four tyres when cold.
►
If it is not possible to make this check
immediately
, drive carefully at reduced speed.
►
In the event of a puncture, use the
temporary puncture repair kit or the spare wheel
(depending on equipment).
The alert is kept active until the system is reinitialised.
Reinitialisation
Reinitialise the system after adjusting one or
more tyre pressures and after changing one or
more wheels.
Before reinitialising the system, make
sure that the pressures of the four tyres
are correct for the conditions of use of the
vehicle and conform to the values written on
the tyre pressure label.
Check the pressures of the four tyres before
performing the reinitialisation.
The system does not advise if a pressure is
incorrect at the time of reinitialisation.
With the vehicle stationary, the system is
reinitialised via the Driving/Vehicle menu
of the touch screen.
►
In this menu, select the "
Driving functions"
tab.
►
In the page, select the "
Under-inflation
initialisation " function.
►
Select "
Ye s" to confirm.
The reinitialisation is confirmed by the display of
a message and an audible signal.
Malfunction
These warning lamps come on in the event of a malfunction.
A message appears, accompanied by an audible
signal.
In this case, the tyre under-inflation monitoring
function is no longer performed.
Have the system checked by a CITROËN dealer
or a qualified workshop.
CITROËN
ConnectedCAM®
(Depending on country of sale)
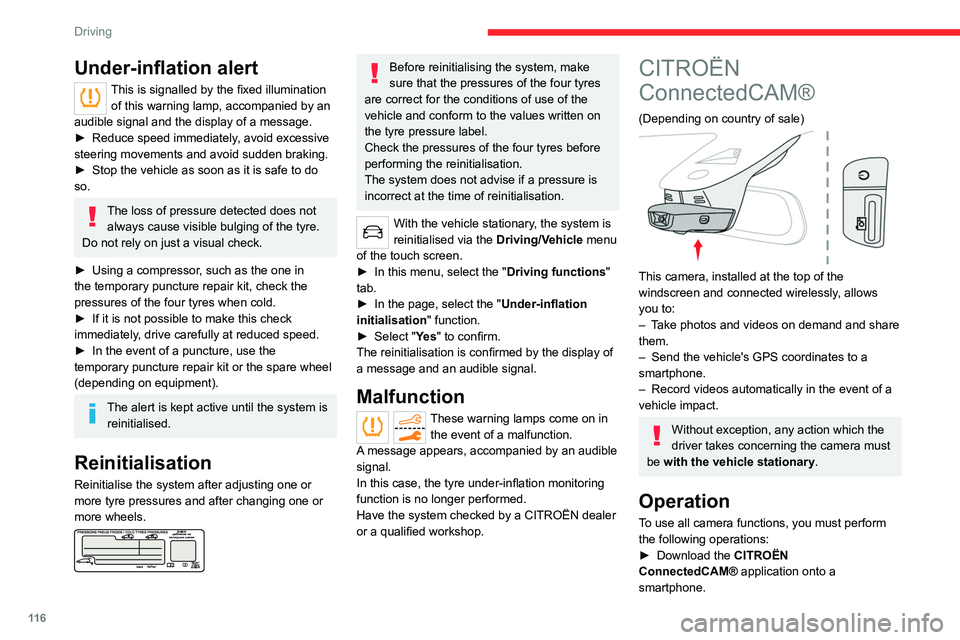
This camera, installed at the top of the
windscreen and connected wirelessly, allows
you to:
–
T
ake photos and videos on demand and share
them.
–
Send the vehicle's GPS coordinates to a
smartphone.
–
Record videos automatically in the event of a
vehicle impact.
Without exception, any action which the
driver takes concerning the camera must
be with the vehicle stationary.
Operation
To use all camera functions, you must perform
the following operations:
►
Download the CITROËN
ConnectedCAM®
application onto a
smartphone.
Page 119 of 276

11 7
Driving
6► Pair the smartphone with the camera
following the instructions given by the
application.
Pairing is necessary at the first connection.
After
this it will be automatic.
The default pairing code is: “ConnectedCAM”.
On/Off
► Press and hold this button to switch
the camera on/off (confirmed by the
indicator lamp coming on/going off).
When the camera is switched on, video
recording is automatic and permanent.
The status of the function is stored when the
ignition is switched off.
Managing photos and videos
► Press this button briefly to take a
photo.
An audible signal confirms that the request has
been acknowledged.
► Press and hold this button to record a
video.
A
micro USB socket also allows the data from
the camera to be saved onto other media such
as computers, tablets, etc.
Thanks to the CITROËN ConnectedCAM®
application, you can then automatically and
immediately share your photos and videos on
social networks or by email.
An audible signal confirms that the request has
been acknowledged.
Resetting the system
Pressing and holding these two buttons
simultaneously resets the system.
This action erases all data recorded in the
camera and reinitialises the camera’s default
pairing code.
For safety reasons, the driver must not
use the CITROËN ConnectedCAM®
application from a smartphone while driving.
He or she must perform any action requiring
sustained attention when the vehicle is
stationary.
Malfunction
When a system fault occurs, the indicator
lamp in the button flashes.
Have the system checked by a CITROËN dealer
or a qualified workshop.
Driving and manoeuvring
aids - General
recommendations
Driving and manoeuvring aids cannot, in
any circumstances, replace the need for
vigilance on the part of the driver.
The driver must comply with the Highway
Code, must remain in control of the vehicle in
all circumstances and must be able to retake
control of it at all times. The driver must adapt
the speed to climactic conditions, traffic and
the state of the road.
It is the driver's responsibility to constantly
check the traffic, to assess the relative
distances and speeds of other vehicles and to
anticipate their movements before indicating
and changing lane.
The systems cannot exceed the limits of the
laws of physics.
Driving aids
You should hold the steering wheel
with both hands, always use the interior and
exterior rear view mirrors, always keep the
feet close to the pedals and take a break
every two hours.
Manoeuvring aids
The driver must always check the
surroundings of the vehicle before and during
the whole manoeuvre, in particular using the
mirrors.
Radar
The operation of the radar as well as the
associated functions may be impaired through
the accumulation of dirt (mud, frost, etc.), in
certain difficult weather conditions (very heavy
rain, snow) or if the bumper is damaged.
Page 163 of 276
161
Practical information
7or electrocution in the event of contact with or
immersion in water!
Charging procedure
Connection
► Before charging, check that the gear selector
is in mode P and the ignition is off, otherwise
charging is impossible.
►
Open the charging flap by pressing the top
right push-button, and check that there are
no foreign bodies on the vehicle's charging
connector
.
The light guides in the flap come on white.
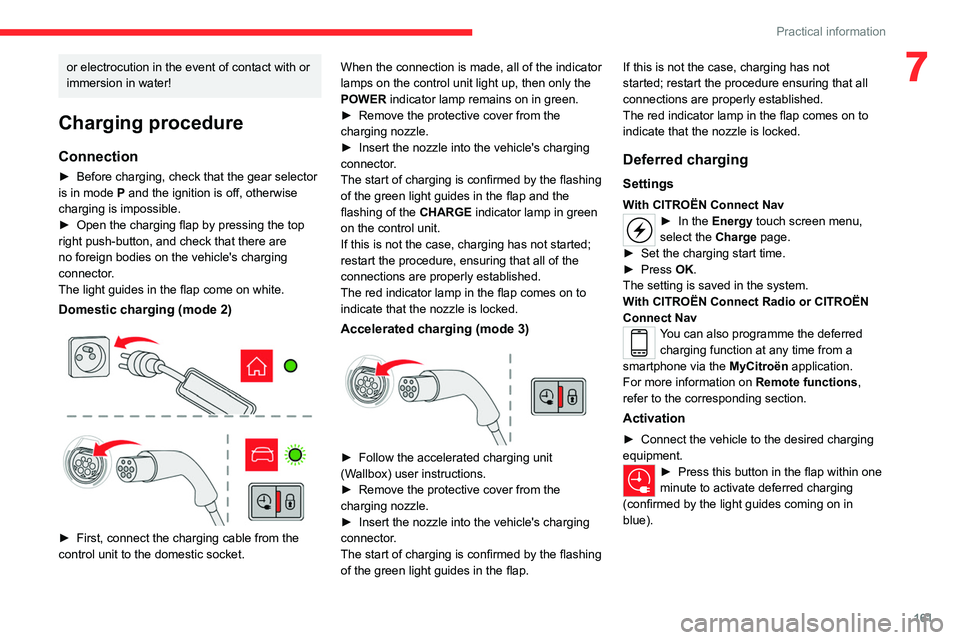
Domestic charging (mode 2)
► First, connect the charging cable from the
control unit to the domestic socket. When the connection is made, all of the indicator
lamps on the control unit light up, then only the
POWER
indicator lamp remains on in green.
►
Remove the protective cover from the
charging nozzle.
►
Insert the nozzle into the vehicle's charging
connector
.
The start of charging is confirmed by the flashing
of the green light guides in the flap and the
flashing of the CHARGE indicator lamp in green
on the control unit.
If this is not the case, charging has not started;
restart the procedure, ensuring that all of the
connections are properly established.
The red indicator lamp in the flap comes on to
indicate that the nozzle is locked.
Accelerated charging (mode 3)
► Follow the accelerated charging unit
(W allbox) user instructions.
►
Remove the protective cover from the
charging nozzle.
►
Insert the nozzle into the vehicle's charging
connector
.
The start of charging is confirmed by the flashing
of the green light guides in the flap. If this is not the case, charging has not
started; restart the procedure ensuring that all
connections are properly established.
The red indicator lamp in the flap comes on to
indicate that the nozzle is locked.
Deferred charging
Settings
With CITROËN Connect Nav► In the
Energy touch screen menu,
select the Charge page.
►
Set the charging start time.
►
Press
OK.
The setting is saved in the system.
With CITROËN Connect Radio or CITROËN
Connect Nav
You can also programme the deferred charging function at any time from a
smartphone via the MyCitroën application.
For more information on Remote functions,
refer to the corresponding section.
Activation
► Connect the vehicle to the desired charging
equipment.
► Press this button in the flap within one
minute to activate deferred charging
(confirmed by the light guides coming on in
blue).
Page 167 of 276

165
Practical information
7► Insert the key into the lock 7.
► Open the lock using the key .
► Hold the towball 5 firmly in one hand; using
the other hand, pull and turn the wheel 6 fully in
a clockwise direction; do not release the wheel.
►
Extract the towball from the bottom of its
carrier
1.
►
Release the wheel; it automatically stops in
the unlocked position (position B
).
► Refit the protective plug 2 to the carrier 1.
► Stow the towball in its bag away from knocks
and dirt.
Maintenance
Correct operation is only possible if the towball
and its carrier are kept clean.
Before cleaning the vehicle with a high-pressure
jet wash, the towball must be removed and the
protective plug fitted to the carrier.
Affix the enclosed label in a clearly visible location, close to the carrier or in the
boot.
Contact a CITROËN dealer or a qualified
workshop for any work on the towball system.
Energy economy mode
This system manages the duration of use of
certain functions, in order to conserve a sufficient
level of charge in the battery with the ignition off.
After switching off the engine, you can still
use functions such as the audio and telematic
system, the wipers and the dipped beam
headlamps or courtesy lamps, for a combined
duration of approximately 40 minutes.
Selecting the mode
A confirmation message is displayed when
energy economy mode is entered, and the active
functions are placed on standby.
If a telephone call is in progress at the
time, it will be maintained for around 10
minutes via the audio system’s hands-free
system.
Exiting the mode
These functions are automatically reactivated the
next time the vehicle is used.
To restore the use of these functions
immediately, start the engine and let it run:
–
For less than 10 minutes, to use the
equipment for approximately 5 minutes.
–
For more than 10 minutes, to use the
equipment for approximately 30 minutes.
Let the engine run for the specified duration to
ensure that the battery charge is sufficient.
T
o recharge the battery, avoid repeatedly or
continuously restarting the engine.
A flat battery prevents the engine from starting.
For more information on the 12
V battery,
refer to the corresponding section.
Load reduction mode
This system manages the use of certain
functions according to the level of charge
remaining in the battery.
When the vehicle is being driven, the load
reduction function temporarily deactivates certain
Page 194 of 276
192
In the event of a breakdown
Fuse No.Rating
(Amps) Functions
F31 10Cigarette lighter/Front 12
V accessory socket.
F34 5Wireless smartphone charger.
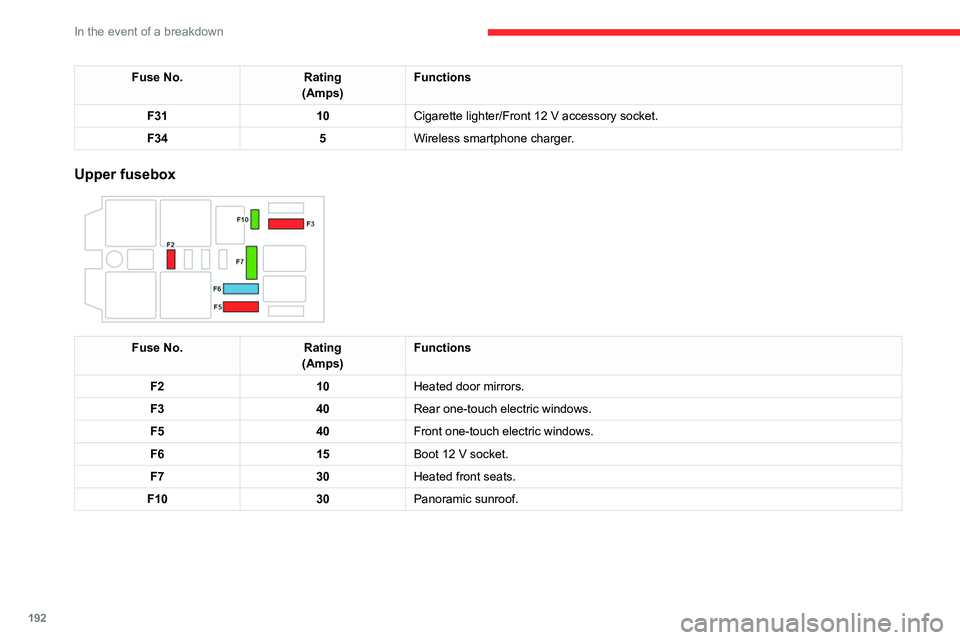
Upper fusebox
Fuse No. Rating
(Amps) Functions
F2 10Heated door mirrors.
F3 40Rear one-touch electric windows.
F5 40Front one-touch electric windows.
F6 15Boot 12
V socket.
F7 30Heated front seats.
F10 30Panoramic sunroof.
Engine compartment fuses
The fusebox is placed in the engine
compartment near the battery.
Fuse No. Rating
(Amps) Functions
F1 40Air conditioning ventilation motor.
F16 20Heated windscreen.
F18 10Right-hand main beam headlamp.
F19 10Left-hand main beam headlamp.
Page 209 of 276
207
CITROËN Connect Radio
10CITROËN Connect Radio
Multimedia audio system -
Applications - Bluetooth
®
telephone
The functions and settings described
vary according to the vehicle version and
configuration, as well as the country of sale.
For safety reasons and because they
require sustained attention by the driver,
the following operations must be carried out
with the vehicle stationary and the ignition
on:
–
Pairing the smartphone with the system via
Bluetooth.
–
Using the smartphone.
–
Connecting to the CarPlay® or Android
Auto applications (certain applications stop
displaying when the vehicle is moving).
– Changing the system settings and
configuration.
The system is protected so that it only operates in the vehicle.
The message Energy economy mode is
displayed when the system is about to go into
standby.
The system’s Open Source Software (OSS) source codes are available at the
following addresses:
https://www.groupe-psa.com/fr/oss/
https://www.groupe-psa.com/en/oss/
First steps
With the engine running, a press mutes
the sound.
With the ignition off, a press turns the system on.
Increase or decrease the volume using
the wheel or the "plus" or "minus" buttons
(depending on the equipment).
Use the buttons on either side of or below the
touch screen to access the menus, then press
the virtual buttons on the touch screen.
Depending on the model, use the "Source" and
"Menu" buttons on the left of the touch screen to
access the menus, then press the virtual buttons
on the touch screen.
At all times it is possible to display the rolling
menus by pressing the screen briefly with three
fingers.
All touch-sensitive areas on the screen are
white.
On pages with multiple tabs at the bottom of the
screen, you can switch between pages either
by tapping the tab for the desired page or by
swiping the pages to the left or right with your
finger.
Press in the shaded area to go back up a level
or confirm.
Press the back arrow to go back a level or
confirm.
The touch screen is of the "capacitive" type.
To clean the screen, use a soft, non-abrasive
cloth (e.g. spectacles cloth) with no additional
product.
Do not use sharp objects on the screen.
Do not touch the screen with wet hands.
Certain information is displayed permanently in
the upper bar of the touch screen:
–
Air conditioning status information (depending
on version), and direct access to the
corresponding menu.
–
Radio Media and
Telephone menu status
information.
–
Privacy status information.
–
Access to the touch screen and digital
instrument panel settings.
Page 210 of 276
208
CITROËN Connect Radio
Audio source selection (depending on
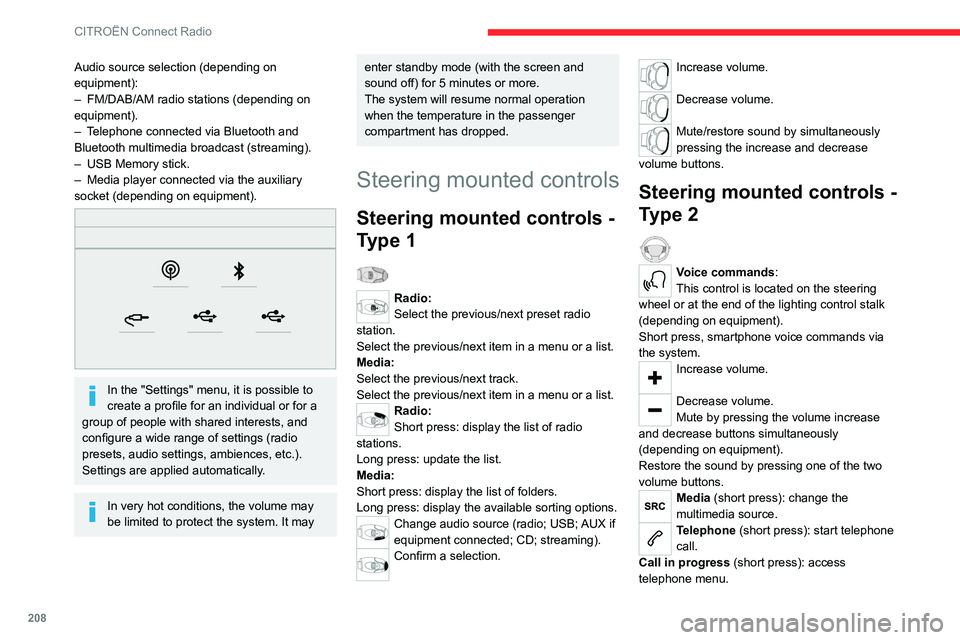
equipment):
–
FM/DAB/AM radio stations (depending on
equipment).
–
T
elephone connected via Bluetooth and
Bluetooth multimedia broadcast (streaming).
–
USB Memory stick.
–
Media player connected via the auxiliary
socket (depending on equipment).
In the "Settings" menu, it is possible to
create a profile for an individual or for a
group of people with shared interests, and
configure a wide range of settings (radio
presets, audio settings, ambiences, etc.).
Settings are applied automatically.
In very hot conditions, the volume may
be limited to protect the system. It may
enter standby mode (with the screen and
sound off) for 5 minutes or more.
The system will resume normal operation
when the temperature in the passenger
compartment has dropped.
Steering mounted controls
Steering mounted controls -
Type 1
Radio:
Select the previous/next preset radio
station.
Select the previous/next item in a menu or a list.
Media:
Select the previous/next track.
Select the previous/next item in a menu or a list.
Radio:
Short press: display the list of radio
stations.
Long press: update the list.
Media:
Short press: display the list of folders.
Long press: display the available sorting options.
Change audio source (radio; USB; AUX if
equipment connected; CD; streaming).
Confirm a selection.
Increase volume.
Decrease volume.
Mute/restore sound by simultaneously
pressing the increase and decrease
volume buttons.
Steering mounted controls -
Type 2
Voice commands:
This control is located on the steering
wheel or at the end of the lighting control stalk
(depending on equipment).
Short press, smartphone voice commands via
the system.
Increase volume.
Decrease volume.
Mute by pressing the volume increase
and decrease buttons simultaneously
(depending on equipment).
Restore the sound by pressing one of the two
volume buttons.
Media (short press): change the
multimedia source.
Telephone (short press): start telephone
call.
Call in progress (short press): access
telephone menu.
Page 211 of 276
209
CITROËN Connect Radio
10Telephone (long press): reject an incoming call,
end call; when no call is in progress, access
telephone menu.
Radio (rotate): automatic search for the
previous/next station.
Media (rotate): previous/next track, move in a
list.
Short press: confirm a selection; if nothing
selected, access to presets.
Radio: display the list of stations.
Media: display the list of tracks.
Radio (press and hold): update the list of
stations received.
Menus
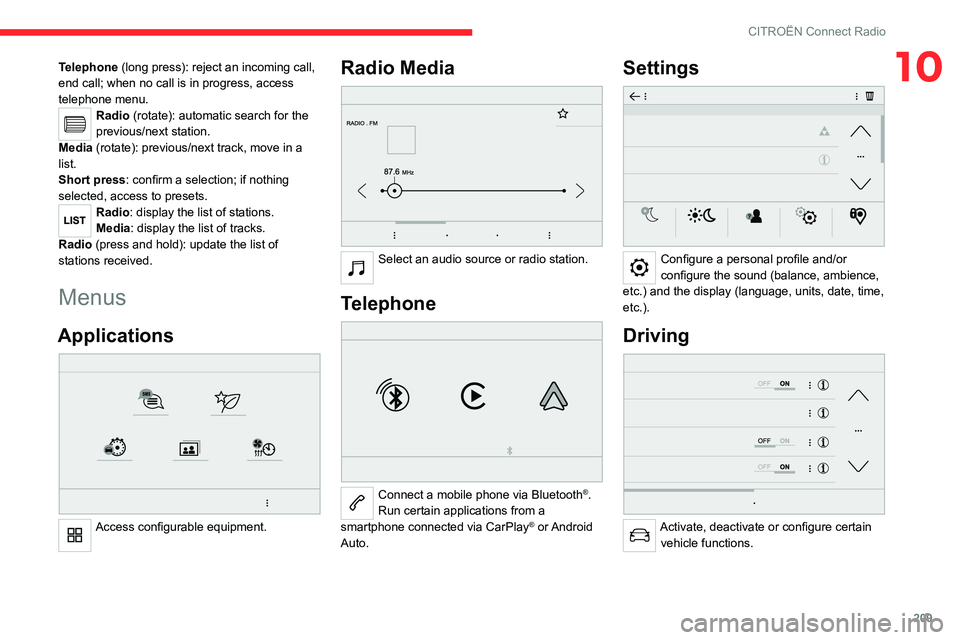
Applications
Access configurable equipment.
Radio Media
Select an audio source or radio station.
Telephone
Connect a mobile phone via Bluetooth®.
Run certain applications from a
smartphone connected via CarPlay
® or Android
Auto.
Settings
Configure a personal profile and/or
configure the sound (balance, ambience,
etc.) and the display (language, units, date, time,
etc.).
Driving
Activate, deactivate or configure certain vehicle functions.
Page 215 of 276
213
CITROËN Connect Radio
10Playlists are updated whenever the ignition
is switched off or a USB memory stick is
connected. The audio system memorises these
lists, which will subsequently load faster if they
have not been changed.
Auxiliary (AUX) jack socket
Depending on equipmentConnect a portable device (MP3 player,
etc.) to the auxiliary jack socket using an
audio cable (not supplied).
This source is only available if "Auxiliary input"
has been selected in the audio settings.
First adjust the volume on the portable device
(to a high level). Then adjust the volume of the
audio system.
Controls are managed via the portable device.
Selecting the source
Press Radio Media to display the main
page.
Press the "SOURCES" button.
Select the source.
BluetoothStreaming®
Streaming allows you to listen to the audio feed
from your smartphone.
The Bluetooth profile must be activated.
First adjust the volume on the portable device
(to a high level). Then adjust the volume of the
system.
If play does not start automatically, it may be
necessary to start the audio playback from the
smartphone.
Control is from the portable device or by using
the system's touch buttons.
Once connected in Streaming mode, the
smartphone is considered to be a media
source.
Connecting Apple® players
Connect the Apple® player to the USB socket
using a suitable cable (not supplied).
Play starts automatically.
Control is via the audio system.
The classifications available are those of the portable device connected (artists/
albums/genres/playlists/audio books/
podcasts). It is also possible to use a
classification structured in the form of a
library.
The default classification used is by artist. To
modify the classification used, return to the
first level of the menu then select the desired
classification (playlists for example) and
confirm to go down through the menu to the
desired track.
The version of software in the audio system may
not be compatible with the generation of the
Apple
® player.
Information and advice
The system supports USB mass storage
devices, BlackBerry® devices or Apple® players
via the USB ports. The adapter cable is not
supplied.
Devices are managed using the audio system
controls.
Other devices, not recognised on connection,
must be connected to the auxiliary socket using
a jack cable (not supplied) or via Bluetooth
streaming, if compatible.
To protect the system, do not use a USB hub.
The audio system will only play audio files with
".wav", ".wma", ".aac", ".ogg" and ".mp3" file
extensions, at bit rates between 32 Kbps and
320 Kbps.
It also supports VBR (Variable Bit Rate) mode.
No other file types (".mp4", etc.) can be read.
All ".wma" files must be standard WMA 9 files.
The supported sampling rates are 11, 22, 44 and
48 KHz.
To avoid reading and display problems, we
recommend choosing file names less than 20
characters long that do not contain any special
characters (e.g. “ ? .
; ù).
Use only USB memory sticks in FAT32 format
(File Allocation Table).
We recommend using the original USB
cable for the portable device.