mirror controls CITROEN C5 AIRCROSS 2022 Handbook (in English)
[x] Cancel search | Manufacturer: CITROEN, Model Year: 2022, Model line: C5 AIRCROSS, Model: CITROEN C5 AIRCROSS 2022Pages: 276, PDF Size: 7.92 MB
Page 6 of 276
4
Overview
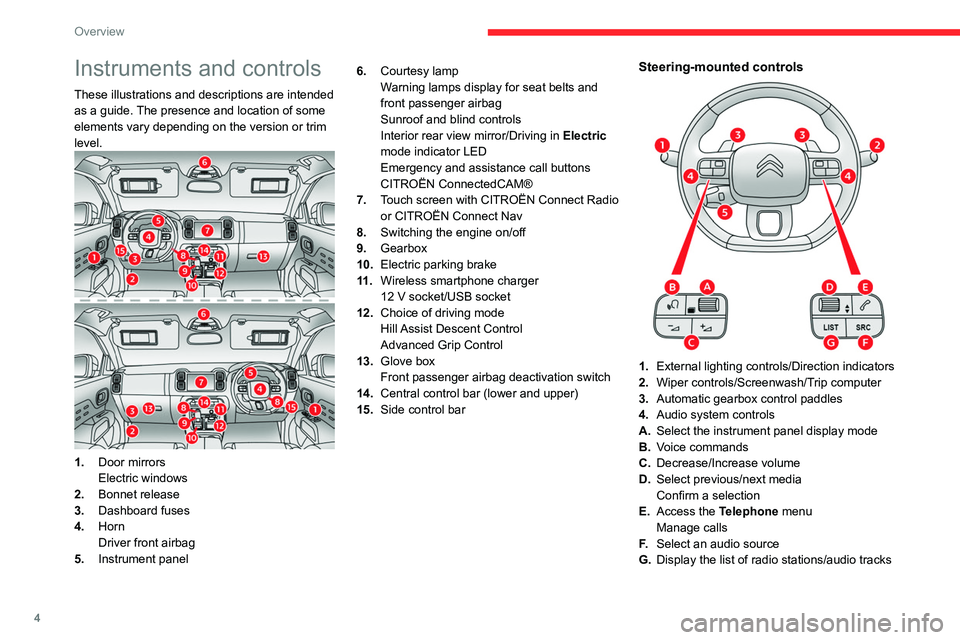
Instruments and controls
These illustrations and descriptions are intended
as a guide. The presence and location of some
elements vary depending on the version or trim
level.
1.Door mirrors
Electric windows
2. Bonnet release
3. Dashboard fuses
4. Horn
Driver front airbag
5. Instrument panel 6.
Courtesy lamp
Warning lamps display for seat belts and
front passenger airbag
Sunroof and blind controls
Interior rear view mirror/Driving in Electric
mode indicator LED
Emergency and assistance call buttons
CITROËN ConnectedCAM®
7. Touch screen with CITROËN Connect Radio
or CITROËN Connect Nav
8. Switching the engine on/off
9. Gearbox
10. Electric parking brake
11 . Wireless smartphone charger
12 V socket/USB socket
12. Choice of driving mode
Hill Assist Descent Control
Advanced Grip Control
13. Glove box
Front passenger airbag deactivation switch
14. Central control bar (lower and upper)
15. Side control bar
Steering-mounted controls
1.External lighting controls/Direction indicators
2. Wiper controls/Screenwash/Trip computer
3. Automatic gearbox control paddles
4. Audio system controls
A. Select the instrument panel display mode
B. Voice commands
C. Decrease/Increase volume
D. Select previous/next media
Confirm a selection
E. Access the Telephone menu
Manage calls
F. Select an audio source
G. Display the list of radio stations/audio tracks
Page 30 of 276
28
Access
illumination of the direction indicators for a
few seconds.
With the remote control
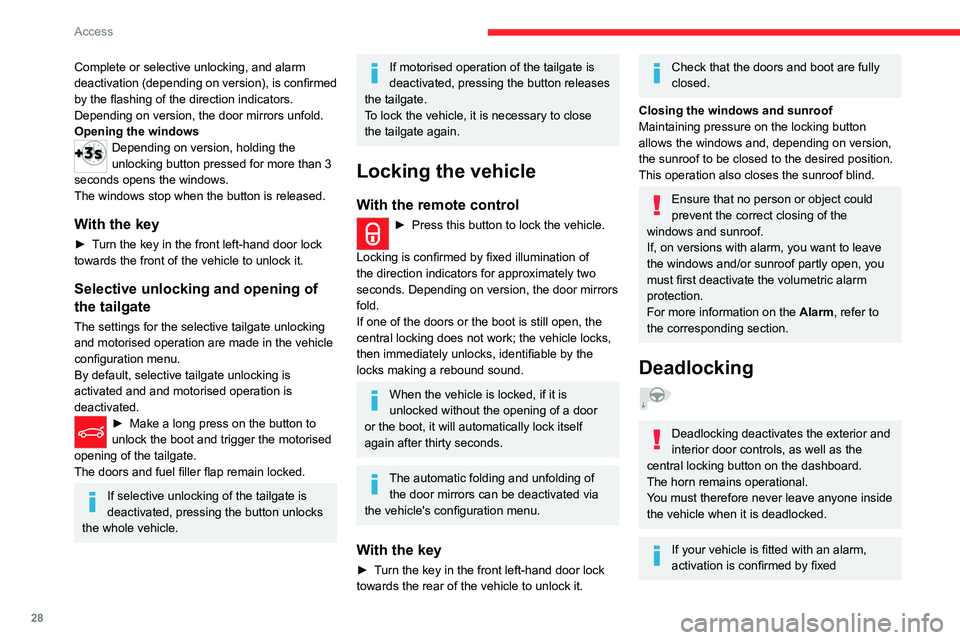
► Within 5 seconds of locking the
vehicle, press the button again to
deadlock it.
With the key
► Within 5 seconds of locking the vehicle, turn
the key to the rear again to deadlock it.
Locating your vehicle
This function allows you to identify your vehicle
from a distance, particularly in poor light. Your
vehicle must be locked.
► Press this button. The courtesy lamps
will come on and the direction indicators
will flash for a few seconds.
Remote lighting of the
lamps
Availability of this function depends on version.► Press this button. The sidelamps,
dipped beam headlamps, number plate
lamps and door mirror spotlamps come on for 30
seconds.
Pressing again before the end of the timed
period switches off the lamps immediately.
Complete or selective unlocking, and alarm
deactivation (depending on version), is confirmed
by the flashing of the direction indicators.
Depending on version, the door mirrors unfold.
Opening the windows
Depending on version, holding the
unlocking button pressed for more than 3
seconds opens the windows.
The windows stop when the button is released.
With the key
► Turn the key in the front left-hand door lock
towards the front of the vehicle to unlock it.
Selective unlocking and opening of
the tailgate
The settings for the selective tailgate unlocking
and motorised operation are made in the vehicle
configuration menu.
By default, selective tailgate unlocking is
activated and and motorised operation is
deactivated.
► Make a long press on the button to
unlock the boot and trigger the motorised
opening of the tailgate.
The doors and fuel filler flap remain locked.
If selective unlocking of the tailgate is
deactivated, pressing the button unlocks
the whole vehicle.
If motorised operation of the tailgate is
deactivated, pressing the button releases
the tailgate.
To lock the vehicle, it is necessary to close
the tailgate again.
Locking the vehicle
With the remote control
► Press this button to lock the vehicle.
Locking is confirmed by fixed illumination of
the direction indicators for approximately two
seconds. Depending on version, the door mirrors
fold.
If one of the doors or the boot is still open, the
central locking does not work; the vehicle locks,
then immediately unlocks, identifiable by the
locks making a rebound sound.
When the vehicle is locked, if it is
unlocked without the opening of a door
or the boot, it will automatically lock itself
again after thirty seconds.
The automatic folding and unfolding of the door mirrors can be deactivated via
the vehicle's configuration menu.
With the key
► Turn the key in the front left-hand door lock
towards the rear of the vehicle to unlock it.
Check that the doors and boot are fully
closed.
Closing the windows and sunroof
Maintaining pressure on the locking button
allows the windows and, depending on version,
the sunroof to be closed to the desired position.
This operation also closes the sunroof blind.
Ensure that no person or object could
prevent the correct closing of the
windows and sunroof.
If, on versions with alarm, you want to leave
the windows and/or sunroof partly open, you
must first deactivate the volumetric alarm
protection.
For more information on the Alarm, refer to
the corresponding section.
Deadlocking
Deadlocking deactivates the exterior and
interior door controls, as well as the
central locking button on the dashboard.
The horn remains operational.
You must therefore never leave anyone inside
the vehicle when it is deadlocked.
If your vehicle is fitted with an alarm,
activation is confirmed by fixed
Page 33 of 276
31
Access
2Closing the windows and the sunroof
Maintaining pressure on the door handle or
the tailgate control allows the windows and,
depending on version, the sunroof to be closed
to the desired position.
This operation also closes the sunroof blind.
Make sure that no item or person could
prevent the correct closing of the
windows and sunroof.
Be particularly aware of children when
operating the windows.
Illumination of the direction indicators for a few
seconds signals:
–
the locking of the vehicle for versions without
alarm,
–
the activation of the alarm for other versions.
Depending on version, the door mirrors fold.
For safety and theft protection reasons,
never leave the electronic key in the
vehicle, even when you are close to it.
Accumulations (water, dust, grime, salt etc.) on the inner surface of the door
handle may affect detection.
If cleaning the inner surface of the door
handle using a cloth does not restore
detection, contact a CITROËN dealer or a
qualified workshop.
A sudden splash of water (stream of water,
high pressure jet washer, etc.) may be
identified by the system as the desire to open
the vehicle.
Deadlocking
Deadlocking deactivates the exterior and
interior door controls, as well as the
central locking button on the dashboard.
The horn remains operational.
You must therefore never leave anyone inside
the vehicle when it is deadlocked.
►
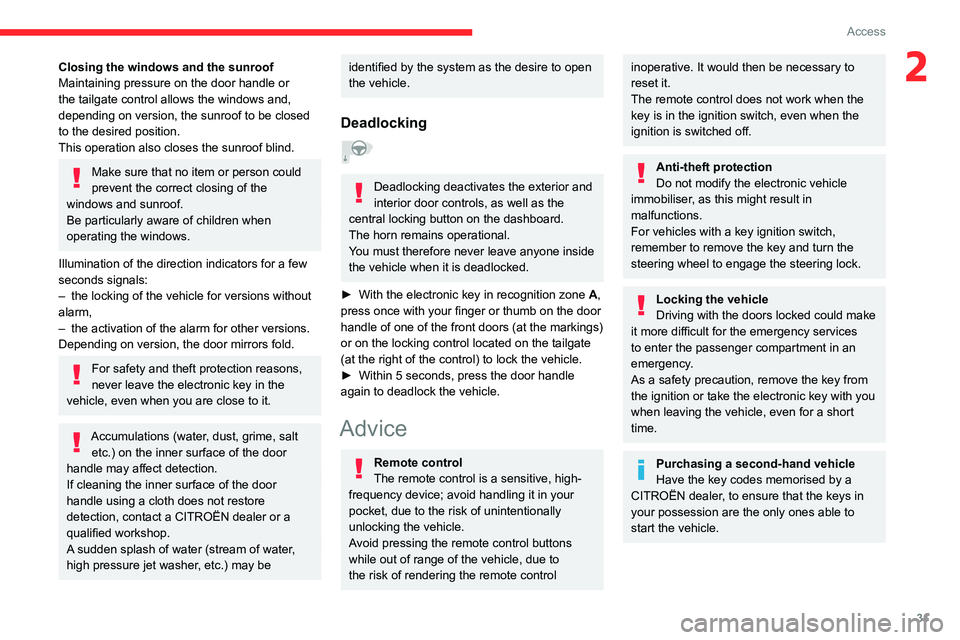
With the electronic key in recognition zone A
,
press once with your finger or thumb on the door
handle of one of the front doors (at the markings)
or on the locking control located on the tailgate
(at the right of the control) to lock the vehicle.
►
Within 5 seconds, press the door handle
again to deadlock the vehicle.
Advice
Remote control
The remote control is a sensitive, high-
frequency device; avoid handling it in your
pocket, due to the risk of unintentionally
unlocking the vehicle.
Avoid pressing the remote control buttons
while out of range of the vehicle, due to
the risk of rendering the remote control
inoperative. It would then be necessary to
reset it.
The remote control does not work
when the
key is in the ignition switch, even when the
ignition is switched off.
Anti-theft protection
Do not modify the electronic vehicle
immobiliser, as this might result in
malfunctions.
For vehicles with a key ignition switch,
remember to remove the key and turn the
steering wheel to engage the steering lock.
Locking the vehicle
Driving with the doors locked could make
it more difficult for the emergency services
to enter the passenger compartment in an
emergency.
As a safety precaution, remove the key from
the ignition or take the electronic key with you
when leaving the vehicle, even for a short
time.
Purchasing a second-hand vehicle
Have the key codes memorised by a
CITROËN dealer, to ensure that the keys in
your possession are the only ones able to
start the vehicle.
Page 46 of 276

44
Ease of use and comfort
Correct driving position
Before taking to the road and to make the most
of the ergonomic layout of the instruments and
controls, carry out these adjustments in the
following order:
–
the height of the head restraint,
–
the seat backrest angle,
–
the seat cushion height,
–
the longitudinal position of the seat,
–
the height and reach of the steering wheel,
–
the rear view mirror and door mirrors.
Once these adjustments have been
made, check the instrument panel can be
viewed correctly from your driving position.
Front seats
Caution when moving the
front seats
For safety reasons, only adjust seats
when the vehicle is stationary.
Before moving the seat backwards,
ensure that there is no person or object
that might prevent the full travel of the seat.
There is a risk of trapping or pinching
passengers if present in the rear seats or of
jamming the seat if large objects are placed
on the floor behind the seat.
Front head restraints
Adjusting the height
The adjustment is correct when the upper edge of the head restraint is level
with the top of the head.
‘Two-way’ adjustment model
Upwards:
► pull the head restraint up to the desired
position; the head restraint can be felt to click
into position.
Downwards:
►
press lug
A and push the head restraint down
to the desired position.
‘Four-way’ adjustment model
Upwards:
► pull the head restraint up to the desired
position; the head restraint can be felt to click
into position.
Downwards:
► press and hold button B and push the head
restraint down to the desired position.
Adjusting the angle
“Four-way” adjustment model
► press and hold button B and push the lower
part of the head restraint forwards or backwards.
Removing a head restraint
► Pull the head restraint up as far as it will go.
► Press the lug(s) A (depending on version)
to unlock the head restraint and remove it
completely,
► Stow the head restraint securely.
Page 48 of 276

46
Ease of use and comfort
Electrically-adjustable seats
To avoid draining the battery, carry out these adjustments with the engine
running.
Longitudinal adjustment
► Push the control forwards or rearwards to
slide the seat.
Backrest angle
► Tilt the control forwards or rearwards.
Electric lumbar adjustment
The control allows independent adjustment of
the depth and vertical position of the lumbar
support.
► Press and hold the front or rear of the
control to increase or reduce the lumbar
support.
►
Press and hold the top or bottom of the
control to raise or lower the lumbar support area.
Seat cushion height and angle
► Tilt the rear of the control upwards or
downwards to obtain the required height.
►
T
ilt the front of the control upwards or
downwards to obtain the required angle.
Comfort functions
Memorising driving positions
Associated with the electrically-adjusted driver’s
seat, this function allows two driving positions
to be memorised, to make these adjustments
easier if there are frequent driver changes.
It records the electric adjustments made to the
seat and door mirrors.
Using buttons M/1/2
► Enter the vehicle and switch the ignition on.
►
Adjust your seat and the door mirrors.
►
Press button
M, then press button 1 or 2
within 4 seconds.
An audible signal confirms the memorisation.
Memorising a new position cancels the previous
position.
Recalling a stored position
While the seat is moving, take care that
no person or object hinders the
automatic movement of the seat.
With the ignition on or engine running
► Press button 1 or 2 to recall the
corresponding position.
An audible signal sounds when adjustment is
complete.
You can interrupt the current movement by
pressing button M, 1 or 2 or by using one of the
seat adjustment controls.
A stored position cannot be recalled while
driving.
The recalling of stored positions is deactivated
45 seconds after switching off the ignition.
Heated seats
The function is active only with the engine
running.
► Press the button corresponding to the seat.
► Each press changes the heating level; the
corresponding number of indicator lamps come
on.
► To switch off the heating, press the button
until all of the indicator lamps are off.
The system status is memorised when the
ignition is switched off.
Page 62 of 276
60
Ease of use and comfort
Wireless smartphone
charger
It allows wireless charging of a portable device
such as a smartphone, using the magnetic
induction principle, in accordance with the Qi 1.1
standard.
The portable device to be charged must be
compatible with the Qi standard, either by design
or by using a compatible holder or shell.
The charging area is identified by the Qi symbol.
The charger works with the engine running and
with the Stop & Start system in STOP mode.
Charging is managed by the smartphone.
With the Keyless Entry and Starting system, the
charger’s operation may be briefly disrupted
when a door is opened or the ignition is switched
off.
Charging
► With the charging area clear, place a device
in its centre.
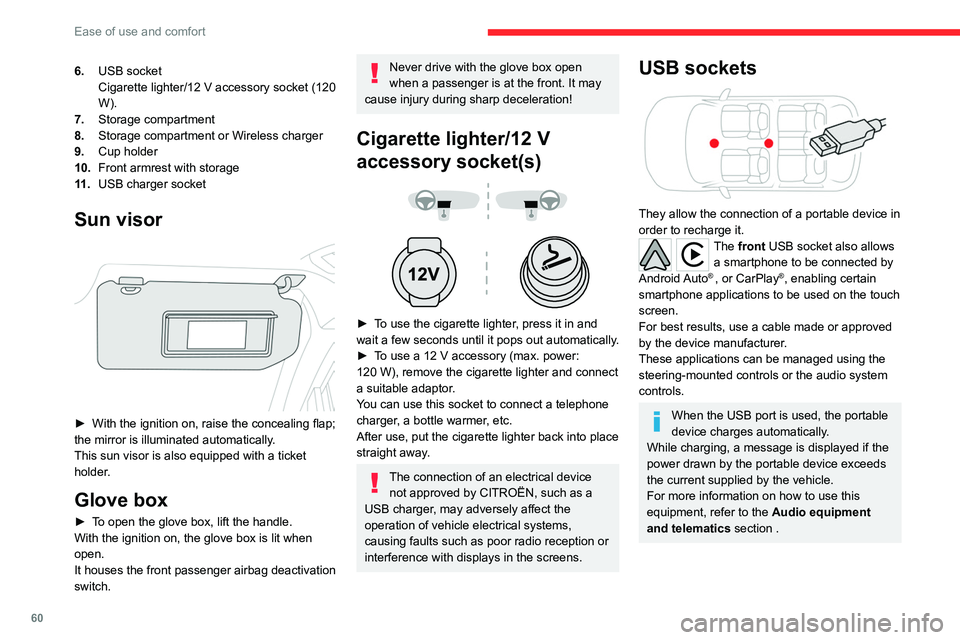
6. USB socket
Cigarette lighter/12
V accessory socket (120
W).
7. Storage compartment
8. Storage compartment or Wireless charger
9. Cup holder
10. Front armrest with storage
11 . USB charger socket
Sun visor
► With the ignition on, raise the concealing flap;
the mirror is illuminated automatically.
This sun visor is also equipped with a ticket
holder.
Glove box
► To open the glove box, lift the handle.
With the ignition on, the glove box is lit when
open.
It houses the front passenger airbag deactivation
switch.
Never drive with the glove box open
when a passenger is at the front. It may
cause injury during sharp deceleration!
Cigarette lighter/12 V
accessory socket(s)
► To use the cigarette lighter, press it in and
wait a few seconds until it pops out automatically.
►
T
o use a 12 V accessory (max. power:
120
W), remove the cigarette lighter and connect
a suitable adaptor.
You can use this socket to connect a telephone
charger, a bottle warmer, etc.
After use, put the cigarette lighter back into place
straight away.
The connection of an electrical device not approved by CITROËN, such as a
USB charger, may adversely affect the
operation of vehicle electrical systems,
causing faults such as poor radio reception or
interference with displays in the screens.
USB sockets
They allow the connection of a portable device in
order to recharge it.
The front USB socket also allows a smartphone to be connected by
Android Auto
® , or CarPlay®, enabling certain
smartphone applications to be used on the touch
screen.
For best results, use a cable made or approved
by the device manufacturer.
These applications can be managed using the
steering-mounted controls or the audio system
controls.
When the USB port is used, the portable
device charges automatically.
While charging, a message is displayed if the
power drawn by the portable device exceeds
the current supplied by the vehicle.
For more information on how to use this
equipment, refer to the Audio equipment
and telematics section .
Page 113 of 276
111
Driving
6partially recharge the traction battery, without
affecting the charge level indicator.
Progressive Hydraulic
Cushions
This suspension system with progressive hydraulic cushions improves driving comfort by
filtering out the imperfections and demands of
the road surface.
Each shock absorber is equipped with a
hydraulic compression stop (at the base) and a
hydraulic rebound stop (at the top).
Depending on the intensity of the shock to be
absorbed, these stops provide the vehicle with a
greater freedom of movement or gradually slow
down the amount of movement in order to avoid
any sudden jolts at the end of travel.
Unlike conventional suspension which absorbs
the energy but then partially returns some of it,
this active suspension absorbs and dissipates
this energy, without producing any rebound.
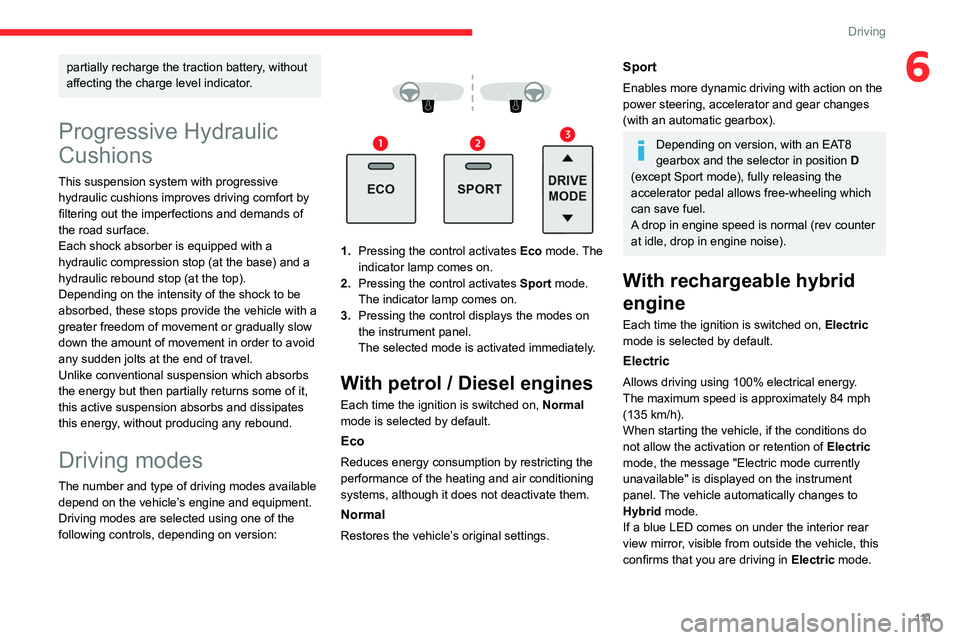
Driving modes
The number and type of driving modes available depend on the vehicle’s engine and equipment.
Driving modes are selected using one of the
following controls, depending on version:
1. Pressing the control activates Eco mode. The
indicator lamp comes on.
2. Pressing the control activates Sport mode.
The indicator lamp comes on.
3. Pressing the control displays the modes on
the instrument panel.
The selected mode is activated immediately.
With petrol / Diesel engines
Each time the ignition is switched on, Normal
mode is selected by default.
Eco
Reduces energy consumption by restricting the
performance of the heating and air conditioning
systems, although it does not deactivate them.
Normal
Restores the vehicle’s original settings.
Sport
Enables more dynamic driving with action on the
power steering, accelerator and gear changes
(with an automatic gearbox).
Depending on version, with an EAT8
gearbox and the selector in position D
(except Sport mode), fully releasing the
accelerator pedal allows free-wheeling which
can save fuel.
A drop in engine speed is normal (rev counter
at idle, drop in engine noise).
With rechargeable hybrid
engine
Each time the ignition is switched on, Electric
mode is selected by default.
Electric
Allows driving using 100% electrical energy.
The maximum speed is approximately 84 mph
(135
km/h).
When starting the vehicle, if the conditions do
not allow the activation or retention of Electric
mode, the message "Electric mode currently
unavailable" is displayed on the instrument
panel. The vehicle automatically changes to
Hybrid mode.
If a blue LED comes on under the interior rear
view mirror, visible from outside the vehicle, this
confirms that you are driving in Electric mode.