display CITROEN C5 AIRCROSS DAG 2022 Handbook (in English)
[x] Cancel search | Manufacturer: CITROEN, Model Year: 2022, Model line: C5 AIRCROSS DAG, Model: CITROEN C5 AIRCROSS DAG 2022Pages: 276, PDF Size: 7.92 MB
Page 20 of 276
18
Instruments
seconds after switching the ignition on, after the
servicing information.
The level read will only be correct if the vehicle is on level ground and the engine
has been off for more than 30 minutes.
Oil level incorrect
This is indicated by the display of a message
prompting you to top up, accompanied by the
Service warning lamp and an audible signal.
If the low oil level is confirmed by a check using
the dipstick, the level must be topped up to avoid
damage to the engine.
For more information on Checking levels, refer
to the corresponding section.
Oil level indicator fault
This is signalled by the display of the " Oil
level measurement invalid" message in the
instrument panel.
Contact a CITROËN dealer or a qualified
workshop.
In the event of a fault with the electric
indicator, the oil level is no longer
monitored.
If the system is faulty, you must check the
engine oil level using the manual dipstick
located under the bonnet.
For more information on Checking levels,
refer to the corresponding section.
Coolant temperature
indicator
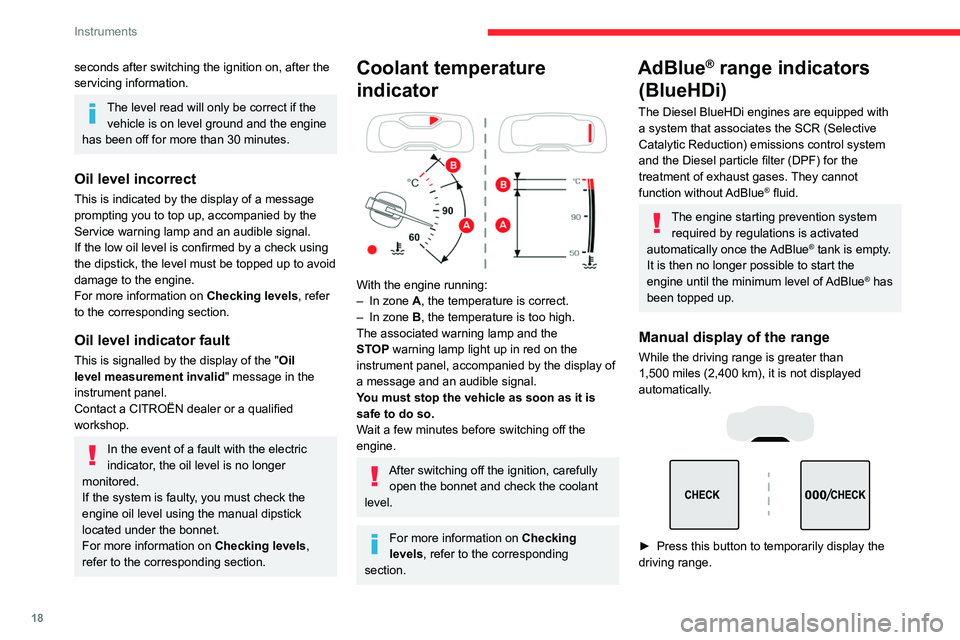
With the engine running:
– In zone A, the temperature is correct.
–
In zone
B, the temperature is too high.
The associated warning lamp and the
STOP
warning lamp light up in red on the
instrument panel, accompanied by the display of
a message and an audible signal.
You must stop the vehicle as soon as it is
safe to do so.
Wait a few minutes before switching off the
engine.
After switching off the ignition, carefully open the bonnet and check the coolant
level.
For more information on Checking
levels, refer to the corresponding
section.
AdBlue® range indicators
(BlueHDi)
The Diesel BlueHDi engines are equipped with
a system that associates the SCR (Selective
Catalytic Reduction) emissions control system
and the Diesel particle filter (DPF) for the
treatment of exhaust gases. They cannot
function without AdBlue
® fluid.
The engine starting prevention system required by regulations is activated
automatically once the AdBlue
® tank is empty.
It is then no longer possible to start the
engine until the minimum level of AdBlue
® has
been topped up.
Manual display of the range
While the driving range is greater than
1,500 miles (2,400 km), it is not displayed
automatically.
► Press this button to temporarily display the
driving range.
Page 21 of 276
19
Instruments
1Actions required related to a lack of AdBlue®
The following warning lamps light up when the
quantity of AdBlue® is lower than the reserve
level corresponding to a range of 1,500 miles
(2,400 km).
Together with the warning lamps, messages
regularly remind you of the need to top up to
avoid engine starting being prevented. Refer to
the Warning and indicator lamps section for
details of the messages displayed.
For more information on AdBlue®
(BlueHDi engines), and in particular on
topping up, refer to the corresponding section.
Warning/ indicator
lamps on Action Remaining
range
Top up. Between 1,500 miles
and 500
miles (2,400
km and 800
km)
Top up as
soon as
possible.Between
500 miles
and 62
miles (800
km and
100
km)
Warning/indicator
lamps on Action Remaining
range
A top-up is
vital, there is
a risk that the
engine will
be prevented
from starting.Between 62
miles and 0
miles (100
km and 0
km)
To be able
to restart the
engine, add at
least 5 litres of
AdBlue
® to the
tank. 0 miles (km)
Malfunction of the SCR emissions
control system
Malfunction detection
If a malfunction is detected,
these warning lamps come
on, accompanied by an
audible signal and the
display of an "
Emissions
control
fault" message.
The alert is triggered while driving when the
fault is detected for the first time, and thereafter
when switching on the ignition for subsequent
journeys, for as long as the cause of the fault
persists.
If the fault is temporary, the alert
disappears during the next journey, after
self-diagnostic checks of the SCR emissions
control system.
Malfunction confirmed during the
permitted driving phase (between 685
miles and 0
miles (1,100 km and 0 km))
If the fault indication is still displayed
permanently after 31 miles (50 km) of driving, the
fault in the SCR system is confirmed.
The AdBlue warning lamp flashes and
a message is displayed (" Emissions
control
fault: starting prevented in X miles
(kms)"), indicating the driving range in miles or
kilometres.
While driving, the message is displayed every 30
seconds. The alert is repeated when switching
on the ignition.
You can continue driving for up to 685 miles
(1,100
km) before the engine starting
prevention system is triggered.
Have the system checked by a
CITROËN dealer or a qualified workshop
as soon as possible.
Page 22 of 276
20
Instruments
Starting prevented
Every time the ignition is switched on, the
message "Emissions control fault: Starting
prevented" is displayed.
To restart the engine
Contact a CITROËN dealer or a qualified
workshop.
Power indicator
(Rechargeable hybrid)
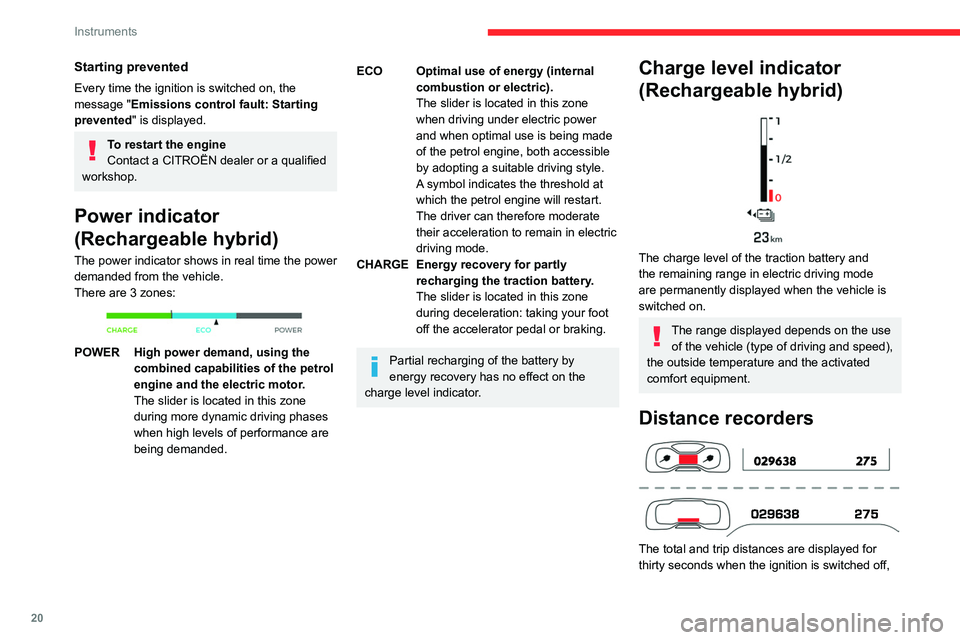
The power indicator shows in real time the power
demanded from the vehicle.
There are 3 zones:
POWER High power demand, using the combined capabilities of the petrol
engine and the electric motor.
The slider is located in this zone
during more dynamic driving phases
when high levels of performance are
being demanded.
ECO Optimal use of energy (internal combustion or electric).
The slider is located in this zone
when driving under electric power
and when optimal use is being made
of the petrol engine, both accessible
by adopting a suitable driving style.
A symbol indicates the threshold at
which the petrol engine will restart.
The driver can therefore moderate
their acceleration to remain in electric
driving mode.
CHARGE Energy recovery for partly recharging the traction battery.
The slider is located in this zone
during deceleration: taking your foot
off the accelerator pedal or braking.
Partial recharging of the battery by
energy recovery has no effect on the
charge level indicator.
Charge level indicator
(Rechargeable hybrid)
The charge level of the traction battery and
the remaining range in electric driving mode
are permanently displayed when the vehicle is
switched on.
The range displayed depends on the use of the vehicle (type of driving and speed),
the outside temperature and the activated
comfort equipment.
Distance recorders
The total and trip distances are displayed for
thirty seconds when the ignition is switched off,
Page 23 of 276
21
Instruments
1when the driver's door is opened and when the
vehicle is locked or unlocked.
When travelling abroad, you may need to
change the units of distance and speed:
The display of distance and speed must be
expressed in the official unit of the country
(km or miles). The change of units is done via
the screen configuration menu, with the
vehicle stationary.
Total distance recorder
It measures the total distance travelled by the
vehicle since its first registration.
Trip distance recorder
This measures the distance travelled since it was
last reset by the driver.
Resetting the trip recorder
► With the ignition on, press the button until
zeros appear
.
Manual test on the
instrument panel
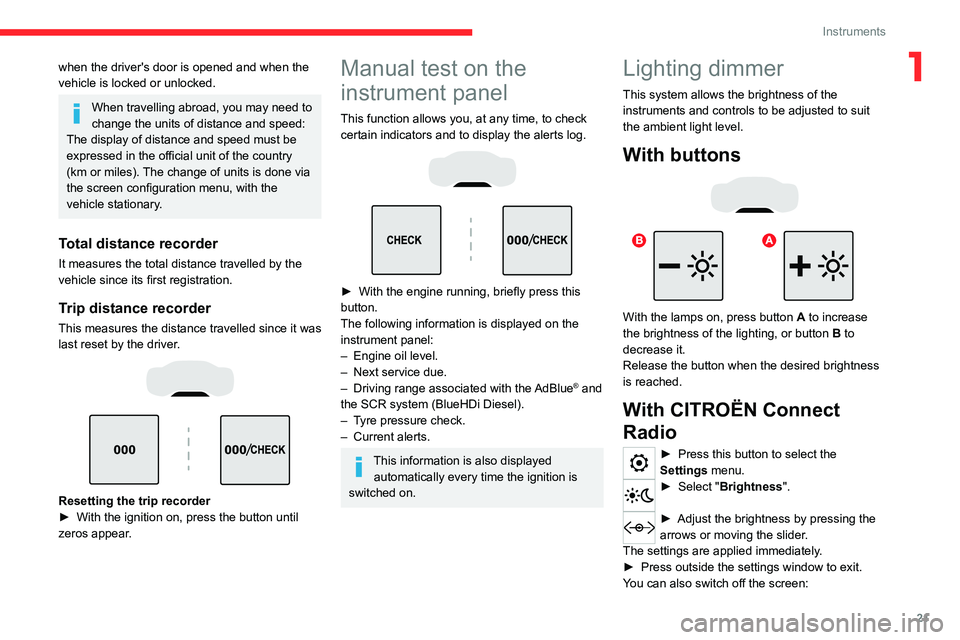
This function allows you, at any time, to check
certain indicators and to display the alerts log.
► With the engine running, briefly press this
button.
The following information is displayed on the
instrument panel:
–
Engine oil level.
–
Next service due.
–
Driving range associated with the
AdBlue® and
the SCR system (BlueHDi Diesel).
–
T
yre pressure check.
–
Current alerts.
This information is also displayed automatically every time the ignition is
switched on.
Lighting dimmer
This system allows the brightness of the
instruments and controls to be adjusted to suit
the ambient light level.
With buttons
With the lamps on, press button A to increase
the brightness of the lighting, or button B to
decrease it.
Release the button when the desired brightness
is reached.
With CITROËN Connect
Radio
► Press this button to select the
Settings menu.
► Select " Brightness".
► Adjust the brightness by pressing the
arrows or moving the slider .
The settings are applied immediately.
►
Press outside the settings window to exit.
Y
ou can also switch off the screen:
Page 24 of 276
22
Instruments
► Press this button to select the
Settings menu.
► Select " Dark".
The screen goes off completely.
►
Press the screen again (anywhere on its
surface) to turn it on.
With CITROËN Connect Nav
► Press this button to select the
Settings menu.
►
Select "
OPTIONS".
► Select " Screen configuration".
►
Select the "
Brightness" tab.
► Adjust the brightness by pressing the
arrows or moving the slider .
► Press this button to save and exit.
You can also switch off the screen:
► Press this button to select the
Settings menu.
► Select " Turn off screen".
The screen goes off completely.
►
Press the screen again (anywhere on its
surface) to activate it.
Trip computer
Displays information related to the current trip
(range, fuel consumption, average speed, etc.).
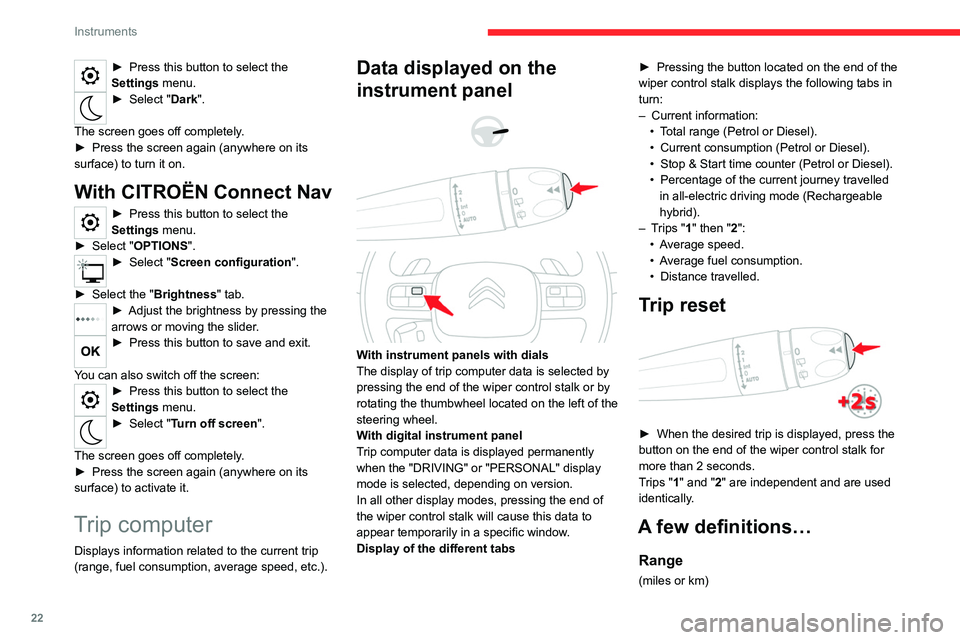
Data displayed on the
instrument panel
With instrument panels with dials
The display of trip computer data is selected by
pressing the end of the wiper control stalk or by
rotating the thumbwheel located on the left of the
steering wheel.
With digital instrument panel
Trip computer data is displayed permanently
when the "DRIVING" or "PERSONAL" display
mode is selected, depending on version.
In all other display modes, pressing the end of
the wiper control stalk will cause this data to
appear temporarily in a specific window.
Display of the different tabs ►
Pressing the button located on the end of the
wiper control stalk displays the following tabs in
turn:
–
Current information:
•
T
otal range (Petrol or Diesel).
•
Current consumption (Petrol or Diesel).
•
Stop & Start time counter (Petrol or Diesel).
•
Percentage of the current journey travelled
in all-electric driving mode (Rechargeable
hybrid).
–
T
rips "1" then "2":
•
A
verage speed.
•
A
verage fuel consumption.
•
Distance travelled.
Trip reset
► When the desired trip is displayed, press the
button on the end of the wiper control stalk for
more than 2 seconds.
T
rips "1" and "2" are independent and are used
identically.
A few definitions…
Range
(miles or km)
Page 25 of 276
23
Instruments
1Distance that can still be travelled with the
fuel remaining in the tank (based on the
average fuel consumption over the last few miles
(kilometres) travelled).
This value may vary following a change in driving
style or terrain, leading to a significant change in
current fuel consumption.
When the range falls below 19 miles (30
km),
dashes are displayed.
After filling with at least 5 litres of fuel, the range
is recalculated and is displayed if it exceeds 62
miles (100
km).
If dashes instead of figures continue to be
displayed while driving, contact a CITROËN
dealer or a qualified workshop.
Current consumption
(mpg or l/100 km or km/l)Calculated during the last few seconds.
This function is only displayed at speeds above
19 mph (30
km/h).
Average consumption
(mpg or l/100 km or km/l)Calculated since the last trip computer
reset.
Average speed
(mph or km/h)Calculated since the last trip computer
reset.
Distance travelled
(miles or km)Calculated since the last trip computer
reset.
Stop & Start time counter
(minutes/seconds or hours/minutes)
If your vehicle is equipped with Stop & Start, a
time counter calculates the time spent in STOP
mode during a journey.
It resets to zero every time the ignition is
switched on.
Touch screen
This system gives access to the following elements:
–
Permanent display of the time and the exterior
temperature (a blue warning lamp appears if
there is a risk of ice).
–
Heating/air conditioning controls.
–
V
ehicle functions and equipment setting
menus.
–
Audio system and telephone controls and
display of related information.
–
Display of visual manoeuvring aid functions
(visual parking sensor information, Park
Assist,
etc.).
–
Internet services and display of
related
information.
–
Front seat massage mode and intensity
settings (depending on version).
– Navigation system controls and
display of related information (depending on
version).
For safety reasons, always stop the
vehicle before performing operations
that require sustained attention.
Some functions are not accessible while
driving.
Principles
► Use the buttons arranged below the touch
screen for access to the menus, then press the
virtual buttons on the touch screen.
Some menus may display across two pages:
press the "OPTIONS" button to access the
second page.
After a few moments with no action on the second page, the first page is
displayed automatically.
To deactivate/activate a function, select " OFF"
or "ON".
Settings for a function
Access to additional information on the function
Confirm
Return to the previous page or confirm
Page 26 of 276
24
Instruments
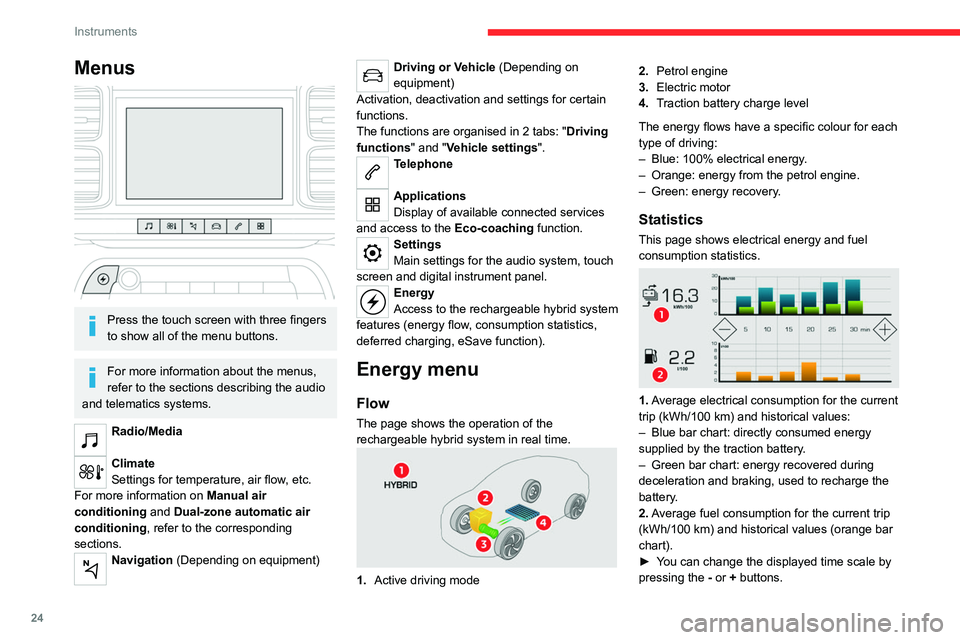
Menus
Press the touch screen with three fingers
to show all of the menu buttons.
For more information about the menus,
refer to the sections describing the audio
and telematics systems.
Radio/Media
Climate
Settings for temperature, air flow, etc.
For more information on Manual air
conditioning and Dual-zone automatic air
conditioning , refer to the corresponding
sections.
Navigation (Depending on equipment)
Driving or Vehicle (Depending on
equipment)
Activation, deactivation and settings for certain
functions.
The functions are organised in 2 tabs: " Driving
functions" and "Vehicle settings".
Telephone
Applications
Display of available connected services
and access to the Eco-coaching function.
Settings
Main settings for the audio system, touch
screen and digital instrument panel.
Energy
Access to the rechargeable hybrid system
features (energy flow, consumption statistics,
deferred charging, eSave function).
Energy menu
Flow
The page shows the operation of the
rechargeable hybrid system in real time.
1. Active driving mode 2.
Petrol engine
3. Electric motor
4. Traction battery charge level
The energy flows have a specific colour for each
type of driving:
–
Blue: 100% electrical energy
.
–
Orange: energy from the petrol engine.
–
Green: energy recovery
.
Statistics
This page shows electrical energy and fuel
consumption statistics.
1. Average electrical consumption for the current
trip (kWh/100
km) and historical values:
–
Blue bar chart: directly consumed energy
supplied by the traction battery
.
–
Green bar chart: energy recovered during
deceleration and braking, used to recharge the
battery
.
2. Average fuel consumption for the current trip
(kWh/100
km) and historical values (orange bar
chart).
►
Y
ou can change the displayed time scale by
pressing the
-
or + buttons.
Page 27 of 276
25
Instruments
1A current trip is any trip of more than 20 minutes without switching off the ignition.
Deferred charging
By default, charging begins when the nozzle is
connected.
Deferred charging may be programmed via the
touch screen.
Deferred charging is then activated by a button
located in the charging flap.
You can also programme the deferred charging function using a smartphone, via
the MyCitroën application.
For more information on Charging the traction
battery (Rechargeable hybrid), refer to the
corresponding section.
eSave
The eSave function makes it possible to reserve
all or part of the electrical energy in the traction
battery for later use during a journey (e.g. driving
in an urban area or in an area reserved for
electric vehicles).
►
Select the electric range to be reserved ( 10
km
, 20 km or the full range MAX) then activate
the function by pressing ON.
Activation of the function is confirmed by
the lighting of this indicator lamp on the
instrument panel and the
indication of the energy
reserve in miles or kms.
►
T
o use the energy reserve, choose the
Electric driving mode in the mode selector.
If the requested range exceeds the
available range (not recommended), the
internal combustion engine starts to recharge
the traction battery up to the requested
threshold. This leads to excessive fuel
consumption.
Information banner(s)
Certain information is displayed permanently in
the touch screen banner(s).
Upper banner of the CITROËN Connect
Radio and CITROËN Connect Nav
– Time and outside temperature (a blue warning
lamp appears if there is a risk of ice).
–
Reminder of the air conditioning information,
and direct access to the corresponding menu.
–
Reminder of the information in the
Radio
Media and Telephone menus.
–
Notifications.
–
Access to the
Settings for the touch screen
and the digital instrument panel (date/time,
languages, units, etc.).
Date and time adjustment
With CITROËN Connect
Radio
► Select the Settings menu in the upper
banner of the touch screen.
►
Select "
Configuration ".
► Select "Date and time".
►
Select "
Date" or "Time".
►
Choose the display formats.
►
Change the date and/or time using the
numeric keypad.
►
Confirm with "
OK".
With CITROËN Connect Nav
Time and date settings are only available if GPS
synchronisation is deactivated.
► Select the Settings menu in the
banner of the touch screen.
►
Press the "
OPTIONS " button to access the
secondary page.
► Select " Setting the time-date".
►
Select the "
Date:" or "Time" tab.
►
Set the date and/or time using the numeric
keypad.
►
Confirm with "
OK".
Additional settings
You can choose:
– T o change the time zone.
–
T
o change the display format of the date and
time (12h/24h).
–
T
o activate or deactivate the summer time
management function (+1 hour).
–
T
o activate or deactivate GPS synchronisation
(UTC).
Page 28 of 276

26
Instruments
The system does not automatically change between winter and summer time
(depending on the country of sale).
Remote functions
(Rechargeable hybrid)
These features are accessible
using a smartphone, via the
MyCitroën
application:
–
Battery charge management (deferred
charging).
–
T
emperature pre-conditioning management.
–
Consultation of the state of charge and range
of the vehicle.
Installation procedure
► Download the MyCitroën app from the
appropriate online store for your smartphone.
►
Create an account.
►
Enter the vehicle’
s VIN (code beginning with
"VF" on the vehicle registration document).
For more information on Identification
markings, refer to the corresponding section.
Network coverage
In order to be able to use the various
remotely operable features, ensure that your
vehicle is located in an area covered by the
mobile network.
A lack of network coverage may prevent
communication with the vehicle (for example,
if it is in an underground car park). In such
cases, the application will display a message
indicating that the connection with the vehicle
could not be established.
Page 35 of 276

33
Access
2Central locking not
functioning
Use these procedures in the following cases:
– Central locking malfunction.
–
Battery disconnected or discharged.
In the event of a malfunction of the
central locking system, the battery must
be disconnected to ensure that the vehicle is
locked fully.
Front left-hand door
► Insert the key into the lock and turn it towards
the rear of the vehicle to lock the door , or
towards the front to unlock it.
Passenger doors
Unlocking
► Pull the interior door opening control.
Locking
► Open the doors.
► For the rear doors, check that the child lock
is not on.
Refer to the corresponding section.
►
Remove the black cap
, located on the edge
of the door, using the key.
►
Insert the key into the socket without forcing
it, then turn the latch towards the inside of the
door
.
►
Remove the key and refit the black cap.
►
Close the doors and check from the outside
that the vehicle is locked.
Changing the battery
A message is displayed on the instrument panel
when the battery needs changing.
Battery type: CR2032/3 volts.
Without
Keyless Entry and Starting
With Keyless Entry and Starting
► Unclip the cover by inserting a small
screwdriver in the slot and lift the cover .
►
Remove the flat battery from its housing.
►
Put the new battery in place, respecting the
polarity
. Start by inserting it into the contacts