headlamp Citroen C5 RHD 2015 (RD/TD) / 2.G Owner's Guide
[x] Cancel search | Manufacturer: CITROEN, Model Year: 2015, Model line: C5 RHD, Model: Citroen C5 RHD 2015 (RD/TD) / 2.GPages: 344, PDF Size: 12.96 MB
Page 201 of 344

199
Changing a bulb
Front lamps
Model with Xenon headlamps (D1S)
1. Dual-function Xenon headlamps (dipped/main): D1S
2.
C
ornering lighting: HP19
3.
Daytime running lamps / sidelamps (LEDs)
For the maintenance of the front lamps and
changing HP19 and D1S bulbs and LED lamps,
contact a CITROËN dealer or a qualified
workshop.
Risk of electrocution
Xenon bulbs must be replaced by
a CITROËN dealer or a qualified
workshop.
You are advised to change both D1S
bulbs at the same time, if one of them
has failed.
The headlamps are fitted with
polycarbonate glass with a protective
coating:
F
d
o not clean them using a dr y
or abrasive cloth, nor with a
detergent or solvent product,
F
u
se a sponge and soapy water or
a
pH neutral product,
F
w
hen using a high pressure washer
on persistent marks, do not keep
the lance directed towards the
lamps or their edges for too long,
so as not to damage their protective
coating and seals. Changing a bulb should only be done
after the headlamp has been switched
off for several minutes (risk of serious
burns).
F
D
o not touch the bulb directly with
your fingers, use a lint-free cloth.
It is imperative to use only anti-
ultraviolet (UV) type bulbs to avoid
damaging the headlamp.
Always replace a failed bulb with a
new bulb with the same type and
specification.
8
Practical information
Page 202 of 344

200
Dipped beam headlamps
F Remove the protective cap B.
F D isconnect the connector by pressing it
between the thumb and index finger.
F
F
ree the bulb from its two metal clamps.
F
T
ake out the bulb.
F
R
eplace the bulb, exerting a slight axial
force.
F
R
efit the connector, until it is all the way in.
F
R
efit the protective cap B .
Main beam headlamps
F Remove the protective cap A .
F D isengage the retaining spring.
F
R
emove the bulb and replace it, paying
attention to the direction of fitting.
F
R
efit the retaining spring.
F
R
efit the protective cap A .
Model with halogen headlamps
1. Main beams: H1
2. D ipped beams: H7
3.
D
irectional lighting: H7
4.
D
aytime running lamps / sidelamps (LEDs)
For the maintenance of the front lamps and
changing LED lamps, contact a CITROËN
dealer or a qualified workshop.
Practical information
Page 203 of 344

201
Directional lamp
F Remove the protective cap C.
F D isconnect the connector by pressing it
between the thumb and index finger.
F
F
ree the bulb from its two metal clamps.
F
T
ake out the bulb.
F
R
eplace the bulb, exerting a slight axial
force.
F
R
efit the connector, until it is all the way in.
F
R
efit the protective cap C .
Direction indicators
F Remove the fixing screw of cover A using a
torx tool, tip the cover over and remove.
F
R
emove the fixing screw of lamp B using
a torx tool and pull the headlamp unit to
remove it from the bumper.
F
d
e
tach the bulb C by pressing on bars 1
and 2 .
F
d
i
sconnect the connector (pull whilst
pressing on the grey tongue using a flat
screwdriver).
F
R
eplace the bulb.
F
R
efit the connector (push the grey tongue
in well). F
R efit the headlamp unit in the bumper.
F
R
efit the lamp screws.
F
P
osition the cover using its guides and refit
the screws.
Bulbs: HP24W
8
Practical information
Page 204 of 344

202
Side repeaters
The side repeater is sealed.
If the bulb is faulty, replace the side repeater.
Contact a CITROËN dealer or a qualified
workshop.
Front foglamps
F Remove the fixing screw of cover A using a
torx tool, tip the cover over and remove.
F
R
emove the fixing screw of lamp B using
a torx tool and pull the headlamp unit to
remove it from the bumper.
F
d
i
sconnect the connector D .F
R emove the bulb by per forming a quarter
of a turn.
F
R
eplace the bulb.
F
R
efit the connector D.
F
R
efit the headlamp unit in the bumper.
F
R
efit the lamp screws.
F
P
osition the cover using its guides and refit
the screws.
Bulbs: H8 When refitting, take care not to trap
the electrical cables.
Practical information
Page 216 of 344

214
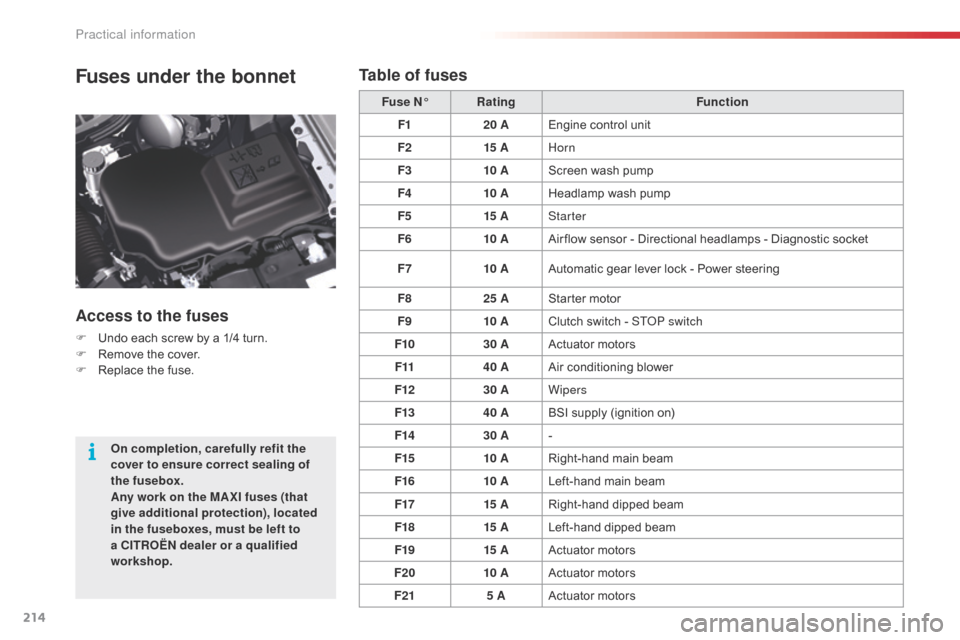
Fuses under the bonnet
Access to the fuses
F Undo each screw by a 1/4 turn.
F R emove the cover.
F
R
eplace the fuse. Fuse N°
Rating Function
F1 20 AEngine control unit
F2 15 AHorn
F3 10 AScreen wash pump
F4 10 AHeadlamp wash pump
F5 15 AStarter
F6 10 AAir flow sensor - Directional headlamps - Diagnostic socket
F7 10 AAutomatic gear lever lock - Power steering
F8 25 AStarter motor
F9 10 AClutch switch - S
T
o
P s
witch
F10 30 AActuator motors
F11 40 AAir conditioning blower
F12 30 AWipers
F13 40 ABSI supply (ignition on)
F14 30 A-
F15 10 ARight-hand main beam
F16 10 ALeft-hand main beam
F17 15 ARight-hand dipped beam
F18 15 ALeft-hand dipped beam
F19 15 AActuator motors
F20 10 AActuator motors
F21 5 AActuator motors
On completion, carefully refit the
cover to ensure correct sealing of
the fusebox.
Any work on the MA XI fuses (that
give additional protection), located
in the fuseboxes, must be left to
a CITROËN dealer or a qualified
workshop.
Table of fuses
Practical information
Page 221 of 344

219
Energy economy mode
System which manages the duration of use of
certain functions to conserve a sufficient level
of charge in the battery.
After the engine has stopped, you can
still use functions such as the audio and
telematics system, windscreen wipers, dipped
headlamps,
courtesy lights, etc. for a maximum
combined duration of thirty minutes.Exiting economy mode
These functions are reactivated automatically
next time the vehicle is driven.
F
I
n order to resume the use of these
functions immediately, start the engine and
let it run for a few minutes.
The time available will then be double the
duration for which the engine was left running.
However, this time will always be between five
and thirty minutes.
Switching to economy mode
Once the thirty minutes are over, a message
appears on the multi-function screen indicating
that the vehicle has switched to economy mode
and the active functions are put on standby.
A flat battery prevents the engine from
starting (refer to the corresponding
section).
This period may be significantly
reduced if the battery charge is low.
If the telephone is being used at this
time:
-
i
t will be maintained for five minutes
with hands-free kit of your Audio
system,
-
i
t will be maintained for ten minutes
with your eMyWay.
8
Practical information
Page 234 of 344

232
The various caps and covers allow access for
checking fluid levels and for replacing certain
components.1.6i THP
1.6i V Ti
Petrol engines
1. Screenwash and headlamp wash reservoir.
2. P ower steering fluid reservoir or power
steering and suspension fluid reservoir.
3.
E
ngine coolant header tank.
4.
E
ngine oil dipstick.
5.
E
ngine oil filler cap.
6.
B
rake fluid reservoir.
7.
B
attery.
8.
A
ir filter.
Checks
Page 235 of 344

233
Diesel engines
HDi 115 / e- HDi 115
HDi 140
The various caps and covers allow access
for checking fluid levels, for replacing certain
components and for priming the fuel system.
1.
S
creenwash and headlamp wash reservoir.
2.
P
ower steering fluid reservoir or power
steering and suspension fluid reservoir,
depending on equipment.
3.
E
ngine coolant header tank.
4.
E
ngine oil dipstick.
5.
E
ngine oil filler cap.
6.
A
ir filter.
7.
B
rake fluid reservoir.
8. B
attery.
As the Diesel fuel system operates
under high pressure, never carry out
any work yourself on this system.
Vehicles fitted with the HDi 140
engine may be fitted with metal spring
suspension. In this case, a different
power steering fluid reservoir is fitted.
9
Checks
Page 236 of 344

234
HDi 160 - HDi 200 engines
1. Screenwash and headlamp wash reservoir.
2.
P
ower steering and suspension fluid
reservoir.
3.
E
ngine coolant header tank.
4.
E
ngine oil dipstick.
5.
E
ngine oil filler cap.
6.
A
ir filter.
7.
B
rake fluid reservoir.
8.
B
attery. HDi 160
HDi 200
The Diesel fuel system operates under
high pressure:
-
N
ever carry out any work yourself
on this system.
-
H
Di engines make use of advanced
technology.
All maintenance and repairs require
special qualifications which only a
CITROËN dealer can guarantee.
Checks
Page 240 of 344

238
Diesel additive level (Diesel
engine with particle filter)
To p p i n g u p
This additive must be topped up by a CITROËN
dealer or a qualified workshop without delay.
Used products
The additive reservoir low level is
indicated by fixed illumination of
this warning lamp, accompanied by
an audible warning and a message
in the multifunction screen.
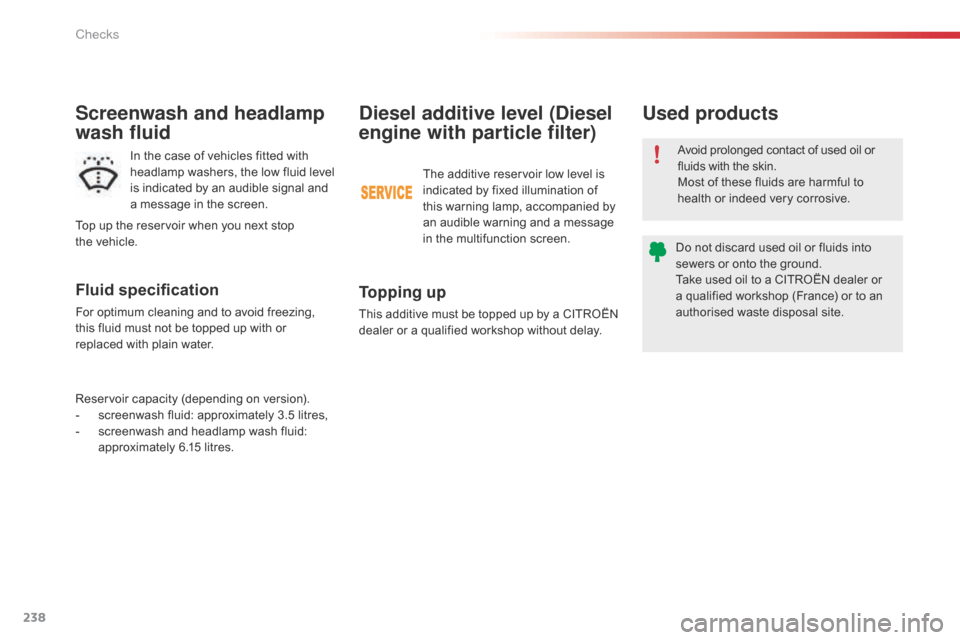
Screenwash and headlamp
wash fluid
In the case of vehicles fitted with
headlamp washers, the low fluid level
is indicated by an audible signal and
a message in the screen.
Fluid specification
For optimum cleaning and to avoid freezing,
this fluid must not be topped up with or
replaced with plain water.
Reservoir capacity (depending on version).
-
s
creenwash fluid: approximately 3.5 litres,
-
s
creenwash and headlamp wash fluid:
approximately 6.15 litres.
Top up the reservoir when you next stop
the
vehicle. Avoid prolonged contact of used oil or
fluids with the skin.
Most of these fluids are harmful to
health or indeed very corrosive.
Do not discard used oil or fluids into
sewers or onto the ground.
Take used oil to a CITROËN dealer or
a qualified workshop (France) or to an
authorised waste disposal site.
Checks